Cherry Hand Pies Recipe
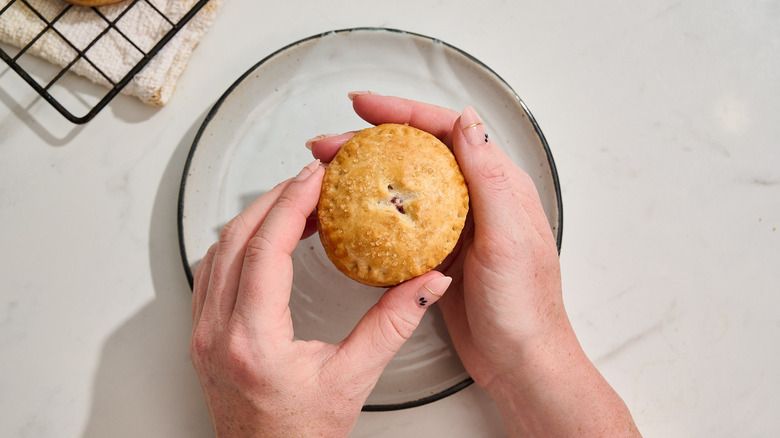
If you're anything like me, you may be wondering why you'd bother spending extra time making tiny, individual pies instead of taking slices from one big one. The truth is, though, that besides being cute, hand pies are far more functional than slices, meaning you can take them on the go, store them easily, and, true to name, eat them with your hands. Perhaps the best example of why hand pies are so great is found at McDonald's, which recently brought back its famous fried apple pies. Growing up, the flaky, spiced apple baked pastry was a delicacy to me, and even better, a dessert I could eat while on road trips and without a plate.
Years later, I still sometimes long for that buttery crust and molten-lava-hot apple filling, and often find myself yearning for other flavors, as well. This cherry hand pie recipe is here to bridge that gap. These adorable, circular little hand pies marry the flaky, buttery pastry crust of the classic treat with a jammy, bright cherry filling for a rich and summery dessert you can have anytime, even on-the-go. Though there are some intricate steps involved, I've laid the recipe out in a way that feels just about as approachable as making a regular pie from-scratch, but the obvious benefit here is that you'll end up with a dozen adorable, single-serve, perfectly-sized cherry hand pies (instead of one big pie).
Gather the ingredients to make cherry hand pies
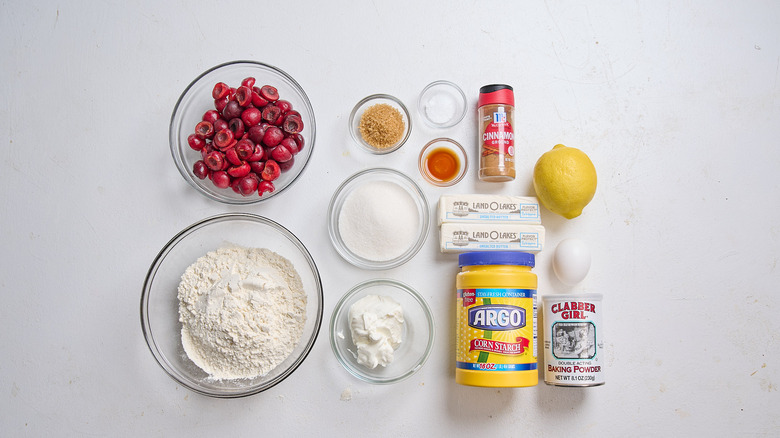
For the crust, you will need flour, sugar, baking powder, salt, cinnamon, cold butter, and sour cream. Unlike many pie crust recipes (like those I use for quiche), this one uses sour cream in place of water, which produces a tender crust that bakes more easily into a sturdy exterior due to having less moisture. For the filling ingredients, you'll need pitted fresh or frozen cherries, sugar, cornstarch, lemon juice, and vanilla. For baking the pies, then, you'll just need an egg and some turbinado sugar, which doesn't melt when it bakes and remains a crunchy sugar topping.
Step 1: Whisk dry ingredients together for the dough
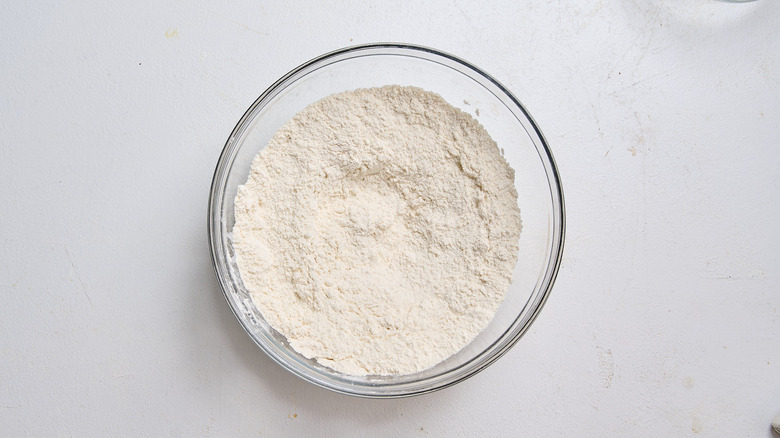
To make the pie dough, whisk the flour, sugar, baking powder, salt, and cinnamon in a bowl.
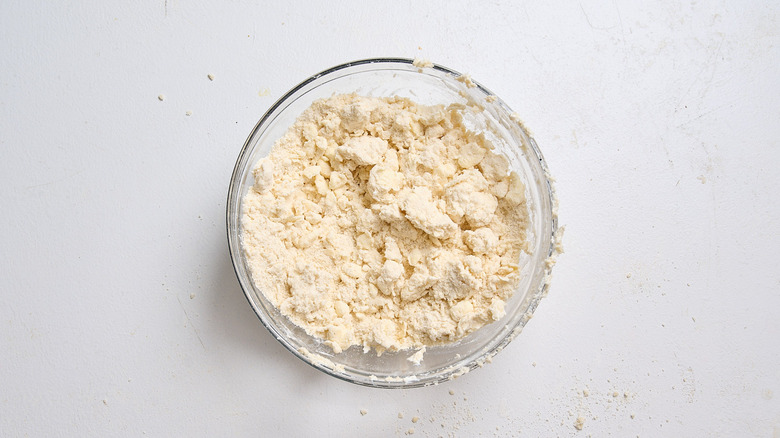
Step 2: Add the butter and combine
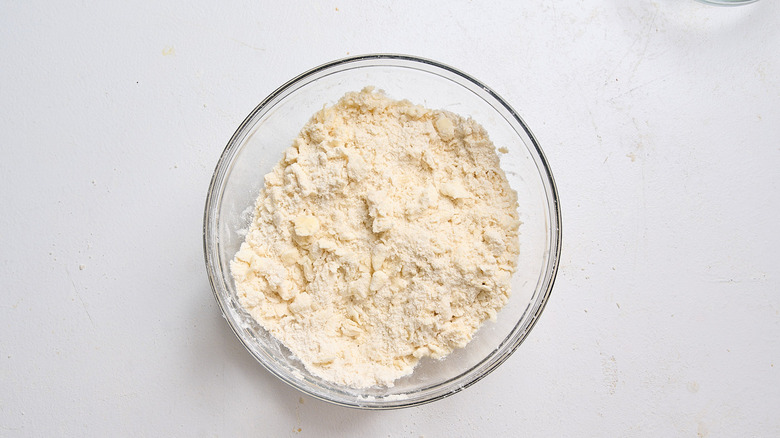
Add the butter cubes and combine into the dry ingredients using your hands, working into pea-sized pieces.
Step 3: Begin forming a dough with sour cream
Add the sour cream and use a spatula to combine into the mixture to form a very shaggy dough.
Step 4: Knead until dough forms
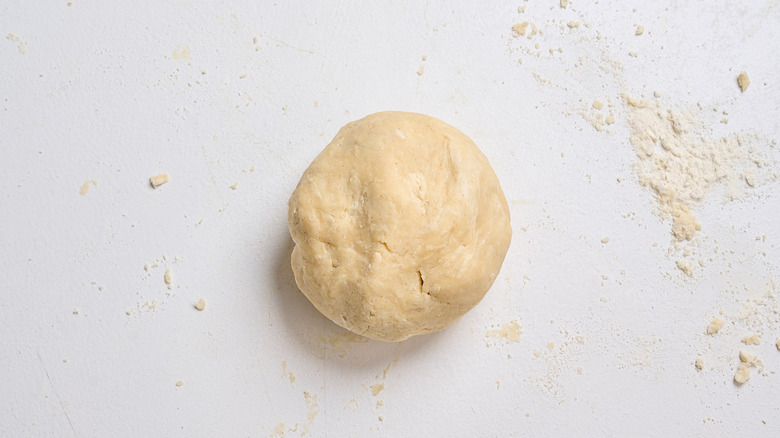
Turn onto a floured surface and knead until a smooth dough forms. Do not overwork the dough.
Step 5: Roll and flatten the dough
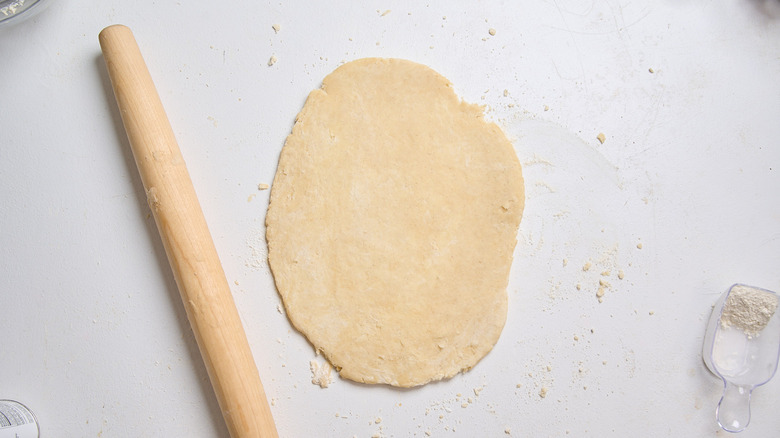
Form the dough first into a cylinder, then roll out into a rectangle.
Step 6: Fold and roll the dough
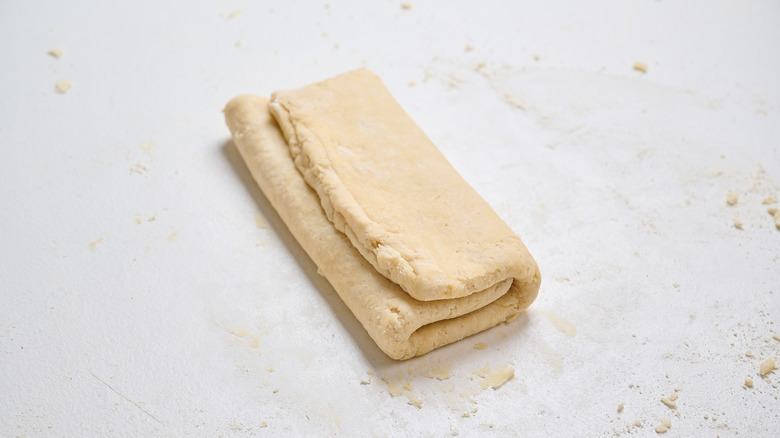
Fold the dough in thirds, then roll out again.
Step 7: Fold, roll, and fold the dough again
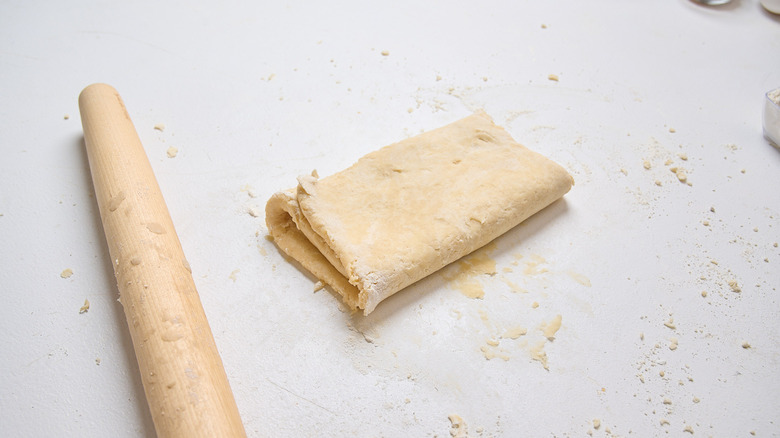
Repeat, folding and rolling into a rectangle, then fold once more into thirds.
Step 8: Wrap and chill the dough
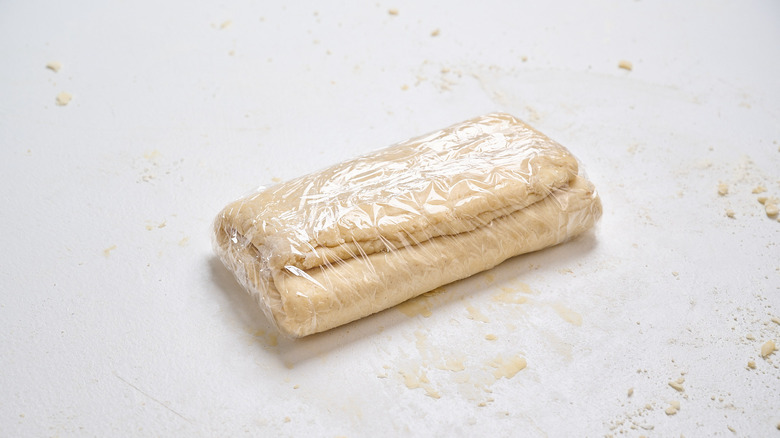
Wrap the dough in plastic and chill for 30 minutes.
Step 9: Add cherry pie filling ingredients to a saucepan
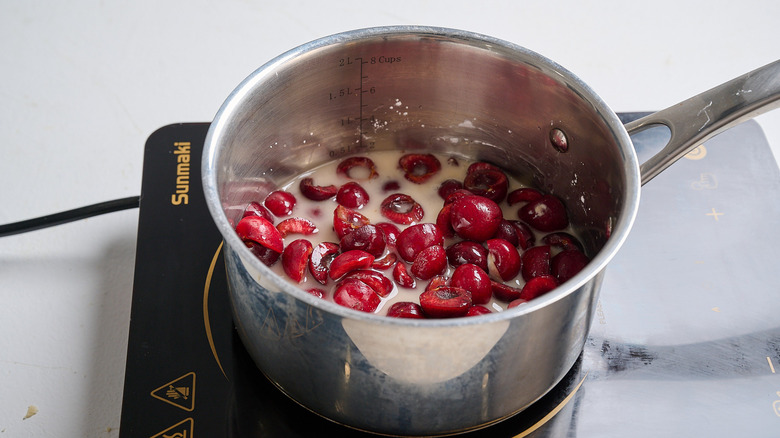
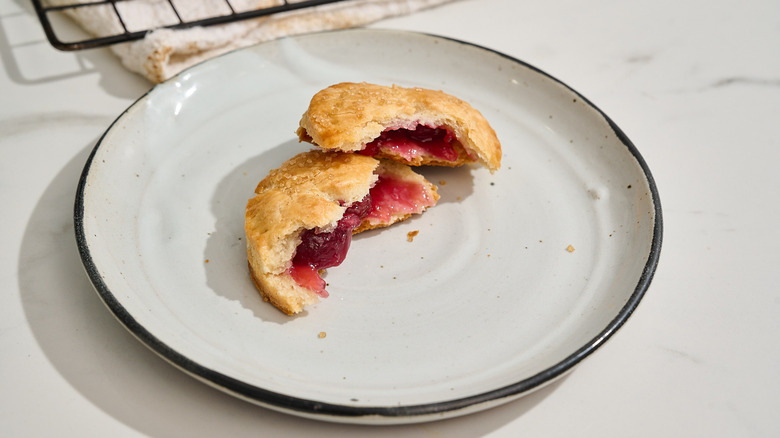
In the meantime, make the cherry filling. Add the cherries, sugar, cornstarch, lemon juice, vanilla, and ½ cup water to a saucepan over medium heat.
Step 10: Cook to thicken the filling
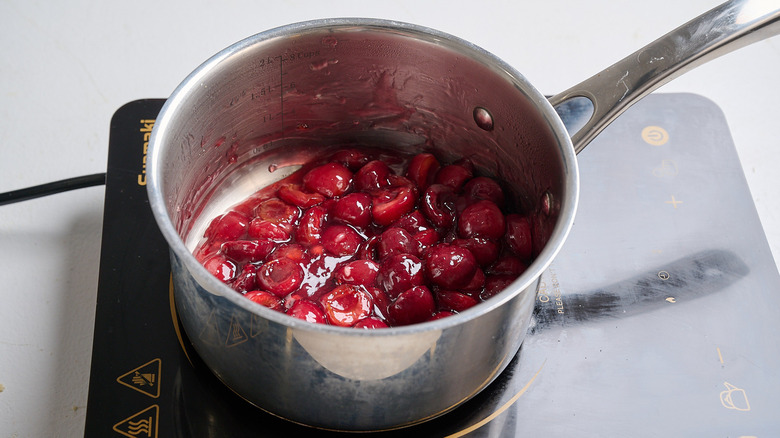
Bring to a boil, then set the heat to low and cook until thick, about 5 to 10 minutes. The color will be deep red and the consistency will be that of a loose jam.
Step 11: Heat up the oven
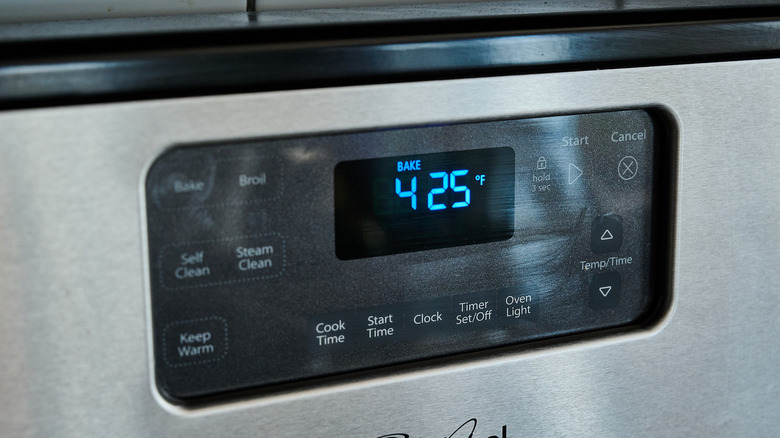
Preheat the oven to 425 F and arrange a baking sheet with parchment.
Step 12: Roll the dough out
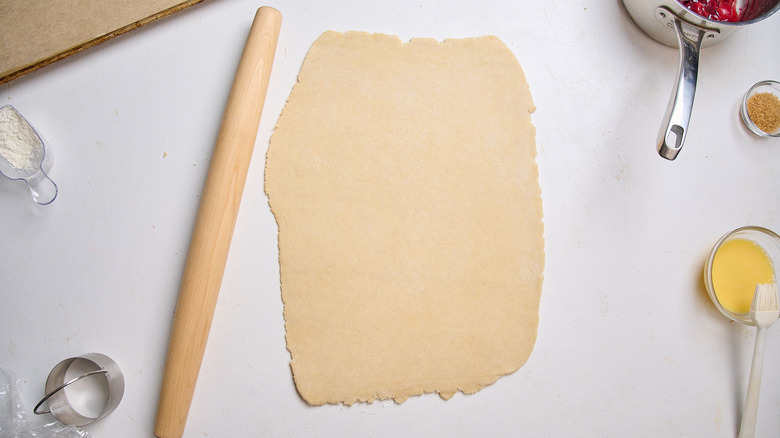
Remove the dough from the refrigerator and roll out to a large, thin square.
Step 13: Cut 12 circles out of the dough
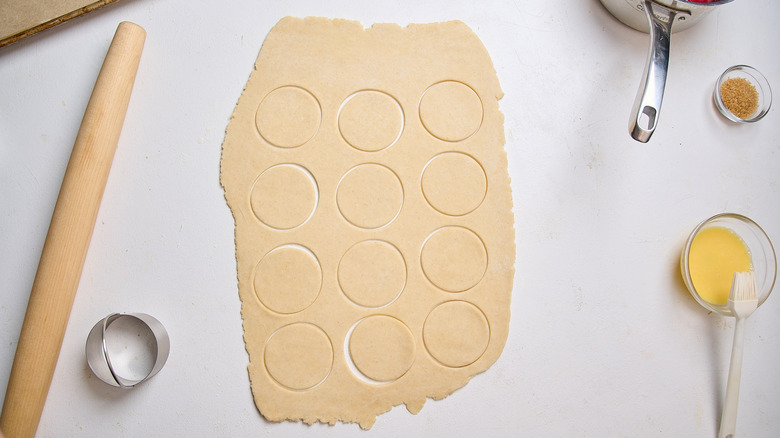
Use a circle cutter to cut 12 (3-inch) circles from the dough. Roll, fold, and wrap the remaining dough and chill.
Step 14: Prepare an egg wash

Add 1 tablespoon water to the beaten egg in a small bowl.
Step 15: Brush half of the crusts with egg wash
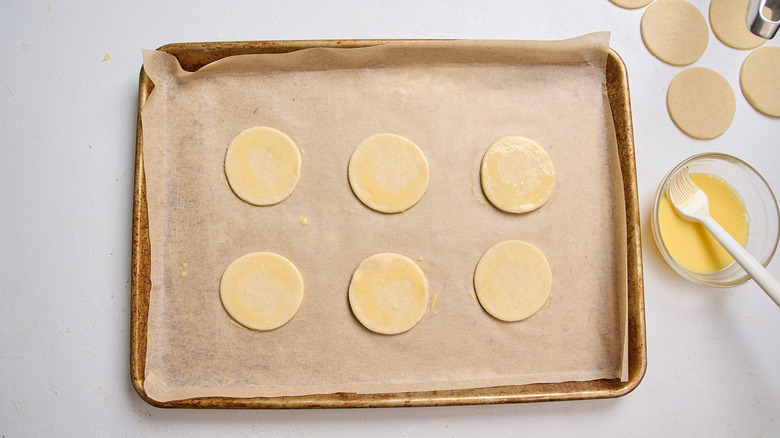
Place 6 dough circles on the baking sheet and brush with the egg wash along each outer edge.
Step 16: Add cherry filling to each
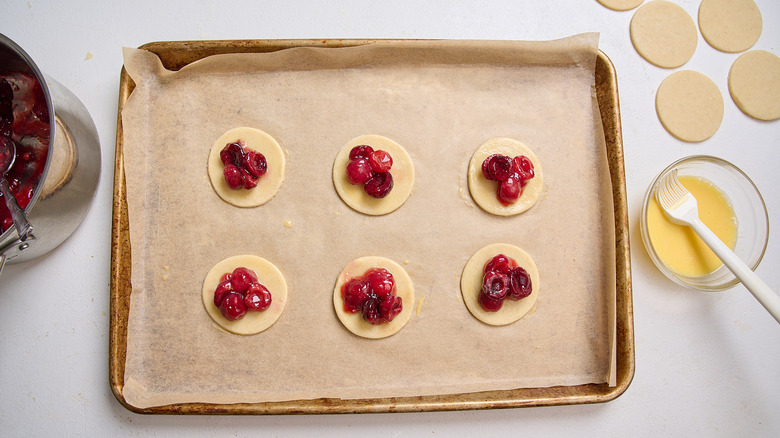
Add a spoonful of cherry filling to the center of each circle.
Step 17: Top and seal the hand pies
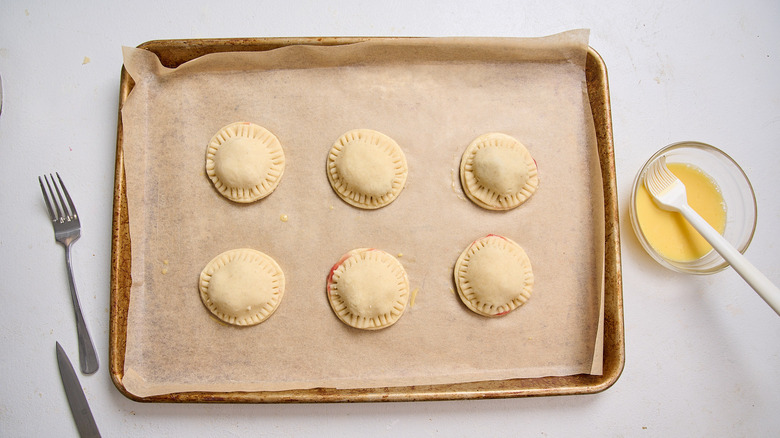
Add the remaining 6 circles on top of the first, sealing to adhere to the egg wash. Use a fork to seal each by crimping.
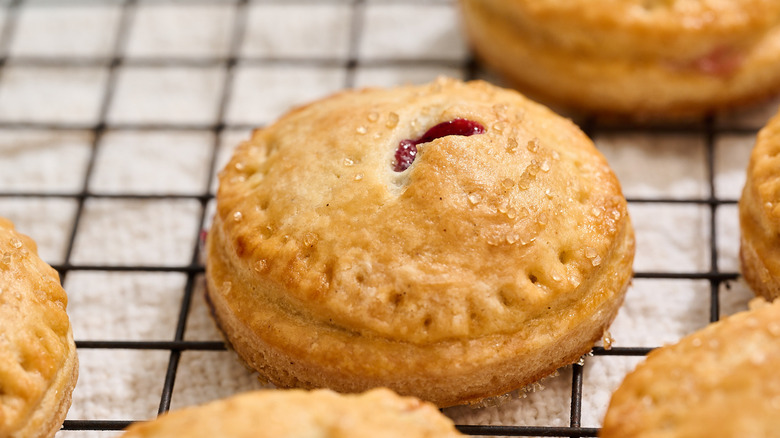
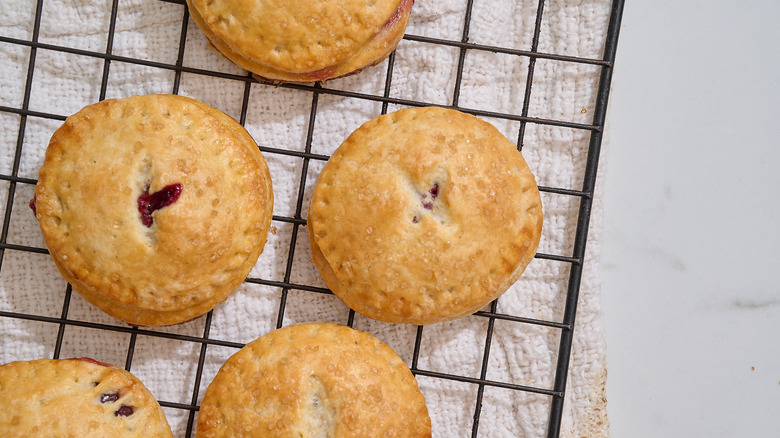
Step 18: Slice vents into the tops of the pies
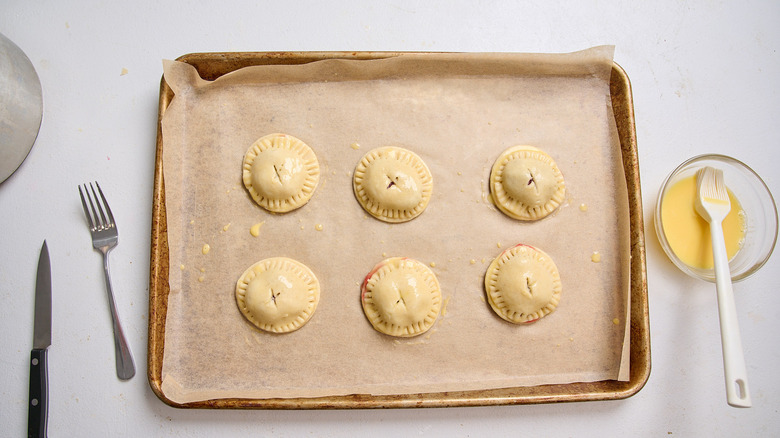
Slice small slits into the tops of each pie, then use the egg wash to brush across the tops of each pie and sprinkle with turbinado sugar.
Step 19: Bake the cherry hand pies until golden
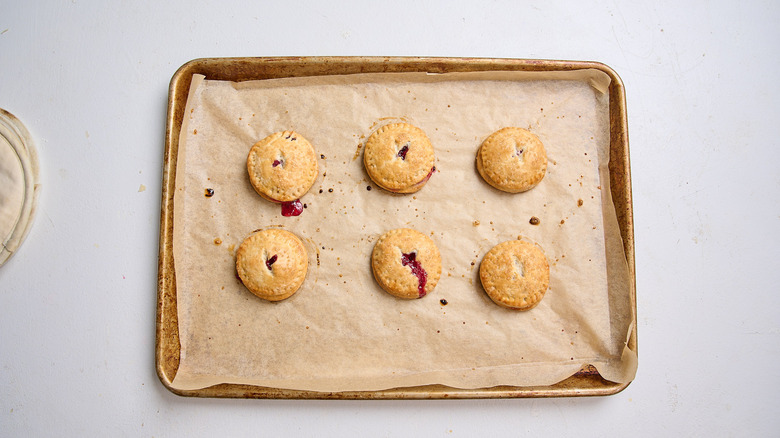
Bake for 18 to 20 minutes, until golden brown and flaky. Repeat with the remaining dough and filling to make 12 total hand pies.
Pairs well with cherry hand pies
Cherry Hand Pies Recipe
These adorable cherry hand pies are the perfect on-the-go treat, featuring a homemade pie crust stuffed with a rich, luscious cherry pie filling.
Ingredients
- For the crust
- 2 cups all-purpose flour
- 2 tablespoons granulated sugar
- ½ teaspoon baking powder
- ½ teaspoon salt
- ¼ teaspoon cinnamon
- 2 sticks cold butter, cut into cubes
- ½ cup sour cream
- For the filling and assembly
- 2 cups fresh, pitted cherries
- ⅓ cup granulated sugar
- 2 tablespoons cornstarch
- 1 teaspoon lemon juice
- ½ teaspoon vanilla extract
- For the hand pies
- 1 egg, beaten
- 1 tablespoon turbinado sugar, for topping
Directions
- To make the pie dough, whisk the flour, sugar, baking powder, salt, and cinnamon in a bowl.
- Add the butter cubes and combine into the dry ingredients using your hands, working into pea-sized pieces.
- Add the sour cream and use a spatula to combine into the mixture to form a very shaggy dough.
- Turn onto a floured surface and knead until a smooth dough forms. Do not overwork the dough.
- Form the dough first into a cylinder, then roll out into a rectangle.
- Fold the dough in thirds, then roll out again.
- Repeat, folding and rolling into a rectangle, then fold once more into thirds.
- Wrap the dough in plastic and chill for 30 minutes.
- In the meantime, make the cherry filling. Add the cherries, sugar, cornstarch, lemon juice, vanilla, and ½ cup water to a saucepan over medium heat.
- Bring to a boil, then set the heat to low and cook until thick, about 5 to 10 minutes. The color will be deep red and the consistency will be that of a loose jam.
- Preheat the oven to 425 F and arrange a baking sheet with parchment.
- Remove the dough from the refrigerator and roll out to a large, thin square.
- Use a circle cutter to cut 12 (3-inch) circles from the dough. Roll, fold, and wrap the remaining dough and chill.
- Add 1 tablespoon water to the beaten egg in a small bowl.
- Place 6 dough circles on the baking sheet and brush with the egg wash along each outer edge.
- Add a spoonful of cherry filling to the center of each circle.
- Add the remaining 6 circles on top of the first, sealing to adhere to the egg wash. Use a fork to seal each by crimping.
- Slice small slits into the tops of each pie, then use the egg wash to brush across the tops of each pie and sprinkle with turbinado sugar.
- Bake for 18 to 20 minutes, until golden brown and flaky. Repeat with the remaining dough and filling to make 12 total hand pies.
Nutrition
| Calories per Serving | 291 |
| Total Fat | 17.7 g |
| Saturated Fat | 10.6 g |
| Trans Fat | 0.1 g |
| Cholesterol | 59.5 mg |
| Total Carbohydrates | 30.5 g |
| Dietary Fiber | 1.1 g |
| Total Sugars | 12.4 g |
| Sodium | 122.9 mg |
| Protein | 3.3 g |
Can I make all 12 hand pies at once or do I have to work in batches?
There are a lot of tips to keep in mind when making pie crust, but perhaps the most important is to keep the dough cold. More specifically, it is important to keep the butter cold, which requires chilling the dough often and working with it as little as possible. The heat from your hands warming the dough is enough to melt the butter within. Because pie dough needs to be cold going into the oven, it is easiest to work in batches when making something that requires several intricate steps like this recipe does.
To avoid the dough getting too warm, I recommend making the pies in batches so that you can work with cold dough each time you roll it flat. If you work quickly (say, you've made this recipe a dozen times and can do it with your eyes closed), you may be able to roll, cut, and re-roll the dough before it warms enough to melt the butter. You'll know the dough is too warm if it becomes glossy, feels almost wet, and starts sticking to the rolling pin. If this happens, chill the dough until it is firm again.
What can I do if I don't have a biscuit cutter?
There are many ways to make hand pies, and no one way is the correct size or shape. To make circular pies like these without a biscuit cutter, you can use the lid or mouth of a Mason jar, the lid of a cocktail shaker, or the edge of a 1-cup measuring cup, which are all the approximate size of these hand pies and have sharp enough edges to slice easily through the dough. You can also make slightly larger pies using the mouth of a small bowl, folding the pie in half to make a half-moon shape instead of a circle.
You can also make your pies into rectangles (like those famous McDonald's pies). This is a great method when you don't have any molds or cookie cutters because it only requires a knife or pizza cutter. Roll the dough out thin on a table, then slice it into rectangles around the size you'd like the pies to be (I recommend about 5x3 inches). Then, simply layer the pieces as you would the circular pieces and crimp the edges to seal.