Girl Scouts-Inspired Thin Mints Recipe
We may receive a commission on purchases made from links.
If you're mid-realization that you've already polished off that box of Thin Mints you nabbed this Girl Scout cookie season, you're not alone. From Thin Mints to Samoas, Girl Scout cookies have a way of disappearing faster than you planned. They're nostalgic, a little too snackable, and always hit just right — whether you're pairing them with a cup of coffee, grabbing a few straight from the freezer, or sneaking one late at night. It's no wonder they're so popular year after year.
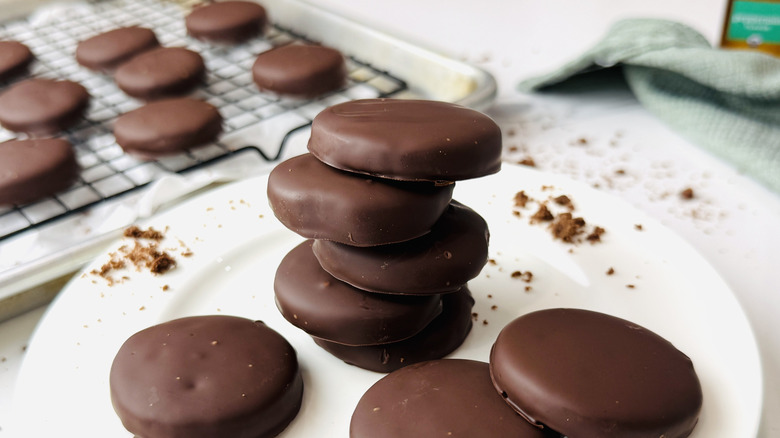
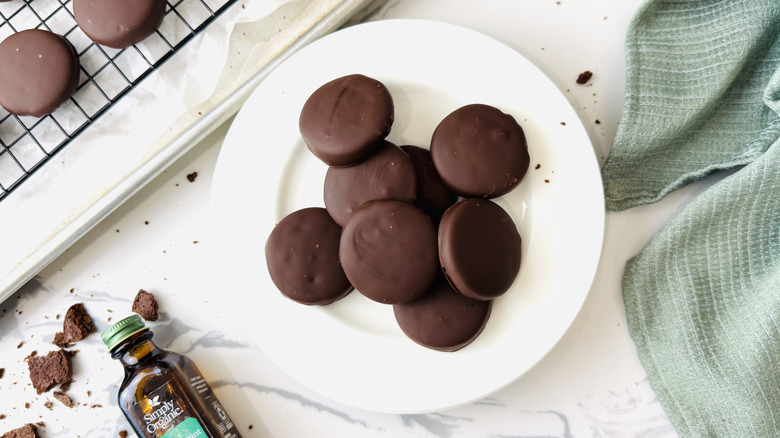
Even if those Thin Mints are long gone by this point, don't worry — you don't have to wait until next year's cookie season to dive into those beloved minty, chocolatey bites again. This Girl Scouts-inspired Thin Mints recipe brings the iconic treat right to your own kitchen, all the way from the crisp chocolate peppermint cookie center to the bittersweet chocolate coating. These homemade cookies are just as delicious as the Girl Scout version, and though they may require a little more labor than purchasing a box, they're well worth it. The best part? One batch makes almost five dozen cookies, so you'll have plenty to stock away in your freezer for when a craving strikes.
Gather the ingredients for Girl Scouts-inspired Thin Mints
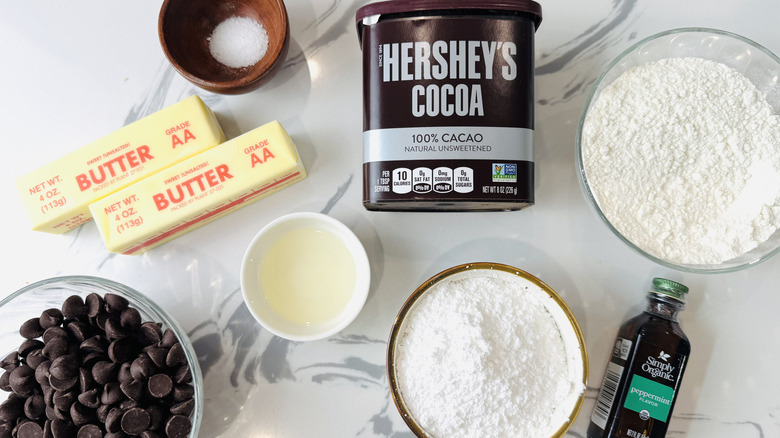
The ingredient list to prepare homemade Thin Mints couldn't be more simple. Unsalted butter and confectioners' sugar cream together to create the base of the dough. You'll want your butter to be softened so it will mix easily, and if you only have salted on hand, go ahead and use it, just leave out ½ teaspoon of the additional salt added to the recipe.
Peppermint extract adds that iconic minty flavor to the dough, with all-purpose flour, unsweetened cocoa powder, and kosher salt rounding out the dough ingredient list. If you have the choice, look for a Dutch-processed cocoa powder, since it will be deeper in color and flavor.
When it's time to dip the cooled cookies, a combination of bittersweet chocolate chips, coconut oil (or any neutral oil you prefer), and peppermint extract are melted together for that delicate chocolate finish. This is where opting for homemade cookies really has its advantages. Feel free to swap in dark, milk, semisweet, white, or any type of chocolate you prefer. If you're big on peppermint, feel free to increase the extract quantity to taste.
Step 1: Beat the butter and sugar
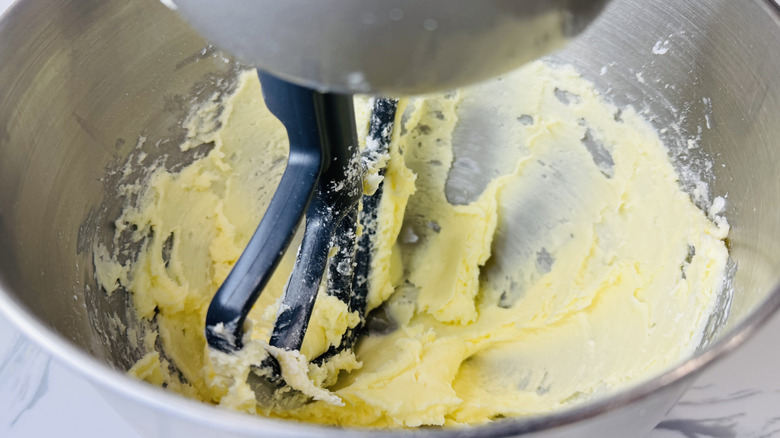
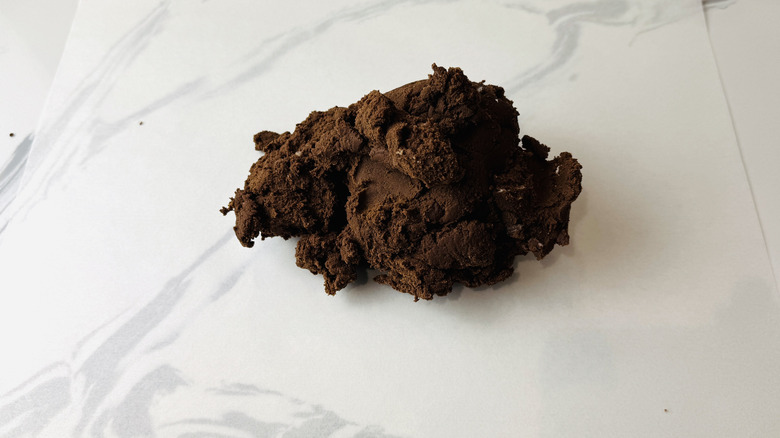
Beat the butter, confectioners' sugar, and 1 teaspoon peppermint extract in a stand mixer fitted with a paddle attachment until smooth.
Step 2: Add dry ingredients
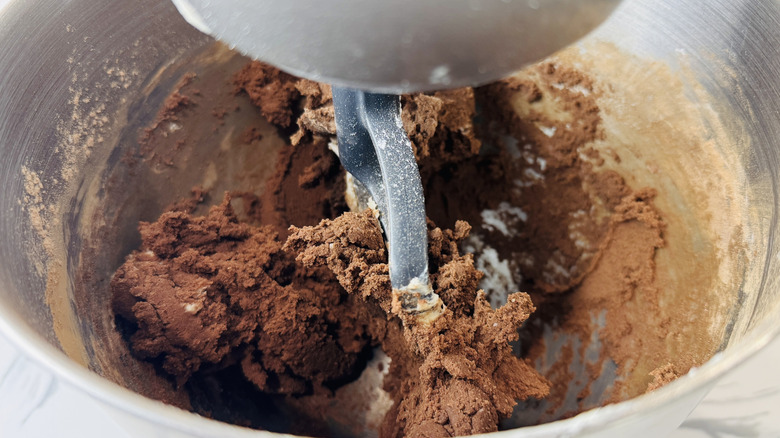
Add the flour, cocoa powder, and salt. Beat to combine.
Step 3: Transfer cookie dough to parchment paper
Transfer the dough to a sheet of parchment paper.
Step 4: Roll out the cookie dough
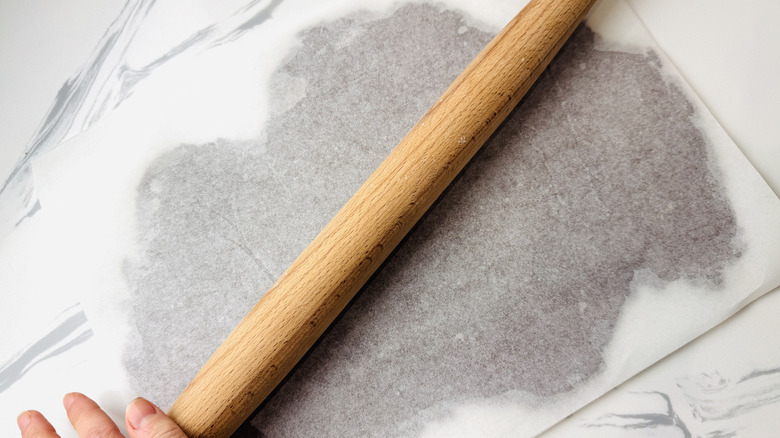
Cover the dough with an additional sheet of parchment paper, then roll it out to ¼-inch thickness.
Step 5: Chill the cookie dough
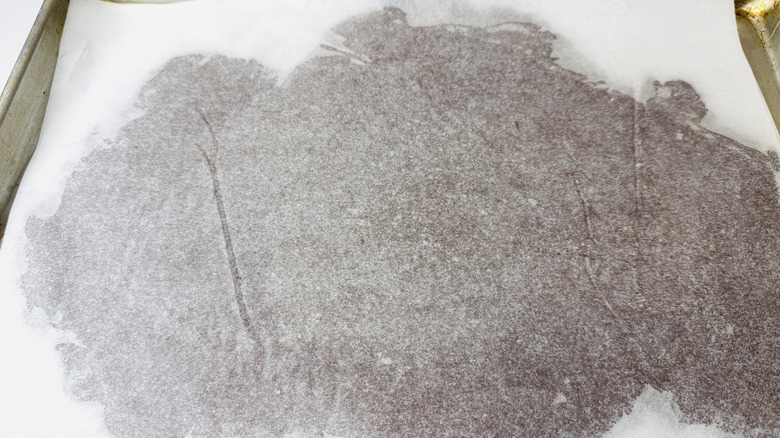
Transfer the parchment-covered dough to a baking sheet and chill at least 15 minutes, or until firm.
Step 6: Preheat the oven

Preheat the oven to 375 F.
Step 7: Cut out cookies
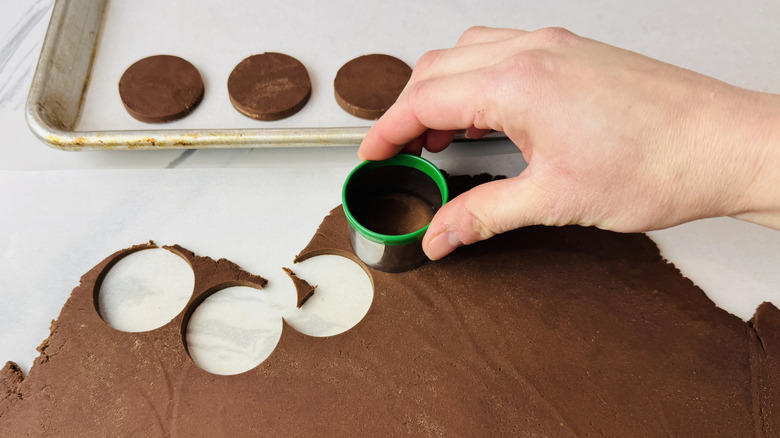
Cut out cookies using a 1 ¼- or 1 ½-inch round cutter and transfer to a lined baking sheet.
Step 8: Roll and repeat to make all of the cookies
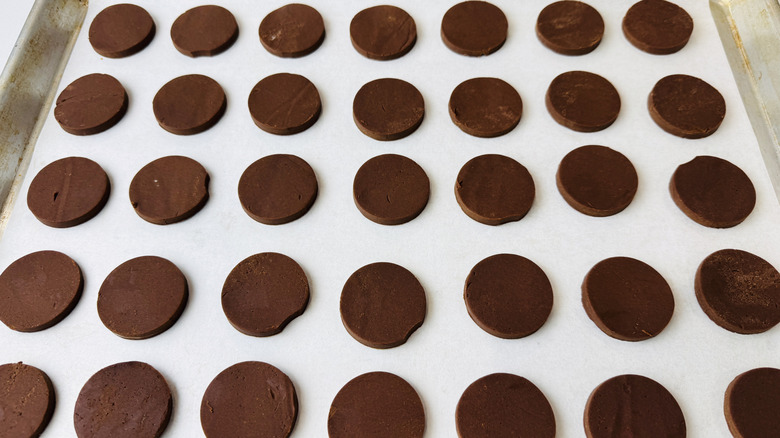
Roll and repeat the process with the dough scraps, until you have roughly 56 cookies.
Step 9: Bake the cookies
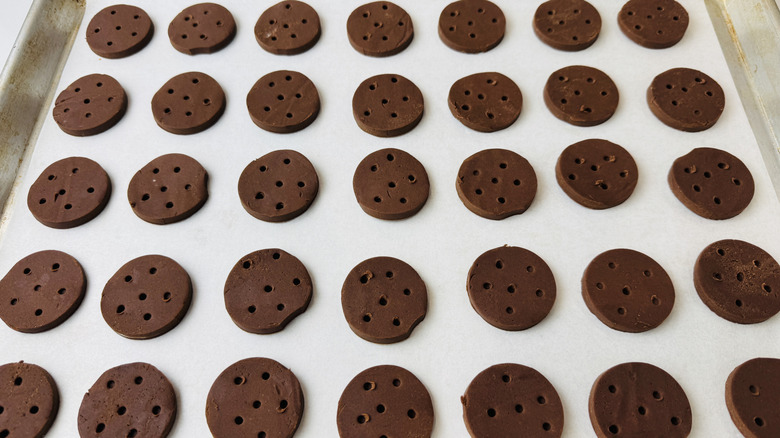
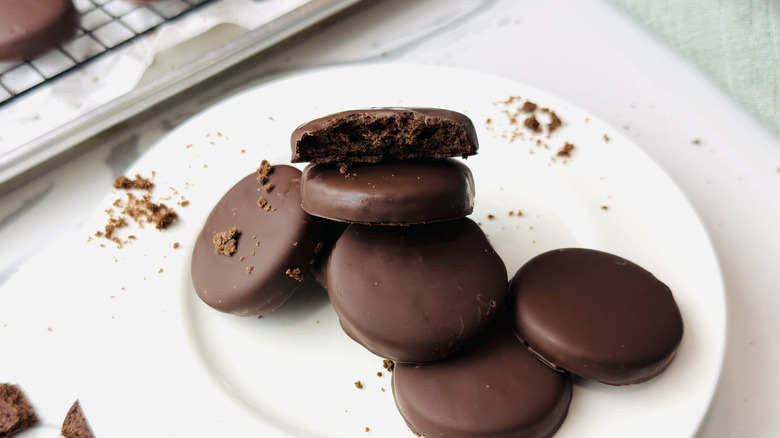
Bake the cookies for 10-12 minutes, or until fragrant and firm. Optional: Before baking, poke holes on top of the cookies using a lollipop stick or skewer for a similar look to official Thin Mints.
Step 10: Melt the chocolate
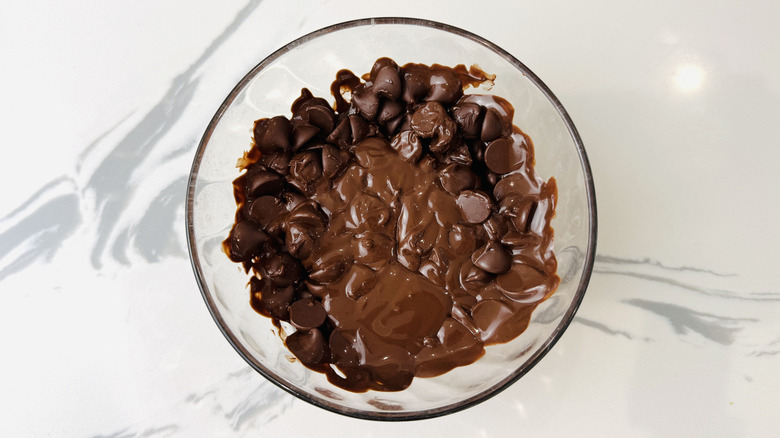
In a microwave-safe bowl, heat the chocolate chips and oil until mostly melted.
Step 11: Add peppermint extract
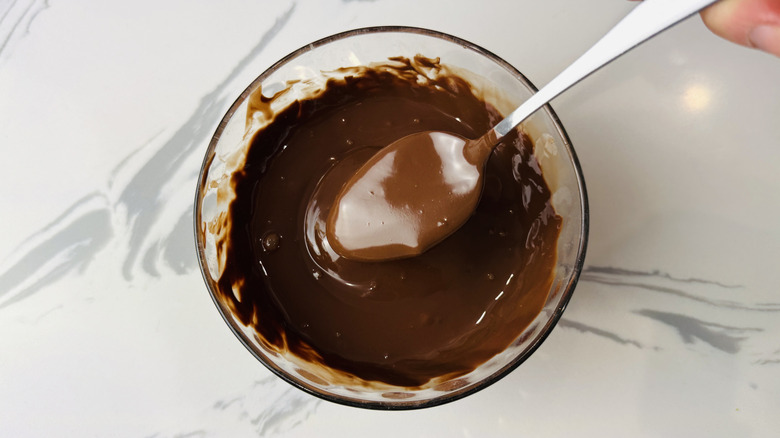
Add the remaining ½ teaspoon peppermint extract to the chocolate and stir until fully melted and smooth.
Step 12: Dip cookies in chocolate
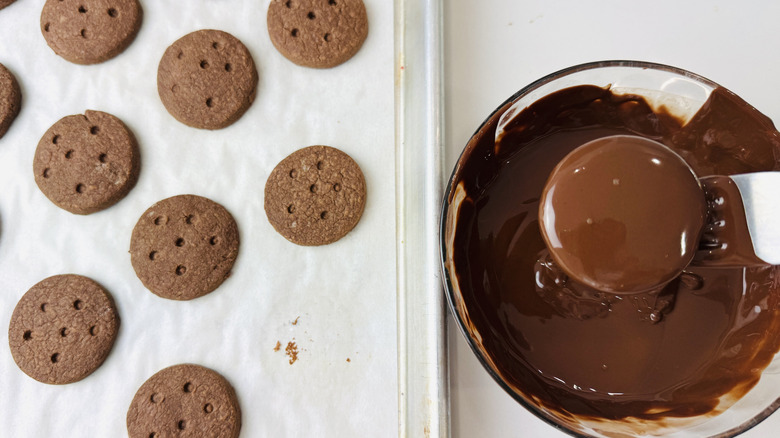
Use a fork or dipping tool to dip a baked cookie into the chocolate coating, tapping and wiping off the excess on the bottom.
Step 13: Finish dipping all the cookies
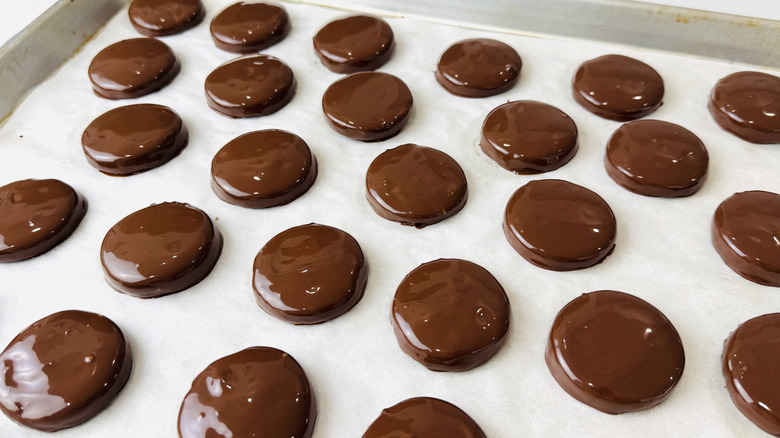
Repeat with remaining cookies, placing them back onto the lined baking sheet after dipping.
Step 14: Chill and serve the homemade Thin Mints
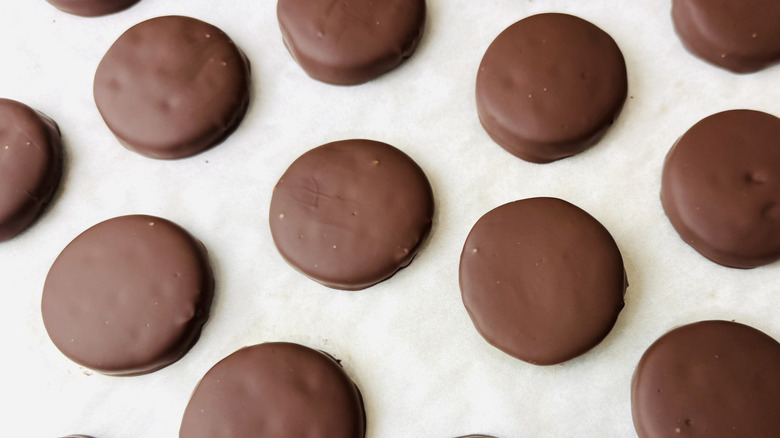
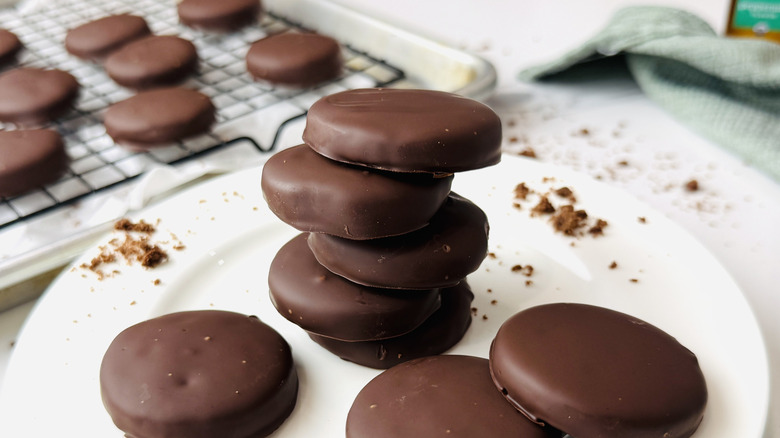
Chill the cookies until firm and serve.
Pairs well with Girl Scouts-inspired Thin Mints
Girl Scouts-Inspired Thin Mints Recipe
If you missed Girl Scout cookie season, fear not - this Girl Scouts-inspired Thin Mints recipe captures that minty, chocolatey goodness in a homemade version.
Ingredients
- 1 cup unsalted butter, softened
- 1 cup confectioners' sugar
- 1 ½ teaspoons peppermint extract, divided
- 2 cups all-purpose flour
- ⅔ cup unsweetened cocoa powder
- ¾ teaspoon kosher salt
- 1 (10-ounce) package bittersweet chocolate chips
- 1 tablespoon coconut oil or neutral oil
Directions
- Beat the butter, confectioners’ sugar, and 1 teaspoon peppermint extract in a stand mixer fitted with a paddle attachment until smooth.
- Add the flour, cocoa powder, and salt. Beat to combine.
- Transfer the dough to a sheet of parchment paper.
- Cover the dough with an additional sheet of parchment paper, then roll it out to ¼-inch thickness.
- Transfer the parchment-covered dough to a baking sheet and chill at least 15 minutes, or until firm.
- Preheat the oven to 375 F.
- Cut out cookies using a 1 ¼- or 1 ½-inch round cutter and transfer to a lined baking sheet.
- Roll and repeat the process with the dough scraps, until you have roughly 56 cookies.
- Bake the cookies for 10-12 minutes, or until fragrant and firm. Optional: Before baking, poke holes on top of the cookies using a lollipop stick or skewer for a similar look to official Thin Mints.
- In a microwave-safe bowl, heat the chocolate chips and oil until mostly melted.
- Add the remaining ½ teaspoon peppermint extract to the chocolate and stir until fully melted and smooth.
- Use a fork or dipping tool to dip a baked cookie into the chocolate coating, tapping and wiping off the excess on the bottom.
- Repeat with remaining cookies, placing them back onto the lined baking sheet after dipping.
- Chill the cookies until firm and serve.
Nutrition
| Calories per Serving | 83 |
| Total Fat | 5.2 g |
| Saturated Fat | 3.1 g |
| Trans Fat | 0.0 g |
| Cholesterol | 8.7 mg |
| Total Carbohydrates | 9.4 g |
| Dietary Fiber | 0.8 g |
| Total Sugars | 4.9 g |
| Sodium | 26.6 mg |
| Protein | 0.9 g |
What are tips for making the best at-home Thin Mints?
When it comes to preparing homemade Thin Mints, a little patience goes a long way. Each step plays a role in achieving that signature crisp texture and clean, bakery-style finish. Start by creaming the butter, confectioners' sugar, and peppermint extract until smooth. Avoid overmixing, which will incorporate too much air, potentially causing the cookies to spread. Once the dry ingredients are added, beat only to combine to avoid an overly dense or rubbery result.
Parchment paper plays a key role in making the rolling process much easier, preventing sticking without the need for excess flour, which can dry out the cookies. If you don't have parchment on hand, chill the dough before rolling on a lightly floured surface, or opt for wax paper if you have it. Make sure to roll the dough thin to ensure the cookies are crisp and easy to coat with melted chocolate. Chill until firm before cutting out rounds to keep the shapes intact while moving them to baking sheets.
Bake the cookies until firm and fragrant, and cool before dipping in melted chocolate to help the coating set nicely. When dipping, let any excess chocolate drip off so you get that classic thin, even shell without chocolate pooling around the base.
What's the best way to store homemade Thin Mints, and how long will they last?
How you store Thin Mints can make a big difference in how long they stay fresh and how their texture holds up. For short-term storage, you can keep them at room temperature in a cool, dry place (so long as your kitchen isn't too warm). However, storing them in the refrigerator or freezer is the best way to maintain their texture and prevent the chocolate from softening or blooming (when streaks or white flecks appear on the surface).
To store, pack the chilled cookies into an airtight container, separated by layers of parchment paper to keep their coatings from becoming damaged. You can also store them in zip-top bags. Store at room temperature for up to three days, in the refrigerator for up to one week, or in the freezer for up to three months. Ask any Thin Mint aficionado — the freezer is the place to keep them for the most refreshing, minty flavor and extra-crisp texture.