10 Foods That Need To Cook On High Heat (And Why)

We may receive a commission on purchases made from links.
Culinary school is a weird mix of drudgery and information overload. On the one hand, aspiring chefs still have to toil through the traditional skill-building exercises, like endlessly turning round vegetables into square cuts. On the other hand, they're also drilled endlessly on sanitation and food safety, culinary history, and the food science that underpins so much of that traditional lore.
One thing that's a focus, in both theory and practice, is learning how to match foods with their most appropriate cooking methods. Steaming is great for fish and delicate vegetables, for example, but a brisket? Not so much. There's also the question of whether something should be cooked quickly at a high temperature, or low and slow for hours.
Speaking as a trained chef and former restaurateur (and as someone who's lived in a rental where the stove worked at full blast or not at all), I can tell you that there are relatively few foods where high heat is the preferred option. That said, high heat definitely has its place, and some foods won't come out properly if you don't crank up the heat. Here are some examples, as well as explanations of why high heat is so important.
Pizza
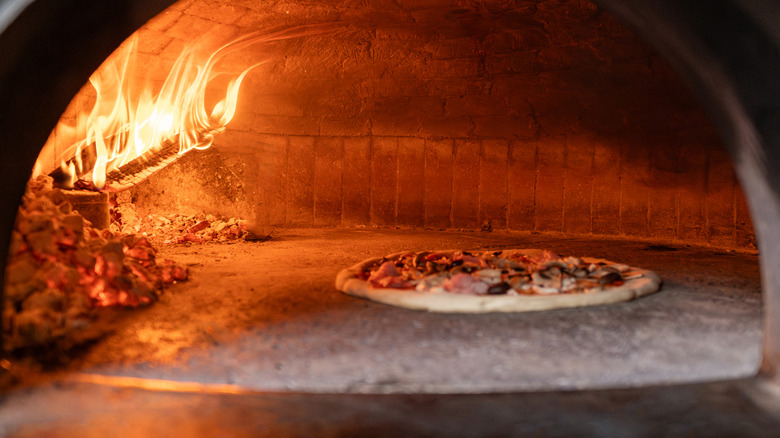
Let's start with pizza. It's a good example, partly because of its universality and high-heat requirements. There are "topped flatbreads" made throughout Italy, but the most influential version is the classic Neapolitan pizza. It's so iconic that it has a legal definition. The Neapolitan is a thin-crust pizza that requires the searing heat of traditional wood-fired ovens (up to 900 F, according to legendary NYC pizza master Anthony Mangieri) to blister and puff the crust's edge, as well as melt the cheese and brown the sauce. The conventional gas-fired commercial pizza ovens used by most chain restaurants aren't usually cranked that high, working in the 500 F to 900 F range, because thicker pizzas with more toppings take longer to cook properly.
Still, a commercial pizza oven at its lowest working temperature is at the high end of what your home oven can achieve. Most of them also have a stone hearth to retain heat and cook the pies quickly, which you can simulate at home with a pizza stone or a sheet of steel. To use one, you'll need to preheat it thoroughly in your oven, which takes time, uses energy, and heats your kitchen. If you're a serious pizza lover, you may want to spring for a standalone pizza oven instead, like the Ninja Artisan Outdoor Pizza Oven available on Amazon. It'll give you the heat you need, more efficiently, and ideally outdoors.
Squid
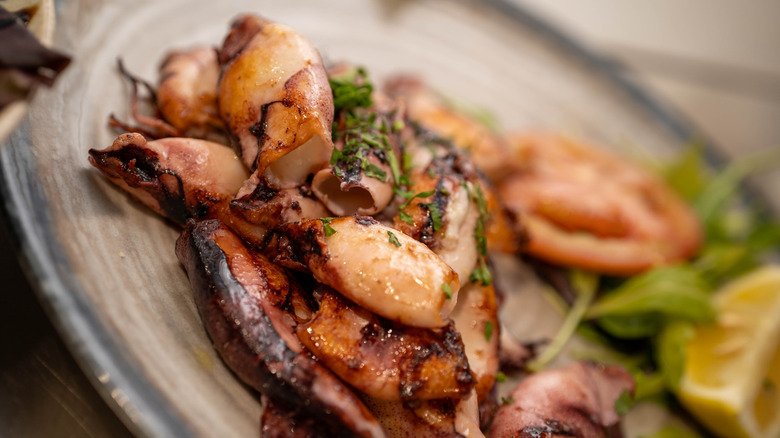
Chefs have a time-honored piece of wisdom about cooking squid. The saying goes, "Cook it for a minute or an hour, but nothing in between." That's a bit of an exaggeration, but if you've ever found yourself endlessly working on a plate of chewy calamari, you already know why we say that.
The issue is that squid, and its relatives like octopus and cuttlefish, lack a conventional skeleton to anchor their muscles and provide leverage. Instead, they make do with extra-long, tough muscle fibers that are high in collagen and connective tissue. For comparison, think of meat cuts like brisket and shank, which also have long muscle fibers and plenty of connective tissue. Those are invariably slow-cooked, in one way or another, but with squid (because it's thin), you also have the option of searing it hot and fast.
Why does this work? Because those tough tissues need a few minutes to contract and tighten, and once they've done that, your only choice is to cook the squid until it starts to break down again. High temperatures, whether in a screaming-hot pan or an intense fire on your grill, let you cook the squid within two to three minutes (the 1-minute thing is an exaggeration, but not by much). If you get the timing right, it's still a bit chewy but not unpleasantly so.
Popovers and Yorkshire puddings
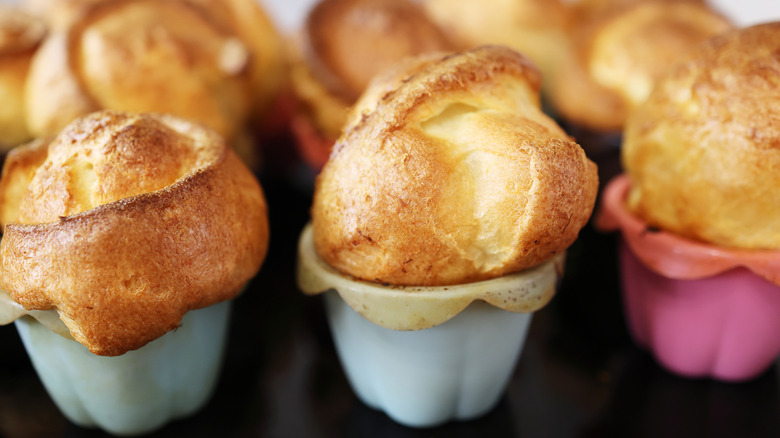
Most of us have had Yorkshire puddings at one time or another. Some of us may also have enjoyed popovers, especially those from the Northeast. There are similarities and differences between popovers and Yorkshire puddings, but fundamentally, they follow the same pattern. Both are made from an unleavened batter, both are traditionally poured into preheated pans filled with fat, and both are cooked in the oven at high heat. The high heat is an essential part of the process here. Because the batter is unleavened, it needs a high-temperature bake to quickly make the crust set. Then, as the batter heats, its moisture turns to steam that's trapped by the crust and makes it puff up, balloon-like, to a light and fluffy texture inside the deliciously caramelized crust.
Yorkshire puddings can be baked in a single big pan, which is the traditional way, or in individual portions. They're usually made with a roast, and the pan is filled first with the fat and drippings from the roast for a savory flavor. Popovers are generally baked in pans filled with melted butter and served as a dessert with a fruit or jam filling spooned in. Although it's less traditional, you may also see popovers given a savory twist with herbs and cheese. Some recipes find a balance, like these cheesy lemon popovers, with sweet and savory elements. Either way, they're good.
Shrimp
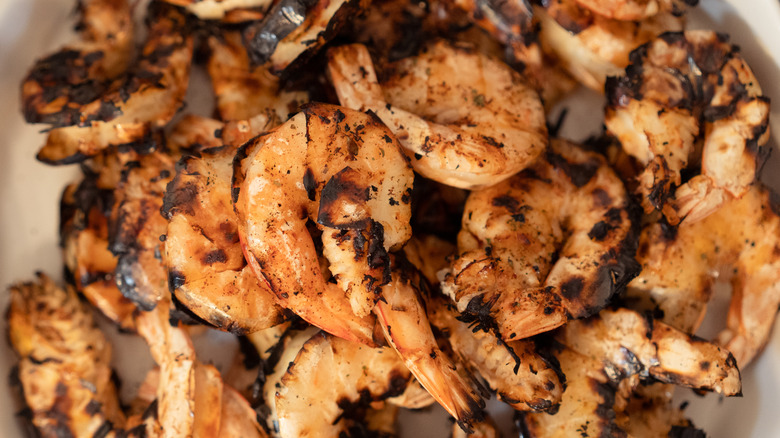
Shrimp are popular and versatile, but they do pose an issue for unwary cooks. Because they're relatively small and thin, it's quite easy to overcook them. Yet they taste best with some browning, and maybe even a bit of char at the edges. So, what's the answer?
Well, blasting shrimp quickly at high heat is one way to give them that flavor-enhancing browning without making them dry or tough. One option is your grill: The shrimp are easiest to handle if you skewer them first, then grill them over high heat at 400 F to 450 F for 2 or 3 minutes. You can also cook them on a plancha (a sort of high-heat griddle), for a pleasantly smoky flavor, or in a hot cast-iron skillet.
I'll point out that this approach to cooking shrimp requires all your attention. If you can't do that, you should probably consider other cooking methods, as cooking shrimp at too high a heat for too long will overcook them. You can buy yourself a bit of leeway by brining the shrimp briefly, or by searing them shell-on (the shells give some protection) and then moving them to a lower heat part of your grill to finish. The rule of thumb I give in my cooking classes is that small shrimp need faster cooking. However, you can dial back the temperature on larger shrimp because they take longer to cook thoroughly.
Thin steaks and chops
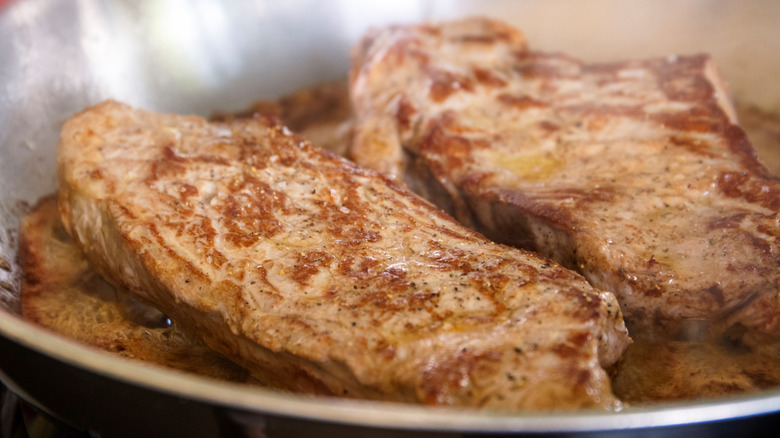
With big, fat steaks and chops, the kind you'll see in cooking videos, there are several ways to get a great result. Some people like to give theirs a fast sear at high heat, for example, and then finish them in the oven at high heat. Others turn that around by cooking their steaks in the oven first, and then searing them (called the reverse sear method, for obvious reasons). There are plenty of benefits to the reverse sear technique, but unfortunately, it's only useful with thick steaks.
And that's a problem. It's all good to say you shouldn't cut steaks too thin, but most of us don't cut our own steaks. We go to the meat counter at the supermarket and buy what's on sale or what looks good. Those steaks and chops are usually well under an inch thick, and that means they're too thin to work properly with the reverse sear technique.
Instead, to get a steak that's nicely seared on the outside but not cooked past your preferred doneness on the inside (for steak lovers, that's usually rare to medium-rare), you'll need to crank up the temperature. The thinner the steak, the faster you'll need to work. At ½ to ¾ inch, you can still do a few minutes on each side before you zoom past medium-rare. For anything thinner, like minute or breakfast steak, you really only have time to sear one side. Give the second side the barest kiss of the pan's heat, and then serve it with the seared side up.
Stir-fried meats and vegetables
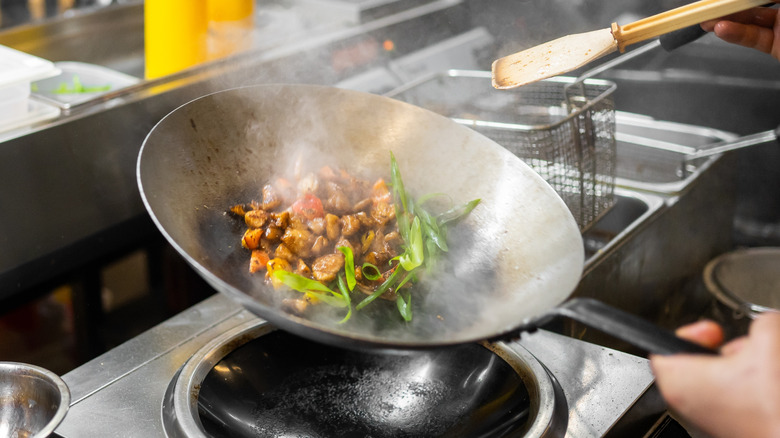
I really admire the wok as a piece of basic kitchen engineering. The traditional round-bottomed shape means you can use minimal amounts of fat and a small, blazing fire to cook a full meal for a family. If you usually throw together a pan of vegetables in your skillet over medium heat, you aren't getting the benefit of that classic technique. The whole point of the technique is to put your effort into prep, rather than cooking time. That's why meats are cut into thin strips, and the vegetables are sliced into small pieces. That way, they can get maximum cooking in minimal time during their quick exposure to the hot fat.
This is where the wok's traditional shape comes into play. You need just a tablespoon or two of oil in the wok for a successful stir-fry (see chef-approved methods). The name says it all, as far as technique. Use your spatula to pass the meats or vegetables into the fat, then up onto the sides of the wok, in small batches. The hot fat cooks them quickly, and then drains back to the bottom as the pieces of food sit farther up the pan. You can also toss them in the wok, if you like. Your food will cook quickly and evenly, keeping its color and textures. If you have the temperature really cranked, you may even taste the elusive "wok hei," a special savory note that only comes with high-temperature stir-fry.
Roasted vegetables
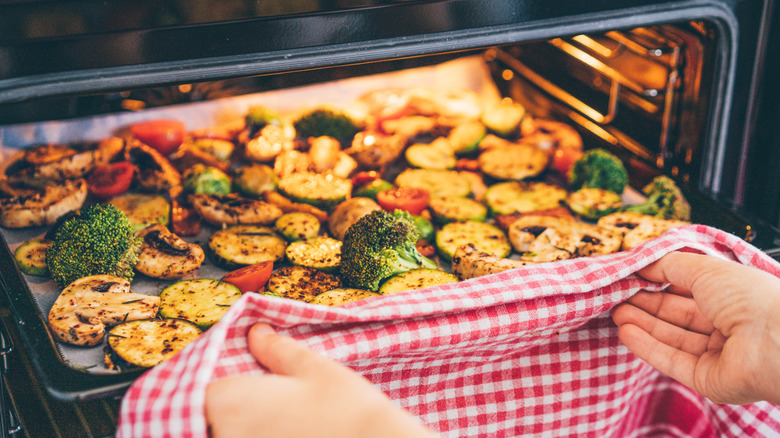
If you're a fan of roasted vegetables, you'll quickly notice that recipes for them fall into two styles. One is aimed at winter meals, and revolves around sturdy root vegetables and winter squashes. The other uses lighter vegetables, like broccoli or even Brussels sprouts, and it's meant to accompany lighter, rest-of-the-year meals.
It's surprising how often those recipes call for the vegetables to be cooked at the same 350 F (sometimes 375 F) you'd use for baking cookies. I seldom do that; here's why. Most vegetables, even the ones you don't think of as sweet — like broccoli, or asparagus — contain natural sugars. Roasting them at higher temperatures, of 400 F or more, caramelizes those sugars. The vegetables brown quickly, before they can become limp and overcooked. They're more flavorful, retain their texture, and are ready sooner. There are also many ways to give roasted vegetables a crispy texture, for added sensory appeal.
There is a case to be made for slow-roasting, but that's best suited for those sturdy root vegetables I mentioned earlier. Even with carrots, parsnips, or rutabagas (three of the sturdiest), I personally prefer high heat. I'll usually cut them into smaller pieces if I'm going the high-heat route, so they'll cook more quickly; otherwise, I'll par-cook them first. Root vegetables are especially high in natural sugars, so they'll caramelize beautifully, which gives them a deeper, richer flavor.
Fresh tuna
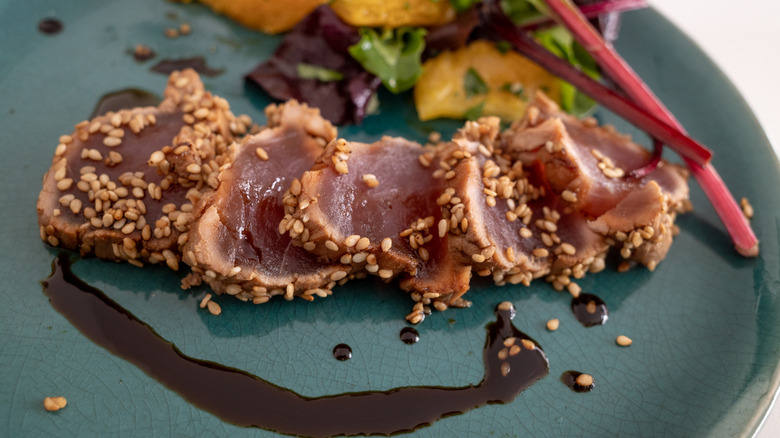
It's a bit ironic that, although I grew up in Nova Scotia, which has a tuna fishery (the world-record bluefin was caught there in 1979), I was in my 30s before I ever ate tuna that wasn't out of a can. In my defense, fresh tuna wasn't yet a thing in my area, as most of the local catch was exported.
My first piece of fresh tuna was crusted with sesame seeds and served medium-rare after a hard sear. The crust of seeds part is optional. However, giving your tuna steak a nice, hard sear on the outside and bringing it to rare or medium-rare on the inside is arguably the ideal way to serve it (though there's certainly a case to be made for tuna sashimi, as well).
With tuna steaks, as with the beefy kind, you won't get that good, solid sear on the outside without applying high heat. If you're going to cook it in a skillet, for example, you'll need a screaming-hot pan (and a high-temperature oil) to get the perfect sear on your ahi or bluefin. The same holds true for grilling, where you'll want the gas at its highest setting (or your coals low and super-hot), and the grill's grate fully preheated. That way, when your tuna hits the grate, you'll get those beautiful sear marks almost instantly.
Fried oysters
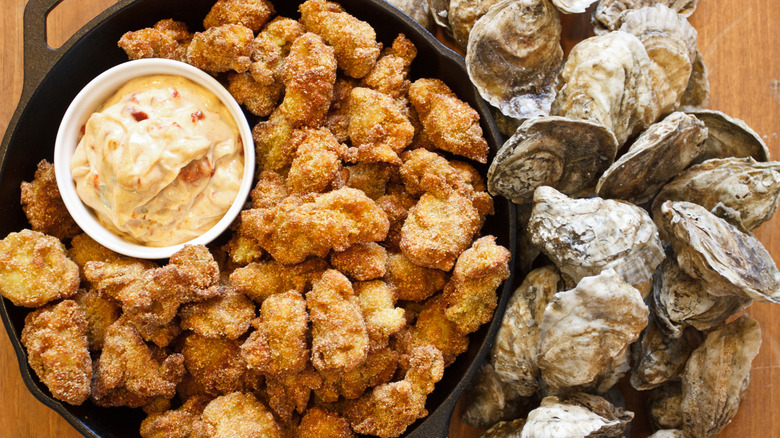
In most cases, when we speak of high-temperature cooking, we mean a temperature of 400 F or more. That's in the upper range of what your oven will do, and you can't get much higher in a skillet unless you pick a really high-heat oil. See the best oils to use with your cast-iron pan.
The math is a bit different for shallow and deep frying. It's okay to crank the heat when you're only using a tablespoon of oil to sauté, but the stakes are higher when you're cooking with more oil. Even high-temperature oils sputter and spatter as you use them, and the higher the heat, the greater the chance a stray drop will ignite and make your day a lot more interesting — and not in a good way. That's why 375 F is usually considered the high end for this kind of cooking.
And that's exactly what you need, if you want to turn out a platter of perfectly fried oysters. Oysters need that hot pan and high-temperature oil, so their breaded coating can become perfectly crisp and golden before they are overcooked. If you're shooting for perfectly fried oysters, that's one of the biggest chef tips. Two others that are important: Fry them in small batches (don't overcrowd the pan) and give the oil a few moments to get back up to temperature between batches. It really helps if you have a candy/deep fry thermometer to help you monitor the temperature.
A Dutch baby pancake
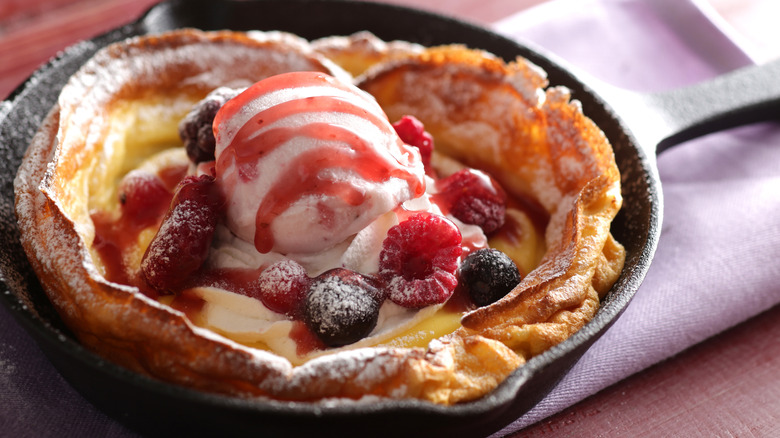
The Dutch baby pancake is something you might only have encountered in the Pacific Northwest, a generation or two ago. Although the Dutch baby's origin story is tangled, and it may actually have German roots, it was a Seattle restaurant that's credited with creating and popularizing this brunch-time treat. So, what is a Dutch baby?
It's very much in the same family as Yorkshire puddings and popovers, which we've already discussed. It's made with an unleavened batter of milk, eggs, sugar, and some added flavorings at the cook's discretion. Most recipes (like this fluffy, rich version on our site) are sized to fit a standard 9-inch cast-iron pan, which is preheated in a 400 F oven. To make this, melt the butter in the pan, pour in the batter, and pop it back into the hot oven.
The oversized pancake puffs up like a soufflé or a popover in the high heat, billowing to a light and fluffy texture. Then, turn the temperature down to 350 F so the pancake can finish cooking without the crusty exterior becoming too tough or dark. The Dutch baby will fall once you take it out of the oven, but that's a feature, not a bug. You can fill that hollow with your choice of syrup, fresh fruit, or preserves before bringing it to the table, and maybe a bit of whipped cream on top if you're really going for the gusto (my grandkids love that!). Divide it in the pan onto individual plates for serving.