5 Ways To Reuse Tin Cans In The Kitchen
We spend so much time in our kitchens that we're bound to occasionally get bored with how it looks and feels sometimes. You obviously cannot tear your kitchen down and start from scratch every time this happens, but you should not have to ignore the feeling either. From painting the cabinets to adding soft furnishings like rugs, there are several ways to refresh your kitchen without a full remodel. Even snagging some kitchen decor items from places like Target can give it an inexpensive upgrade. But the best way to add character and personality to your kitchen doesn't even have to involve buying things.
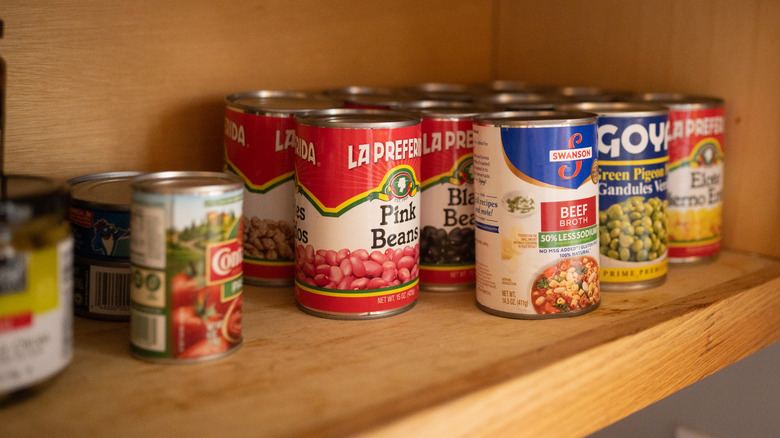
Simple DIY projects can give your kitchen the kind of personalized charm that money simply cannot buy. Then there's the immense pleasure you can derive from upcycling or recycling items that would otherwise go into the thrash heap. From chopping boards made of scrap wood to old bottles turned into mood lighting, the possibilities are limitless once you get going. In fact, you could get a wholesome DIY upgrade going just by using old tin cans. Between canned tomatoes and peas, and little tins of tuna and corned beef, there's bound to be a steady stream of tin cans coming into the house. Now you can use these to make your kitchen more organized, quirky, and 100% personalized. Here are five simple ways to reuse old tin cans in your kitchen.
Start your own herb garden
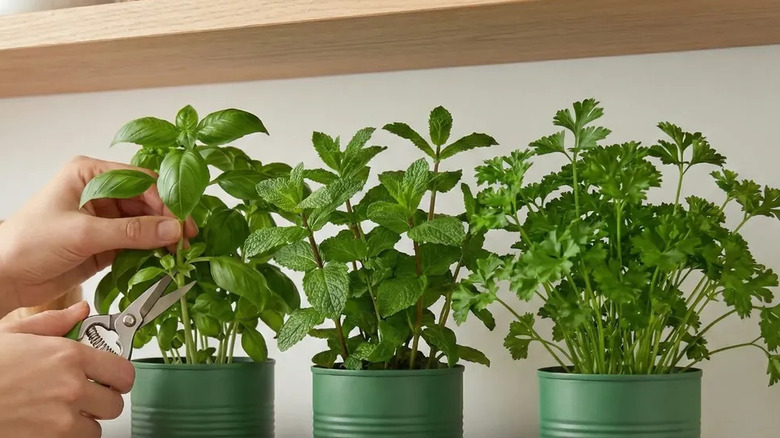
Kitchens and herb gardens are a match made in heaven. Not only does the smattering of green give a natural lift to a kitchen, but also nonchalantly reaching out and plucking a sprig of mint to drop into your salad is a trick that never fails to impress. The first step is to collect your tins and clean them thoroughly. You could leave the original stickers on, but stripping the cans down gives you more freedom from a design point of view. Painting them can become a fun side-project on its own, while labeling each of them with what you've planted will save you the trouble of answering many questions about what is growing in each can.
Either way, once you have your cans clean, fill them with soil and plant your seedlings. Don't forget to make a couple of small holes at the bottom to drain excess water. If you don't like the idea of muddy water seeping onto your kitchen counter, you can add a small layer of pebbles at the bottom of the can before topping it up with soil and skip the hole punching. If you are sold on the idea of container herbs, let's get you started with the 18 absolute best seeds to grow in your kitchen.
Hold things you need quick-and-easy access to, from scissors to spatulas
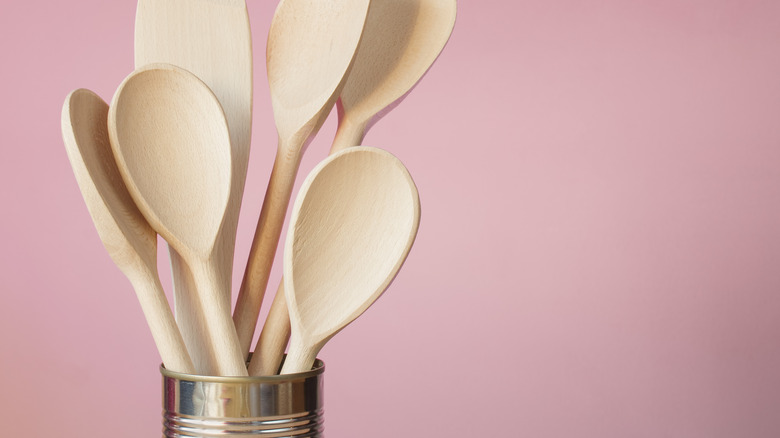
If you are looking for an easy project to get started, there is no better option than this. There are some kitchen items that you need within arms length at all times — scissors, tongs, and spatulas, for example. From stirring a pot of sauce to turning over the meat that is cooking on the skillet, you want to be able to get to these at a moment's notice when you're cooking. Kitchens where all these things are stored in a pull-out drawer along with the cutlery and serving spoons are annoying, and clearly organized by people who don't cook.
To turn your tin cans into a handy storage solution. All you need to do is take a large can, like the kind you get tomatoes in. Ditch the lid, wash the tin, sand down any sharp edges to avoid injuries, and you're good to go. Do this with a collection of old tins of different sizes and you have a whole new sorting system in place. Use the largest tins for tongs and spatulas, and put the smallest ones to use for spoons and forks. Depending on your personal aesthetic and the vibe of your kitchen, you can either take the labels off so all of them have a consistent metallic finish or leave them on as a potential conversation starter about your favorite brands of canned food.
Make your own wine rack
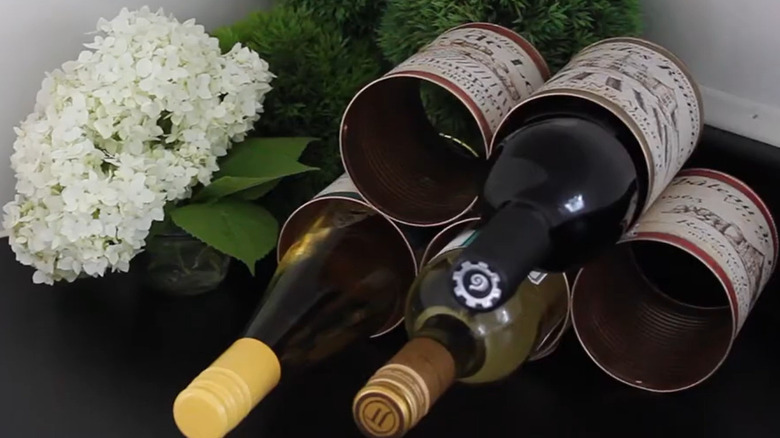
Speaking of conversation starters, this one has the potential to be the main talking point during a dinner party, especially if the wine is flowing. To make your first tin can wine rack, we suggest you collect a minimum of six tins of the same size. The 28-ounce cans that hold things like soup and tomatoes are ideal, as a bottle of wine can slide through perfectly. You will also need industrial strength glue and some spray paint. Having a wine rack is important since storing wine bottles upright is a mistake that can seriously compromise your favorite bottle.
Once you have stripped the cans of their labels and washed them thoroughly, you need to cut out the bottom of the can so a bottle can go right through. As always, we suggest sanding down any rough edges to avoid injuries (a tip that should be taken even more seriously when alcohol is involved). While you can experiment with structures as you go along, for your first wine rack we suggest building a pyramid shape — three tins at the bottom, two on top of that, and one on top to complete the pyramid. Glue these together with the industrial strength adhesive. Be generous with the glue, since you do not want the pyramid to start crashing under the weight of the bottles. Once the glue has dried out, arm yourself with the spray paint gun and have a blast. The phrase "artistic freedom" was penned for these moments.
Make vintage fridge magnets that double up as storage

Clips and rubber-bands have this confounding ability to go missing when you need to seal an open bag of anything, from chips to spices. Same with pens and notepads just when you want to make your shopping list. Now you can give these important assorted knick-knacks a home with these quirky fridge magnets that double up as storage. You will need a few different tins, magnets, and some strong adhesive. Since this one is as much a decorative item as a utility one, we suggest picking out some interesting vintage tins — from pocket tobacco tins to small spice tins. Basically anything with quirk and personality.
For the magnets, we suggest picking ones that are at least 1 inch in diameter and slightly thicker, since we need them to latch firmly on to the fridge and take the weight of the tin and whatever you store in it. For the larger or taller tins, like the ones that held tobacco, you might want to use two magnets to ensure they are stable and don't spin around. Use the adhesive to stick the magnets on, and your DIY vintage storage magnets are ready to go on the door or side of the fridge. Depending on the shape and size, you can use these to store clips, rubber bands, pens, and even sticky notes. These magnets fit perfectly alongside other products for a vintage kitchen, like a Ritadeshop Depression-style green glass salt and pepper shakers or an Ayerphalo bacon grease container.
Turn tin cans into quirky dinner table candles
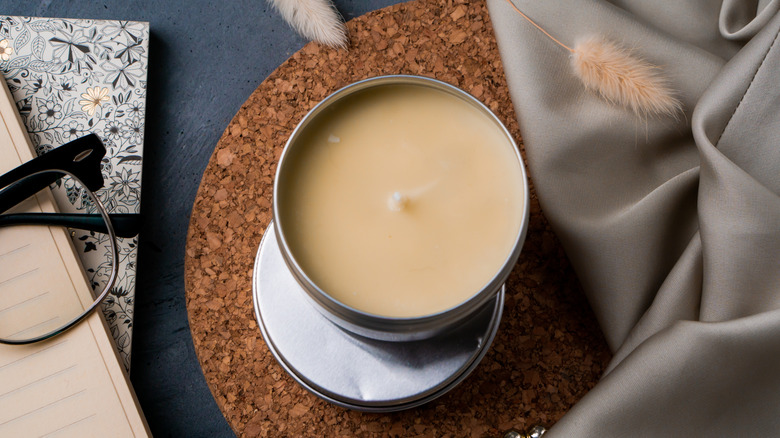
So far we've been upcycling tins for utility, with a side of fun. It is time to flip that and make something fun — candles for your dinner table from old cans. Short and cylindrical, the small tuna tin cans are the perfect shape and size for homemade candles. Collect your tins, take off the labels, give them a good wash, and paint them. We suggest starting with a base coat of white paint, and then adding colors on top of that to make them pop. These make for great last-minute party decor.
Now that you are done with the arts part of the project, it is time to get on to the craft segment. You will need a set of wicks and some wax. You can either make basic candles or, since we're having fun, turn them into scented candles by using essential oils or dried herbs like lavender or rosemary (food-scented candles were all the rage a few years ago). To make a basic candle, you will need to melt your wax, hold your wick in place in the tin using a clothespin for safety, and pour in the melted wax. Stop before it reaches the brim and let it cool.
If you want to make scented candles, you need to choose your fragrances and stir them into the pot when you're melting the wax (you can grab the spatula from the DIY tin holder you made earlier). Important tip with regard to the pot: Use something you're happy to either discard or use specifically for melting more wax later. Cleaning these can be very difficult once you have used one to melt wax.