Ninja Creami Guide: 8 Tips For Making The Most Out Of Your Machine
We may receive a commission on purchases made from links.
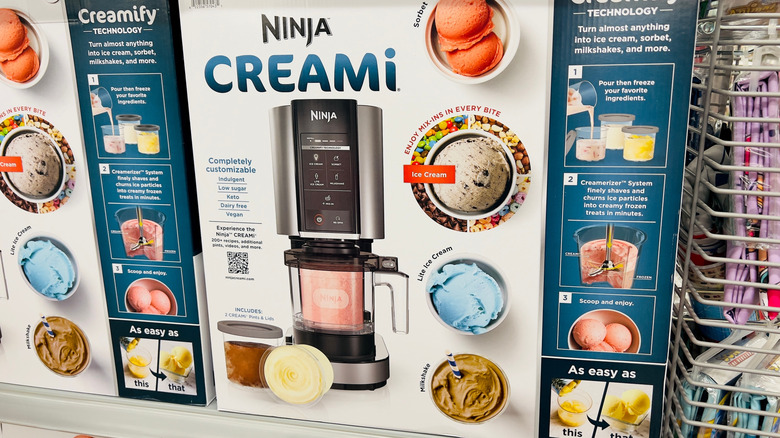
Very few appliances have captured the attention of home cooks quite like the air fryer – except, perhaps, for the Ninja CREAMi. When it was first released, the internet was skeptical. SharkNinja, a company that made its mark with infomercials and vacuums was now making ... an ice cream machine? However, this appliance quickly caught on among customers as an alternative to the heavy, cumbersome, and frankly annoying-to-use home ice cream churners of years past. There was now a machine that could make ice cream and a whole host of other pint-sized frozen desserts in no time at all — and social media ate it up in no time.
We got to try the Ninja CREAMi machine back in 2024, and while we weren't entirely sold on it, we can respect the hype associated with this kitchen appliance. As such, we wanted to find out some insider secrets for how to make the most of the CREAMi and its various functionalities. That's why we spoke to Rachel Buck, Ninja's test kitchen manager, and got her top tips for creating frosty, sweet creations using this beloved appliance.
Freeze your pint containers flat

Preparing ice cream with your Ninja CREAMi is a relatively simple process. First, add all of the components to your provided pint containers, freeze them, and then blend them when you're ready to enjoy them. However, there's one big mistake that you may be making that can potentially set this whole process back for you: Freezing the containers at an angle.
Ninja test kitchen manager Rachel Buck explains that if you don't freeze your pints flat — such as by propping them up on a surface in your freezer — you're doing your finished product a disservice. "This will prevent an uneven texture of blending," she explains.
This is likely because the machine works by descending the spinning blade (called the Creamerizer paddle) into the frozen block. If the liquid isn't frozen flat, this means that parts of your pint will become really well blended while others will not — and it could potentially even damage your machine. Luckily, the remedy for this issue is super simple: Clear out some space in your freezer and place the pint containers as flat as possible.
Avoid overfilling your pint
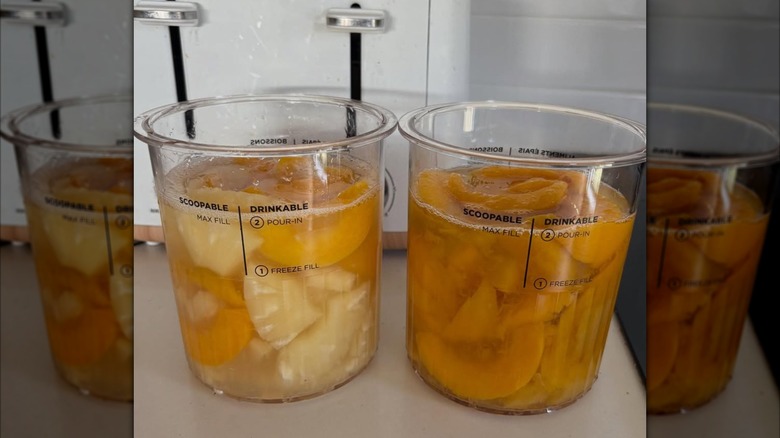
Making a frozen treat in your Ninja CREAMi is relatively straightforward. Although it requires very little thinking, you do need to have some understanding of how basic science works to operate it. One of the first and most important things to know? Liquids expand when they freeze. So, although you may look at the freeze-fill line on the outside of the container and think, "That's not really that full," we can assure you that once the liquid freezes and the Creamerizer cuts up the frozen block, you will have plenty of ice cream on your hands.
Nothing good comes from adding too much liquid to your containers. "This will protect the motor and will prevent overflow of ice cream," says Rachel Buck. The only time it's acceptable to go above the freeze-fill line is if your recipe specifically dictates it — for example, if you're making a frozen cocktail with your machine (in that case, use the drinkable-fill and max-fill lines).
Abide by the 24-hour freezing recommendation
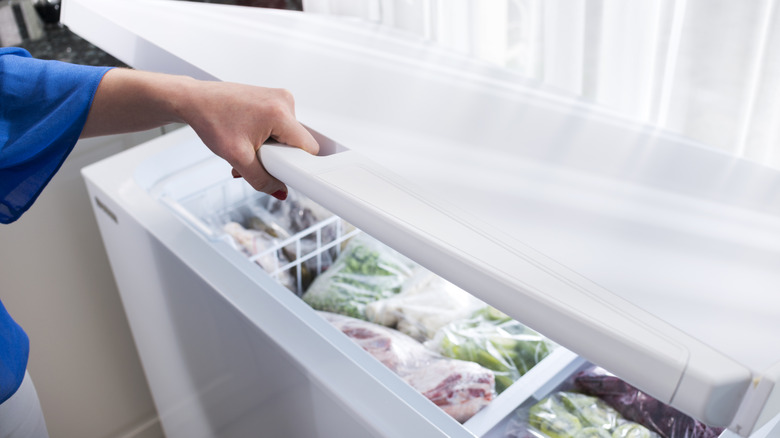
When we first got our CREAMi, one of our biggest shocks was how militant the brand was about the 24-hour freezing rule — for all of its recipes. Aside from its milkshakes, which can be prepared by mixing together already-prepared ice cream with milk, everything else has to be frozen solid for at least 24 hours ahead of time — which can really put a damper on your immediate ice cream cravings.
Rachel Buck explains that not adhering to this wait time is one of the biggest mistakes folks make with their CREAMis. She explains that, while you may want to expedite the process, leaving your pint in the freezer for the full length of time will allow it to reach what she calls the "perfect texture" once it's processed. Ninja does not elaborate on the mechanics of the 24-hour freeze, but it might have to do with the design of the Creamerizer paddle. It descends into the block of frozen liquid and essentially shaves it to form the ice cream, rather than churning air into it like a conventional ice cream maker. If the ice cream is frozen solid, the blade creates very small pieces of ice — exactly the texture that you're looking for.
That being said, there are a lot of variables that can factor into how long you actually have to freeze it, including the temperature of your freezer and how well insulated it is (for example, a chest freezer versus a standard one). We've found that the 24-hour rule works for every recipe we've made in our CREAMi, from light ice cream to full-fat renditions to sorbets.
Don't skimp on fat or sugar

One of the draws of the CREAMi is that you can use it to make high-protein "healthy" ice cream. And if you've seen the cost of nutrient-dense ice cream alternatives like Halo Top recently, you may jump at the chance to make your own twists on traditional ice cream in your machine. However, swapping out some calorically dense building blocks of ice cream — including fat (stabilizers) and sugars — can spell disaster for its texture.
Rachel Buck explains that using stabilizers, fat, and sugar will help you "avoid an icy or powdery texture." Many of the recipes in the provided recipe book use cream cheese as a stabilizer (which we have found works pretty well), but you can also find more macro-friendly stabilizer options available in CREAMi recipes online. One popular option is sugar-free instant pudding (there are tons of different pudding flavors to choose from), though some people remark that they don't really like the pudding or artificial sweetener aftertaste in their recipe. Some folks have also used sugar substitutes like allulose with some success. The general rule of thumb we would recommend is to stick to a tried-and-true recipe. If you are, for some reason, removing the stabilizer or the sugar, try to find an alternative rather than skipping it completely.
On the other side of the spectrum, we would also caution against adding too much fat to the recipe. One time, for example, we tried to thin out ice cream during a re-spin with heavy cream only to have the pint come out like a block of over-churned, partially frozen butter. Basically, a solid recipe is going to be your best bet when working with this machine.
Spin the contents before adding mix-ins

Once you pull your pint out of the freezer, it's time to get to work. The first step is to affix your CREAMi pint in the provided plastic container, add the lid, and process it. It would make sense why you'd think to add your mix-ins to the container now — be it chopped cookies, sprinkles, or dessert sauces — but doing so at this point would be a mistake.
Rachel Buck recommends only adding mix-ins to the container after spinning it for the first time (which, we should add, should be done on the correct setting, as the speed is different depending on whether you're making gelato, sorbet, regular ice cream, or some other frozen creation). "This will prevent blade damage and [reduce] the risk of your mix-ins becoming too small," she says. Holding off on adding your mix-ins is especially important if your ice cream needs to be re-spun, but more on that later.
To add your mix-ins, you'll want to create a tiny well in the center of your frozen dessert with a spoon. Since the Creamerizer paddle pushes down into the center of the pint, digging a little mix-in cavern for yourself shouldn't require that much effort. You also don't need to add that many mix-ins, since the Creamerizer paddle does a pretty sufficient job of pushing those additions to the edges of the pint (and you don't want to overfill it). We've found that running the edges of the plastic container under hot water before processing helps loosen the ice cream and encourages better dispersal of the mix-ins.
Re-spin your ice cream if it looks 'weird'

A rite of passage of owning a Ninja CREAMi is panicking when you crack open the container after the first round of processing to find that the contents are balled up, chalky, stuck to the walls of the container, or decidedly not like ice cream. As you can probably guess, this is quite common. It usually happens when the fat and sugar ratio isn't entirely right, meaning light ice cream will require more re-spins than a full-fat selection.
Rachel Buck explains that re-spinning your ice cream when it looks like this will remedy any dryness or crumbliness. The trick is to only use the re-spin function after your ice cream has been initially processed on the respective setting, as the re-spin alone can't get a frozen block of ice cream to its ideal texture.
If you need to re-spin, add a splash of liquid to the pint (we like to use plain milk, as anything higher in fat puts you at imminent butter risk) and use the re-spin as many times as you need to reach the perfect texture. It's important to note that the more liquid you add and the more you re-spin your ice cream, the more it will look like soft serve instead of chewy ice cream, so keep this in mind when deciding whether to stir the contents with a spoon or re-spin it.
Clean your unit well after each use
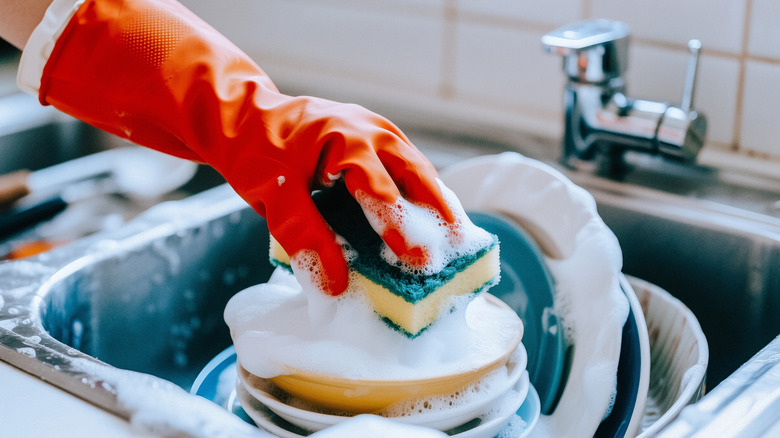
The Ninja CREAMi is not a cheap machine, meaning you'll want to do as much as you can to keep it in good working condition. Per Rachel Buck, this means cleaning all of the components well in between uses. "All parts except the motor base are [top-rack] dishwasher-safe," she says. We've found that sometimes washing the Creamerizer blade, which can be easily detached from the lid, by hand is better, since a dishwasher doesn't always get into all of the nooks and crannies. You can use a clean cloth to wipe down the motor base.
Buck also highlights the importance of cleaning the paddle release lever and the gray rubber seal. Ensuring these are clean, dry, and refastened correctly to the machine will keep it working efficiently. The good news is that assembly and reassembly are relatively simple, and we've found that even if something is just off-center or out of place (like if the Creamerizer blade is not fully attached), it usually won't work — which is your sign that you need to do some detective work and figure out what you messed up.
Use it for more than just ice cream
The functionalities of the Ninja CREAMi vary based on the model (by which we mean the 11-in-1 versus the 7-in-1), but even if you opt for a cheaper machine, know that you can still get creative and make a ton of different frozen dessert recipes.
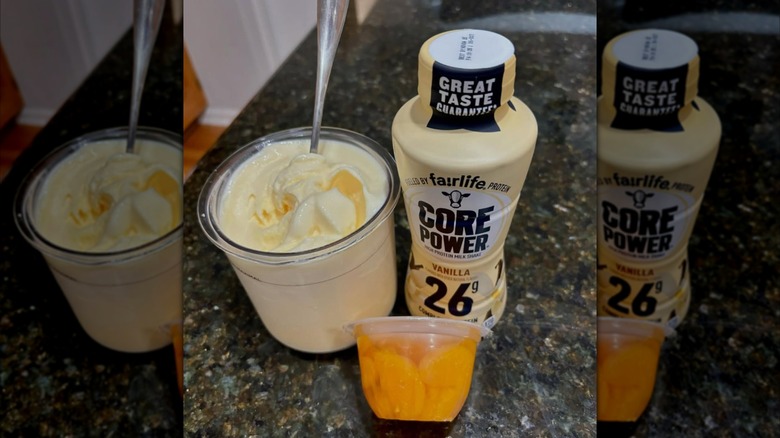
The handy recipe guide that comes with the machine is a great place to start, but there is no shortage of recipes shared on social media worth trying as well. One of our personal favorites requires only one ingredient: canned fruit in syrup. Now, you can't use your CREAMi as a blender with whole frozen fruit pieces, as the blade is not sharp, nor is it meant to do anything besides shaving through a block of frozen liquid. Canned fruit in water cannot be processed by the machine, but canned fruit in syrup is safe (remember: Sugar is important!). The only thing you have to do is drop your syrupy peaches straight from the can into the pint, freeze for a day, and process them for easy sorbet within minutes.
Another suggestion from Rachel Buck? Pet-friendly frozen treats. "Research what types of swaps you can make to traditional [CREAMi] recipes, and swap for approved pet-friendly ingredients," she says. Homemade atermelon sorbet, frozen peanut butter (as long as it's xylitol-free), banana, Greek yogurt, and pumpkin are all flavorful options that both you and your pooch can enjoy.