Places You Might Not Think To Clean In Your Kitchen (But Definitely Should)

Your kitchen looks clean. The counters gleam. The dishes are put away. The trash is out. But the illusion of cleanliness is exactly that — an illusion. Did you know that 86% of kitchen dish cloths tested positive for coliform bacteria, a marker for fecal contamination, according to a 2025 study published in the Environmental Health Engineering and Management Journal? Even your salt shaker or can opener might harbor harmful bacteria, like E. coli, Salmonella, and coliform! Most of us clean by sight, targeting crumbs, spills, and obvious messes, leaving bacteria to thrive in overlooked and hard-to-reach areas. Think appliance buttons, fridge seals, or the underside of your range hood.
Some of the germiest places in the home are in the kitchen, and not where you'd expect. When was the last time you cleaned your knife block? The one where you slide in freshly washed blades is likely a breeding ground. That dish drying rack? Often full of stagnant water and mold. Even the rubber fridge seals trap bacteria from spills and produce. And let's not even get into the grease and dust behind your stove. That lingering kitchen smell you can't place? Probably from one of these neglected areas. That sudden ant invasion? Same. You might be a pro at preparing 30-minute meals that still impress, but if your kitchen isn't truly clean, your food's integrity is already compromised. That's why we've rounded up the sneaky blind spots you probably forget to clean but absolutely should. The best part? Most take just minutes to address.
Faucet fixtures

You wash the sink and drain trap, but when was the last time you cleaned your kitchen faucets? For something touched daily, it's surprisingly easy to ignore. According to cleaning experts and real-world horror stories shared on Reddit, faucet bases are breeding grounds for mold, grime, and biofilm. Think about it: You touch the faucet before washing your hands, probably while handling raw meat or cooking with greasy fingers.
That grime builds up over time and harbors bacteria that re-contaminate your hands even after you've washed them. The damp environment around the sink, especially where splashes of water tend to collect at the bottom and between joints, only makes it more inviting for bacteria to thrive. Because they don't look dirty, most faucets get a quick wipe, if that. That's not enough. Fixtures with pull-out sprayers or aerators can be worse. Hard-water deposits, calcium buildup, and hidden gunk lead to weak flow, unusual color, and possible contamination.
Thankfully, cleaning is simple. Soak the faucet in vinegar or CLR for 20 minutes, then scrub with a toothbrush or cotton swab, particularly under handles and around joints. For aerators, unscrew the tip using your hand or pliers (with a towel or tape to protect the finish). Soak in white vinegar and scrub to remove mineral buildup. Always close the drain to avoid losing small parts, like screens or gaskets. If the aerator is recessed or stuck, an aerator key may help. Sometimes, replacement is the simplest fix.
Heat exchanger coils on your refrigerator and under your fridge

If cooling seems inconsistent or your motor sounds louder, it may be time to check the heat exchanger coils. These coils, found on the back or beneath the unit behind a front vent, release heat pulled from inside. But when caked with dust, dirt, and pet hair, they can't operate efficiently, forcing your compressor to work harder, which increases energy use and shortens the fridge's lifespan.
Per the do's and don'ts of cleaning fridges, wiping down fridge coils takes 15 minutes to a few hours, and should be done once or twice a year. First, unplug the fridge. Gently pull it away from the wall. If the coils are underneath, remove the front kickplate. Use a coil brush or vacuum cleaner with a soft nozzle to eliminate debris without damaging the fins. Some people recommend using a leaf blower instead. Next, reattach the panel and plug the fridge back in.
Take precautions: Coils often have sharp fins that can cut your hands or snag tools. Also, don't use water — moisture can bend fins or cause a short when power is restored. While you're back there, check the wall and floor, too. The space behind and beneath a refrigerator is a dust magnet and often hides food bits, spills, or even pests. A Reddit user on r/CleaningTips who regularly pulls out their fridge said the dust buildup is no joke, particularly in pet-owning homes, and recommends doing it once every three months.
Behind and underneath your stovetop
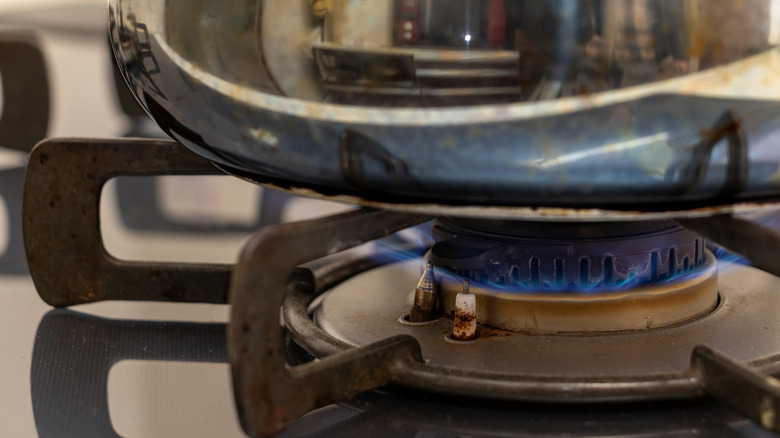
If your kitchen smells a little off despite regular cleaning, the culprit might be hiding in plain sight — or rather, just beneath it. The space behind and underneath your stovetop is one of the most overlooked zones. It's out of view, inconvenient to access, and usually only cleaned when something spills dramatically or during a move.
On r/CleaningTips, in a Reddit thread, one user described pulling out their stove's down-draft range and finding hundreds of mouse droppings and two partially decomposed mouse carcasses stuck to old glue traps. Others echoed similar experiences, reporting years' worth of hardened grease, dust, food crumbs, and even lost pet toys. On Quora, a former cleaning professional described the space behind stoves as some of the filthiest in any kitchen, often hiding enough dirt "to grow potatoes," with cabinet sides coated in grease and buildup most people never think to check.
Fortunately, a deep clean doesn't take much effort and needs to happen only twice a year. Start by unplugging your stove, then gently pull it out from the wall. If you have a gas stove, locate and shut off the nearby gas valve before disconnecting it. Sweep or vacuum any debris, then spray and wipe down the floor, walls, and sides of the appliance with a great grease-cutting all-purpose cleaner. If your model has a bottom drawer, remove it fully and scrub the inside of the cavity and the underside.
Your range hood
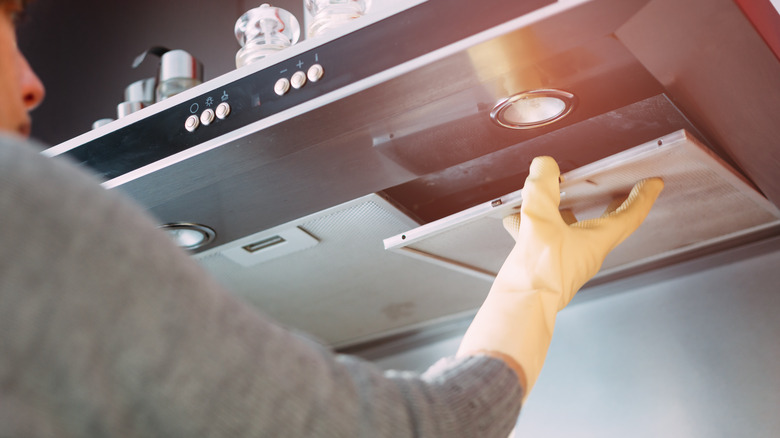
Designed to pull grease, steam, and smoke out of the air, range hoods trap a surprising amount of grime. And if you're not cleaning yours regularly, you could be creating a fire hazard. Even if you rarely fry foods, cooking vapor carries microscopic grease particles that cling to the filter and housing. Over time, that buildup can ignite if the grease drips onto a hot surface.
To clean it properly, start by turning off the hood and the stovetop, ensuring everything is cool. Remove the filters (usually a simple pop-out mechanism) and soak them in hot, soapy water. Then scrub with a non-abrasive brush or sponge. Rinse and let them air dry. Add a degreasing agent for stubborn spots.
Be sure to wipe the inside and outside of the hood housing, especially the underside where drips form and grease collects. Use a microfiber cloth or sponge soaked in warm, soapy water to wipe the inside and outside of the hood, moving in the direction of the grain. For stubborn grease, a baking soda and vinegar paste works wonders. Avoid abrasive materials and keep the cleaner away from light bulbs and electrical components. Wipe the fan blades with soapy water, then rinse and dry completely. Don't forget to check the vent as grease buildup can restrict airflow, reduce performance, or pose a fire risk. Do this one every three months, depending on how often you cook.
Your cutlery tray and drawer
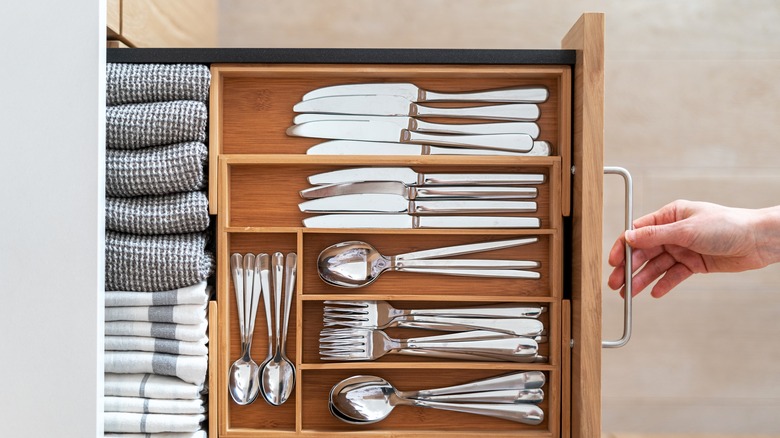
You probably open your cutlery drawer several times a day — grabbing a fork for lunch, a spoon for soup, or a butter knife for your morning toast. But when was the last time you looked at it? Like, really looked. If you remove all your cutlery and lift the tray itself, chances are you'll find more than just a few crumbs lurking underneath. While easy to overlook, dirty kitchen organizers (check out some Amazon Prime day deals) and utensil drawers aren't just unsanitary — they attract insects, making the problem even worse.
Silverware trays should be cleaned at least monthly. That might seem excessive until you realize just how easily gunk builds up. Crumbs from nearby counters fall in. Dust collects over time. Water from freshly washed utensils drips into the compartments, and if your cutlery isn't completely dry, you may even notice rust or mold forming.
Cleaning your cutlery tray depends on its material. Plastic trays are the easiest to handle — you can wipe them with vinegar or spray cleaner, soak them in warm soapy water for stubborn grime, or place them in the dishwasher. For wood, metal, or basket-style trays, shake out crumbs and wipe with a clean cloth. If the tray allows crumbs to fall through, like mesh or rattan, vacuum the drawer before placing it back. To disinfect, use a cloth dampened with vinegar. Wipe down the inside of the drawer too, especially the corners. Once everything's dry, reassemble its contents.
Spice jars, racks, and drawers

Spices quietly contribute to a hidden mess in your kitchen. Whether stored in a cabinet, drawer, or countertop rack, spice containers are notorious for collecting grease, dust, and spills. And unless you're in the habit of wiping them down regularly, you might be harboring bacteria and mold. A 2020 study published in the International Journal of Food Microbiology found that nearly 50% of spice jars tested positive for cross-contamination, with a tracer virus higher than on any other surface in the kitchen. It's easy to understand why — spice jars often look clean at a glance, especially if they're neatly lined up. But take one out, and you might notice a film of residue from months of handling with greasy fingers.
Worse still, common pantry bugs, like cigarette and drugstore beetles, thrive in spice containers, particularly in those that are rarely opened or have expired. In one Reddit thread on r/Adulting, a user shared how they discovered a full-blown infestation of the latter in long-forgotten jars. As for spice drawers, they tend to collect crumbs, powders, and spills, especially in corners, which make an ideal breeding ground for bugs and bacteria.
To avoid this, empty your spice rack or drawer occasionally. Wipe down each jar with a cloth dampened with warm, soapy water, then disinfect. Clean the rack or drawer with a vacuum crevice tool to remove crumbs and dust. Lastly, wipe with a wet cloth. And be sure to check for expired spices.
Dishwasher
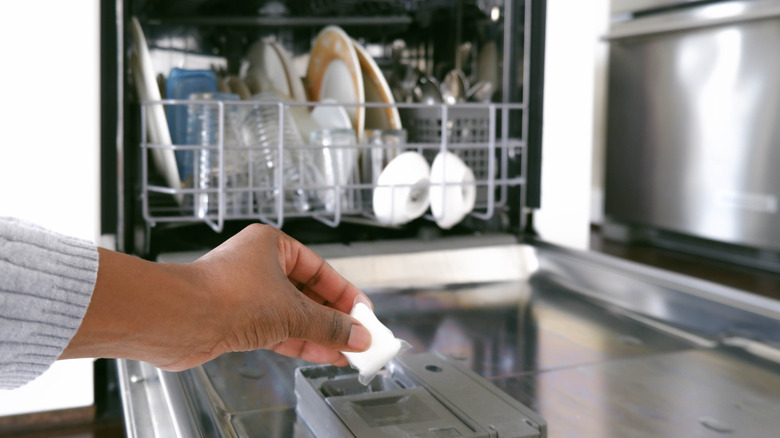
You'd think the machine that washes your dishes would stay clean, right? Wrong! Turns out that even cleaning appliances needs cleaning. Many people assume dishwashers are self-cleaning by default. Unfortunately, that's far from true. Beneath that polished stainless steel interior, gunk can quietly accumulate in the filter, sprayer arms, and rubber door seals.
When dirty and clogged, your dishwasher's performance tanks, leaving residue on your dishes, causing unpleasant odors, and even shortening the appliance's lifespan. Filters should be removed and cleaned while spray arms — those rotating jets that distribute water — need to be checked for clogs. Food particles can lodge in their tiny holes, leading to uneven cleaning and lingering odors. Then there are the rubber door gaskets. They form a seal to prevent leaks, but over time, they collect grime and mold.
To clean your dishwasher, start by removing all dishes and the bottom rack, and then check the drain for trapped food. Next, remove the filter, rinse it under hot water, and scrub with a soft brush to remove buildup. Check and unclog the spray arms using a toothpick or small brush. Wipe the interior walls, door, and rubber seals with a vinegar-water solution. Place a cup of white vinegar on the top rack and run a hot cycle to remove odors and residue. Finish by sprinkling baking soda on the bottom and running a short, hot rinse. Cleaning the dishwasher takes about 10 minutes and should be done monthly.
Garbage cans and recycling bins

Even with liners, your garbage can is not as clean as you think. Those plastic bags may contain the bulk of your waste, but they don't stop leaks (especially if food containers or liquids are involved), crumbs, or odors from settling into the bottom of the bin or under the lip of the lid. And don't let your recycling bin off the hook either. Just because it's "dry" waste doesn't mean it's clean.
Online discussions reveal a pattern: People avoid cleaning trash cans until the stench sets in. It's not just gross, it's a hygiene issue. Bacteria, mold, and pests thrive in the dark, moist environment inside a trash can, especially if it's covered with a lid and rarely cleaned, so a quick wipe isn't enough. You may even need to soak the bin. For quick garbage can cleaning hacks, start by removing visible grime or dust. Then, use an all-purpose cleaner or vinegar (if you prefer something less harsh) to kill odor-causing germs, like mold and bacteria. Scrub the bin thoroughly using a sponge or brush with soapy water, rinse, and dry.
Recycling bins deserve attention, too. Roughly rinsed bottles and containers often leave behind sugary residues or bits of food, which collect at the bottom, causing odor, contamination, and rendering the load unrecyclable. Give your bins a proper wipe down at least once a week and deep clean four times a year.
Electrical outlets, light switches, and light fixtures
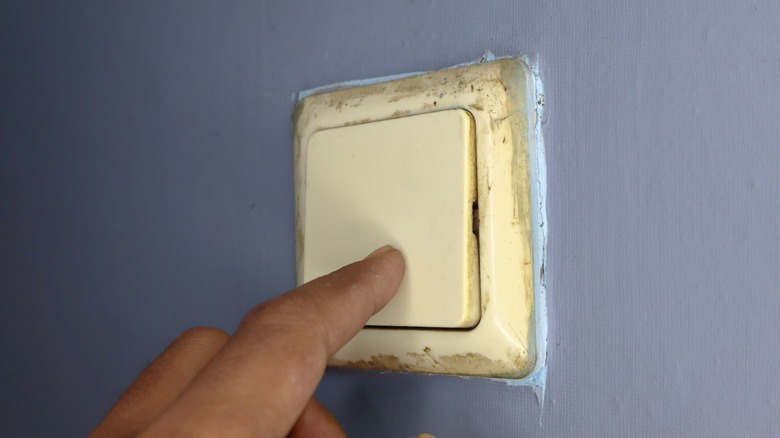
You touch light switches and outlet covers dozens of times a day— walking in, before cooking, or after using the bathroom — yet they're rarely part of your cleaning routine. These surfaces can harbor an astounding amount of bacteria. Studies show light switches have 217 bacteria per square inch, more than many toilet seats, according to Realtor. They may not appear dirty, but they are prime germ carriers, especially in kitchens where greasy hands and cross-contamination are common . Dust, fingerprints, and oils accumulate invisibly, creating breeding grounds for bacteria and viruses like Staphylococcus and coliforms.
Light fixtures are also frequently forgotten, although they can collect dust, dirt, and even insects, which dims bulb output by up to 30% (via HuffPost). Dead bugs, cobwebs, and soot stains are also common on glass globes and bulbs. To clean safely, always turn off the power at the breaker, especially for outlets and fixtures. Wipe switch plates and outlet covers with a damp cloth and mild cleaner. For light fixtures, remove detachable parts, such as glass or crystal covers, and soak them in warm, soapy water or a vinegar solution. Use a soft cloth or brush to clean the main fixture.
Once dry, reassemble and restore power. How often you clean depends on the fixture. Wipe wall sconces and vanity lights monthly. Dust table and floor lamps weekly. Deep-clean pendants and rattan fixtures every two to three months. For chandeliers, every three to six months is ideal.