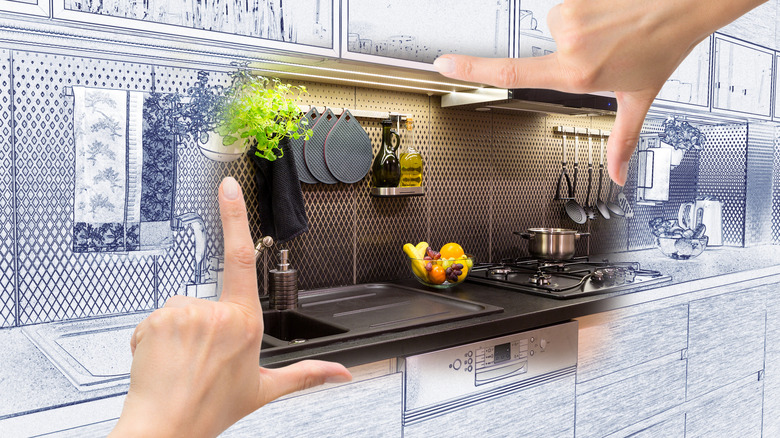
15 Steps To Prepare For A Kitchen Remodel
Everybody has their own reasons for a kitchen remodel. Perhaps you have been itching to try out these outdated kitchen design trends that are making a comeback. Or maybe you can no longer ignore the telltale signs that it is time for a remodel. But the most compelling reason to remodel your kitchen is that the space no longer serves your evolving lifestyle and needs.
A remodel gives you the opportunity to address functional inefficiencies, but it can also feel intimidating. The easiest way to stop the renovation from taking over your life is to safeguard your daily routines. By investing time beforehand in the necessary preparation, you can ensure that life continues as normal with a makeshift kitchen and a steady supply of ready-to-eat foods. Doing your homework in advance can also ensure you are on the same page with your construction crew, preventing ambiguity and costly corrections later. To help you get started, we turned to Kadambari Uppal, founder and creative director of KAD Designs, for answers. Ahead, she outlines a step-by-step guide to remodeling your kitchen without losing your home or your sanity.
1. Draft a clear budget

Budgeting is often viewed as a formality — something to get out of the way before you can move on to the exciting phase of scouting Pinterest for inspiration and visiting showrooms. But Kadambari Uppal has found that a clear, realistic budget can keep unpleasant surprises at bay. In her experience, it helps to allocate a fixed percentage of your budget for common overheads.
Don't be surprised if cabinetry monopolizes 30 to 40% of your budget. Since this feature is designed for aesthetic value as well as longevity, she believes that it will be money well spent. Countertops and appliances typically account for 10-20% of the budget each. To avoid any costly mistakes and do-overs, it helps to brush up on the outdated countertop trends to avoid and which ones to try instead. The remainder of your money will likely be devoted towards the right finishes, lighting, and decor to bring the kitchen of your dreams to life.
Uppal also recommends keeping 10 to 15% as a contingency for unplanned costs, such as fluctuations in the prices of materials, permits, and plumbing upgrades. "Planning for these variables upfront ensures design intent is preserved without compromise when inevitable surprises arise during execution," she says.
2. Clear adjacent areas

Your goal may be to remodel the kitchen, but the truth is that the construction chaos rarely ever stays confined to one room. Dust can migrate through other rooms at the speed of light, and the constant movement of the workers in and out of the house will also leave behind a trail of debris. The easiest way to prevent lengthy deep-cleaning sessions is to clear any areas that are directly adjacent to the kitchen. "A contained work zone allows the remodel to remain focused while protecting the integrity of surrounding spaces," Kadambari Uppal explains.
Your work begins by tracking the areas around the kitchen that are likely to attract the highest traffic — anything fragile or valuable in this space should be temporarily relocated. Uppal recommends adding dust sheets to those pieces of furniture and rugs that can't be moved easily. "Installing plastic barriers or zip walls at doorways helps contain dust and debris, while floor protection along walkways prevents scratches and wear," she says. Laying down tarp or cardboard panels along walkways can also make clean-up easier.
3. Remove all wall decor and fixtures

Your priceless appliances have been secured with great care, but you won't want to turn your kitchen over to the contractors until you have taken down all forms of wall decor and light fixtures. These fragile items will easily fall prey to dust, debris, and vibration from heavy drilling tools if left unattended. "Clearing walls also allows designers and contractors to work efficiently, ensuring that structural and electrical updates are executed without unnecessary obstacles," Kadambari Uppal says. Having an uninterrupted canvas can further help the contractors ensure that the cabinets and other fixtures are aligned symmetrically.
She has found that it is helpful to gently disconnect, wrap, and store light fixtures in clearly labeled boxes. If you are taking down the primary source of lighting in the kitchen, it is helpful to rent a professional floodlight to provide adequate illumination. Artwork, meanwhile, should be stored in a cool, dry area away from direct sunlight. "This preparation ensures items are preserved in their original condition and simplifies reinstallation later," she says.
4. Create a temporary kitchen setup
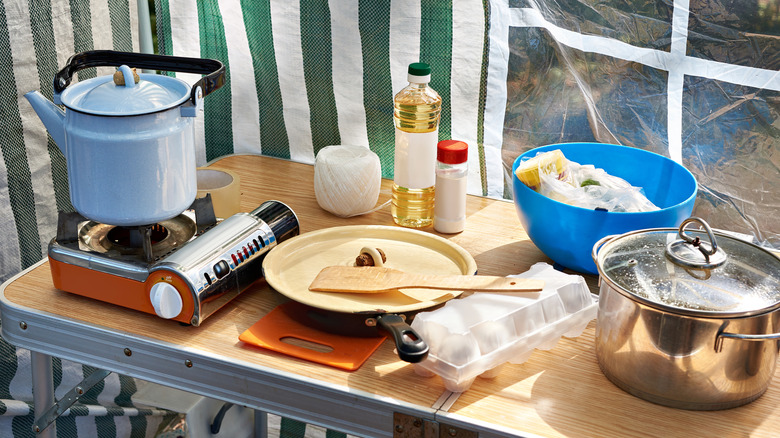
Losing access to your kitchen during a remodel doesn't just bring life to a standstill, but also deprives you of those simple routines that you found joy in — such as brewing yourself a fresh cup of coffee every morning. It helps to plan a temporary kitchen so that everyday life can continue, even through unforeseen delays. "A thoughtfully planned temporary kitchen can significantly ease daily life during a remodel. Even a compact setup allows for continuity and comfort while construction is underway," Kadambari Uppal notes.
Your choice of location is pertinent. "Positioning this space away from heavy dust zones and ensuring access to power outlets and ventilation is key," she adds. While you can't expect to replicate the full functionality of an actual kitchen, a temporary option should be kitted out with all the essentials for your everyday needs. You'll need to plug in important appliances, such as the microwave, electric kettle, coffee machine, and a mini fridge. Biodegradable plates and cutlery can help minimize clean-up after every meal. If you are hoping to cook with minimal fuss, these one-pot recipes are guaranteed to be a weeknight favorite.
5. Draw up a realistic timeline

When you are working out of a makeshift kitchen and cleaning construction dust out of your hair by night, even a single additional day can feel like a lifetime. But this is where a realistic timeline can help. "A kitchen remodel is a multi-layered process that requires careful coordination between design, manufacturing, and site execution," Kadambari Uppal notes. She estimates that the average kitchen remodel runs between 10 and 16 weeks. However, this timeline isn't set in stone — it can increase depending on the complexity of customisation you are opting for.
Just as your budget needs to account for hidden costs, Uppal believes it is crucial to allocate a buffer period in your timeline. Unforeseen delays can occur due to several reasons, and not all of these might be within the control of your contractor, from the unavailability of key materials to weather conditions. "Ordering long-lead items such as countertops, tiles, appliances, and custom cabinetry well in advance is not just advisable — it's essential," she adds. To ensure you have a clear picture of what to expect, it helps to have a sit-down meeting with your contractor in advance. Check on any permits that need to be acquired, expected supply chain delays, or bespoke fabrications that might be time-intensive.
6. Take 'before' photos

Over the years, you have likely trained your kitchen to match your everyday routine and cherished culinary rituals. However, when you are putting everything back after a remodel, you may find yourself all thumbs: Why does the coffee maker suddenly feel so far from the mugs? For Kadambari Uppal, detailed 'before' photos are an invaluable reference point throughout the duration of the remodel. "Thoughtful documentation supports a smoother process and helps maintain continuity between the original space and the redesigned kitchen," she says.
For starters, taking detailed before-and-after photos is guaranteed to elicit gasps of delight when you reveal your new space to your loved ones. But there are practical considerations as well. By zeroing in on the existing layouts and positioning of the electrical outlets and plumbing points, you and the construction crew can stay on the same page. "These images provide clarity for both designers and contractors, reducing reliance on memory or assumptions," she says. For best results, the photos should be taken in natural sunlight instead of artificial lighting to capture the precise hues and colors of your existing setup.
7. Collect packing supplies

A remodel can, in many ways, be just as strenuous as moving houses. Cabinets have to be emptied, appliances need to be relocated, and your precious china collection needs to find a temporary home. The only way to bring some method to the madness is to stock up on the right packing supplies. Kadambari Uppal has an easy list to follow: "Sturdy boxes in varied sizes, packing paper, bubble wrap, zip-lock bags, masking tape, and permanent markers are essential for systematic packing and clear labelling," she rattles off.
Sure, you could just move your serveware and ceramics to another room — but only if you'd like to spend the next three years coaxing construction debris out from every nook and cranny. Uppal instead recommends individually wrapping fragile kitchen items and then storing them in compartmented boxes or reinforced cartons. Honeycomb packing paper can help cushion glassware against impact, while foam sleeves are the ideal candidate for packing individual plates. Corrugated moving boxes with integrated divider kits will also make it easier to store and move drinkware from one room to another. "Taking the time to pack thoughtfully protects valuable items, prevents breakage, and ensures a smoother transition back into the space once the remodel is complete," she affirms.
8. Declutter everything

If you are looking to work smarter, rather than harder, it helps to eliminate redundant items before a remodel — you'll be surprised at the amount of storage you'll discover in your new kitchen. Kadambari Uppal has found that it can be a liberating exercise. "It allows homeowners to reassess what truly serves their lifestyle and prevents unnecessary items from being packed, stored, and reintroduced into a newly designed space," she explains.
Start by purging out any duplicate items that are slyly taking up space, from measuring spoons to utensils. Anything that is chipped or cracked also deserves to be shown the door. Uppal also encourages using this exercise to hit reset on your kitchen. Reevaluate and donate any cookware or specialty appliances that no longer align with your lifestyle. If you are not sure about what to keep versus toss, it helps to question whether you'd buy a replacement if this item was broken. If your life can carry on just fine without its presence, it is a safe sign that this item needs a new home.
9. Keep pantry essentials on hand

Homeowners who would rather not survive solely on takeout during the remodel should strategically assemble a daily kit of pantry essentials in advance. While larger appliances and seasonal cookware will be ushered out of the way, this kit should be placed on hand to ensure that you aren't digging through endless boxes to locate your morning cereal. "This thoughtful approach ensures daily routines remain uninterrupted while safeguarding essentials, allowing homeowners to maintain a sense of normalcy amid the renovation process," Kadambari Uppal elaborates.
Anything that you use frequently during a week deserves a spot in this kit. "Everyday items such as tea, coffee, sugar, snacks, cooking oils, basic spices, and breakfast staples should be kept easily reachable in airtight containers," she advises. The same rules of camping apply here: long-life staples and non-perishable meal bases are preferred. Airtight boxes with sealed lids will keep dust away, while clear labels will reduce unnecessary handling. However, you don't want to start a supermarket out of your living room: Uppal recommends opting for minimal quantities to avoid cluttering your temporary setup.
10. Put specialty items into storage

The biggest mindset shift that needs to be made during a kitchen remodel is that you are swapping the luxuries of everyday life for a more pared-down style of living that is anchored around the essentials. Specialty items, such as fine china, occasion-specific serveware, and rarely used appliances, are likely to get in the way and should be stored away safely. "These items are not only vulnerable to damage from dust and movement, but they also take up valuable space during a period when efficiency matters most," Kadambari Uppal points out.
When relegating specialty serveware to storage, it helps to ensure that items are wrapped individually to keep dust away — in a pinch, you can simply add a shower cap over medium-sized platters. You'll also find a wide range of protective covers designed for different appliances, from microwaves and air fryers to stand mixers. "This proactive step reduces visual and physical clutter, allowing the remodel to proceed smoothly while preserving items that may hold both functional and sentimental value," she adds.
11. Secure all appliances

If you'd rather not add a long list of replacement appliances to your remodeling expenses, it is necessary to take adequate precautions in advance. By moving appliances out of the way, you can reduce the risk of accidents and damage from falling debris. "Properly protected appliances extend their lifespan and safeguard the investment already made in quality equipment," Kadambari Uppal says.
Setting up a clear work zone devoid of any fragile appliances will also allow the construction crew to work efficiently. "Appliances should be unplugged, water and gas connections professionally shut off, and surfaces protected with padded covers or shrink wrap," she advises. It is helpful to wipe down any grease and food residue beforehand and to securely tape any cables and wires to the side of the appliances. Those appliances that will be in everyday use should ideally be relocated to a dust-free area away from the construction zone. As a handy measure, these gadgets should be covered with a protective film to prevent dust from clogging any internal vents.
12. Measure precisely

Appliances are the recommended starting point when working on a kitchen remodel, as their dimensions and electrical needs determine the rest of the layout. It is advisable to measure thoroughly before placing any expensive orders, as even a few millimeters can result in an awkward fit. The positioning of the countertops, cabinets, and aisle space all hang in the balance. "Precision ensures that bespoke elements align seamlessly, allowing the final kitchen to function exactly as envisioned," Kadambari Uppal says.
The fallout of skipping this step is inaccurate dimensions that can compromise other aspects of the remodel. Uppal cautions that you can expect costly delays, misfitting appliances, and diminished design impact. Beyond just measuring the length and breadth of the appliances, it is also crucial to account for other variables, such as adequate clearance for door swings. Even the ceiling height and doorway width should be measured to ensure large appliance boxes can pass through easily during installation. "Double-checking measurements at multiple stages — during design, prior to fabrication, and before installation — helps eliminate errors," she adds.
13. Stock up on ready-to-eat foods

Once the vital appliances have been unplugged and your kitchen has been taken over with construction debris, it might seem like takeout is the only option left. But you can enjoy nutritious meals from the comfort of your makeshift kitchen by making strategic choices. Instead of opting for elaborate recipes, it helps to choose ready-to-eat foods that allow you to skip prep altogether. "Planning ahead ensures that mealtimes don't become an added burden during an already disruptive period," Kadambari Uppal says.
Your shopping list when stocking up before a remodel needs to be driven by practical options that require minimal assistance from appliances. Uppal recommends opting for pre-cut fruits, salads, wraps, soups, yoghurt, and straightforward sandwich ingredients. This round-up of the best ready-to-eat canned foods will also keep stress at bay — no more "what should we eat today?" dilemmas. By reducing your reliance on takeout, you can better stay within your planned remodel budget. "Thoughtful food preparation supports wellbeing and allows homeowners to focus on the excitement of the transformation rather than daily inconveniences," she says.
14. Allocate an equipment zone

Unless you are looking forward to stubbing your toe on a motley array of tools each morning, it is necessary to designate a spot for storing construction equipment and raw materials. "A well-managed equipment zone reflects a thoughtful approach to renovation, balancing efficiency for the team with comfort and security for the household," Kadambari Uppal observes.
The equipment zone should ideally be located away from the main walkways in a low-traffic area in the kitchen. "Providing workers with a defined area for overnight storage prevents tools from migrating into living spaces and reduces daily setup time," she adds. If you have children or pets living under the same roof, she recommends setting up temporary barriers to shield them from all the potential hazards in this zone. If you have a lockable cabinet lying vacant in the kitchen, it can serve as a handy spot to keep construction equipment away from little hands. You can also request the construction crew to set up a temporary wall rack for storing sharp tools out of reach. Larger bins can be used for storing tiles, slabs, and other raw materials safely.
15. Put together a clean-up kit

The fact is, a remodel can never be a mess-free job. However, by keeping a cleanup kit stocked with all the necessary essentials, you can prevent chaos from taking over your life. An end-of-day tidying-up ritual can prevent mess from compounding into a massive post-renovation cleanup later. "A dedicated clean-up kit empowers homeowners to manage dust and minor messes as they arise during a remodel," Kadambari Uppal agrees.
While the contractors will likely move the larger debris, you'll need to focus on other factors within your control, such as air quality and hygiene. Your handy kit needs to feature all the cleaning staples necessary for surviving a remodel: Uppal recommends adding microfibre cloths, disposable wipes, a handheld vacuum, floor cleaner, trash bags, and air purifiers or dust traps. "A prepared clean-up kit supports comfort, hygiene, and peace of mind throughout the renovation journey," she concludes.