10 Kitchen Cleaning Tasks You Should Do Every Day, Week, Month, And Year

The prospect of whipping up creative meals in the kitchen can be exciting, but dealing with the fallout? Not so much. Most of the time, cleaning serves as a reaction to mess — something you must do to get rid of any visible spills and clutter. However, if this was reframed as a proactive measure, you'd find that you wouldn't have a mammoth clean-up job waiting for you during your annual spring cleaning.
Dirt, debris, and grime accumulate in kitchens at different speeds. There are the daily spills and splatters and there is the long-term grease that quietly coats your cabinets and walls. The only way to keep up with all the different elements that require cleaning is to devise a schedule that allows you to tackle each at a reasonable rhythm. Instead of attempting to completely overhaul the space once a year, it helps to execute certain cleaning measures at regularly paced intervals — such as every day, week, month, and year — to prevent dust and debris from building up. Beyond simplifying your cleaning routine, you'll also find that regular maintenance can help prolong the lifespan of expensive appliances and design elements. Small yet consistent efforts now can save you time and money in the long run — who's in?
Every day: Wipe down countertops
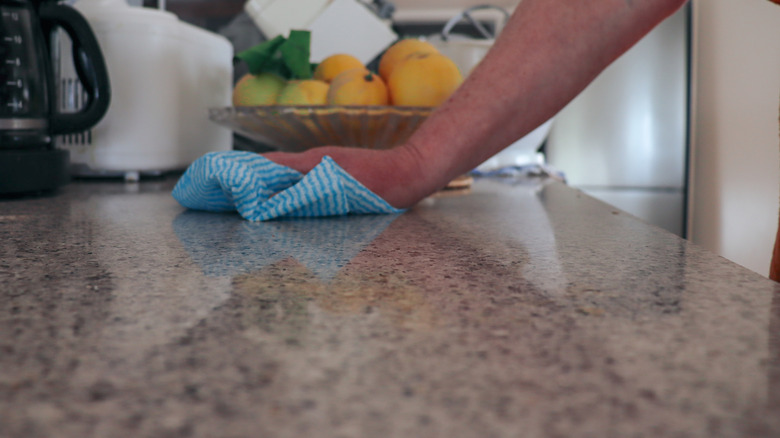
On an average day, your kitchen counters encounter a wide berth of bacteria, oils, and moisture from hot pans, grocery bags, or chopping debris. If ignored, this residue can pile up and lead to cross-contamination of food, compromising the safety of the meals you are laboring over in the kitchen. Wiping down the countertops may not sound like anyone's favorite task to end the day with, but a regular routine can keep smaller spills and debris from ballooning into a massive clean-up job at the end of the month.
The cleaning drill will probably sound familiar: Spritz on disinfectant spray and wipe down all visible surfaces. Once done, it helps to run a dry microfiber cloth over the area to prevent any water streaks and spots. When you have some time to spare on the weekends, move stationary items aside — such as coffee makers, small appliances, and utensil crocks — to wipe away any crumbs and food debris trapped underneath. If you are looking to score extra points, you can make your countertops shine like new with the bananas you already have in your kitchen. Mix chopped banana peels with vinegar and water and use it as an effective and eco-friendly cleaning agent.
Every day: Clean stovetop
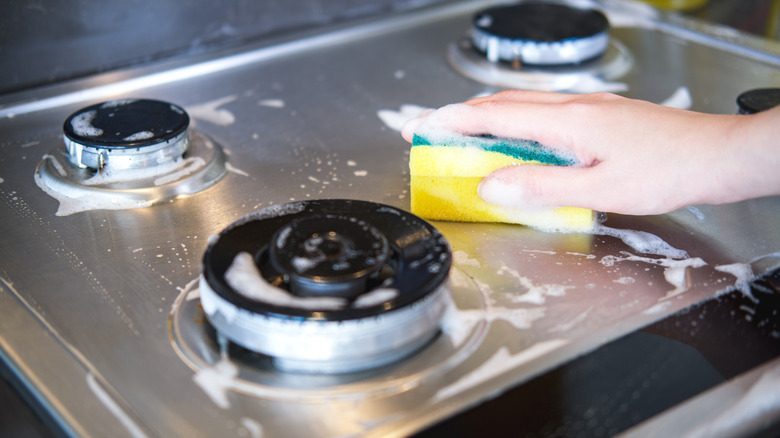
Grease splatters, food spills, and boil-overs are bad enough on their own. However, the heat-intensive environment of the gas stove means that residue can get baked into place within the span of minutes. When left unattended, these spills can become long-term house guests that will require copious amounts of elbow grease during your annual spring cleaning. Instead of allowing stains and spills to settle into place, it helps to develop the habit of a daily five-minute cleaning method as a natural extension of your post-cooking routine.
Gas stoves may be counted among the worst kitchen items to clean, but there are ways to make it easy. Safety is of paramount importance here — you won't want to go in with your cleaning crew immediately after shutting the burners off for the day. Once you have allowed adequate time for the stovetop to cool down, use a non-abrasive scrubbing pad dipped in warm water and a cleaning solution to dislodge cooking residue, oils, and crumbs. Grates coated in stubborn spills can be dipped in hot water and dish soap for 20 minutes while you wind down the rest of the kitchen. A nylon scrubber can then be used to scour away any residue and leave your grates looking as good as new.
Every day: Mop up any spills
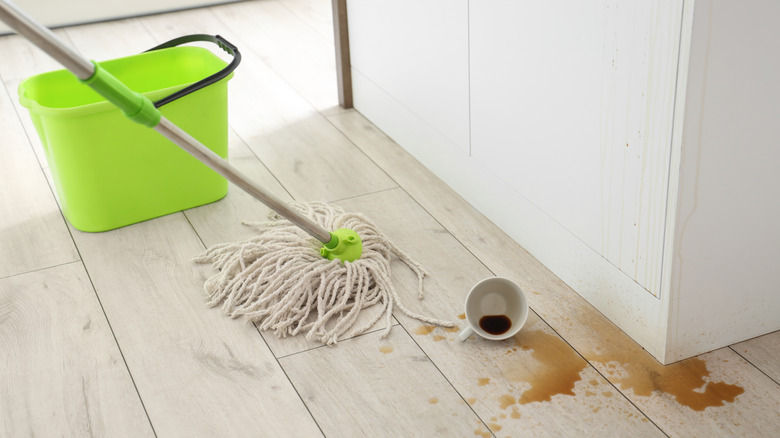
Spills and splatters are a kitchen eyesore that nobody wants to see — but tackling them is not just an aesthetic issue. If ignored, dry debris and food crumbs might serve as a midnight feast for a wide array of insects and rodents. Wet spills, meanwhile, can cause you to lose your footing as you juggle hot pans by the stove. As tempting as it might seem to deal with it later, kitchen spills demand your daily attention.
As a standard practice, it helps to sweep or vacuum dust and small particles in high-traffic areas in the kitchen before turning in for the night. If you spot any signs of greasiness, it helps to go back in with a mop dipped in a cleaning agent of your choice. After running a final dry rag over the floor, any spills will be ancient history.
Oil spills and grease splatters are the trickiest to tackle because they are not created equal. While plant-based oils can be easily blotted off with a paper towel, animal fats can solidify rapidly and settle in for the long haul. Time is of the essence, so it helps to quickly place a layer of paper towels to absorb the spill. You can make your job easier by sprinkling some coarse salt on the area to soak up the oil. Any remnants can then be easily wiped away with a cloth.
Every week: Clean the interiors of the microwave
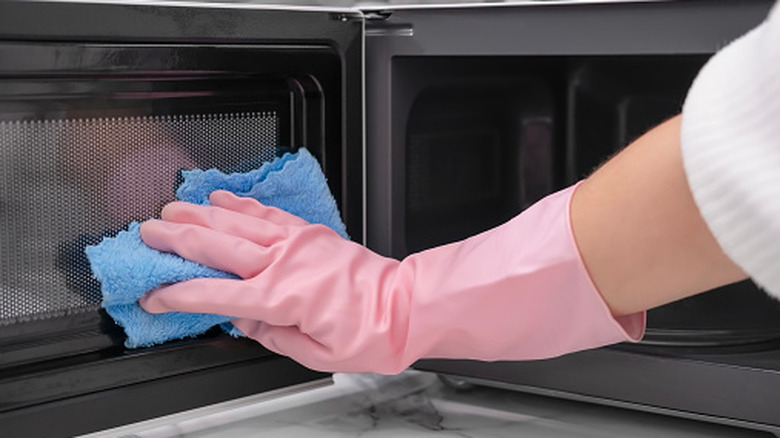
Messes in the microwave rarely cause sleepless nights — out of sight, out of mind, right? However, camping inside all the nooks and crevices are a variety of splatters and food particles. Each time you run the microwave, the residue and odors from these remnants are making their way to your food. If you do not fancy deep-cleaning the microwave every month, it helps to get rid of this build-up consistently on a weekly basis.
While a quick wipe will suffice for the exterior, cleaning the interior of a microwave requires a two-pronged approach. First, you'll want to detach the turntable – after it has cooled completely — and wash it using dish detergent. While it is drying, you can turn your attention to the interior walls. The best way to clean a dirty microwave without a ton of work is to let steam do the job for you. Simply run a combination of water and vinegar in the microwave for five minutes to hydrate all the caked-on splatters. These can then be dislodged easily with a clean sponge to leave your microwave spotless. Microfiber cloths can work just as well, but remember to steer clear of any abrasive scouring pads that can scratch the interior coating. Likewise, you'll want to make sure that you aren't spraying water or any cleaning agents directly inside the vents to avoid damaging the inner mechanism of the microwave.
Every week: Wipe cabinets
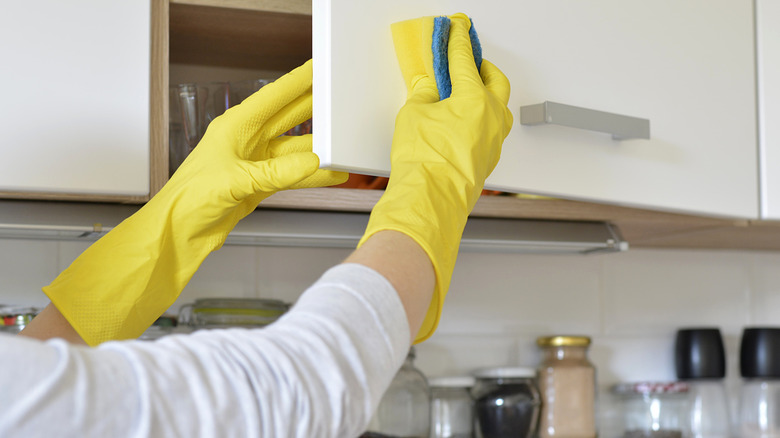
Have you ever thought what happens to steam, vapors, food particles, and residue that are released into the air every time you cook? You might like to think they vanish into thin air, but the unfortunate truth is that they have likely found a permanent spot somewhere on your kitchen cabinets. Over time, this buildup can result in a greasy coating that'll ruin their finish, making a weekly clean non-negotiable.
Tackling all the cabinets at once can seem overwhelming, but a systematic approach can help. Clean one cabinet at a time, working your way from the top down with a microfiber cloth sprayed with a cleaning agent. If you encounter any stubborn stains, reach for a solution of baking soda — one of the best pantry ingredients to degrease kitchen cabinets. For efficient results, make a solution with water and use a soft-bristled brush to scrub in a uniform motion.
When cleaning kitchen cabinets, remember to clean both sides of the door as food particles and grime can work their way through the tiniest gaps. Likewise, cabinet hardware also deserves your attention. Give greasy handles and drawer pulls a fresh lease of life by cleaning them with some dish soap. If your brass handles have been lacking luster, it helps to apply a solution of lemon juice and baking soda to break through the tarnish if you don't want to use heavy-duty chemicals.
Every week: Wash kitchen towels and dishcloths

While big-ticket items like the microwave and countertops easily monopolize your cleaning efforts, it is easy for stains and grime to slip by unnoticed on smaller items, such as kitchen towels. Used heavily for cleaning surfaces and wiping down the kitchen, these fabrics stay damp for hours and can easily turn into a breeding ground for bacteria. With a weekly washing routine, you'll ensure that odors don't get trapped in these hard-working fabrics and their absorbency isn't compromised.
However, cleaning kitchen towels is not quite as simple as just tossing them in the wash. For starters, you'll want to ensure that you are washing them separately to ensure that the odors from last night's curry don't settle into your favorite workout clothes. It helps to add a cup of baking soda as a deodorizer to deter any strong smells. If you prefer washing fragile fabrics by hand, soak them in lukewarm water and dish soap for half an hour. Next, use a brush to scrub away any stains and food residue. Once done, allow everything to air-dry sufficiently. If you prefer a crisp finish for your kitchen linens, iron them on the reverse side while still damp to get rid of any pesky wrinkles.
Every month: Deep-clean the refrigerator
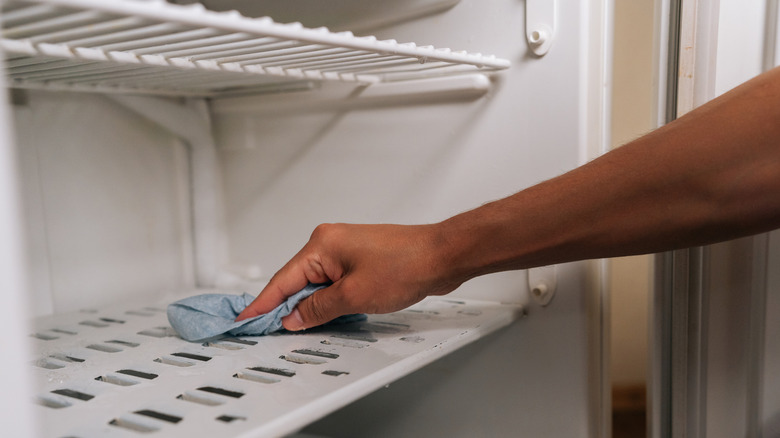
From forgotten leftovers to spoiled produce, refrigerators easily get inundated with a variety of questionable odors. When left unchecked, these odors can transfer to other items, altering their flavors and aromas. But the problems don't end there. Cluttered shelves can serve as a breeding ground for neglected spills. Once the airflow gets compromised, it can affect the lifespan of the refrigerator and lead to costly repairs.
If you aren't familiar with the basics of deep-cleaning this appliance, these dos and don'ts of cleaning the refrigerator can always help. Start by emptying the shelves from top to bottom. Next, treat the inner walls, shelves, and drawers to a cleaning solution and a soft sponge. Remember to pay special attention to nooks and crevices, such as the rubber seal on the fridge door. Dunk a toothbrush in a mixture of baking soda and warm water before scrubbing away all the minute particles that have settled into the rubber. If you come across any persistent odors, place an open bowl of coffee beans and air out the interior. Before you reload the shelves, move the empty refrigerator away from the wall so that you can mop away any crumbs that have settled underneath.
Every month: Degrease the range hood

You rely on your range hood to trap cooking odors, airborne food particles, and steam. However, this hard-working appliance needs its downtime as well as a diligent maintenance schedule. Over time, airborne food residue can coat the outer surface of the hood with a greasy film that refuses to budge despite your best cleaning efforts. There are greater performance concerns as well. If left untouched, all the buildup can clog the airflow and decrease its efficiency and lifespan.
The road to a cleaner range hood starts with adequate prep. As tempting as it may seem to immediately start sloughing off grease, it helps to lay down a layer of old kitchen towels first to protect and catch drips. Then, you'll want to dislodge dust with a dry rag. Once done, you can pop out the detachable filter and thoroughly scrub the metal mesh with dish soap.
If you are looking to keep harmful cleaning chemicals out of your kitchen, a solution of baking soda mixed with warm water can also help remove grime. Vegetable oil is another secret for a polished range hood as it can dissolve grease and residual oils clinging to the outer surface. A quick clean with a rag soaked in vegetable oil, and your stainless steel range hood will rediscover its lost luster.
Every month: Declutter pantry shelves

A disorganized pantry doesn't happen overnight. Clutter likes to play the long game — creeping in slowly, but steadily, through half-used bottles, duplicate items, and expired products pushed to the back of pantry shelves. If you allow this dysfunction to assume free rein, it will soon take over. Beyond slowing down meal prep and leading to decision fatigue, it can also lead to food waste and overbuying. In the long run, what looks like innocent clutter leads to wasted time, effort, and money.
The only way to understand what truly belongs in your pantry is to take complete inventory of what you own. Start by emptying out the shelves and then divide everything into distinct piles: keep, toss, and donate. Once done, things you plan to keep can be sorted into categories such as snacks, grains, pasta, condiments, canned goods, and so on.
Make sure to wipe down any spills or drips off the containers before arranging everything back on the shelves. Needless to say, items that are nearing expiry need to be placed in front so that they can be used first. You can also try to subtly reshape your consumption habits by placing junk food out of reach and storing healthier alternatives at eye level.
Every year: Clean the walls

There is nothing that airborne grease and food particles love more than a blank surface to latch on to — and your kitchen walls make for an easy canvas. At first glance, the walls may appear largely clean, but upon closer inspection, you'll find dust, debris, and grease creating a sticky film on the surface. An annual clean-up can not only maintain appearances, but also serve as a necessary hygienic measure.
Depending on the type of finish you have chosen for your kitchen painted walls, your modus operandi will differ. Glossy and oil-based paints are easier to clean because they can withstand water. To avoid reducing the shine of the finish, it helps to wipe these walls with a damp cloth soaked with mild dish soap. Flat paint, however, tends to be penetrable and might dissolve if washed with water. Instead, clean these walls with a microfiber cloth or the dust brush on your vacuum cleaner.
Tiled walls, on the other hand, will require extra attention as dirt can lodge itself firmly into the grout. A mixture of baking soda and water can help. For wooden walls, it is best to avoid soapy solutions that can damage the surface. Instead, you can opt to do dry cleaning with a lint-free cloth or dampen it with a touch of lemon oil to remove dust particles and make your wooden walls shine again.