10 Basic Cooking Skills Everyone Should Know By The Age Of 25
Here's an embarrassing truth: I was a clueless cook before the age of 25. I didn't know the difference between a skillet and a saucepan, or cumin and coriander. And while I could boil water for pasta, my noodles were always mediocre. Fast forward 30 years, and I've got it mostly figured out. I've even written 11 cookbooks. Since I was once a rookie, I get it, and I know what it's like to feel helpless at the cooktop. For that reason, I've compiled 10 basic skills you need for navigating the kitchen with confidence. Once you've got these fundamentals down, there's no limit to your culinary ingenuity.
You might be thinking, "I don't need guidance; I'll just trudge through meal making." I've been a food writer for three decades, so I'm well aware that some people hate cooking. Especially when it seems like a daunting task, and when food delivery is so temptingly easy. But cooking isn't just about sustenance; it can be an expressive experience, and one that's as cathartic as an art class, or yoga session, or whatever fuels your inner creative person. I'd like to introduce a few tips and techniques to change your perception. These are lifelong skills you can utilize, whether you're cooking for family or dining solo. Plus, your confidence will yield inspiration, and you'll be whipping up delectable delights with ease (while dodging failed projects). Here are 10 cooking skills that you should embrace.
Measuring wet and dry ingredients
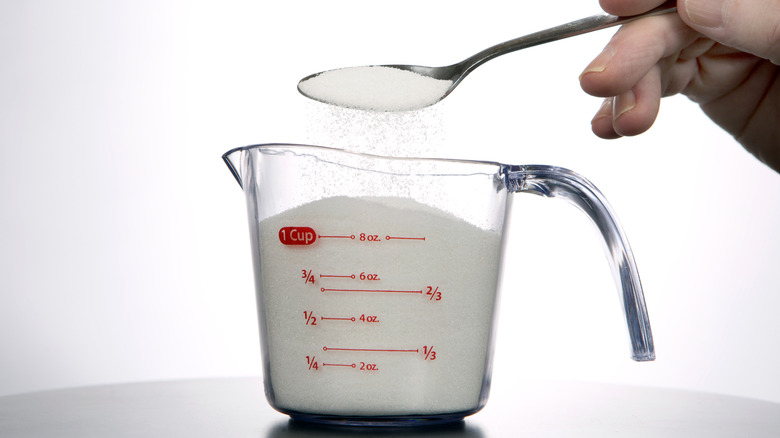
The most important thing to know here is this: measuring tools are not one-size-fits-all. Some cups are meant for wet ingredients, while others are meant for dry. You need short measuring cups for dry ingredients and tall glass or plastic cups for liquids. Why does this matter? Because it's nearly impossible to level off dry ingredients in a tall measuring cup. When measuring ingredients like flour and sugar in a short cup with a rim, it's easy to level off the top to get a precise measurement. Accurate measurements are critical in baking. If you can't level the top (which would happen in a liquid measuring cup), you may end up with more or less than you need.
Liquid ingredients should be measured in a clear, glass, or plastic measuring cup so you can see and adjust the volume and get exactly what you need. The good news is, liquid ingredients level themselves by nature, so there's no need to level the top. Simply use the measurements on the side of the cup and stop when you reach the correct volume (or pour some out if you overfilled).
You don't need pricey sets of dry and liquid measuring cups, and they can be metal, plastic, or glass — but you do need two sets.
Choosing pots and pans
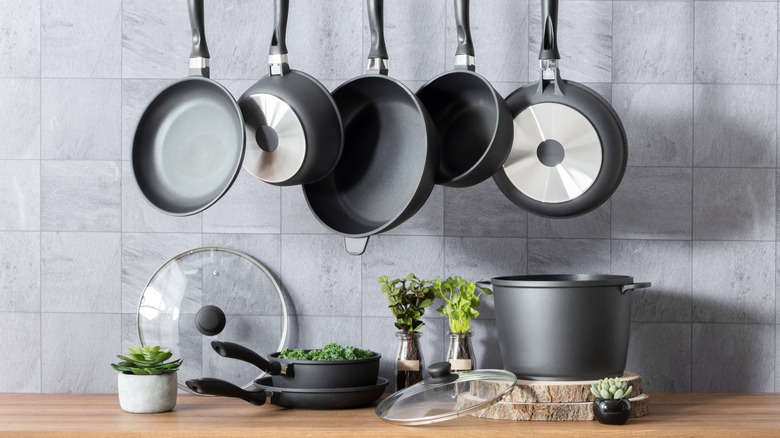
When selecting pots and pans, it's important to consider your cooking style. Do you need a pan for pot roast? Or stir-fries? How much care and maintenance are you willing to do? Ceramic-coated nonstick pans make cleanup a breeze, but food doesn't stick, so you don't get tasty, browned bits stuck to the bottom of the pan (flavorful morsels that get incorporated into the dish). And if you like the idea of starting on the cooktop and finishing the dish in the oven, oven-safe cookware is ideal.
I'm not a fan of cookware sets because, oftentimes, one or two pieces never get used. I suggest choosing a few versatile pieces that you'll use regularly. For example, a deep stock pot (6- to 8-quart) for cooking pasta and soup is a must. As is a 12-inch skillet for searing, sautéing, and braising. A smaller skillet for eggs and side dishes is nice to have. I also suggest a medium-size (4-quart) saucepan for cooking rice and smaller quantities of soups and sauces.
Regarding material, I prefer stainless steel for its durability and cast iron for its heat retention (cast iron is also oven-safe). For nonstick pans, I suggest enameled cast iron or ceramic-coated pans since most are free from PFAS. No matter what material you purchase, look for quality construction and pans with thick bottoms and sturdy handles. Start with a few necessities and expand your collection over time.
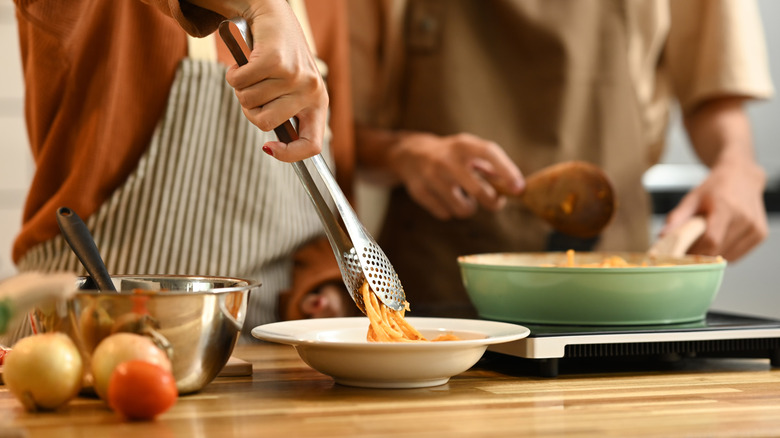
Cooking pasta
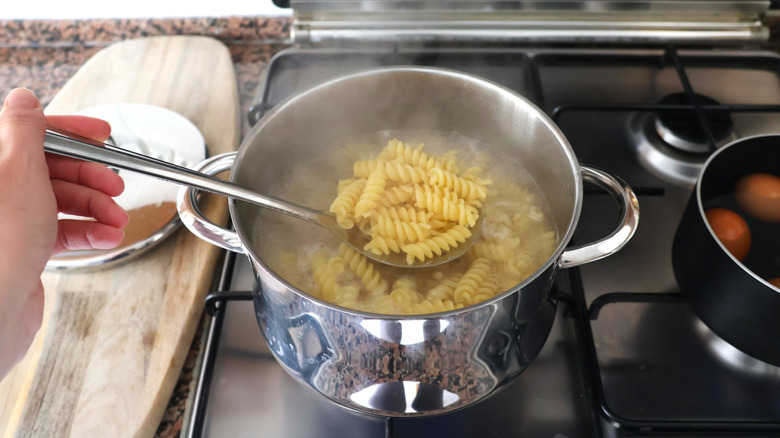
Instructions for cooking pasta are on every box of noodles, so why include tips for cooking pasta here? Because most package instructions are great for cooking times, but they leave out the important tip about salt. For the best-tasting pasta, meaning noodles that are seasoned all the way to the core, you need to generously salt the cooking water. In my experience, most brands suggest salting the water "to taste". What does that mean exactly? What is it supposed to taste like?
Pasta cooking water should be briny, but not overly salty. To achieve this, add one tablespoon of salt to 4 quarts (1 gallon) of water — this is the volume of water typically used to cook one pound of pasta. Add the salt after the water has come to a rolling boil to ensure it dissolves faster (this also protects your pan; if you add salt to cold water, it can scratch the bottom of the pan before it dissolves).
One last tip, and this isn't crucial, but it makes everything better. Always save some of the pasta cooking water when you drain your pasta. The flavorful, starchy liquid is excellent to have on hand, whether you need to thin your sauce or add volume. I like to reserve at least ½ cup of pasta cooking water for "just in case", and I put a ladle in my strainer, so I don't forget.
Knowing when your meat is cooked
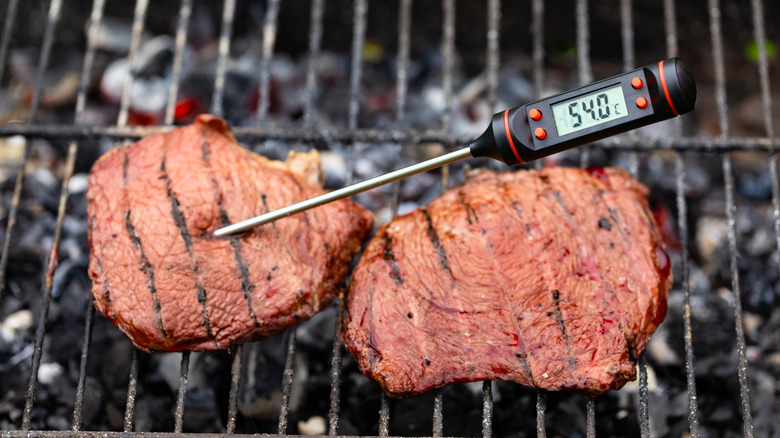
To determine if your meat is cooked to the correct temperature, you need a meat thermometer. There are several affordable, easy-to-use thermometers on the market, so purchase one and learn how to use it.
To test your meat for doneness, insert the thermometer's probe into the thickest part, avoiding fat, bone, and gristle. Note that meat will continue to cook after it's removed from the heat, and this residual heat will raise the temperature about 5 degrees. For this reason, you should remove the meat from the heat when it's 5 degrees from your goal. For example, if you're aiming for a final temperature of 145 degrees Fahrenheit, remove the meat from the heat at 140 degrees Fahrenheit; carry-over cooking will bring it to 145 degrees Fahrenheit.
It's also important to know what temperature you're looking for. All poultry, including chicken, turkey, and duck (and their ground counterparts), should be cooked to 165 degrees Fahrenheit. Hamburgers should be cooked to 120 to 125 degrees Fahrenheit for rare, 130 to 135 degrees Fahrenheit for medium-rare, 140 to 145 degrees Fahrenheit for medium, 150 to 155 degrees Fahrenheit for medium-well, and 160 to 165 degrees Fahrenheit for well-done. When cooking steaks, follow the guide for burgers, and remember the carry-over cooking of 5 degrees.
Lastly, all beef, poultry, and pork should rest for at least five minutes before serving. During this time, the meat relaxes, and the juices redistribute, ensuring each bite is moist and tender.
Making a roux
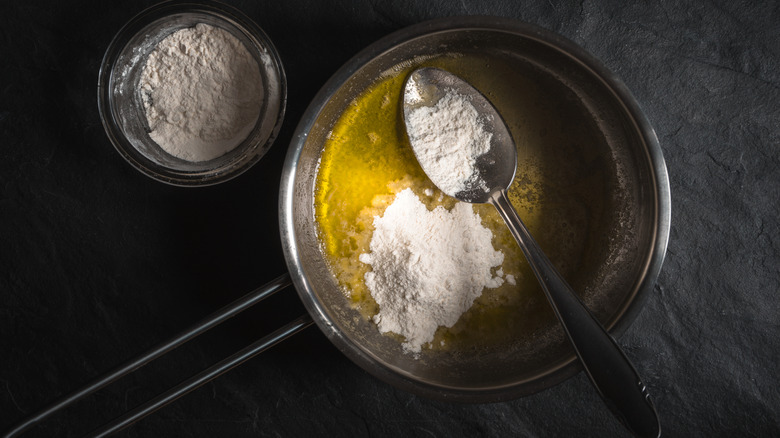
Despite the fancy French name, a roux is quite easy to make. A roux is a simple marriage of fat and flour — in equal parts. Once blended, the paste-like mixture is used to thicken soups, stews, and gravies. Unsalted butter is the most common fat, but any grease will do, including oil, bacon drippings, and lard. All-purpose flour is customary, but I've succeeded in making a roux with a gluten-free flour substitute.
The color of a roux can range from pale white to reddish-brown, depending on how long it's been cooked. A lighter roux has greater thickening power and is used for sauces like bèchamel. A darker roux has a deeper, nutty flavor and is used in Creole and Cajun dishes like jambalaya and gumbo.
To make a roux, melt your fat in a heavy saucepan over medium-low heat. Once melted, whisk in an equal amount of flour. For example, if you used 2 tablespoons of fat, use 2 tablespoons of flour. Whisk until the mixture forms a velvety, creamy texture. If your recipe calls for roux with color, keep cooking until you reach that color, whisking constantly.
The most important tip? Don't walk away from your roux. Keep whisking until you reach a thick paste and your desired color. The whole process takes less than 5 minutes, so it's not a big ask.
Cutting an onion
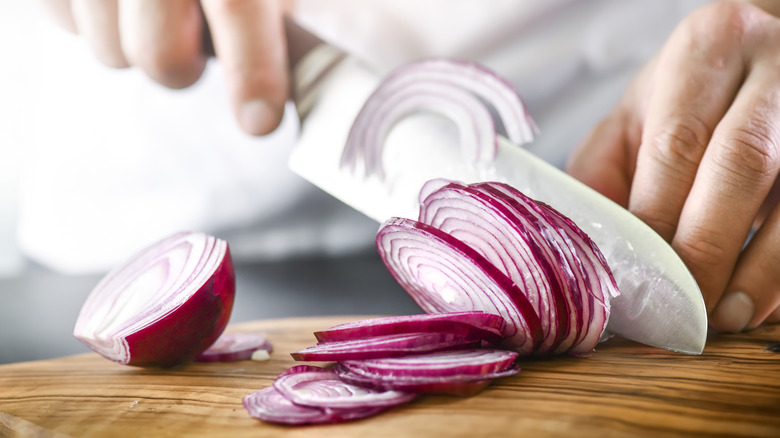
This might seem like a basic skill, but it's a critical one, nonetheless. Think about the number of savory dishes that call for onions — it's wise to know how to cut one properly and safely. There are several tips for cutting onions on the web, so I'll just reiterate the fundamental method for slicing and chopping.
Place your onion on a cutting board and, using a sharp knife, slice off the stem end, leaving the root end intact. When cutting, curl your fingers under (like a claw) to protect them. Stand the onion on the flat (newly cut) side and slice down through the middle to create two equal halves. Peel off the papery skin and outer layer of onion (the outer layers can be tough and dry).
For half-moon slices, place the onion cut side down and slice to create C-shaped pieces. For chopped onion, place the onion cut side down and make several vertical, parallel slices from the stem end to the root end, stopping before you cut all the way through, and just shy of the root — this keeps the slices intact. Next, make several horizontal cuts through the center of the onion, in the opposite direction of the vertical slices you just made. The closer your vertical and horizontal cuts are to each other, the smaller the dice. Now, slice straight down through the onion and you'll instantly have perfectly chopped, uniform pieces.
Cooking eggs
Crammed with protein and nutrients, delicious eggs are ready to eat in minutes and can be cooked many different ways. Since poached eggs can be tricky, and scrambled eggs can be finicky, I'll focus on those here.
Poached eggs are glorious, boasting tender whites and soft (or runny) yolks. But poached eggs can also be frustrating, especially when the white and yolk separate while cooking. Here's an easy hack for perfect poached eggs (no vinegar or water cyclone necessary): Bring 1 to 2 inches of water to a simmer in a large skillet. Crack eggs into a ramekin and slip them (one at a time) into the water from a low height. Turn off the heat and cover the pan. Let stand for 3 to 5 minutes, depending on how runny you like your yolks. Remove the eggs with a slotted spoon and blot the bottom of the spoon with a paper towel.
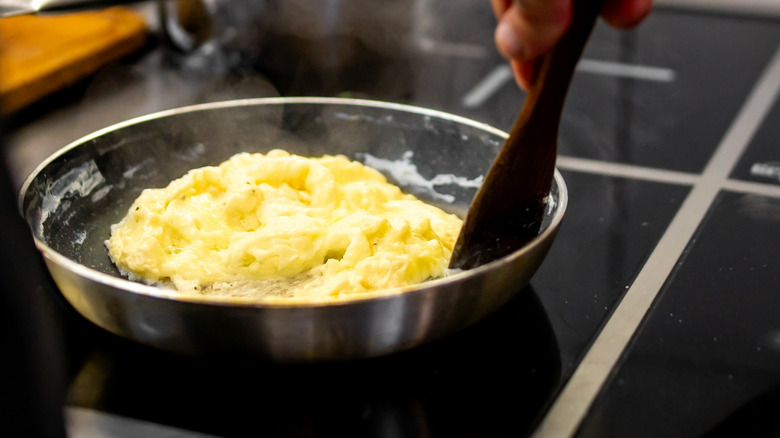
Perfect scrambled eggs are fluffy and moist, not dry and rubbery. To achieve creamy scrambled eggs, add a splash of water or heavy cream – water helps create fluffy curds and heavy cream adds richness. Also, add a pinch of salt; salt prevents the egg proteins from binding when heated, keeping them tender. Here's the process: Crack eggs into a bowl, add a splash of water or heavy cream, and a pinch of salt. Cook the eggs in a little fat (butter, oil, lard, bacon drippings) over medium heat until light and fluffy.
Cooking rice
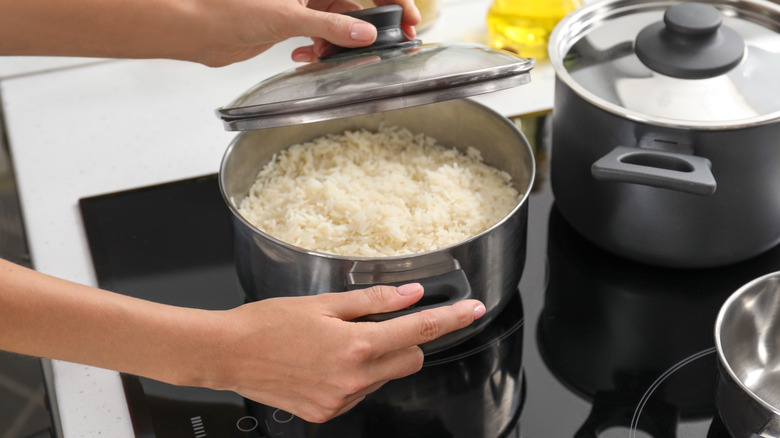
As easy as it may be to reheat microwave-ready rice, nothing beats rice cooked on your cooktop. And while you could easily follow the package instructions, I have a foolproof process for ensuring your rice cooks up tender and fluffy every time. This method works for long grain rice (including aromatic varieties like basmati and jasmine), as well as medium and short grain rice.
For starters, you don't need a special appliance to cook rice. And you certainly don't need a rice cooker. You simply need a saucepan with a lid (the 4-quart saucepan I mentioned above would be a great choice). However, one piece of equipment you do need is a fine mesh strainer. Packaged rice is coated with a layer of starch, a floury substance that can make your rice sticky and gummy. To avoid gluey clumps, place the rice in a fine mesh strainer and rinse it under cold water until the water runs clear.
Now for the cooking part. Combine 1 cup of rinsed rice and 1 ½ cups of water in a saucepan. Set the pan over high heat and bring to a boil. Cover, reduce the heat to low and simmer for 15 minutes. Remove the pan from the heat and let the rice steam for 5 minutes. Fluff with a fork and serve. Easy breezy — no salt, no butter, no stirring.
Roasting versus baking
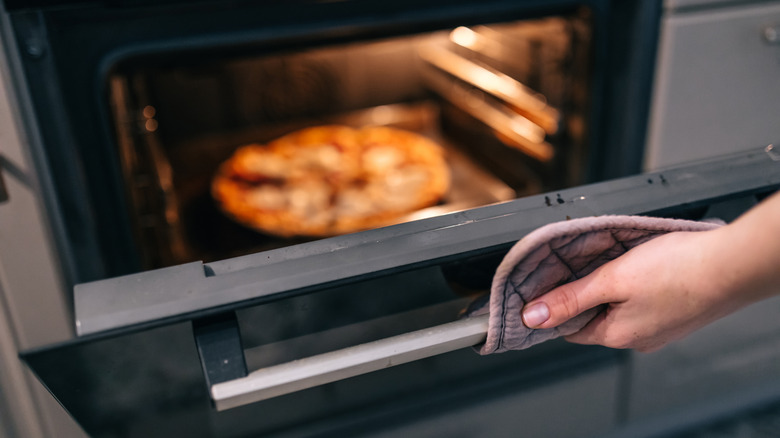
Roasting and baking are both dry heat methods of cooking, but they differ in the temperature of the oven. In general, roasting refers to food that's cooked at higher temperatures, typically 400 degrees Fahrenheit and above. Baking generally refers to oven temperatures below 400 degrees Fahrenheit, and often in the range of 325 to 375 degrees Fahrenheit.
Why does this matter? Because higher oven temperatures promote delicious browning and caramelization, which is ideal for meat, poultry, vegetables, and fruit. These foods are solid in structure, meaning they are whole pieces and not a medley of ingredients, as with cake mixes and bread doughs. Foods that start as liquids or doughs (think cake batter and cookie dough) are baked at lower temperatures to give the separate ingredients a chance to marry and transform into something whole. What started as a liquid and/or dough evolves into something completely new.
When using your oven, start by following instructions for oven temperature and cooking time and you'll soon learn what gets roasted and what gets baked. An easy reminder if you forget? Whole foods (vegetables, meat) typically cook at higher temperatures, while blended ingredients (batters) cook at lower ones.
The skill I want to leave you with is this: Roast your chicken over 400 degrees Fahrenheit, and bake your cookies and cakes at or around 350 degrees Fahrenheit.
Sautéing versus braising
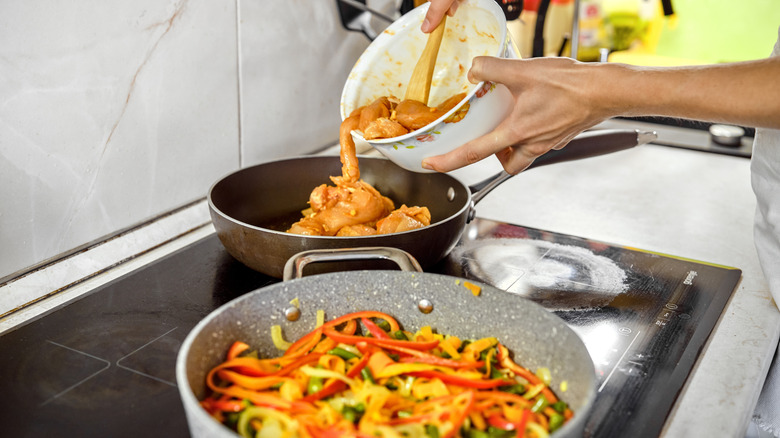
In simple terms, sautéing is a dry-heat method of cooking, and braising is a moist-heat technique. Think searing chicken breast in oil versus simmering it in sauce. The two techniques often overlap — meaning a recipe may instruct you to start by sautéing and finish by braising, but they are two different cooking methods.
When sautéing, a small amount of fat is heated in a hot pan and used to sear foods like meat, poultry, seafood, vegetables, and fruit. The hot fat (oil, butter, lard, etc.) and hot pan brown the exterior of the food quickly, adding flavorful complexity and caramelization.
Braising is typically a slower process, and over a lower temperature. Braising is excellent for tenderizing tougher cuts of meat, and for adding depth of flavor to sauces (since the ingredients have a chance to meld and evolve). Often, braising is preceded by sautéing — the two-step process ensures the seared ingredients are caramelized and flavorful before they simmer in liquid to tenderize. Plus, sautéing leaves tasty browned bits in the bottom of the pan that subsequently get incorporated into sauces, soups, and stews.
Both sautéing and braising are cooking techniques that offer a wide variety of applications, so learn to know the difference and have fun exploring the outcomes.