9 Essential Tips You Need When Braising Meat

Braising meat is an excellent way to feed a crowd without spending a fortune. Not only that, but it's a great option for turning tough, inexpensive cuts of meat into dinner party-worthy dishes. A culinary technique that dates back more than 300,000 years, braising remains a popular choice for cooks. The cooking method combines wet and dry heat to cook large pieces of meat over several hours, transforming even the toughest cuts into succulent, melt-in-your-mouth morsels of savory goodness.
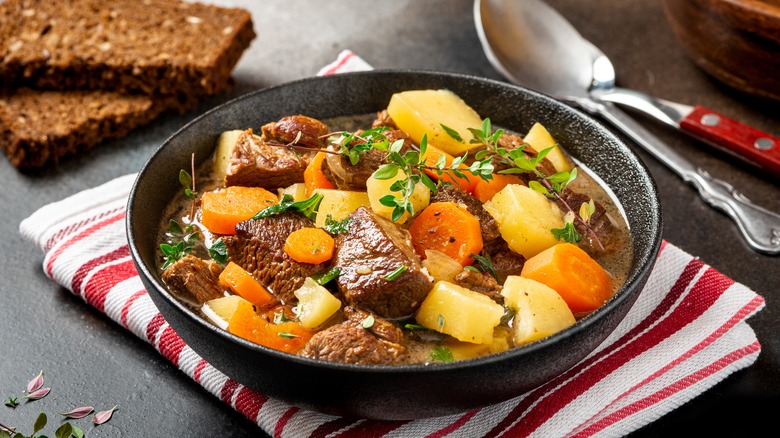
There are three basic steps to the braising process: seasoning your meat well to ensure maximum flavor, searing it to develop a crisp, brown skin, and then cooking it in a flavorful liquid until it's fork-tender. The result is fall-off-the-bone meat that's moist and full of flavor. You can even prepare a hearty and filling dish — complete with vegetables — in a single pot with this cooking method.
For years, I taught a cooking class series of basic culinary techniques, including lessons on braising (which was hands down the most delicious week). Simply put, if you're able to master this cooking technique, there are virtually no limits on how or when to use it — and you'll find you can braise just about everything. Whether your potential menu includes chicken, beef, or other meats altogether, here are some essential tips you need when braising meat.
Don't confuse braising with stewing
Some cooking terms are commonly used interchangeably, even though they're not exactly the same. For instance, despite the distinction between chicken stock and chicken broth, many folks don't bother differentiating between the two when cooking — and the same goes for braising versus stewing. While both methods involve cooking food in liquid over time, there are numerous differences between the two.
Braises start with larger cuts of meat that are seared before any cooking liquid or vegetables are added and generally require a longer cooking time to allow the meat to tenderize and cook through. Meanwhile, stewing recipes typically call for meat that's cut into small, bite-sized pieces, like an old-fashioned beef stew. The meat is also often coated lightly in flour and seasoned before being added to a hot pan. The flour works to thicken the liquid in the pan, turning it into a flavorful sauce while it cooks.
Another key difference between braising and stewing is the amount of cooking liquid used. For most stews, you'll need to add enough liquid to completely cover the meat. However, with braises, you should only add enough liquid to come about halfway up the sides of the meat you're cooking.
Pick the right cut of meat
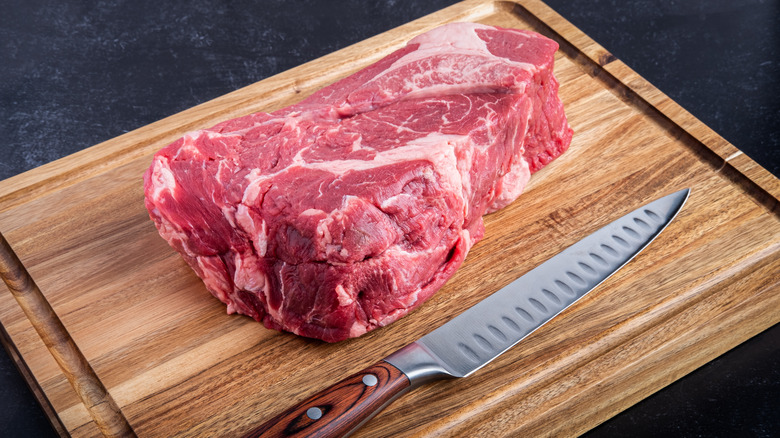
When it comes to braising, selecting the right cut of meat can make all the difference. Whether you're talking about beef, pork, or lamb, the absolute best cuts of meat for braising are those with a lot of connective tissue and marbling, as these are the most likely to yield tasty and tender results over time.
Connective tissue is the tough, fibrous tissue that connects bones and muscles. It contains collagen, which begins to break down when heated between 160 and 205 degrees Fahrenheit. Collagen releases gelatin as it melts, which gives braised meats their signature tender texture.
Marbling is another trait to look for when choosing meat to braise. Marbling refers to fat that's distributed throughout the meat, such as the white lines or specks that are similar to veining. This fat helps meat retain moisture while cooking, contributes to its tenderness, and adds flavor. Some cuts of meat with lots of connective tissue and marbling include upper Boston butt, pork shoulder and ribs, beef chuck roast, and brisket. Slow-braised lamb shanks make a delicious meal, and chicken thighs are another excellent braising option.
The right pan can make or break your braise
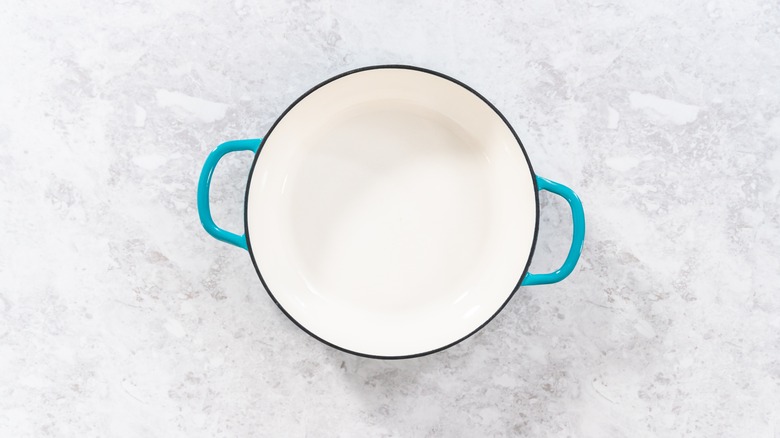
Choosing the right size pot for braising meat is a crucial step in ensuring your meat turns out properly. The most important traits to look for in a braising pot are size, weight, and a tight-fitting lid. It's imperative that your pot is large enough to hold the meat you're cooking, of course. But don't forget to take into account the amount of liquid you need to add, as well as any vegetables or aromatics that are part of your recipe.
You should also select a pot with a heavy bottom. Heavy-bottomed pots conduct heat more evenly, which will ensure your food cooks with fewer hot spots capable of burning it. A braiser is a pot that's different from a Dutch oven in that it's designed specifically for braising. It typically has a wider surface and shorter sides than the average Dutch oven, though if you don't own a braiser, a Dutch oven is an acceptable substitute.
The size of your braiser pot depends on the size of the meat you're using. A 5-quart braiser is a great option for larger cuts. For smaller braises, a 3-quart or 4-quart braiser will achieve the best results. Additionally, whether you're using a braiser or a Dutch oven, make sure your pot has a tight-fitting lid. Braising relies on the heat and steam trapped in the pot to cook and moisten your meat, so a solid lid is necessary to make that happen.
Start by seasoning and searing your meat
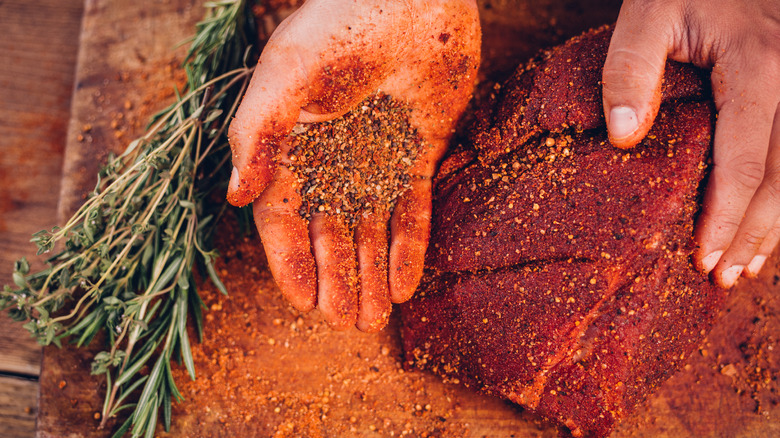
As I noted earlier, the first steps in braising are to season and sear your meat. These fundamental parts of the braising process play a pivotal role in enhancing the flavor and texture of your final dish. Properly seasoning the meat with salt and pepper (at minimum) will add depth and complexity to the meat's flavor. You don't have to stop with salt and pepper, though. Consider other spices for additional flavor, or mix up a simple dry rub on your own.
In addition to giving your meat a tasty crust, the spices you use will make their way into your braising liquid, as well — imparting even more flavor to your dish. Searing the meat will enhance your braised meat, and it's surprisingly simple. Heat a thin layer of oil in your pan over medium-high heat. Be patient, as the pan and oil need to get hot before you add meat. The meat won't brown properly if your pan isn't hot enough, and you should hear a strong sizzle when the meat hits the pan.
The goal of searing is to create a shiny, brown crust on your meat. Although the crust may lose its crispiness when added to the cooking liquid, the flavor and gorgeous brown color will remain in the final product.
Build more flavor with vegetables and aromatics
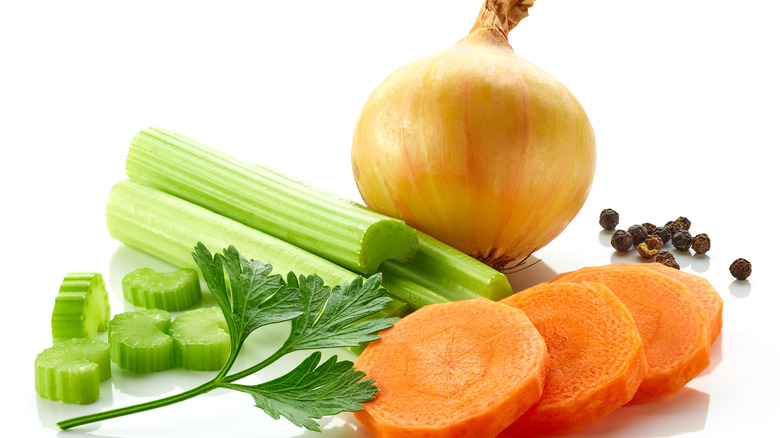
After searing your meat, the next step in braising is to incorporate aromatics and vegetables. Aromatics are herbs, spices, and vegetables that become the base of flavor in your dish. They are typically added at the beginning of cooking to give them time to impart their flavor and moisture onto the rest of your braise. There are three different categories of aromatics: herbs, spices, and vegetables. For the tastiest results, use a mix of all three.
Both fresh and dried herbs work well as aromatics when braising, and you can stick to tried-and-true options like parsley, rosemary, and thyme, or branch out with more complex flavors like tarragon or sage. Raid your spice cabinet and use whole or ground spices for deeply flavorful braises, while garlic, shallots, and leeks are effective aromatics, as well. Additionally, since onions, carrots, and celery make up the classic French aromatic blend called mirepoix (which is the basis for many dishes), utilizing those vegetables will give your braising liquid a well-rounded, full flavor. Pay attention to how you cut your vegetables before braising, also, as you'll want to chop them into larger pieces so they can better withstand the long cooking time.
When braising, aromatics should be added to your pan after the meat has been seared. They'll benefit from being cooked in the flavorful bits that stick to the bottom of the pan after searing, and you should cook aromatics until they begin to soften and brown.
Choose your braising liquid wisely
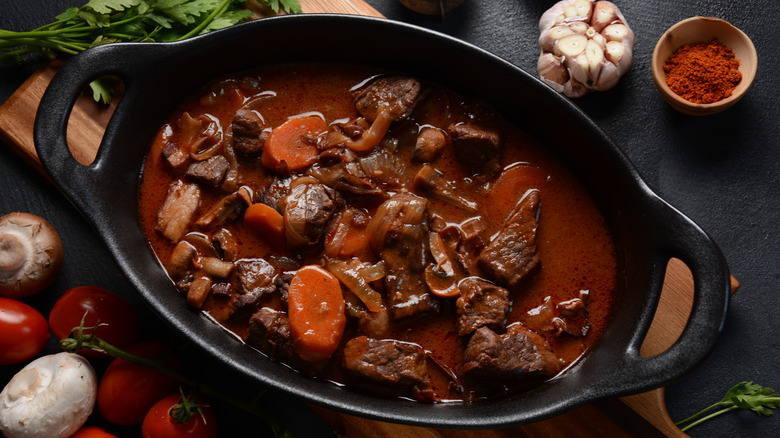
Choosing the right braising liquid is a critical aspect of crafting a delicious and well-balanced dish. The liquid serves two purposes: helping cook the meat, and giving your meat an abundance of flavor. It's the foundation for your dish's flavor profile, after all. The braising liquid will become the basis for whatever sauce you serve with your meat, too, so selecting a quality option is imperative.
Stock or broth may be the most common choices for braising. Both are readily available, inexpensive, and will easily take on the flavor of your aromatics. Additionally, if you've ever made any version of boeuf bourguignon, you've undoubtedly used red wine as a braising liquid. White wine and beer can also add tons of flavor to your braises, while a mix of wine and stock is another common (and tasty) option.
You can think outside the box when choosing a braising liquid, as well. Consider tomato sauce, olive oil, and even milk for your braises. Braising meat in milk is a centuries-old technique, in fact, because lactic acid in the milk helps tenderize the meat, and the natural sugars add a layer of subtle sweetness to your sauce. Whichever braising liquid you choose, be sure to cover the pot once your liquid begins to simmer. Leaving the pot uncovered will allow your braising liquid to evaporate – and essentially defeat the entire purpose of cooking in this manner.
Braise on the stovetop or in the oven
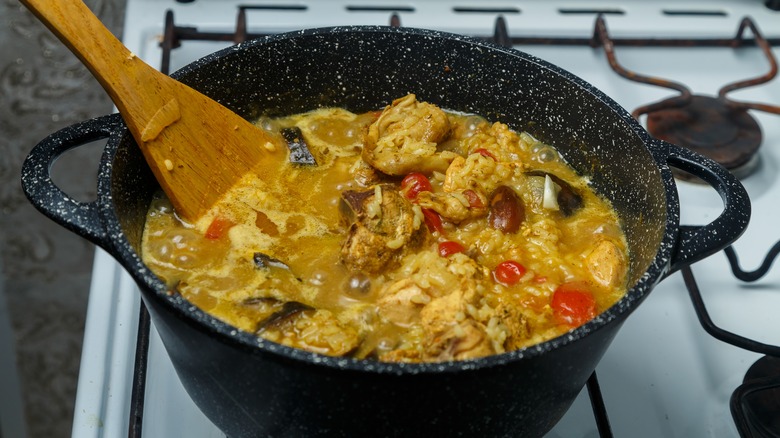
Braising is a versatile cooking technique that can be done on the stovetop or in the oven. Choosing the best method for your dish depends on several factors, like the size of your cut of meat and the expected cooking time.
Oven braising is the best choice for larger cuts. Being surrounded by the oven's hot air is apt to cook your meat evenly, and the dish can braise without too much hands-on interference. Braising in the oven does require a longer cooking time – about 20% longer than a stovetop braise – which makes it perfect for those cuts requiring a longer cooking time.
Stovetop braising is another (albeit more labor-intensive) option. For starters, you'll need to monitor the meat periodically to make sure your braising liquid remains at the appropriate level. Another aspect to consider with stovetop braising is irregular heat. It's much more difficult to control the heat on the stovetop, after all, so you'll spend more time checking the dish for burning while it cooks.
Lower temperatures are better for tough cuts of meat

Whether you're braising in the oven or on the stovetop, temperature plays a pivotal role in the art of braising meat. Keeping your pan at the appropriate temperature is crucial, after all — particularly since you'll be cooking at different temperatures throughout the process to achieve the best results.
First, a high temperature is required to properly sear the meat. Then, once the braising liquid is added, your pan should stay at a relatively high heat so you can bring it to a boil. Once the braising liquid boils, you can reduce the heat until the liquid simmers; it's important to maintain this simmer for the remaining duration of the cooking process.
Additionally, make sure your braising liquid doesn't come back to a full boil. Boiling the braising liquid will cook your meat too quickly — before the collagen has a chance to melt and do its job. Consequently, your meat is likely to end up stringy and dry if your braising liquid boils while cooking, which is the exact opposite result you want. With that in mind, once your braising liquid has been reduced to a simmer, look to the perfect braising temperature, which is between 250 and 300 degrees Fahrenheit.
Use your slow cooker
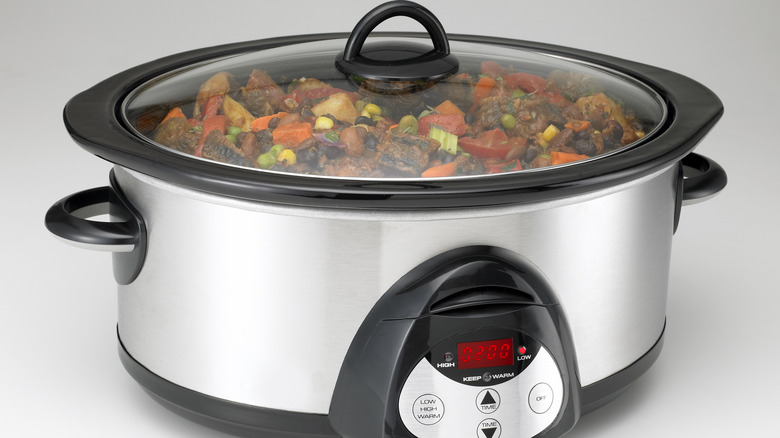
One of the simplest ways to braise meat is by using your slow cooker. Slow cookers maintain an even temperature throughout cooking and are known for maintaining moisture in meat. The appliance's gentle, low-temperature cooking environment allows for long, slow braising that's ideal for busy days when you want to set it and forget it, and you can enjoy the benefits of a home-cooked meal that tastes like you spent hours standing at the stove cooking it.
To braise in the slow cooker, start by browning your meat on the stovetop, then adding it to the slow cooker with your preferred aromatics. You'll need a braising liquid in the slow cooker, too, but not as much as other braising methods. After all, slow cookers not only retain moisture, but produce additional liquid while your food cooks.
Using the same amount of braising liquid in your slow cooker as you would when stovetop or oven braising will cause your food to stew instead of braising, so be sure to reduce the amount you add. You can even cut the liquid you use in your slow cooker by up to 50% to prevent a watery final braise.