Follow This 10-Step Decluttering Checklist To Clear The Chaos From Your Kitchen Within A Day
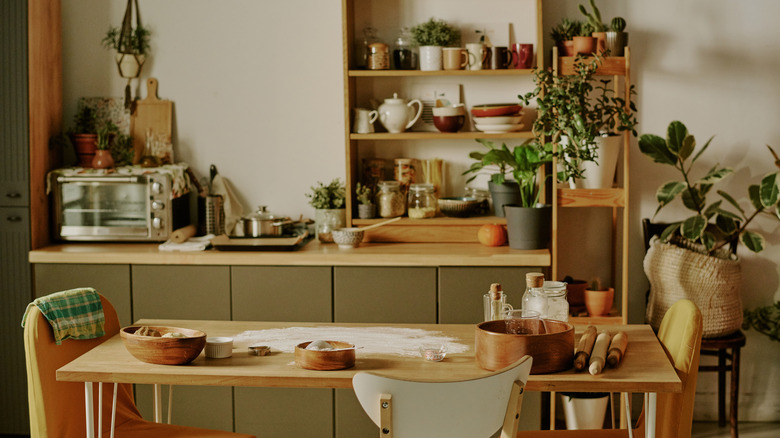
Decluttering the kitchen is never topping anyone's wish list for the ideal weekend, but there is something to be said about the magic of sipping a calming cup of tea in your newly organized space. And that is not all that it can do for you — by getting an accurate grasp of what you already own, you can stop buying duplicates. Having your daily necessities stored neatly at hand's reach can also make your cooking routine more efficient.
But while you may start out with the best intentions, attempting to overhaul the entire kitchen without a plan of action isn't a wise endeavor — don't be surprised if you find yourself abandoning the project before the afternoon sun has peaked in the sky. This is why you need a step-by-step decluttering routine that takes the overwhelming mass of clutter camping out rent-free in your kitchen and breaks it down into manageable projects. As you go from one corner to the other, you'll be able to watch your progress around the room and clock with a sense of accomplishment. With all your energy devoted to one decluttering task at a time, you can manage to get more done than you could with haphazard, half-focused bursts. To master the clutter in your kitchen — and keep it that way — follow this step-by-step guide for banishing the chaos within one day.
Morning: Clear the countertops
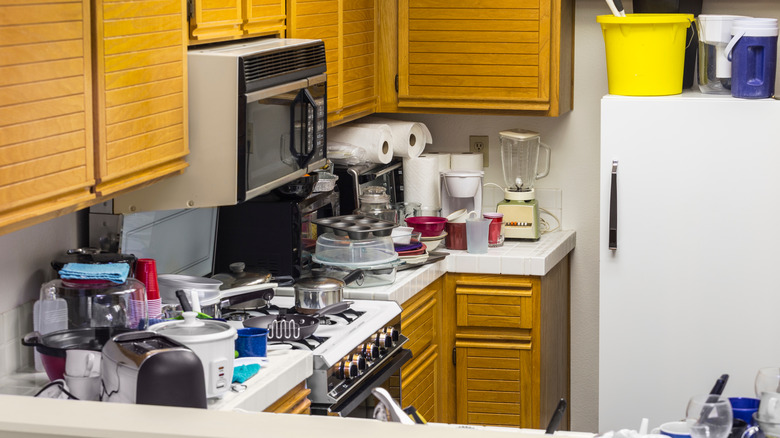
Chipped coffee mugs. Crumpled takeout menus. Orphaned USB chargers belonging to who-knows-which gadgets. Half-written grocery lists. The countertop can unfortunately serve as a catch-all for all the clutter that accumulates in our everyday lives. And after the third time the cutting board topples over the jumble of empty cereal boxes on the counter and onto your tiny, ouchy toe, you know it's time for a serious overhaul.
Decluttering the kitchen can seem like an intimidating challenge, but it helps to start small with practical, doable projects, such as purging the countertops — a quick reset shouldn't take more than half an hour. If you are stuck on where to begin, it helps to follow the chaos method for banishing clutter from your countertops. Promoted by Kim Jones of Lock & Key Home, this technique requires you to take everything off your counters so that you can get visual clarity of everything you own and decide what needs to go where accordingly.
Once everything is laid out clearly, you can group similar items together and opt for some merciless introspection. Which tools, knives, and cutting boards do you actually reach for everyday? Chances are that you have one favored, well-worn option that you use routinely while the others are simply taking up precious real estate on your countertop. Relocate extras to a cabinet drawer and move all pantry items to their rightful home. You can also count on these organizational hacks to help you create more countertop space.
Morning: Empty one cabinet at a time
Once you are riding high on the sense of accomplishment of transforming your countertops from an anarchic landfill into a sleek, organized space, it is time to tackle some bigger projects. If reorganizing all your kitchen cabinets at once seems tough, you can spend the next portion of your morning tackling these one by one. Cleaning, sorting, and organizing one cabinet at a time will afford a sense of triumph as you track your progress.
But organizing your kitchen cabinets isn't quite as simple as taking everything out, giving the shelves a wipe-down, and then returning the same jumble back inside. Instead, you'll want to take this time to discard items that aren't in use. There is a good chance that there is an assortment of promotional bottles, mismatched containers, and never-used appliances lurking within — all items that you can toss or donate without a second thought. Once you have shed the dead weight, you'll want to follow this guide on how to organize your kitchen cabinets like a pro.
Armed with a strategic approach for how things are placed and organized, you can devote 15-20 minutes for redoing each cabinet. The items that you'll actually use can be grouped together in task-based zones. All baking equipment, measuring bowls, and pans can nest together in a baking zone, while specialty dishware for entertaining can stay together for easy access when unexpected guests pop by.
Morning: Streamline cookware and utensils
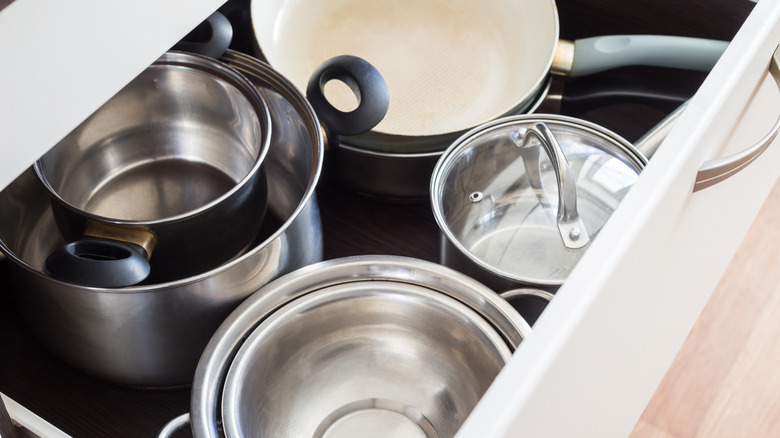
You may have had visions of churning out silky strands of spaghetti every night after a trip to Naples, but if your pasta maker has been buried under a stack of baking equipment, it is time to edit your cookware collection.
If your kitchen feels perennially starved for space, it is time to turn your attention to bulky items that might be consuming more room than they need to — specialty cookware is a prime culprit. Items that aren't used frequently can be placed out of reach on higher shelves over the course of half an hour. If you are attached to anything in particular, you can always find alternative uses for it around the house. For instance, the last thing you can do before throwing away an old loaf pan is to use it as a storage bin for baking items, such as sprinkles and tin liners. A season-based approach can also help for deciding cookware placement: You can safely tuck your grills and barbecue equipment at the back of your cabinets during winter.
It also helps to turn a vigilant eye towards the kitchen tools you don't really need anymore. Topping this list are any items that have become worn out over the course of time. Knives, spatulas, and cutting boards all face a significant amount of wear and tear — if yours have seen better days, it is time to swap in newer ones that can make your cooking process more efficient.
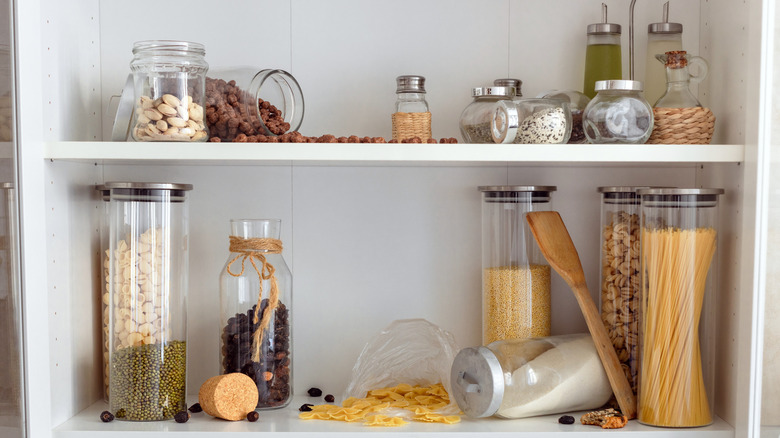
Midday: Conquer the pantry
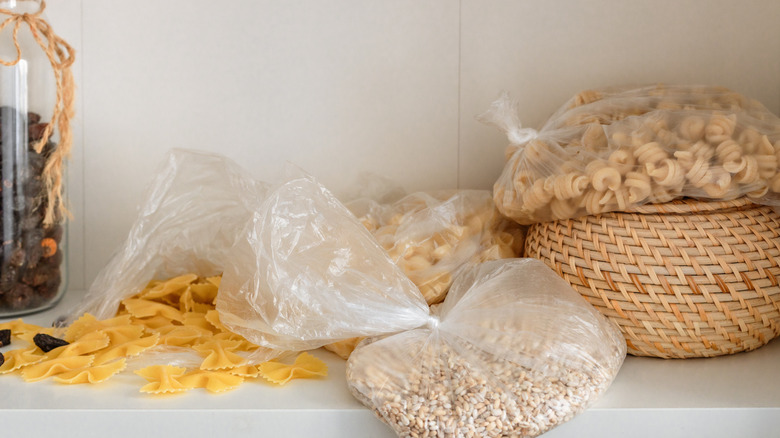
Picture this: You reach into your pantry in between a complicated beef wellington recipe only to find that everything is at hand's reach. The spices you need aren't tucked away behind an obscure pile of outdated snacks, sauces are stored in clearly labeled jars, and all your canned goods are organized according to their expiry dates. This is a dream that you can turn into a reality by devoting one hour during the midday to tackle the pantry.
Over the course of the morning, you will have likely settled into a rhythm for decluttering: Remove everything, toss out expired items, and group related products together. For staying one step ahead of stains and spills, it helps to lay down a protective blanket of shelf liner as a base — feel free to get creative with patterns and prints to create an eye-catching base. You can even choose to add some wallpaper to the back of your pantry to invite some color into this space.
Once done, you'll want to pay special attention to how items are organized. Similar items will go together in deep acrylic storage bins that will afford easy visual access to what's inside. To prevent mismatched boxes from eating into your storage space, it helps to decant goods into clear containers or mason jars. Finally, spending 10 minutes with a label maker will help you quickly identify what is stored where during hectic meal prep.
Midday: Edit your spice collection
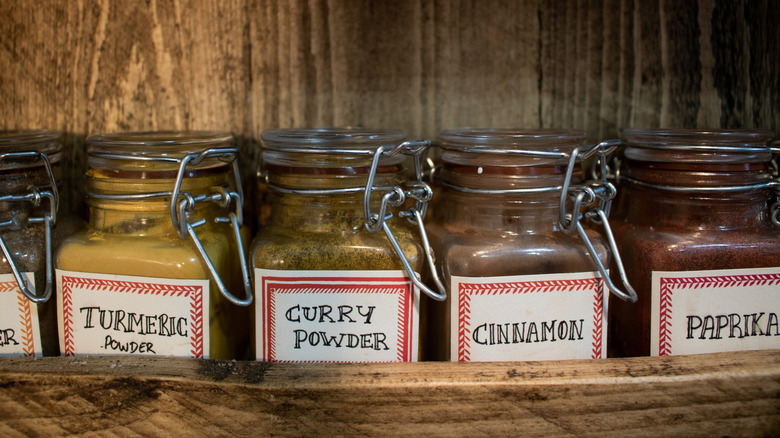
To ensure that you do not run out of steam, it helps to temper heavy organizational tasks, such as redoing the cabinets and pantry, with lighter decluttering chores. If you are looking for a breather, turn your attention to the smaller task of editing your spice collection over 15 minutes.
The best part? You needn't invest too much mental energy in this one. There are no existential questions of "How often will I use this waffle maker?" and "Why am I not the person who can make fresh waffles every morning?" to be considered here. By simply checking the expiry dates, you can weed out the options that you don't need anymore and start freeing up space. You can then line up your spices as per your everyday needs — front-row preference needs to be given to those that need to be used within six months.
For bringing order to your spice collection, you'll find a wide array of organizational solutions that are only too happy to help. A rotating lazy Susan spice rack will help you instantly access the bottles at the back with ease. Shelf risers can also help you maximize vertical storage within a cramped cabinet and afford easy visibility of the bottles at the very back.
Midday: Refresh the fridge and freezer
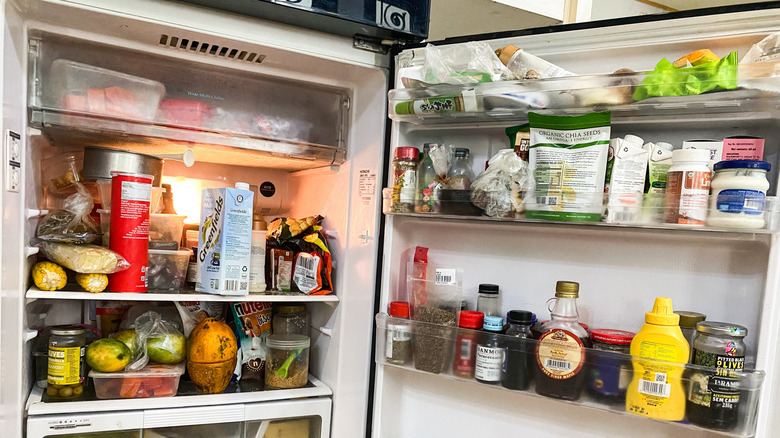
The last sprint of energy that you put in before taking a lunch break needs to be directed towards one of the most common storehouses of unused clutter in the kitchen: the refrigerator. From forgotten leftovers to expired sauces, there is a good chance that your fridge and freezer are perennially stuffed because they are playing host to things that aren't really needed anymore.
Over the course of an hour, you can easily bring some semblance of order to this space. After removing and wiping down everything in the first 30 minutes, the remaining time will go towards editing and reorganizing. Expired condiments and anonymous leftovers belong on the toss pile, as do any frozen goods or meats that are suffering from freezer burn. During this task, you'll likely discover you have multiples of the same item, from dips to ice creams. Unopened options can be donated or gifted to someone who is more likely to use them.
You can apply the same rules of pantry organization here: Label everything with religious zeal, stack similar items in storage bins, and decant beverages into coordinated containers to create a cohesive finish. If you'd like some extra credit on this assignment, you can try out these creative tips to master the art of fridgescaping. By arranging herbs like a bouquet of flowers or creating seasonal displays, you can bring some joy into the simple act of opening the fridge door to pour yourself some milk.
Afternoon: Declutter under the sink
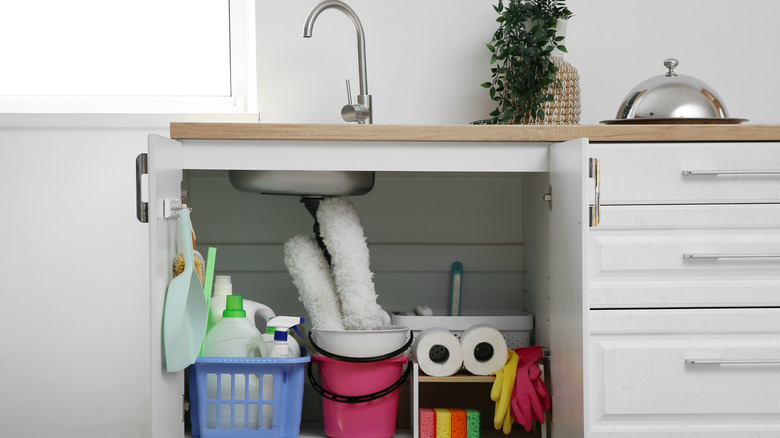
The area under the sink — with its unseemly odors and odd jumble of pipes — is never anyone's favorite area in the kitchen. But it would be a crime to overlook the storage potential of this area. When organized methodically and without clutter, it can serve as a handy space to stash cleaning supplies, detergents, and washcloths.
To transform this area from a musty eyesore into a streamlined cleaning station within half an hour, you'll want to empty everything out and inspect the space for any leaks or damp spots. Once you have ensured that every inch is dry, you can call upon some organizational tools to make the most of this area. Pull-out drawers will ensure that you don't have to root around the back to locate a stray sponge, while dish towels and wash clothes can be slung on a tension rod fixed to the inside of the door.
Before stashing your entire collection of wash cloths inside, it helps to consider how many you truly need and which ones need to be retired. So, how can you know when it is time to throw a cleaning rag away? If it has an inexplicable odor even when it is clean, it is time to opt for new ones. As a rule of thumb, it helps to have four wash cloths in your everyday rotation for wiping down the counters as well as two additional cloths for mopping up spills on the floor.
Afternoon: Reconsider your appliances
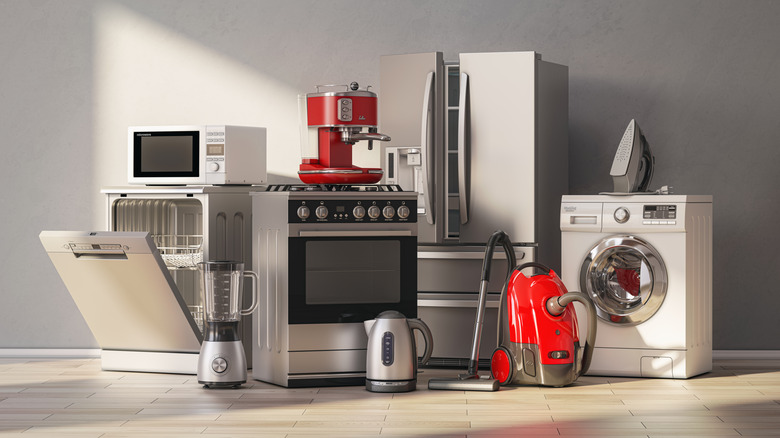
You managed to make sense of your overflowing pantry, you turned those overflowing cabinets into an organized haven. Now, it is time to banish the chaos from your collection of kitchen appliances within 30 minutes. Not sure what belongs and what needs to head towards the door? "Have you used it in the past year?" is the ultimate litmus test for rooting out the clutter from your kitchen appliances.
If you are wondering what to do with all the gadgets you don't use anymore, it helps to browse through our ultimate guide to recycling kitchen appliances. From pick-up services offered by certain manufacturers to government-run recycling programs, you'll find a host of helpful ways to ensure that your old appliances don't end up as landfill bait.
When looking for the best placement for your remaining kitchen appliances, it helps to consider how frequently each gadget is used. Everyday options will need to be placed on a prime spot on the counters, while rarely used or seasonal items can be relegated to the garage or the basement. Deep lower cabinets, meanwhile, serve as a handy place for storing bulky rice cookers and stand mixers. By investing in some cord organizers, you can keep your cabinets and drawers from turning into a mad tangle of stray cables. Looking for a better way to store those small appliances? A 10-inch turntable can offer easy access to all your coffee frothers and hand blenders.
Afternoon: Tidy the junk drawer
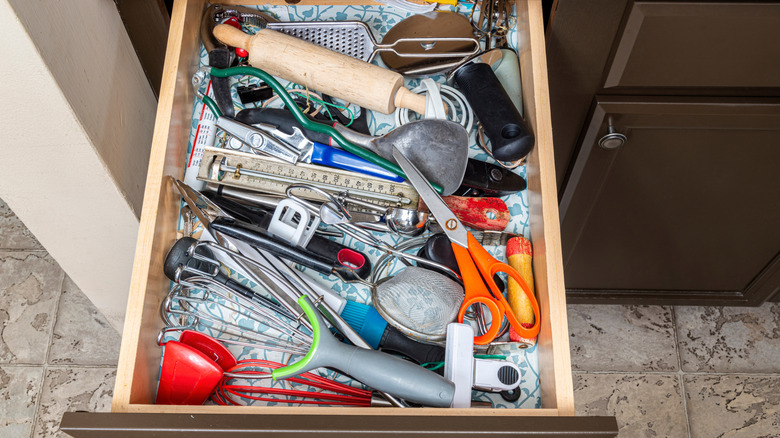
You may deny it. You may have successfully tricked your brain into believing that it never exists. But we all have one: A junk drawer that serves as an unwelcome reminder of our packrat storage habits. From spare batteries and chargers to mysterious keys that don't seem to belong to any lock, the junk drawer doesn't discriminate — everything is fair game here.
If you push yourself every few months to take on the mammoth task of purging the clutter only for it to revert back to square one within a few weeks, it helps to introduce better organizational systems to this space. Over the next half an hour, you'll want to empty the drawer and lay everything out on a table so you can weed out the trash — anything that is old, broken, or not in a working condition anymore. Wipe down the drawer to create a clean base. Instead of adding everything back, consider if any items can be relocated elsewhere — does that stack of highlighters belong in your home office instead?
Customizable drawer dividers can then be called upon to create dedicated zones for different items, from scissors and zip ties to grocery lists and measuring tapes. Seasonal items, such as picnic napkins and disposable cutlery, can be grouped together into a storage tub. Label everything neatly and relegate it to the back of the drawer when not in season.
Evening: Add finishing touches
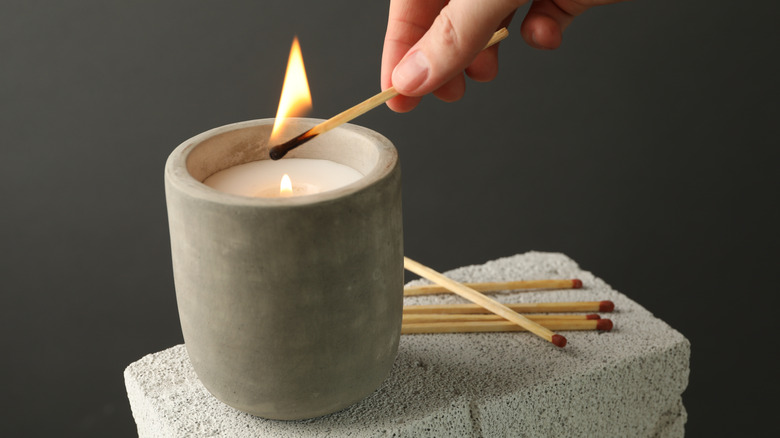
As the sun begins its downward incline, you'll find that your kitchen has transformed. From the pantry to the refrigerator to the cabinets, every door you open reveals a streamlined haven that would make Marie Kondo beam with joy. Your fatigued feet are probably crying for a reprieve and a warm soak, but all that is left to do is to tie up some loose ends to ensure that your clutter-free kitchen stays that way.
To dial up the Zen energy in your kitchen, you'll want to wipe down the surfaces and take out the trash. A quirky finishing touch, such as a retro wall phone or a statement ceramic bowl, can add visual interest to the space. Instead of hiding away all those mugs you discovered at the back of the cabinet, why not create a colorful display on your countertops? After getting rid of the visual clutter, you can engage your other senses by lighting a scented candle to create a cozy ambiance. If you'd rather go natural, these common ingredients will keep your kitchen smelling lovely.
To ensure that clutter doesn't sneak back in, you'll need to commit to a quick reset every month and a deeper overhaul every quarter. With a final walkthrough to ensure that everything has a home of its own, all that is left to do is to enjoy the dopamine hit from looking around your newly organized space.