How A Classic Pattern Can Breathe New Life Into Your Kitchen's Wood Floors
If you're dying to give your boring kitchen an upgrade but you're not quite sure where to start, why not think low? We don't mean low ambition-wise, we mean literally low — start with the floors. You could always find a new kitchen mat, maybe one of those fancy anti-fatigue ones that'll help as you chop veggies by the sink, or you can go even lower and do something about the floor itself. Skip the construction tools; we're not here to rip up the wooden kitchen floors, we're here to paint them checkerboard style, one of 10 outdated kitchen trends making a comeback, according to a design expert.
You read that right, we're painting a checkerboard on the wooden floors. Think of it like that childhood memory of painting lines and shapes on brown construction paper, but in a more coordinated, sophisticated, upgrade-your-kitchen kind of way. This isn't the checkerboard pattern's first time in the limelight, soaring to popularity in the 1920s and 1930s before fizzling out in the '50s. The design is experiencing a revival, but it's straying away from the tacky, tiled pattern of the past, giving old wooden floors a breath of new life in a timeless way. You'll feel a sense of nostalgia and whimsy every time you set foot in the kitchen, and perhaps a sense of accomplishment, too, if you do the painting on your own.
Painting checkerboard floors in your kitchen is the new DIY flex
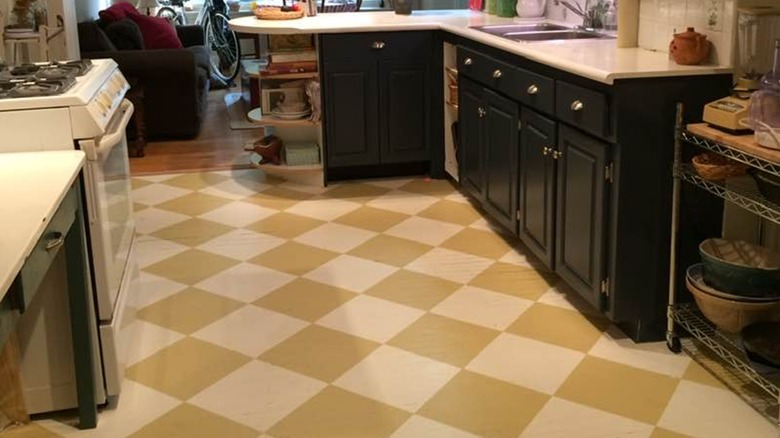
While painting directly on the wooden floors might sound a little out there, there are massive benefits to pulling out the paintbrush instead of the prybar. First and foremost being exactly that — there's no hardcore renovation involved. You'll save money and work by opting to paint a checkerboard on the wood, as opposed to ripping up the old flooring, buying a ton of checkered tiles, and securing everything properly. Although the process can be tedious, you'll also save time by painting, and you give yourself the freedom to pick specific designs and colors you otherwise wouldn't be able to.
Tackling this DIY project won't take much, especially if you remember these 15 mistakes to avoid when painting your kitchen. You'll need to decide if you're doing classic black and white or a checkered pattern with the wood still showing. From here, sand the applicable surfaces and gather paint(s), sponges, straight edges, rollers, paintbrushes, a painter's tray, and a ruler. Use your ruler to create a checkerboard pattern and lightly sketch out the marks. You don't necessarily need to use tape; just use a straight-edge brush to keep the lines straight or a straight-edged sponge to keep the corners uniform. All it truly takes to make your old kitchen feel new is a can of paint for the floor, and maybe a coordinating can of paint for the cabinets, especially with these 12 timeless kitchen cabinet colors that will never go out of style.