A Vermonter's Guide To Making Maple Syrup

Growing up in Vermont there were three guarantees. The first was that flannels would be worn year-round (yes, even in the summer), the second was that at least 50% of potluck dishes would be kale-based (especially in the fall), and the third was when someone said syrup we all knew it meant maple syrup (is there any other kind?). And that stuff went on everything. To this day I don't even bother buying white sugar because maple syrup goes in my coffee, baked goods, curries, and salad dressings.
Starting in kindergarten we learned everything there is to know about maple syrup. We started harvesting sap as tots, and then later toured sugar houses and learned the science behind it. Our friends and neighbors were sugarers, and that heavenly aroma of smoke and maple filled the air during each harvest season. Luckily, the art of sugaring isn't a geographical secret. That's why I'm going to share with you a Vermonter's guide to making maple syrup.
The art of sugaring requires patience, the right tools, trees, and weather. If the latter three come together, then you're halfway there. Plenty of Vermonter's make maple syrup without owning a farm or sugar shack. And isn't it part of being a foodie experimenting with new foods and techniques? Saddle up, grab you Bean boots, a flannel, and a tree tap and let's get sugaring.
Know its origin story
As a cultural anthropologist, a recipe designer, and a chef, I like to give my recipes context. If I'm pulling techniques or ingredients from other cultures, I like to understand their history and original use before developing my own interpretation, so I believe it's important to start with the origin story.
Maple sap was discovered by Native Americans well before Europeans invaded the Americas. There is plenty of folklore around the discovery of the sap, including one Iroquois legend where a chief threw his tomahawk at a maple tree, only to remove it and discover the flowing sap. It's likely that Native Americans reduced the sap into syrup using hot stones dropped into sap in wooden or clay pots, which were the containers that the sap was originally collected in.
Early settlers quickly caught on and began producing maple syrup. It quickly found its way in the trade systems, and communities were setting up so-called sugar camps. Although the techniques of extracting and boiling maple sap have changed since then, the basic steps are quite similar to the original process, and our love for the liquid gold has not wavered. It became a staple ingredient in switchel, a Vermont-born beverage best described as an early farmer's Gatorade, used for energy and hydration starting in the 1700s. Today, we enjoy maple syrup in anything from maple soft serve, also known as creemees, to barbecue sauce, and Vermont maple lattes.
Where in the US can you make maple syrup?
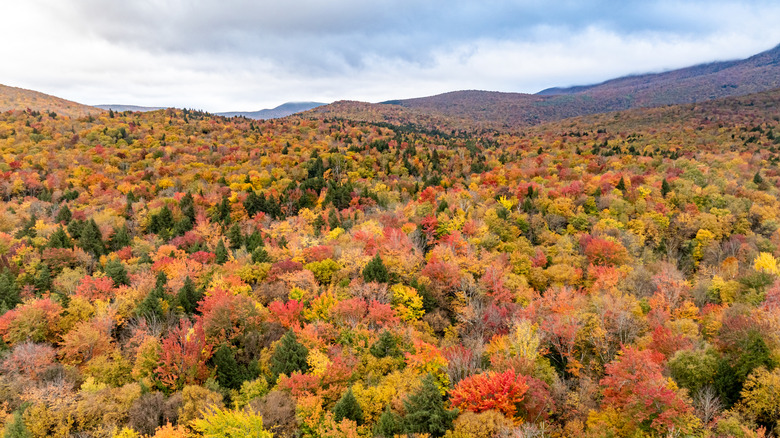
So, can any old person tap a maple tree in their backyard and get maple sap? In order to harvest sap, maple trees need to be in a climate with weather fluctuations that freeze the sap, and thaw it, helping it flow. This is why states that have strong winters tend to favor maple production. Canada is a huge producer of maple syrup, in fact, most of the world's maple syrup comes from there. But within the United States, Vermont takes the lead, with New York and Maine close behind. Most of New England has an abundance of trees filled with flowing sap, as well as the Great Lakes region and some in the Midwest.
So, if you live in one of these areas, have a plethora of maple trees in your backyard, and have the sugaring bug then you might just be in luck. However, there are still many other factors that go into your ability to harvest tree sap, so don't get too excited just yet. You'll have to be sure it's a good year to sugar based on the temperatures if you're on the edge of the maple harvesting zone (AKA you'll need some deep freezes), and you'll want to make sure you are dealing with the correct species and age of maple trees. No wonder this stuff is so pricey!
Choose your tree wisely
Most people might just assume a maple tree is a maple tree. Well, I'm here to tell you that there are over 100 species of maple trees, with 13 native to North America. While many varieties produce sap that we can reduce into the ever-so-famous maple syrup, maple production typically centers around the sugar maple (no surprise there). Red maples also produce sap, but one that has less sugar content. Other maple trees like silver, black, box elder, and Norway maple are all viable options, and at the end of the day you have to work with what you've got.
If you're wondering how the heck you're supposed to identify these trees, the answer lies within their leaf shapes. You'll want to research the best time and temperatures to harvest sap from the particular species and note any major differences like sugar content. For a lower sugar content, you'll want to extend production time, particularly during the boiling process, to achieve the tantalizingly sweet syrup we all love. The tree must also be mature — at least 10 inches in diameter and 4 ½ feet tall, according to the University of Maine.
Timing is everything

Okay, you've checked to see that you're in the correct geographical location, and you've found a mature sugar maple to tap. You feel like you're just a stone's throw away from making your own fresh maple syrup. Well, there are only a few times per year when sap is flowing freely, and you can actually harvest maple syrup, so you might have to wait a while.
Technically, you can tap trees in the fall. The best time to spring into action before winter is when the night reaches freezing temperatures, which may or may not happen in your location come autumn. The days should be warmer though, allowing the sap to thaw in the trees, and helping it to flow more easily from the tap. The absolute best time of year to tap maple trees, however, is at the end of winter into early spring. At this time, the freezes and thaws are much more intense, and the trees are actively forcing sap upwards to the leaf buds.
Gather your equipment
Once you have your tree picked out and ready to go and the weather is just right, it's time to tap your tree. The first piece of equipment you'll need is a drill. You can use a hand drill, or electric drill, and the goal is to make a hole in the tree where the tap will go. Drill your hole at least 3 feet up from the base of the tree, and use a 5/16 inches drill bit, or whichever size your tap indicates. If you're tapping a larger, more established tree, you can drill two holes, one on either side. Drill in a little over one inch and make your hole at a bit of an upward angle, helping the sap flow downward into the bucket.
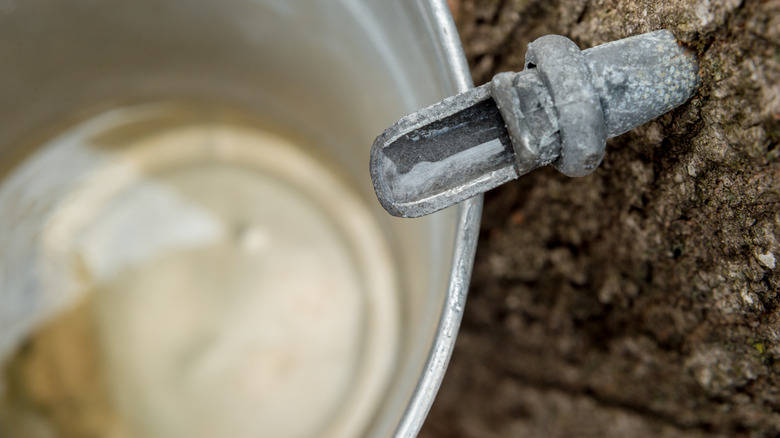
Next, you'll insert the tap. Choose a stainless steel tap that's specifically designed for sap harvesting. You can hammer it into the hole. You'll either have a tube to attach to the tap, or you can let it drip directly into a stainless steel bucket that you'll hang just below the tap. You can even hang the bucket right on the tap. These sap collecting buckets often come with lids to prevent debris from falling in. If the temperature has been cooperating, you may even start to notice sap flowing right away.
You'll need a lot of sap
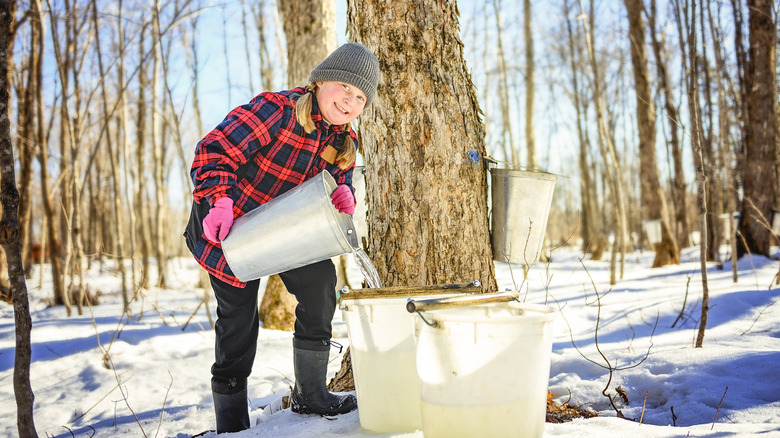
Sap is flowing and you're getting excited. You may even have a few inches filling up your bucket and you're thinking about how much maple syrup you'll be able to bottle this spring. It's best to wait a little longer, as when you reduce it, even a large quantity of sap makes very little syrup. One big reason that real maple syrup is so expensive is that approximately 40 gallons of sap makes only one gallon of maple syrup.
To prevent bacterial growth, empty your bucket at least once a day, but twice if it's located somewhere warm or in the sunlight. You can bury your buckets in snow to keep them cool or refrigerate them. Once the sap is out of the tree it's prone to bacterial growth, so it's best to keep those buckets emptied and the contents refrigerated until you're ready to boil it, which should take place as soon as possible. Once the sap is extracted — ideally within a few days after harvest — you'll want to begin cooking it.
Use a a wood-burning open fire
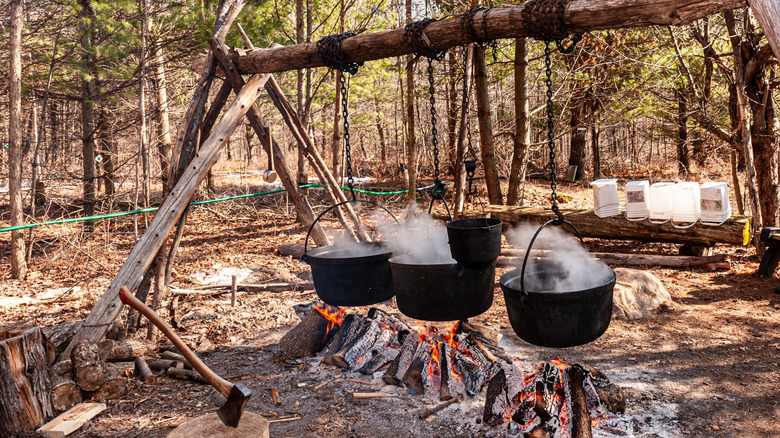
For that classic smokey maple taste, I recommend reducing your maple syrup the old-fashioned way. Yes, in a pinch you can certainly use a stovetop pot or slow cooker, but to be authentic, consider a wood-burning fire in your backyard. Create a wide base and stack your wood high as you will need to keep that fire going for quite a long time. Do this on a day where you can spend some time outside monitoring your fire, or within view from a window inside your home. Take precautions to build your fire in a fire-friendly zone, away from dry brush or man-made structures.
Avoid using softwood which burns quickly and stick to hardwood which will last longer. The goal is to have steam constantly coming out the top of the pot. This will remove the water content to leave behind a thicker syrup. If there is no steam, then you'll want to build up your fire. If you see the syrup rapidly boiling or smell burning, then you'll want to level out the fire coals.
A wide pot works best
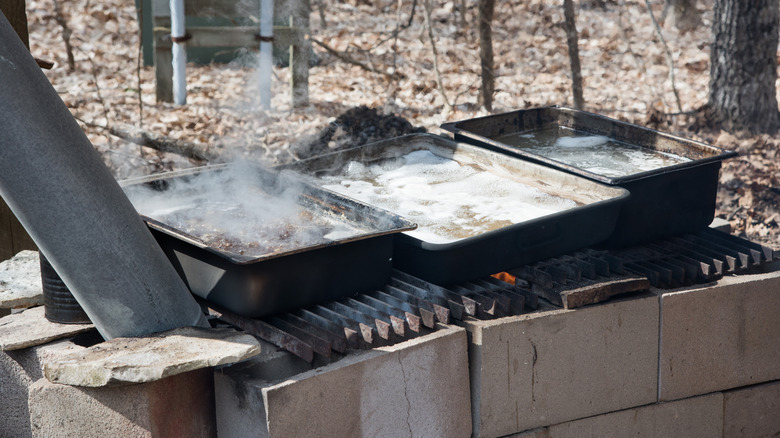
If available, use a wide cast iron pot to boil down maple syrup. They hold up well to an open flame and distribute heat well. However, work with what you have as any fire-safe pot with a wide mouth will do, though some may be more prone to burning the sugar. Hang the pot above the flame, far enough so that the syrup isn't burning or rapidly boiling, but low enough to ensure a steady cloud of steam is rising from the surface.
Because the top is uncovered, you can use a screen to protect the sap from falling leaves, ash, and other debris. Just be sure to clear it off in case of buildup. The size of your pot or pan matters for reduction, because the more surface area you have, the faster water can escape. Do not cover the top with a lid. This defeats the purpose of cooking it, as the goal is to let steam out, not to heat the sap.
Be patient
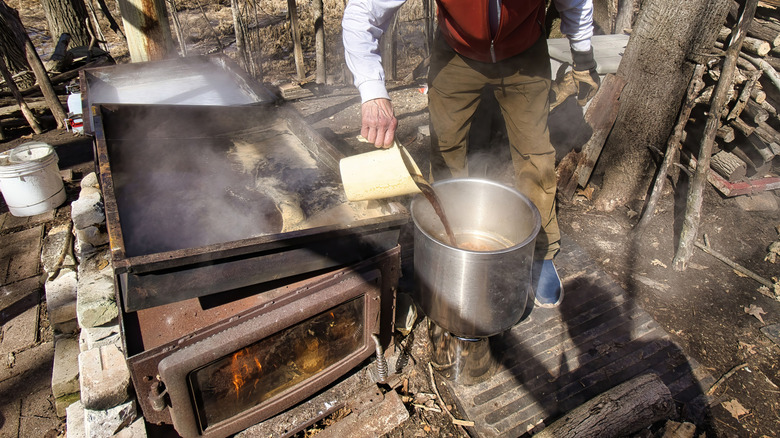
Maple sugaring is hard work, but it's also a waiting game. Reducing large quantities of liquid takes patience and time. You'll want to reduce your sap on a day that you're home, so you can tend to your fire or check the stovetop pot. Cooking times vary depending on the pot you're using, whether you're cooking over an open flame, the temperature your sap is cooking at, what time of year the sap was collected, and the concentration of the sap when it comes out of the tree. Different grades of maple syrup are a result of varied harvesting times throughout the season. Reducing just 10 gallons of sap can take anywhere from 3 to 10 hours, but I'd budget for about 8, at least for your first go-around.
This doesn't mean you can just set and forget. For safety reasons, you'll want to monitor your fire or stovetop pan. If you notice any burning, it's important to attend to your sap, and you'll want to be ready and waiting once it reaches desired consistency. Don't stir it, although it may be tempting. Keep the sap boiling between 212 and 218 degrees Fahrenheit until it's fully reduced.
Filter the syrup
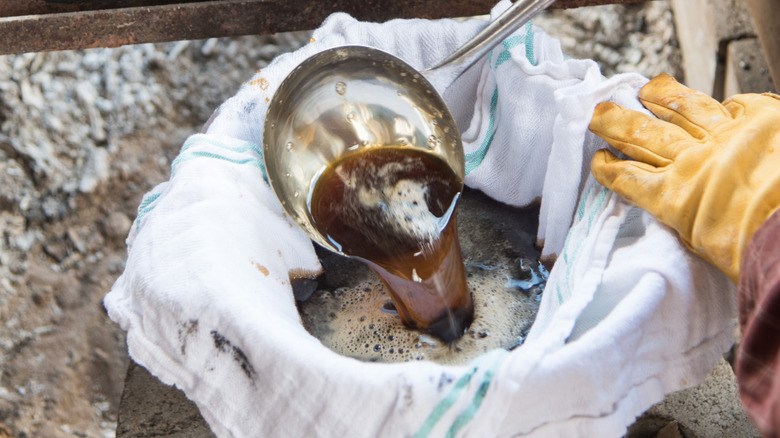
Once the sap is reduced, you're ready for a taste test. My favorite part about visiting sugar shacks as a kid was that warm mug of maple syrup they'd give you to enjoy, coupled with the sweet steamy aroma of woody sugar. Be careful not to burn yourself, and let the sap cool before handling it. Also, you may notice upon your taste test that there are little bits of debris left over from the process. This is not something unusual; the liquid came from a tree, and you likely cooked it outside, so it's only natural you'd find bits of dirt, wood, leaves, and ash mixed into the syrup.
My personal thought is that a little ash never hurt anyone, but it's always safe to filter it out. Buy yourself a syrup filter, or use cheesecloth for a small batch. This should remove anything that isn't syrup, and it will make your tasting experience that much more gourmet. The result? Pure maple syrup, sans sticks.
Disinfect your bottle
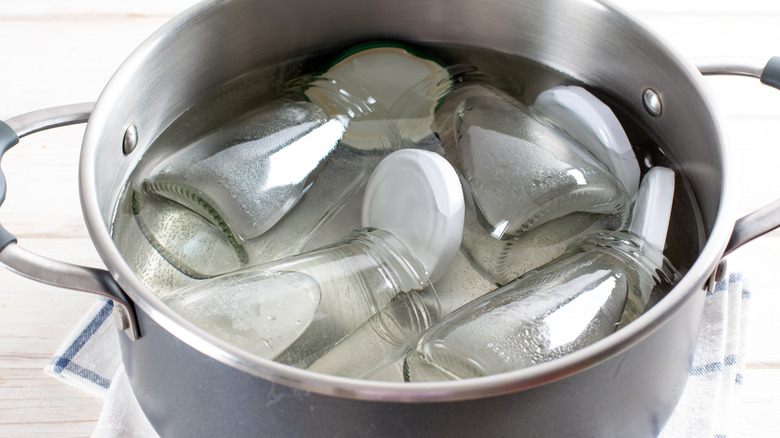
After collecting the sap, you may want to use it all right away. It's likely you didn't end up with much, so guzzling it down shouldn't take too long. If you've produced quite a bit, and you'd like to store it, consider canning as an option. The process is similar as the one you would do with pickles or homemade jam. If you've canned before then you may already understand the importance of disinfecting everything you're working with. I would recommend boiling the bottles or jars, seals, and lids, and then transferring the hot maple syrup to the sterilized canning jars right away to reduce the chance of any bacteria sneaking its way in there.
Alternatively, you can use a pressure canner to make your jar of syrup shelf stable. Be sure to let your pressure canner jars cool naturally instead of popping them in the fridge. Once canned in a glass jar, your syrup should last for years.
Store it properly
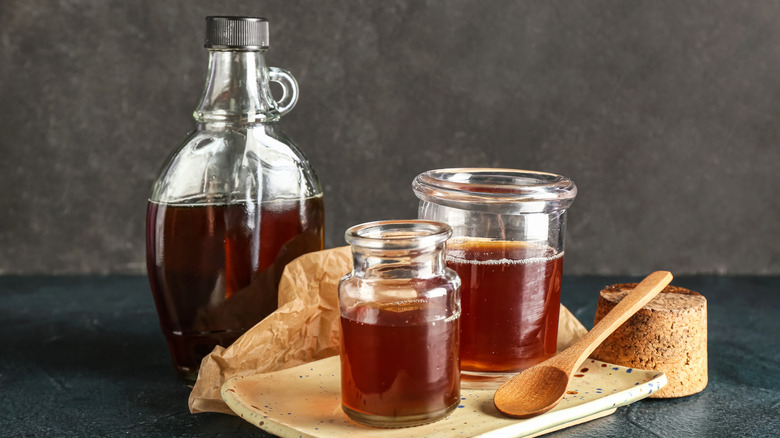
Maple syrup and honey are similar in many ways. They are both sticky, sweet, and come from the natural world, but unlike honey, maple syrup doesn't have antibacterial properties. This means that it can't live in your tea cabinet or pantry like honey might — it needs to be refrigerated once it's been opened. Maple syrup can last in your refrigerator for about a year once it's opened before you'll want to consider tossing it, but who hasn't used their gallon of syrup by then anyway?
Prevent any additional bacteria from making its way into the jar by pouring it instead of ladling it out. I like to use narrow-mouth bottles for this very reason. You can also freeze maple syrup to lengthen its expiration. Feel free to freeze, thaw, and refreeze maple syrup as needed. If you think about it, sap goes through that cycle naturally anyway. Just be sure there's no cross-contamination involved before you pop it back into the freezer, and always use a freezer-safe container.
Use it on everything like a true Vermonter
Now that you've made maple syrup like a true Vermonter, it's time you consumed it like a true Vermonter. Forget about pancakes — there is so much more versatility involved in this sweet ingredient, and it's time you expanded your culinary horizons. Start by using maple syrup to sweeten your drinks like tea, coffee, and hot chocolate. Next, move on to using it in your baking as an alternative sweetener. Once you've gotten the hang of that, we will move onto dressings and sauces. If you're not marinating your meat or tofu in a maple-sweetened sauce, then you might just be a flatlander.
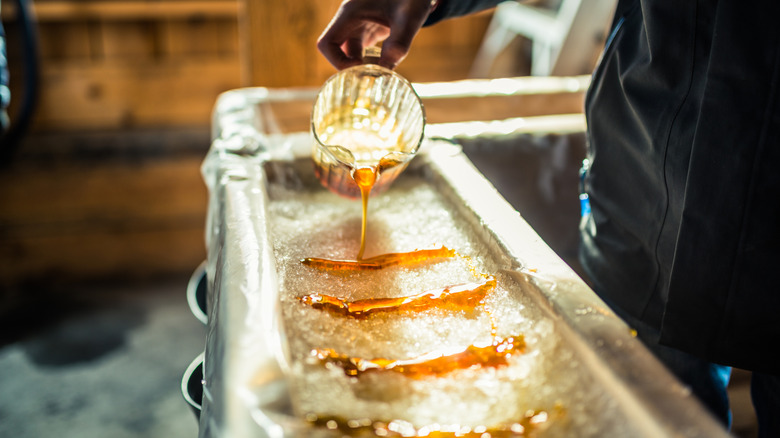
Go full Vermonter and use maple syrup to sweeten your apple cider or switchel. It's an absolute must for sweetening your fresh apple pie, but remember you'll need to enjoy it with milk, cheddar cheese, or vanilla ice cream. When in doubt, try sugar on snow, which is a Canadian and Vermonter's way of enjoying semi-frozen maple syrup. Throw on your flannel, some Mukluks, find your tree, and let's get tappin'.