10 Mistakes Everyone Makes With No-Bake Cheesecake
There are plenty of reasons to love cheesecake, and there's no shortage of delicious cheesecake recipes to make. Making a baked cheesecake can be a chore though, especially for novice bakers. Plus, on hot summer days, putting on the oven is not the best idea for staying cool. Thankfully, with no-bake cheesecake (also sometimes called fridge cheesecake), you can have all the creamy satisfaction without the added heat. No-bake cheesecake is the perfect answer for a summer dessert. It's cold, luscious, and only requires some time in the fridge to set.
One of the best things about no-bake cheesecake is that it's accessible to people who have a hard time, or little experience, with baking. It was one of the first cake recipes I learned to make as a child, yet it's a timeless and consistently well-loved cake that I still make now for my dessert business. It's relatively forgiving, and you won't need to worry about it rising, burning, cracking, or drying out. This doesn't mean there aren't ways it could go wrong though. There are a few things you do need to take note of that people often miss. As someone who makes no-bake cheesecake professionally, I've made countless mishaps and encountered every problem possible. Don't worry though, once you know what to look out for, it can be a breeze. Here are some of the mistakes everyone makes with no-bake cheesecake.
Using the wrong cake tin (must be a springform pan)
One of the most important things to put in place before you begin your no-bake cheesecake is to check that you've got the right cake tin. As your cheesecake will take the shape and set inside the tin or dish it's in, it crucial that cheesecake can be removed from the container with ease. This means you have to use a springform pan. This pan allows you to remove the sides, while keeping the bottom intact. This might sound obvious to seasoned home cooks, but you'd be surprised how many times I've had colleagues in the kitchen reach for the wrong kind of cake pan — especially as springform pans can often look similar to solid cake tins if you're not concentrated.
Once your cheesecake has set and is ready to be eaten, all you need to do is release the sides. Then, if you're feeling confident that the crust is solid enough to hold your cake, you can slot in a spatula to carefully remove the whole cake and transfer it on a plate, or a cake stand. However, you don't have to do this step at all. Simply serve your cake with the bottom part of the pan. You can transfer it to a plate with the bottom still attached. You wouldn't be doing anything wrong as that's what it's intended for.
Sticking to plain cheesecake when there are so many ways to flavor it
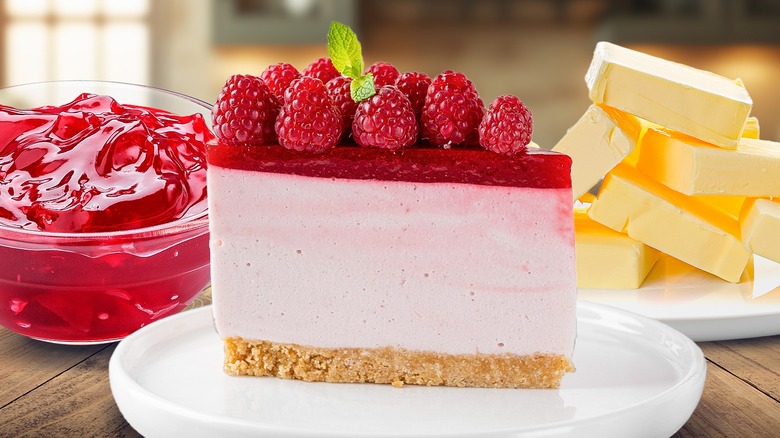
No-bake cheesecake is sometimes relegated to the retro or old-fashioned dessert corner, and people sometimes don't consider it to be a real cheesecake. In truth, no-bake cheesecake is different from baked cheesecake, but that doesn't make it any less delicious. Arguably, it is a variety that is really easy to flavor. Of course, if your preference is plain cheesecake, go for it, but choosing no-bake cheesecake is the opportunity to get creative with flavorings. You can customize it in countless ways. Make a decadent chocolate cheesecake by melting chocolate into your cheese mixture, and you can even marble chocolate and vanilla together by splitting your cheese batch in two. You can also go with a lighter, lemon cheese filling by adding lemon juice and lemon zest.
It's even easier to add flavor to the cheesecake topping. Top it with fresh fruit like strawberries, blueberries, or some sliced up kiwis. Or, turn your fruit into a compote to use as a topping. If you don't want the hassle of fruit preparation, you can even slap on some jam, or some store-bought dulce de leche and sea salt for a salted caramel delight. If you want to try something completely different, give these candy cane no-bake cheesecake bars, or chocolate peppermint cheesecake a try.
Using less butter than you need for the crust
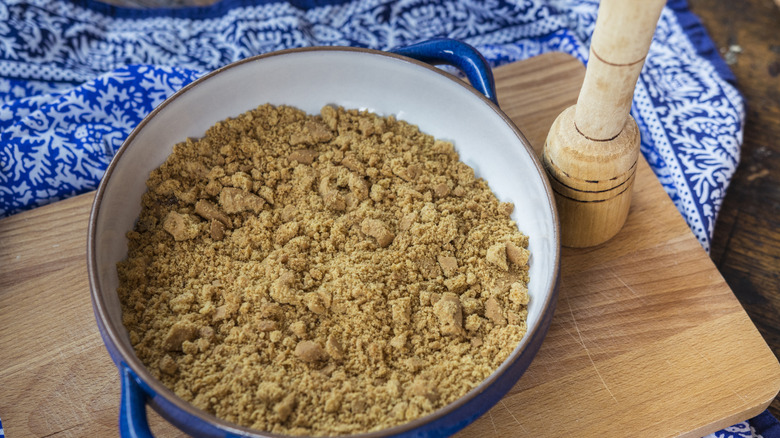
The no-bake in no-bake cheesecake is very literal and applies to the whole cake, including the crust. Sure, you can separately bake your crust but that defeats the whole point. Like any cheesecake crust, a no-bake crust is easily formed by smashing up some graham crackers, or whatever biscuit you prefer, and mixing it with melted butter. This mixture is then pressed into the cake pan to form a thick, hard layer onto which your cheesecake mix will be poured. Usually, no-bake crusts contain more butter than a baked cheesecake, so don't make the mistake of following a baked cheesecake crust recipe.
In a no-bake crust, the butter works to bind the crushed biscuit as it cools down. This helps it harden and become crisp, just as butter hardens when cold. You need this cake to have a solid base, so whatever you do, don't skimp on the butter. Follow your recipe ratios accurately and if you're in doubt, add a little more butter. The whole biscuit mixture should be totally moistened, so add a little melted butter at a time until you reach that.
Not giving the crust a chance to solidify

Once you've pressed your crushed biscuit and butter mixture into your springform pan, you'll have your cheesecake crust. But, you must let it set and harden in the fridge first, before pouring in your cheese mixture. Don't skip this step thinking that the crust looks hard enough once pressed. It's not going to be able to carry the weight of the filling, and it may crumble if you don't let it get cold first.
I always start my cheesecake making with the crust and leave it in the fridge while preparing other ingredients. If you plan correctly, you won't be delayed by it. With a little forethought, it can be a breeze to make. If I know I'm going to make a cheesecake in the afternoon, I prepare the crust in the morning. Two hours in the fridge will do the trick nicely, but if you're a little more impatient, at least half an hour is needed.
Choosing the wrong kind of cheese
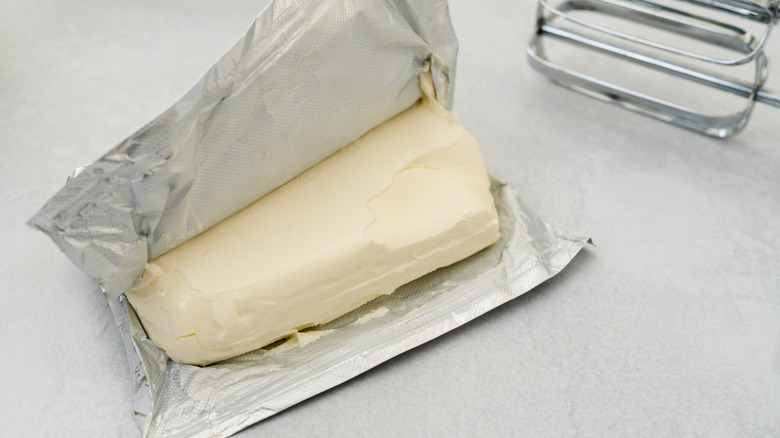
With no-bake cheesecake, you have to be quite specific with the type of cheese you use. You may already know that you should look for cream cheese, but not any cream cheese will do. You'll need to find the block cream cheese, and not the softer, more spreadable kind. There are ways around using a softer cheese, but they require you to set your cheesecake in the fridge for much longer. Alternatively, you'll need to use more gelatin and other types of stabilizing ingredients. If you want to try something a little fancier for your no-bake cheesecake, try this goat cheese cheesecake recipe, where you mix some goat cheese into your cream cheese mixture, and beat them together. That way you'll get the best of both worlds — the flavor of goat cheese and the velvety texture of cream cheese.
I personally prefer the taste and lightness of cottage cheese in my no-bake cheesecake, and it works, but with some caveats. I use creamed cottage cheese, along with powdered gelatin, and I set my cheesecake in the fridge for a long period of time, sometimes for over two days. This allows me to use softer cheese, but it really does take ages to set enough to hold its shape. You'll need a major dose of patience if you use soft cheese, however, if you opt for solid cream cheese that comes in a block, your cheesecake will solidify in less than a day.
Using ingredients that are too cold or too warm

In many baking recipes, the temperature of the ingredients you're working with is important, and this also applies to no-bake cheesecakes. In fact, temperature is crucial to the final outcome. Most dessert recipes suggest using room temperature ingredients, and though this is a valid advice for no-bake cheesecakes, there are some things you should have in mind. If it's a warm day, this might not be the best advice to follow. One of the common mistakes people make with no-bake cheesecake is to use warm cream cheese. If you leave it on the counter for too long, especially on a warm summer day, it might soften too much, which might result in a runny cream cheese filling.
However, if you use cream cheese that's too cold, it might not whip up easily with whipped cream, which could leave unpleasant lumps in your cheesecake. That's why you need to use some discretion. If your fridge runs really cold and the cream cheese is colder and harder than you'd want, then leave it out at room temperature, but not for too long. Another alternative that I've found that works quite well is to whip cream cheese separately from whipped cream. This way you can work out the lumps in the cheese without overbeating the cream. Then, combine them together with a spatula.
Thinking you don't need to use a stabilizer
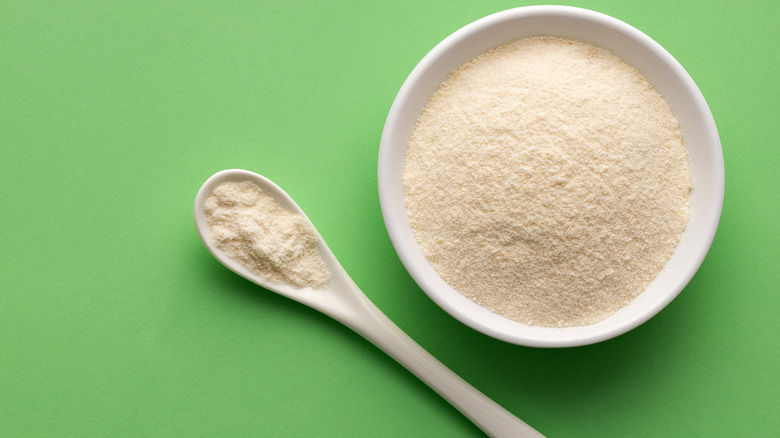
There are plenty of recipes for no-bake cheesecakes that don't call for any stabilizers. These mostly rely only on the cream cheese and time in the fridge to set. Unless you've followed an accurate recipe to the tee and ensured the right conditions, not using stabilizer can lead to a lot of problems with the most obvious being a runny cheesecake and a major disappointment when the serving time comes. In my opinion, I think you should always use a stabilizer like gelatin or agar agar. These ingredients have no flavor and work to support your cake as it sets.
The cake will still need sufficient time in the fridge, but the stabilizer helps everything to solidify as it should. You have to be careful not to overdo it though, as adding too much gelatin or agar agar can make your cheesecake rubbery. The amount of gelatin will differ whether you're using powder or leaves, and agar agar uses different measurements altogether. This is one place you can't improvise, and it's best to follow a trusted recipe's ratios.
Rushing the setting time in the fridge
Not giving your cheesecake enough time to set is perhaps the mistake that is the most understandable of all. You've done all the labor of making a delicious looking no-bake cheesecake and you are dying to have some. You may be thinking that surely after an hour or two, it should be ready. This is where you'd be wrong. Rushing the setting time of a no-bake cheesecake is a recipe for disappointment. It really takes a long time for the cheese to properly set in the fridge, and in my experience, no less than six hours will do.
To check if it's firm enough, most people try giving the cake a poke on top to check if it feels firm, or shake the whole cheesecake to see if it jiggles. Sadly, these methods are not reliable. The cake may have set on the outside, but inside can still remain runny and liquid. A long setting time is needed, even if you've used gelatin. The last thing you want to do is cut into the cake and find the center has totally flopped over. You are really going to need to have the patience of a saint. It will be worth it in the end. Try to make it the day before you plan on serving it and attempt to completely forget about it until then.
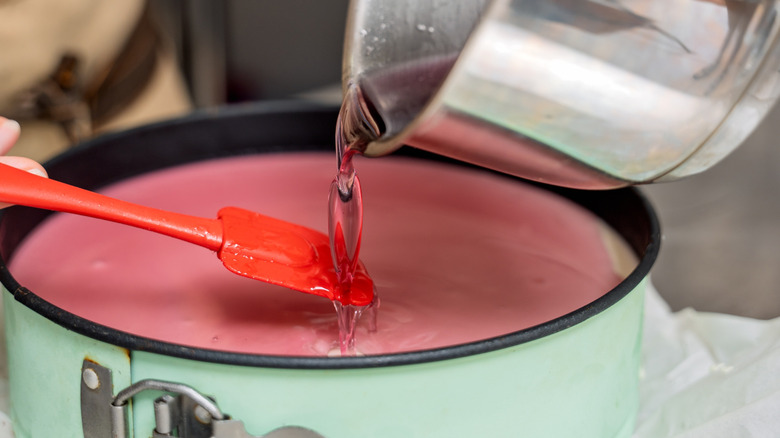
Adding in the gelatine solution while it's hot
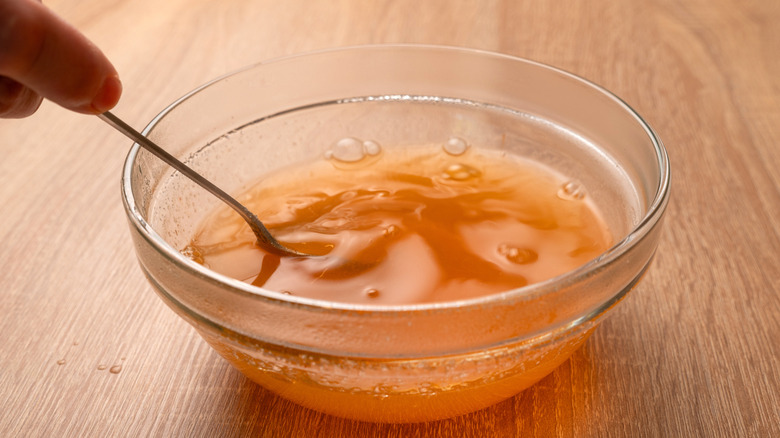
If you're using powdered gelatin, there are a few things to watch out for. Powdered gelatin can be pretty volatile, and I find it needs three stages to work successfully. Firstly, you need to rehydrate it in some water. Give it a couple of minutes to absorb the water and become a little thick. Then, you need to warm it up so the mix melts and becomes homogeneous. These steps results in a liquid blend and allow you to work the gelatin into your cheese evenly, otherwise, it will be a lumpy mess with inconsistent results. The catch is that you should pour warm, not hot, gelatin into your cheese mix.
You need to give your gelatin a chance to cool down before incorporating it with cheese. It's another thing to plan ahead, but it will serve you well, as adding hot gelatin leads to soft and sometimes runny no-bake cheesecake. Start prepping the gelatin before you start whipping your cream, or you can do at the same time that you make your crust. Consider these to be the two parts of the cake-making process that need time to cool down before you can go on with the rest.
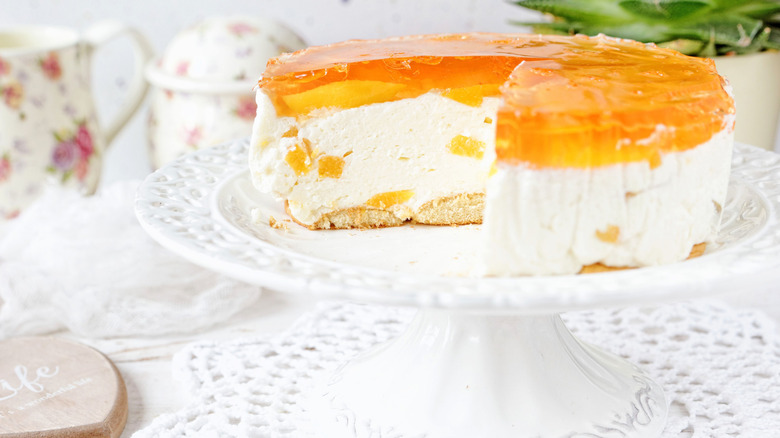
Thinking you don't need to decorate a no-bake cheesecake
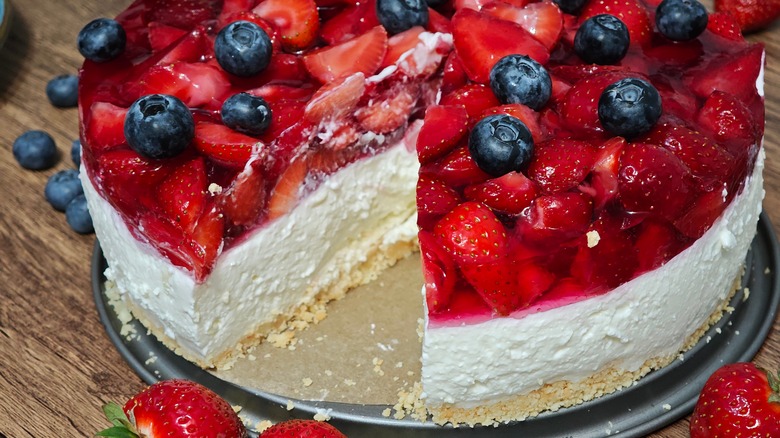
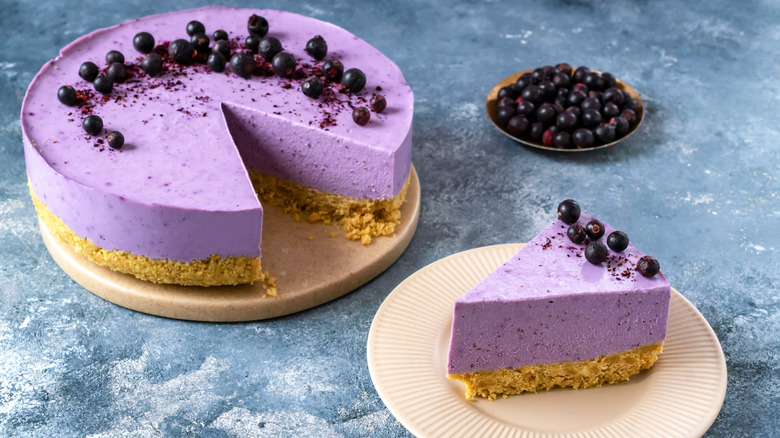
You can decorate a no-bake cheesecake in more elaborate ways than a baked cheesecake. That's why it's a shame to make a bare no-bake cheesecake when there are so many opportunities to make it look visually striking. Other than decorating the top with fresh fruit or jam, there's the classic jelly topping, which entails setting the cheese layer first, and then adding a liquid jelly on top. You can match the jelly flavor to the flavor of your cheesecake, and even fill the jelly with chunks of fresh fruit. Another classic is marbling, which you can do by pouring chocolate sauce and using a knife to swirl it into the cream cheese. You can also use berry coulis to make a beautiful red swirl.
There are many other decorating options. One of my favorites is to make a two-tone cheesecake by stacking two cheese layers of different colors and flavors. Just make sure you let the first layer set before adding the second one. Some possible combinations include vanilla and mango or berries and cream to create flavor-packed, two-tiered cheesecakes. If you want to get fancy you could also add some tasteful edible flowers on each slice or in the center. For a holiday-themed cake, make a Christmas-inspired wreath with some fresh rosemary, cranberries, and a dusting of icing sugar.