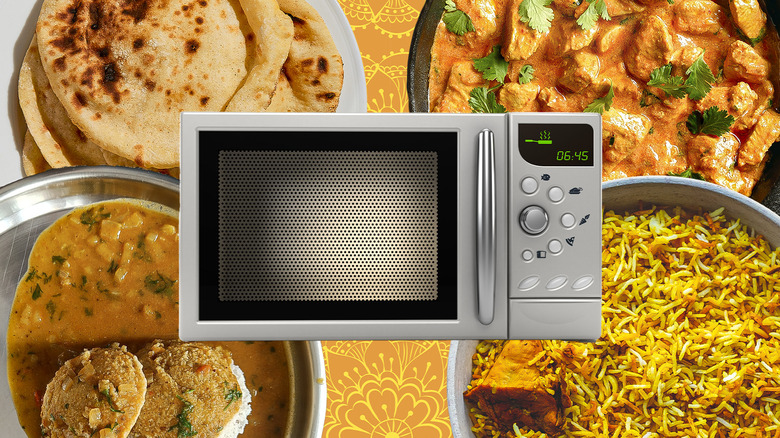
10 Things To Avoid When Reheating Indian Takeout At Home
Having grown up in a culture where tossing away leftovers is frowned upon, most Indian foods tend to be long-term guests with leftovers waddling across the refrigerator for three to four days at a minimum. However, this served as little motivation for me to fine-tune my reheating skills while I was growing up — any attempts at reheating a prized vat of biryani rice were often prefixed by cautionary warnings from my parents.
Having finally started running a kitchen of my own, I have been able to observe the difference that patience and restraint can make when reheating Indian foods. Try blasting your curries with extreme heat, and you will find it rebelling with a thickened texture. Pakoras and other deep-fried foods do not take too kindly to the microwave, while the aromatic haven of biryani can devolve into a brittle mess if the basmati rice grains are not treated with respect — and a touch of moisture. To help you steer clear of all the mistakes I have made, I channeled my own experiences into a comprehensive guide of what not to do when reheating Indian takeout at home.
Reheating curries over scorching heat

As convenient as it can seem to blast your curry on full heat and be done with it, the fallout comes in the form of a compromised texture. I cannot recount how many nights I have been tempted into turning the flame on a little too high to give leftover curries a quick nudge — only to be rewarded with unseemly lumps and clumpy mouthfuls. The smooth velvety texture that I had mopped up with naan bread just one night before? Ancient history.
The science behind this misstep is easy to understand. Indian curries are a potent concoction of spices, herbs, and condiments. The sauce-like texture of this medley can thicken when refrigerated, and it is advisable to add a splash of water or chicken stock to bring it back to life. If you are reheating yours on the stovetop, it helps to keep the heat at medium and stir the concoction often to avoid having it stick to the bottom of the pan. If the microwave seems easier, you'll want to follow the same rules as reheating any gravy. Start by adding some chicken stock to the curry and place it on medium heat in the microwave. Pause at intervals of 45 seconds to smooth over any lumps to retain the original, delightful texture of the curry.
Reheating biryani rice without water

For as far back as I can remember, any special occasion has only ever been complete once someone produces a steaming pot of biryani. While nothing can compete with the aroma bomb of freshly baked biryani, this dish is usually prepared in large quantities — a process made easy once you know the common homemade biryani disasters to avoid.
But the first rule that was drilled into my skull: Never eat biryani rice that has not been heated adequately. My mother's words of caution are well-justified. Rice is known to play host to a form of bacteria that can cause foodborne illnesses. To ensure that the basmati rice doesn't dry out, water is the main character here. Once you have covered the bottom of a thick-bottomed pan with water or stock, you can spread the biryani evenly. After placing the flame on low or medium, place a fitted lid to trap the steam that the water will generate and ensure uniform distribution of heat.
If you find yourself leaning in favor of the microwave on busy weeknights, a couple of workarounds can help. Start by removing your desired portion of the leftovers into a microwave-safe dish and cover it with a damp paper towel. Treat it to medium heat in the microwave for short bursts of 30 seconds until you are satisfied that all the rice grains have been heated sufficiently.
Heating naan without moistening it first
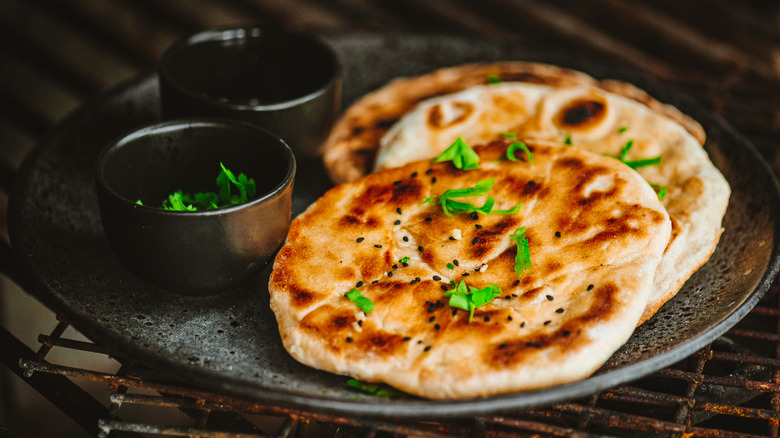
From chasing down the last remnants of chicken tikka masala off your plate to serving as a worthy dance partner for tandoori dishes, naan has endless uses. It's no surprise, then, that naan flatbread has been proclaimed as the best bread that Aldi has to offer. But the key to ensuring that it tastes doughy, but never chewy, the next morning lies in introducing a bit of moisture to the process.
When refrigerated, naan bread can easily turn into a lump of rock — combating this dryness is made easier by adding moisture by way of water or milk. The essentials for reheating naan bread are easy to find. You will need some water to spritz lightly over the naan and then hold it face-down on a heated skillet. Flip it over after some time and repeat the process until the exterior crisps up. For those running short on time, wrapping the naan in a dampened paper towel and stashing it inside the microwave for 10 seconds will also get the trick done.
But the absolute best method of reheating naan bread combines the wisdom of both of these techniques. After briefly heating the leftover naan in the microwave, it helps to place it in a heated pan with some ghee to recapture the same restaurant-like pillowy texture.
Skipping the resting period for tandoori chicken after reheating
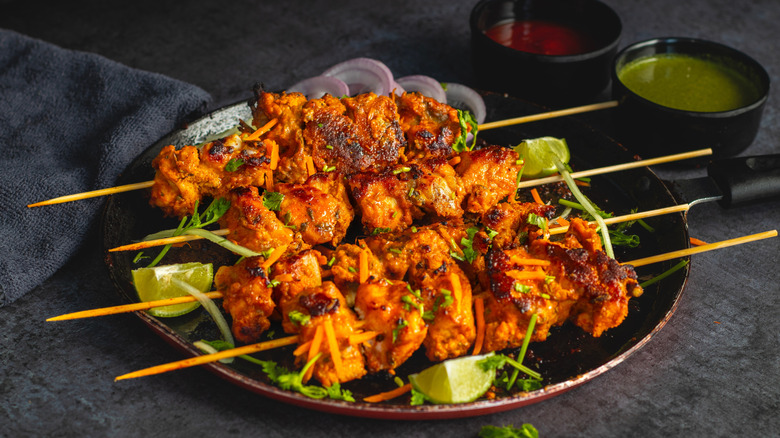
From yogurt to chutneys, there are endless ways to enjoy tandoori chicken. Brushing it with butter is a secret hack that chefs have up their sleeve when making restaurant-style tandoori chicken. For my money, I will take anything that has been served fresh off the tandoor. Jostling for elbow room around a cramped table with your loved ones is optional but somehow, elevates the experience.
If you are looking at recreating the same magic the next day for lunch, you will need to start by addressing any loss of juiciness in the meat first. Since this dish is prepared on skewers, it can toughen up after an extended bout in the refrigerator.
The easiest way to get the job done is to treat each side of your tandoori leftovers to an oiled skillet for three to four minutes. Once heated, the trick retaining the juices is to allow the meat to rest for a while. You can even choose to add a light glaze of butter during this time to dial up the juiciness of the meat. This resting period allows the juices to redistribute, so that every mouthful offers up a moist, succulent treat.
Leaving samosas in the microwave for too long

There's that moment when you feel the crispy shell of a samosa giving way with a delightful crack so that you can discover the savory stuffing within — the moment when you know in the depths of your soul that you won't be stopping after just one. Although, in all fairness, once you have mastered the art of stuffing and folding samosas like a pro, you'll have a hard time ordering takeout again.
If you couldn't bring yourself to leave any crumbs on the table, there are ways to revive your leftovers to the same crispy perfection the next day. If you are looking for a shortcut, samosas can be reheated in a microwave with constant supervision. But the fallout of taking your eye off the ball for a matter of seconds can result in a rigid outer shell that feels about as delightful as biting into sandpaper.
As a rule of thumb, it helps to check on your plate of samosas every 30 seconds once it has been parked in the microwave. If you'd rather not run the risk of turning your samosa shells wooden, it helps to take the party to the oven instead. After preheating to 350 degrees Fahrenheit, place the samosas on a wire rack and bake for around 10 minutes until the shell and the inner filling have been adequately heated.
Using a microwave instead of an oven to reheat pakoras

There is something about the romanticism of a rainy day that prompts Indian families to conjure up pakoras — lip-smacking vegetable fritters that are deep-fried to golden-hued perfection and then served alongside a steaming cup of chai. But while the prospect of munching on these fritters while watching raindrops patter on the window can be exciting, the prospect of dealing with leftovers? Not so much.
In a bid to avoid adding more oil to this deep-fried food, I tend to avoid stovetop methods of reheating pakoras. But microwaves, while convenient, are no friend to leftover pakoras, either. It is nothing personal: Microwaves simply function by heating the water molecules within food. When this principle is applied to deep-fried leftovers, such as pakoras, the heating occurs from the inside and turns the once-crispy exterior into a soggy, disappointing texture.
So, what can you do instead? If you love making pakoras in the air fryer instead of deep-frying, you can take heart in the fact that you can turn to this trusted device again when it is time to resuscitate leftovers. After preheating to 350 degrees Fahrenheit, place the pakoras in an even layer at the bottom of the basket and let 'em feel the heat for five minutes or so. The same technique can also be extended to the oven, where you will be preheating to 375 degrees Fahrenheit and then letting the pakoras sit inside for around 10 minutes until the exterior feels crispy again.
Applying too much heat too quickly to butter chicken
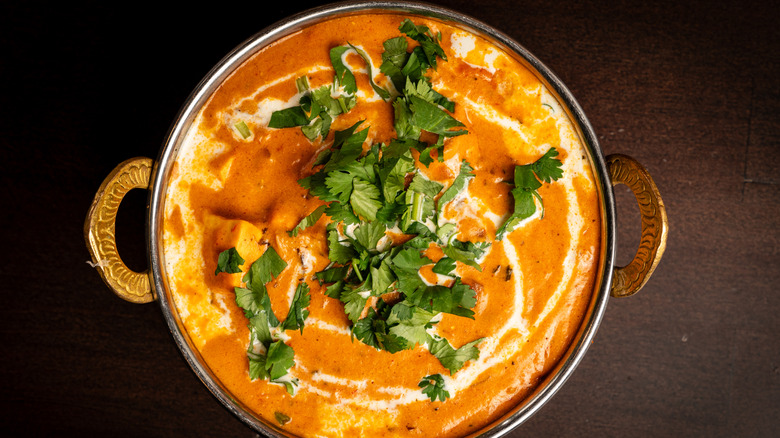
It is hard to come across any Indian takeout menu that doesn't list butter chicken among its specialties. A bed of charred tandoori chicken treated to a decadent, buttery sauce: What's not to love? But if you ended up ordering more butter chicken than you could handle in one sitting (and who hasn't?), the leftovers won't need much coaxing to regain their creamy flavors — as long as you apply heat with caution.
More is definitely not merrier here. Creamy gravies, such as butter chicken, require a gentle hand on the heat. When blasted on high heat quickly, the ingredients in the sauce can start separating and become vulnerable to burning. Likewise, the chicken won't fare any better, either. Since tandoori chicken is skewered and then lightly charred, being subjected to high heat can turn the texture dry and rigid.
After several times of biting through the leathery chunks of chicken and thickened gravy, I set out in quest of better alternatives. I found that gently simmering your butter chicken leftovers on the stovetop allows the gravy to heat uniformly. To keep the gravy from sticking to the bottom of the pan, it helps to stir occasionally. If the texture shows any signs of thickening, you'll need to have some broth on hand to revive the concoction.
Reheating dosa without a non-stick pan
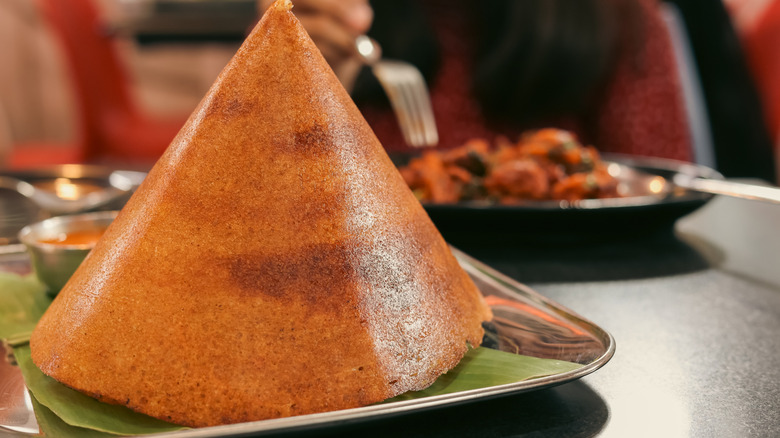
Dealing with dosa leftovers is not a problem that most Indians usually have to ponder. After all, the crispy, air-like texture of this rice crepe means that every last crumb is usually polished off in one sitting. But those who want to save some dosa leftovers for the next morning will want to bookmark the best methods of keeping their texture intact.
For starters, dosas cannot be popped into the microwave for swift reheating. By heating the water molecules in the food, microwaves can turn the signature crispness of dosa into a limp mess. Most Indian kitchens generally have a cast-iron skillet designated as the "dosa tawa" with the sole purpose of heating and reheating dosas evenly.
A non-stick skillet will stand you in good stead when attempting to revive your leftovers to ensure that the crepe isn't glued to the bottom of the pan. You can choose to add a few drops of oil or ghee to add some buttery crispiness to the exterior of the dosa for that audible crunch as you dip it in chutney and enjoy the leftovers over a leisurely weekend morning. Sambar, or vegetable stew, is a classic accompaniment with dosas. If you have brought some home along with the dosas, it can be easily reheated on the stovetop with a splash of water until it starts bubbling.
Reheating idli without a steamer
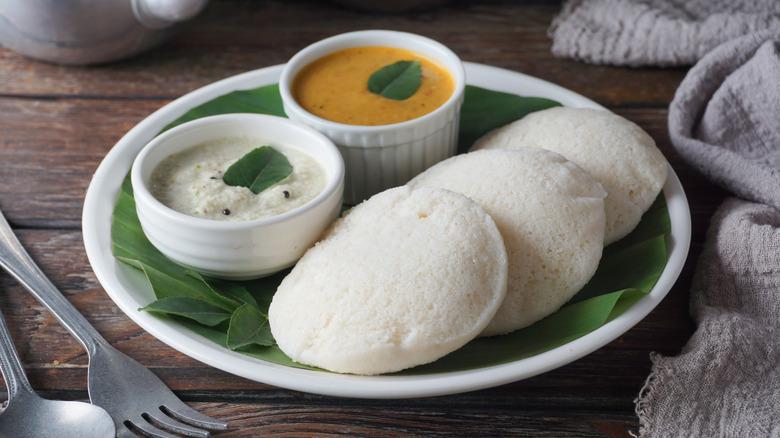
When it comes to reimagining the possibilities of what to do with leftover idli, you will find no dearth of creativity. I love using these fermented rice cakes as the base for other recipes — such as swapping the chicken in chicken Manchurian for bite-sized chunks of idli. If you aren't too sold on the idea of sweating away by the stove after a late night, your idli leftovers can make for a worthwhile breakfast as long as you are using the right tools.
Sending leftover idli to the microwave can compromise their spongy texture — no surprises here. Since idli is prepared in a steamer, it helps to turn to this gadget again. After filling the steamer with water, pile up all the slices of idli inside on a stand. After heating with the lid on for two to three minutes, you can open the steamer to discover idlis that taste almost fresher than they did at the restaurant.
In case you are loyal to the microwave, you will want to add some moisture to avoid drying out the idlis. My mother likes to place a cup of water next to the plate to create an alternate source of moisture. I have observed her doing this with a wide array of foods, including pizzas, and discovered that the results are doughy-soft every time, with no signs of drying out.
Using high heat for reviving parathas

You may love your naan bread, but dipping a flaky paratha into butter chicken can be a life-altering culinary experience. From this point onwards, you will discover that parathas work well with almost every kind of Indian food, from yogurt-based dips like raita to spicy curries.
Making parathas at home can be a notoriously difficult process, which is why you'll want to snag yours from the nearest Indian restaurant. If you are keen to take some home and test-drive their versatility with different foods, it helps to stay informed on the right reheating methods. I only ever send my leftover parathas to the microwave when I am looking to chew on leathery chunks — which is never. Instead, a non-stick skillet is my closest ally for reviving parathas. After a quick drizzle of ghee on the base of the pan, each side of the paratha is lightly roasted until it takes on the barest hint of brown. However, heating a pan over high heat is hazardous as it can burn the ghee and consequently, harden the flaky texture that paratha is known for.
The air fryer can also make for a worthy candidate — simply place a single paratha in the basket and turn the heat to 350 degrees Fahrenheit. After three minutes, you will be able to take out the basket to discover warm, revived parathas with a delicious hint of crispiness.