10 Tips For Making A Delicious Icebox Cake
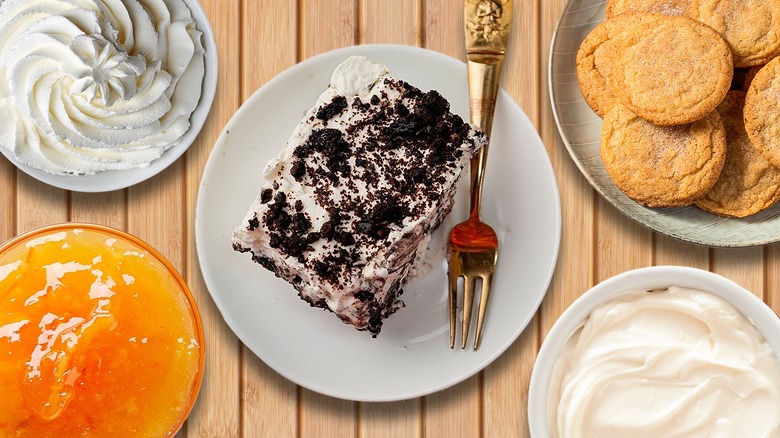
When the heat of summer arrives and the very last thing you want to do is turn on the oven, the icebox cake – the quiet hero of effortless desserts — will save the day. A relic of old kitchens and vintage cookbooks, the icebox cake had a low-profile revival among home cooks and foodies — and for very good reason. With nothing more than cookies, whipped cream, and waiting time, you can construct a gorgeous, sliceable dessert that's more impressive than it is difficult to make. The sorcery really happens in the refrigerator, where crunchy cookies become soft layers and whipped cream turns into a rich and custard-like filling.
Despite its simplicity, making an excellent icebox cake is not a walk in the park. A bad cookie refuses to soften and stays stubbornly crunchy, while too-watery fruit or underwhipped cream can bring the whole thing crashing down. Even presentation (something so easy to take for granted in a no-bake dessert) is more crucial than you'd think when you have to unmold and serve it. But when you do manage it, the reward is rich, retro, and downright satisfying.
To help demystify the process and elevate this humble dessert into something truly special, we called on the advice of two pros: Odette D'Aniello, founder of Dragonfly Cakes and expert in layered desserts, and Jessie-Sierra Ross, cookbook author and creator of Straight to the Hips, Baby. Their input can help you turn a simple fridge cake into a summer showstopper.
Pick the right cookie
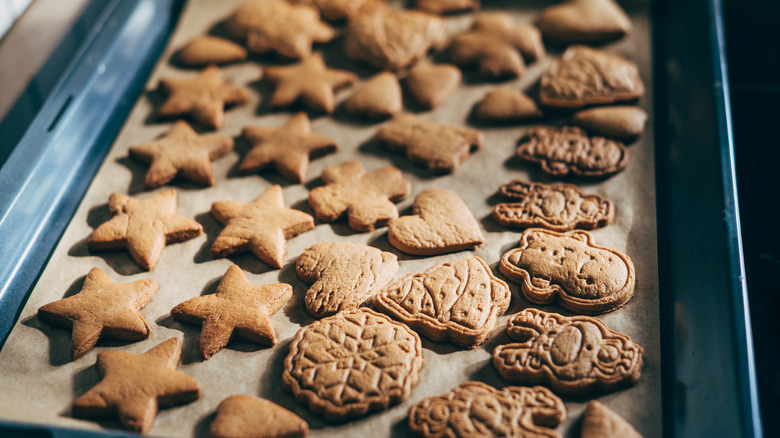
The anchor of an icebox cake is the cookie, and selecting the right one makes all the difference. Both baking professionals emphasize the importance of using thin and crispy cookies. "At home, I reach for classic chocolate wafers, graham crackers, or digestive biscuits — anything thin and crisp that softens well in the fridge," says Odette D'Aniello, founder of Dragonfly Cakes. "I've used speculoos cookies layered with whipped cream and stone fruit [like summer peaches], and it was gone in minutes."
Cookbook author Jessie-Sierra Ross echoes that philosophy. "You want a cookie that can provide just enough structural support and not turn soggy after sitting with the ice cream, pudding, or whipped cream layers," she says. She likes using vanilla or chocolate wafers, ladyfingers, and ginger snaps. The secret is not to use any chewy or very thick cookies, as they won't absorb the cream properly or soften. So while chunky chocolate chip cookies are great, you should avoid adding them to your icebox cake.
Ross emphasizes the infinite options available: "What's really genius about icebox cakes, besides being oven-free, is their versatility. There's the old standard combination: chocolate wafer cookies layered with vanilla whipped cream and cooled until firm, but variations abound!"
Go for homemade whipped cream
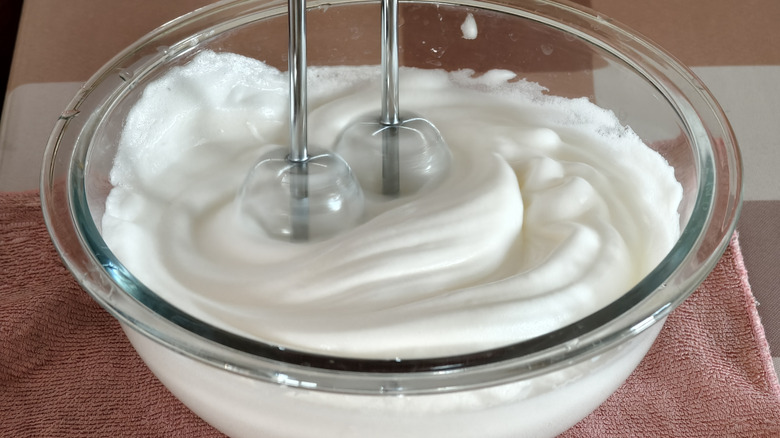
If you're after an outstanding icebox cake, don't go with a tub of whipped cream. Store-bought pre-whipped toppings are definitely handy, but they can't compare to a homemade version. "I always prefer homemade whipped cream over [store-bought]," says Jessie-Sierra Ross. "The texture, taste, and freshness can't be beat." And when you're working with a short ingredient list, each element has to shine. Odette D'Aniello agrees wholeheartedly. "It just tastes better and gives you more control over the texture and sweetness."
Not only can store-bought whipped toppings be too sweet or artificial tasting, but they are also often too watery or overly stabilized. The homemade version will soak into the cookie layer, rather than just sitting atop it. It's also incredibly easy to personalize. Want to sprinkle in a little almond extract? Stir in mascarpone? Soften it or make the peaks hold their shape? You can do it all when you whip it up from scratch. It's not just a topping — it's the heart and soul of the dessert. And when it's fresh, the transformation from plain old layers to something worthy of center stage is part of the alchemy.
Stabilize your whipped cream
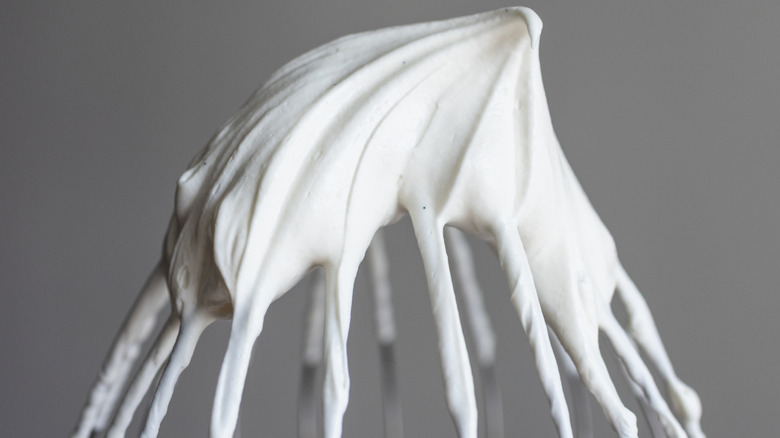
If there's one thing that makes a beautiful, sliceable icebox cake stand apart from flat and collapsed disappointment, it's stabilized whipped cream. Without it, your layers can slip and slide or weep overnight in the refrigerator. Fortunately, there are a few easy ways to ensure your cream comes out perfect.
"The trick to stabilizing from-scratch whipped cream is to use a tablespoon or two of [confectioners'] sugar to keep the airiness for longer," says Jessie-Sierra Ross. She explains that the cornstarch in the sugar will help your whipped cream keep its texture. She recommends using about 1 heaping tablespoon of the confectioners' sugar per cup of heavy whipping cream, along with vanilla extract per your recipe's instructions.
Odette D'Aniello takes it a step further in decadence with her tip. She recommends adding powdered sugar, mascarpone, or another unconventional stabilizer: cream cheese. For long-term stability — if you plan for the cake to hold its structure for more than a day — D'Aniello also suggests blooming a small amount of gelatin in hot cream and folding it in while whipping. It's a matter of keeping your whipped cream from deflating under the weight of the cookies, delivering clean slices and a luxurious bite again and again.
Brick-lay your cookies
If you want an icebox cake that slices clean and will hold its shape, consider how you lay your cookies. Staggering them in a brick pattern rather than laying them squarely on top of each other will create a stronger structure and more level cream distribution.
Odette D'Aniello refers to this process as what she does in the bakery: "I like to layer the cookies like bricks, slightly offset, to give the cake better stability and cleaner slices." Like building a wall, overlapping the seams removes structural vulnerabilities in your cake. If you slice into the cake later, you'll discover the layers hold together more and look neater. It also provides more even bites with the perfect cookie-to-cream proportion.
Jessie-Sierra Ross also emphasizes even layering as a way of avoiding collapse. "If you use too few cookies, it won't have enough structure to keep the cake together after unmolding, and it will fall apart. If you make the layers too thick, the cake can be difficult to cut, and squish out all of those lovely layers of cream, curd, and fruit." To avoid this, she suggests placing the cookies in a single layer with as few gaps as possible. The staggered pattern serves to avoid huge gaps where cream can settle and contributes additional strength to the integrity of the dessert. It's a small adjustment of a method that makes a massive visual and textural impact, especially if you're trying to achieve that magic cross-section moment.
Seal the edges and line your pan
If you prefer that your icebox cake unmold neatly and hold moisture from edge to edge, you'll want to do two things: spread the cream to the edges of each layer and line the pan before you start. Jessie-Sierra Ross describes how often people omit the lining step, with disappointing results. "It's just a shame when an icebox cake sticks to the pan and you can't turn it out in one piece!" she says. "Having that slight barrier between the cake and the pan makes your chances for an uneventful unmolding much higher."
Other than looks, pushing the cream out to the edges of your dish gives you better control over moisture. Not using a cover on the top layer of cookies can cause them to dry out and create stiff edges. By extending each layer of cream to the edge and lining your dish or pan of choice, you lock in moisture and guarantee that the cake becomes one entire unit. The goal is to create a dessert that becomes a cohesive cake with a consistent shape and crumb.
Odette D'Aniello confirms this with her methodical approach to layering. "Start with a thin layer of cream to anchor everything, then alternate cookies and cream until you run out, finishing with cream on top," she says.
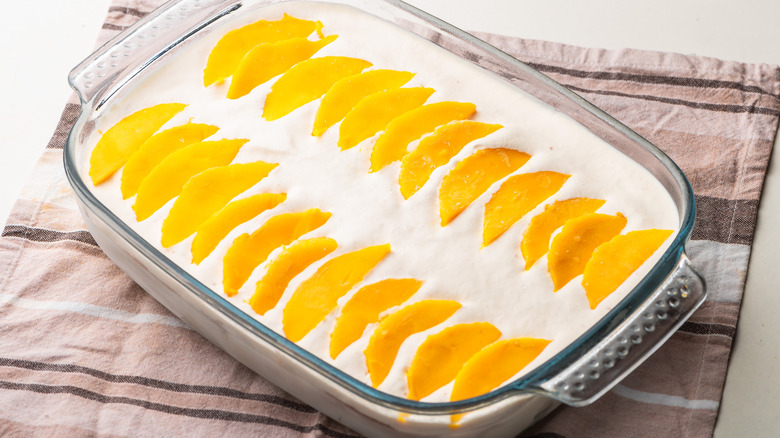
Mind the water content
Fruit can freshen up an icebox cake, but not all of them are created equal. Water content can be a persistent issue, and fruits with a ton of it, like watermelon, kiwi, or citrus slices, can leak into the cream and compromise the cake's structure. Jessie-Sierra Ross says she uses thin layers of fruit, rather than thick ones, and avoids "super watery fruits like melons because their liquid can make everything a little bit too soggy."
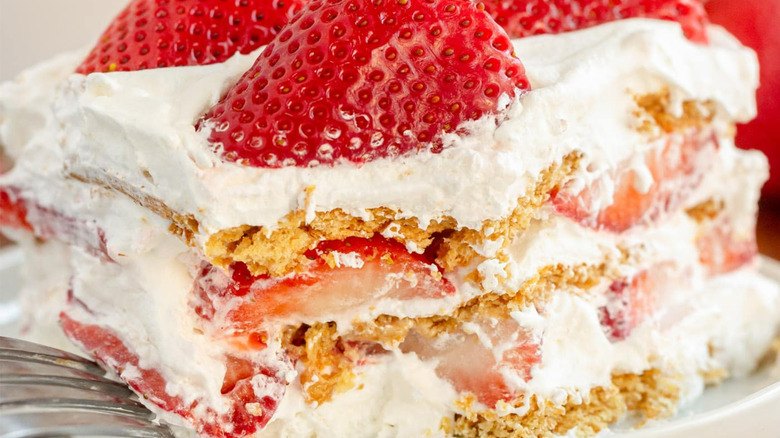
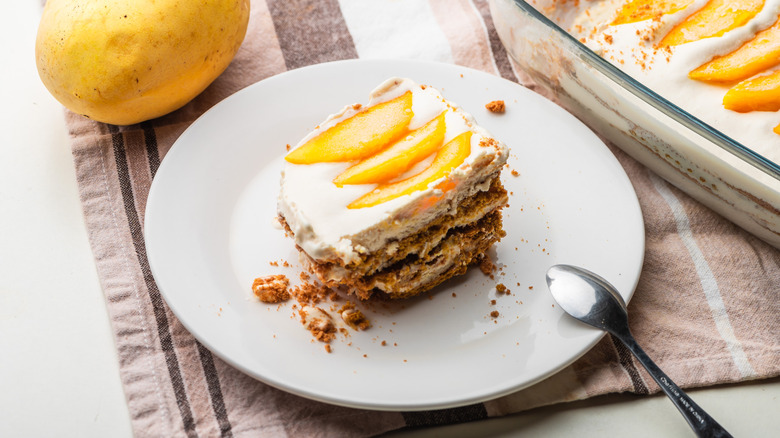
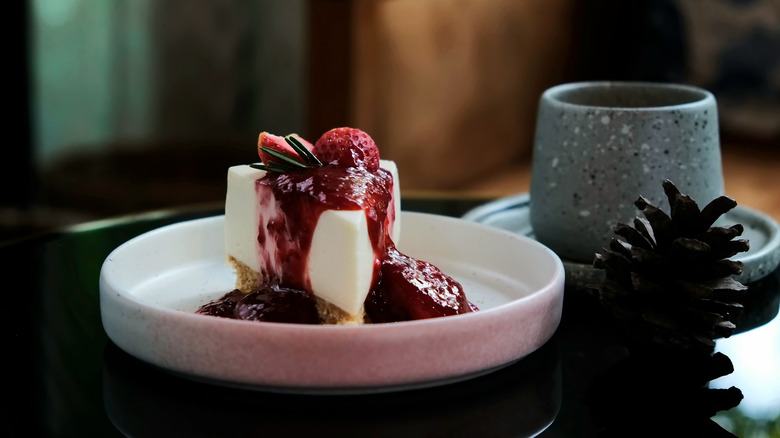
Choose fruit that is juicy yet firm and has a decent amount of flesh, like strawberries, cherries, blueberries, or sliced peaches. They add color and flavor without releasing too much juice. When used sparingly and layered gently, they become part of the cake rather than overpowering it. Odette D'Aniello, similarly, layers her fruits and ingredients intentionally. "I treat each layer like I would a petit four — clean, even, and intentional," she says.
A good rule of thumb is to dry off your fruit before adding it and avoid large chunks that may leak moisture. A few well-placed fruits go a long way. The goal isn't a fruit salad: It's a creamy, cohesive dessert that doesn't turn into a puddle.
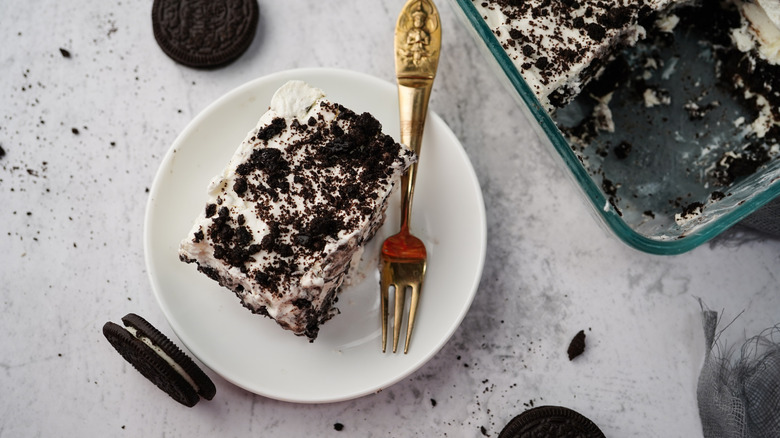
Play with flavors
The chocolate wafer and whipped cream icebox cake is a classic for a reason — but that doesn't mean you're obligated to stick to it. One of the dessert's greatest strengths is its versatility. With the right flavor combinations, an icebox cake can feel nostalgic, sophisticated, tropical, or even a little bit boozy. Jessie-Sierra Ross, for example, makes her own twist on lemon meringue pie with vanilla wafers, homemade lemon curd, meringue crumbles, and an almond extract-infused whipped cream. She also loves alternating Chambord-spiked whipped cream with strawberries and graham crackers.
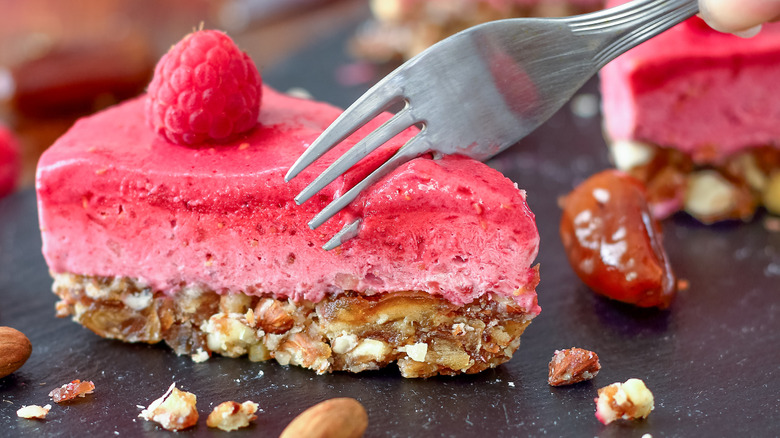
Odette D'Aniello finds seasonal and cultural inspiration. "Lemon whipped cream with fresh berries is always a favorite," she says. She also has made a Mango Bravo-inspired iteration with whipped cream and graham crackers, a tribute to the well-known Filipino dessert. "As long as the flavors are balanced and the textures play well together, you can really make it your own."
From espresso and dark chocolate to tropical fruit and coconut cream, contrast is your friend. Pair tangy with sweet and crunchy with smooth. Just make sure your flavors enhance your base rather than overpower it. Whether you're riffing off a pie, a childhood snack, or a global dessert, the icebox cake is your canvas. Let it surprise people!
Use fillings sparingly

It's tempting to layer an icebox cake with fruit, curds, jams, or nut butter — but too much of a good thing can ruin its balance. The star of the show here is the flavor and structural integrity of the whipped cream; everything else should take a supporting role.
Odette D'Aniello explains this best when describing her layering technique: "If you're adding fruit or jam, do it sparingly between cream layers to avoid sogginess." The emphasis is on restraint and intention — each additional element should accent the cream, not compete with it.
Jessie-Sierra Ross also warns that too many add-ins can compromise the structure of the cake. "Because icebox cakes are so easy to make, and the ingredient possibilities seem nearly endless, we can get a little overexcited with our flavor add-ins," she says. She's right — thick fruit layers, runny jams, or too much nut butter can make layers to slip apart or slices messy or unstable. That doesn't mean you should leave them out entirely. A swirl of raspberry jam here, a few slices of juicy peach there, or a discreet spread of almond butter can add flavor without overwhelming the structure. When in doubt, follow the "less is more" rule. Let the whipped cream be the star — it's what gives the cake silky texture and richness. Everything else should just complement it.
Let time work its magic
The hardest part of making an icebox cake? Waiting. But there's no avoiding it. Time is what transforms individual ingredients into a cohesive dessert. The cookies soften, the cream sets, and the layers become one sliceable, scoopable fantasy. Jessie-Sierra Ross calls icebox cakes "a lesson in patience," noting that while you may be inclined to remove it after a few short hours, it will need more time for those flavors to meld and for it to firm up. Ideally, Ross insists that the cake should sit in the refrigerator for a minimum of six hours. Overnight is even better to achieve solid, sturdy slices. All that time spent meticulously layering those cookies and fillings would end up a waste if you eagerly took the cake out too early. Just pop it in the fridge and distract yourself!
Odette D'Aniello recommends chilling your icebox cake overnight. "A minimum of [four to six] hours will work in a pinch, but if you want that perfectly sliceable, cake-like texture, overnight is best. The cookies absorb just enough moisture to soften without falling apart, and the cream sets into something that feels truly indulgent." If you're using especially thick cookies, even longer chilling may help. The goal is to allow the cream to fully soak into the cookies without losing structure. The fridge isn't just a holding zone; it's where the magic happens, so don't rush it!
Try a vegan version of the recipe
Vegan and dairy-free eaters don't have to miss out on the magic of an icebox cake. With the right plant-based ingredients, you can make a version that's just as rich, creamy, and delightful as the original. Odette D'Aniello loves using coconut cream. "Coconut cream works beautifully if you chill the cans and scoop out the solids. Plus, it adds such delicious flavor and can be paired with tropical fruits or chocolate for a delicious coconut icebox cake." She has also experimented with plant-based whipping creams and notes they have a similar texture to dairy-based varieties.
Jessie-Sierra Ross recommends substitutes like Biscoff cookies or Annie's honey grahams (which may contain milk, thus may not be suitable for those with allergies), with coconut whipped cream and strawberries. Her favorite is a s'mores-inspired version, with vegan marshmallow creme and dairy-free ganache. When building a vegan icebox cake, the same rules apply: thin layers, seal the edges, refrigerate overnight. Just keep an eye out for moisture — plant-based ingredients like coconut milk and cashew cream are sometimes softer or more watery, so you may need to adjust the firmness of your cream in order to keep your cake structurally sound. Done correctly, a vegan icebox cake will stun even the most traditional dessert lovers.