10 Ikea Hacks To Know Before Remodeling Your Kitchen
You don't need to rip out cabinets or max out your credit card to give your kitchen a serious glow-up. Sometimes, the best transformations start with a screwdriver, a can of paint, and a humble Ikea cart. Whether you're renovating on a tight budget or just craving smarter storage, we have come up with 10 hacks that will only stretch your creativity — not your wallet!
These ideas aren't just about building new things, they're about rethinking what you already have. By tweaking familiar staples like RÅSKOG carts or BEKVÄM trolleys, or repurposing offcuts from your last countertop install, you can squeeze more utility (and style) out of every corner of your kitchen. Most of these projects are ideal for tight budgets — something we explore more in this guide to affordable kitchen renovations. And if you're still in the planning stage, it might also be worth skimming these common Ikea kitchen-buying mistakes before heading to the store.
These aren't just aesthetic upgrades, although we have tried our best to provide you with visual inspiration — from a sculptural pendant light made out of leftover countertop, to a slim rolling island that doubles as prep space. But more than that, these ideas are about function: making the most of vertical space, solving awkward drawer layouts, and rethinking forgotten corners. If you've got a little time and a free weekend, you've got what it takes. Let's get into the ideas, and perhaps spark your next favorite project while we're at it.
Convert KALLAX into a bench or island with shelving
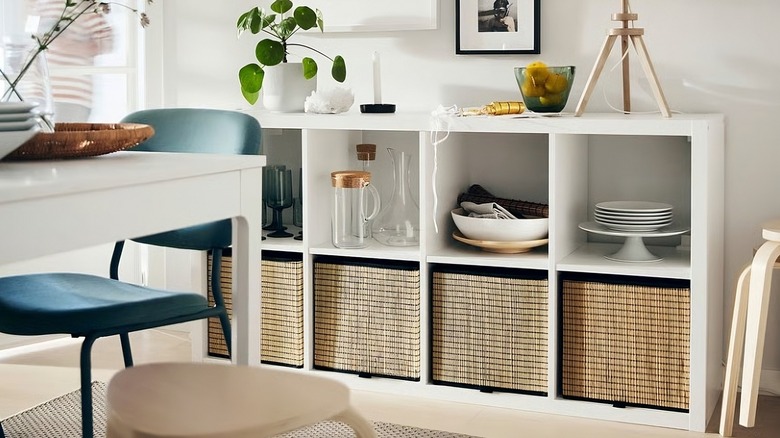
Ordering the perfect custom kitchen island almost always costs an arm and a leg — which is fine if that's what you want and have the budget for. But if you're looking for an alternative option that is also much more affordable, we've got just the hack for you. With a little more than the humble KALLAX shelf unit, you can create a multipurpose bench or island that looks great and works hard in your kitchen.
The KALLAX is a favorite for storing books, baskets, toys, consoles and other similar items. But thanks to its simple cube structure, it's also incredibly hackable. For a kitchen island project, many DIYers use two 2x2 KALLAX units side-by-side to form a square base. This setup offers generous storage and a solid footprint for a countertop. The key is finding the right top: most Ikea laminate options — like EKBACKEN or LILLTRÄSK — look great but are often too shallow for a double-KALLAX setup. Look for deeper surfaces (at least 85 cm) to ensure proper overhang. A faux-marble finish or butcher block could add an upscale touch.
Keep in mind, KALLAX isn't solid wood — it has a hollow honeycomb core — so it needs some reinforcement if you plan to sit, lean, or load it up. DIYers often add wooden strips inside or secure everything with L-brackets or mending plates. As one builder put it, glue alone won't cut it — especially in a hot, steamy kitchen.
Build a pantry with IVAR shelving + doors & paint
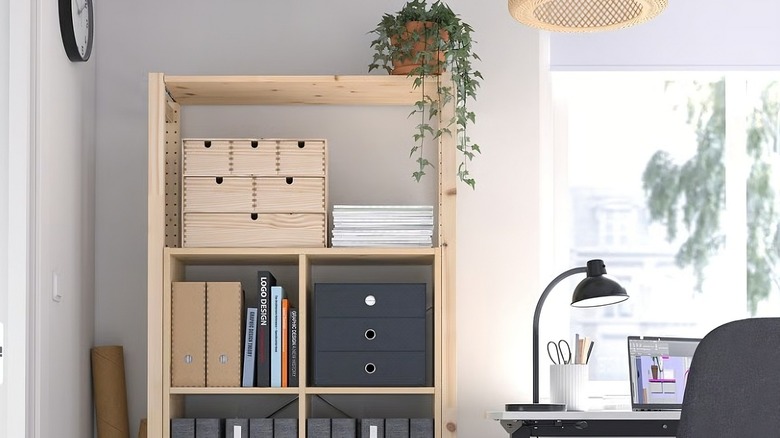
If your kitchen is short on built-in storage, or you're renting and can't install permanent cabinetry, a pantry built with Ikea's IVAR system could just be your best friend. IVAR shelves are strong and customizable, and — quite crucially for many people — highly affordable. You can stain, paint, or leave them raw to match your kitchen's aesthetic, and add doors or curtains to hide away any visual clutter.
There are many advantages that IVAR provides, but none arguably surpasses the value of options that it comes with. Whether you start with a narrow 12" unit or stack multiple sections together, you can scale it to fit your space and your needs. Many DIYers even cut the frames or shelves down to size for tight nooks. Just be sure to level the whole structure before installing the cross brace, and consider adding adjustable feet or caster wheels for uneven floors or future flexibility.
To maximize functionality, outfit your shelves with pantry bins, clear jars, or shelf inserts. Open backs make it easy to access light switches or wall outlets. While some people prefer the sleek, enclosed feel of PAX wardrobes or BILLY bookcases, IVAR remains a top hack for DIYers because of its price, customizability, and character. Think of it as the blank canvas of pantry design: perfect for painting, trimming, or transforming into a showpiece.
Hack BILLY bookcases into pantry storage or open shelves with trim & paint

You wouldn't expect a basic BILLY bookcase to belong in the kitchen, but it turns out it's a clever and affordable pantry upgrade option when you give it a little love. The key is transformation: instead of sitting flush against a wall looking like an afterthought, you can elevate BILLY with a few simple upgrades — wrapping it in trim, adding crown molding, even painting it to match your cabinetry. Suddenly, it looks like it was always part of your kitchen.
The magic is in the details. Baseboards and molding lend structure and polish, while side trim conceals the telltale Ikea seams and helps the unit blend with your existing kitchen. To make the bookcase functional as a pantry, outfit the adjustable shelves with bins, jars, and inserts for your dry goods. The flexibility means you can fit everything from cereal boxes to spice tins without any awkward gaps.
If you want it to feel even more finished, you can add glass or wood-panel doors (OXBERG is a popular choice), or paint the frame to match your kitchen. Painting Ikea furniture may sound tricky, but it's doable with the right primer and a cabinet-grade enamel like Valspar or Benjamin Moore Advance. DIYers recommend light sanding and patience between coats to help the finish last. It's a budget-friendly way to add serious storage — and serious style — without knocking down walls, perfect for renters or first-time remodelers on a tight budget.
Transform LACK tables into budget‑friendly kitchen islands or prep tables with added storage
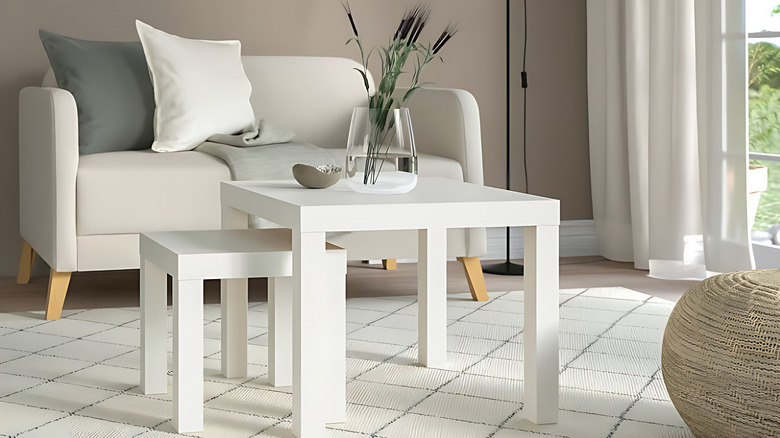
At first glance, it might seem too simple to work — just two Ikea LACK tables, some paint, and a little glue? But this hack is a fan favorite precisely because it's so achievable. No advanced woodworking required. No power tools beyond a drill. And yet the result is a functional kitchen island or prep table that can be customized to your space, your style, and your budget.
Here's how it works: you stack two LACK side tables one on top of the other, securing them together with wood glue or brackets. Some people add a third tabletop between the legs to act as a lower shelf for storage — perfect for bowls, baskets, or even your microwave. Others cut slats from scrap wood or use a spare Ikea shelf instead. To finish, simply cap the top with a butcher block, marble-look adhesive film, or even a VIKA tabletop, and you've got yourself a stylish little workstation that didn't require a full renovation.
Painting the tables beforehand adds a pop of color or helps the unit blend into existing cabinetry. You can match your kitchen's palette or use it as a unique accent. Add L-brackets, decorative trim, or even handles for a more finished look.
Maximize vertical space with FINTORP rail systems for hanging utensils and pots
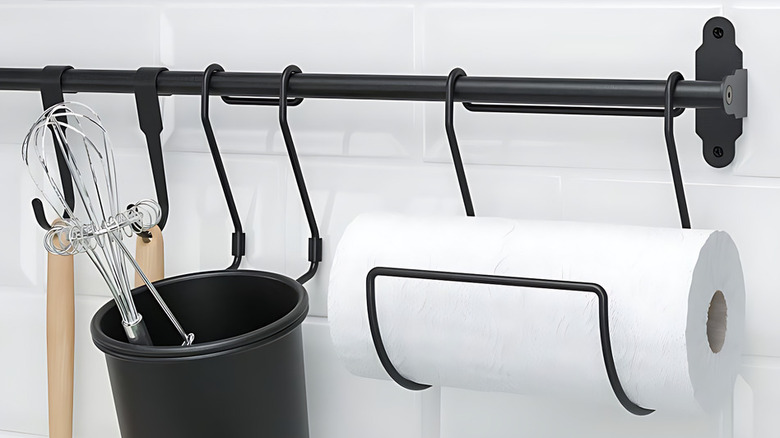
Sometimes the smartest kitchen storage solutions tend to also be the simplest. The Ikea FINTORP rail system is a perfect example of this. With just a rail, a few S-hooks, and a wall to mount them on, you can turn otherwise unused vertical space into a hardworking storage hub for utensils, pots, or even colanders and cutting boards. This hack is especially ideal for small kitchens or anyone who's ditched their upper cabinets in favor of a more open, breathable layout.
Installation is straightforward — even if your wall studs aren't perfectly positioned. One DIYer solved this by building a "ladder" style backing from scrap wood and attaching the rails to that. The result was a space-saving, easy-to-access wall of cookware that doubles up as inspirational decor. The rails come in black or stainless steel, and the 3" or 4" S-hooks let you hang everything from spatulas to cast iron pans. And the best part? It looks intentional. With thoughtful placement, the rail becomes a design feature in itself. Hang one above your stove for quick pan access, or add a few near the sink to hold towels, mitts, or sieves.
If the rail is well-secured, it can also handle far more than just light utensils. Even heavier items like Dutch ovens or cast-iron pans are fair game, so long as the mounting is solid and the bar itself is sturdy. Essentially, anything with a handle or loop is a candidate for hanging. Functional and pretty? That's a win-win in our books!
Transform the RÅSKOG utility carts for extra storage space
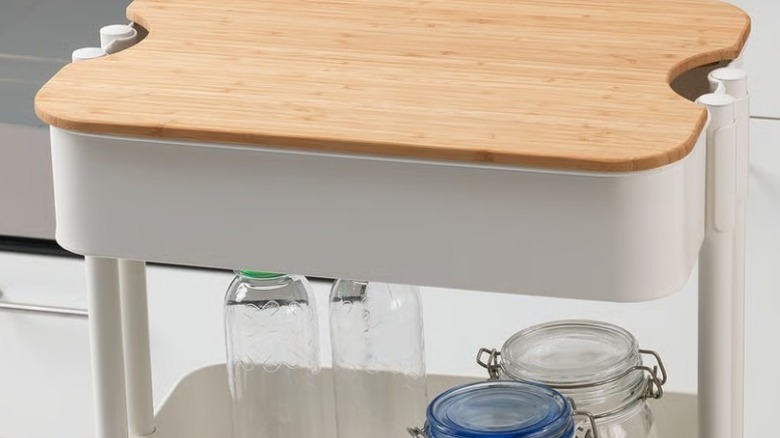
This is another one of those Ikea hacks that are so deceptively simple, you wonder why you didn't try them sooner. The RÅSKOG utility cart — a cult favorite among Ikea fans in its own right — becomes a space-efficient kitchen island with just one small but mighty addition: the HÖGSMA chopping board.
The cart's three-tier design already makes it inherently useful, especially in tight kitchens where every inch of storage matters. Reddit users sing its praises, using the various tiers for different items. One user summed it up best: "In my kitchen it holds extra beverages in the bottom. Baggies and other food packaging in the middle. And rolled items in the top..."
But the real magic happens when you top the cart with a HÖGSMA chopping board. Designed to fit perfectly on the RÅSKOG, the board adds a smooth, flat surface that instantly upgrades the cart from functional to multifunctional. Suddenly, you've got a compact mobile island that's ready for action—chopping, prepping, serving, or even holding your coffee machine. You can also style the whole apparatus up by painting the cart to match your kitchen color scheme, or attaching small hooks to the sides for hanging utensils or towels. With wheels that glide easily across your floor, you can roll it out for use and tuck it away when you're done.
Remodel BEKVÄM kitchen carts into prep islands
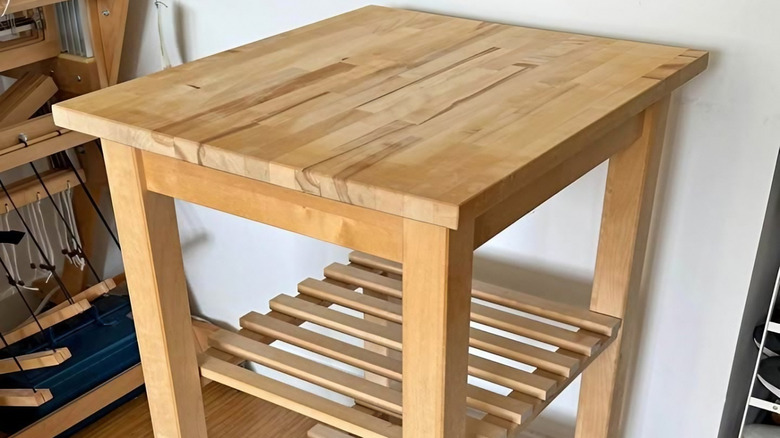
It started with a rescue mission. The BEKVÄM kitchen cart had been left outside — weather-beaten, stained, and wobbling slightly on one side. Most people would've tossed it. But one DIYer (Upcycle My Stuff) saw potential: a second life as a kitchen centerpiece. With a little sanding, fresh stain, and a clever reimagining of the top, that forgotten cart was reborn as a stylish prep island — complete with custom shelving and smooth-gliding casters.
That's the quiet power of the BEKVÄM. With just a little imagination (and a bit of sandpaper), it can be very easily elevated: Paint the legs to match your cabinetry, stain the top for a warm butcher-block effect, or go bold with contrasting colors. Some swap the wheels for chunkier casters, attach towel bars or spice racks to the sides, or even build entirely new tops using extra boards for more surface area and a custom feel.
One popular upgrade is sealing the wood with multiple coats of polyurethane. Not only does this bring out the richness of the stain, but it also makes the surface water-resistant and easy to wipe down — crucial for kitchen use. Others prefer a softer, rustic approach: a light whitewash on the frame, finished with mineral oil for a more natural sheen.
Add custom pull-out drawers to maximize deep cabinet storage
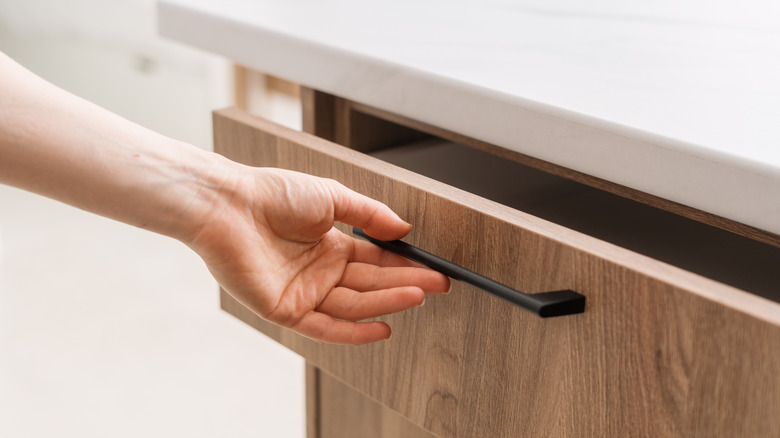
Behind every deep cabinet lies a familiar frustration: wasted space. That awkward back section where things go to be forgotten — foil rolls, mixing bowls, mystery containers. But you can reclaim that abyss with one of the most satisfying upgrades: installing your own pull-out drawers. And the best part? You don't have to gut your kitchen or start from scratch. With a little know-how and a few sliders, even basic Ikea cabinets can be transformed into highly functional storage stations.
One Reddit user hacked their shallow 15" METOD cabinet — not originally designed for pull-outs — by adapting drawer brackets from the PAX wardrobe system. Many DIYers also mix and match components like UTRUSTA rails or KOMPLEMENT brackets, depending on cabinet depth and weight requirements.
If you're ready to go fully custom, a proper drawer installation involves a few key steps: accurate measurements, shelf removal, mounting the drawer slides, and carefully fitting the drawer box. Materials matter here too — solid wood drawers with soft-close glides can instantly elevate both function and feel. Once they're in, even your deepest cabinets become your most organized. Think of it as unlocking a hidden floor of storage in your kitchen — no full renovation required.
Craft a wood pendant light from leftover KARLBY countertop
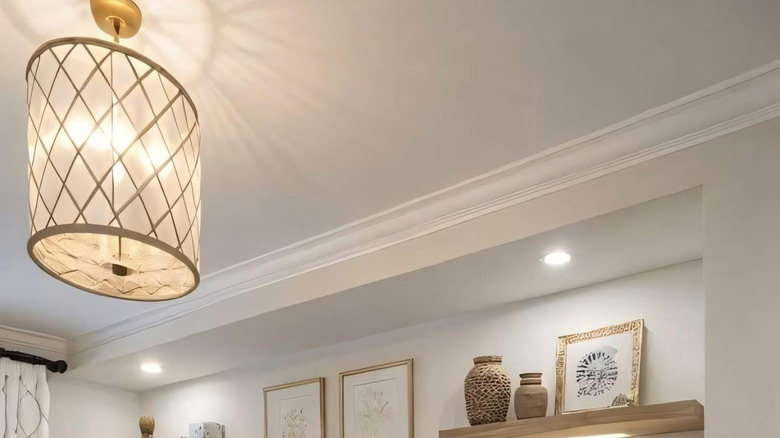
You know that satisfying moment when a project wraps up — but then you look at a leftover slab of KARLBY and wonder, "What now?" Instead of letting it collect dust in the garage, that cut-off could become your next functional upgrade. With its warm wood tones and clean edges, KARLBY is already halfway there towards your goal of a minimalist lighting hack.
Start by sketching out the size and shape you want. Cut it down to size, smooth out the edges, and drill a clean center hole for a pendant cord set. Add your favorite exposed filament or frosted LED bulb, and suddenly, that leftover countertop becomes a standout DIY fixture — one that gives off a soft, ambient glow above your sink, dining nook, or prep area.
It's a smart way to reduce waste — and the best part is, you get to decide what shape fits your space. Whether you keep it clean and blocky, round it into a soft cylinder, or carve something more sculptural, the leftover wood becomes a light that's both useful and personal.
Build a DIY touchless trash can with Ikea bins and a bit of twine
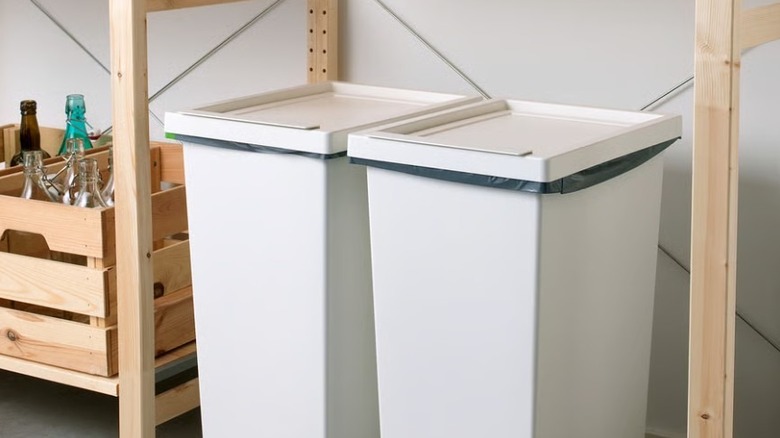
Trash duty doesn't have to be a two-handed task. If you've ever found yourself awkwardly trying to toss scraps while also wrestling open a trash can lid, you're not alone. One clever solution — pulled straight from the Ikea hacking world — lets you open the bin without touching it at all.
The hack is refreshingly simple: pair a standard pull-out cabinet setup with a lidded Ikea bin like the FILUR, then rig the lid to open automatically using just twine and tape. By attaching one end of the twine to the bin's lid and the other to the drawer front (or cabinet frame above), the lid lifts each time you pull the drawer out. It's one of those "why didn't I think of that?" solutions — especially helpful when you're mid-meal prep and your hands are full.
Getting the twine length right is the only real challenge (around 8–12 inches tends to work, depending on bin placement), but otherwise the materials are minimal: painter's tape (for easy repositioning), basic twine, and a bit of trial and error. Some DIYers go further, swapping in piano hinges or elastic cords for more durability, or adapting UTRUSTA drawer frames for a more polished look. But even at its simplest, this setup adds major function to an often-overlooked corner of the kitchen — no electronics, sensors, or special hardware needed.