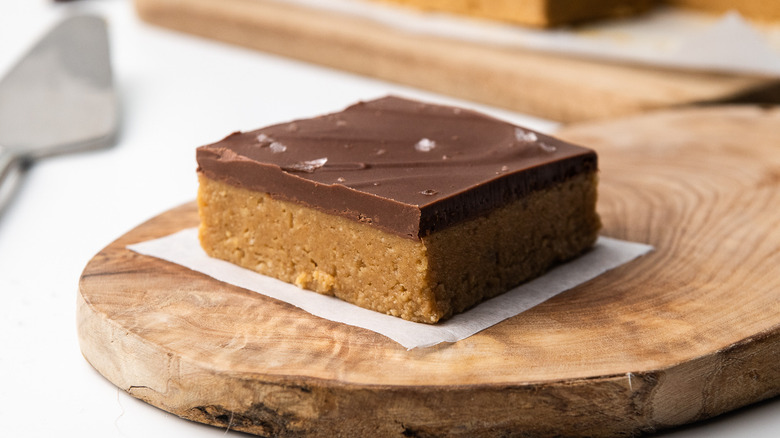
Salted Peanut Butter Bars Recipe
Dessert may not be the most important meal of the deal, at Tasting Table we count it as the most delicious. Okay, maybe it's not quite a meal, but it's a sweet treat you enjoy after one. Either way, it hits the spot. There are thousands of different options to serve for dessert, but if you are looking for something slightly outside of the box, these salted peanut butter bars are a perfect idea. This recipe comes complete with a graham cracker or cookie crust and a smooth layer of chocolate mixed with peanut butter. Add a bit of flaky sea salt on top, and the contrast between sweet and salty is incredible.
Recipe developer Jennine Bryant came up with this sweet treat that will satisfy the peanut butter lover in all of us. "What I love about this recipe is how simple these bars are to throw together. An easy and quick recipe that makes super tasty treats is my favorite thing. The peanut butter and chocolate combination is so classic, and these bars are super decadent — they taste so much like Reese's pieces!" Bryant raves. "The salt really amplifies the flavors of the chocolate and the peanut butter and perfectly balances out the sweetness. They are super creamy and, texture-wise."
Gather the ingredients for these salted peanut butter bars
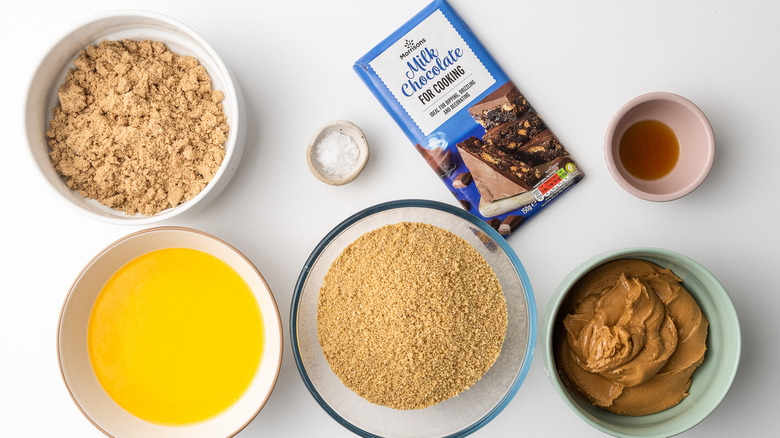
The first order of business is to grab all the ingredients you need to make this wonderful recipe. Pick up graham crackers or cookies, brown sugar, salt, melted unsalted butter, peanut butter, vanilla extract, milk chocolate (or semi-sweet), and flaky sea salt.
Once you have those items, you can make these decadent salted peanut butter bars.
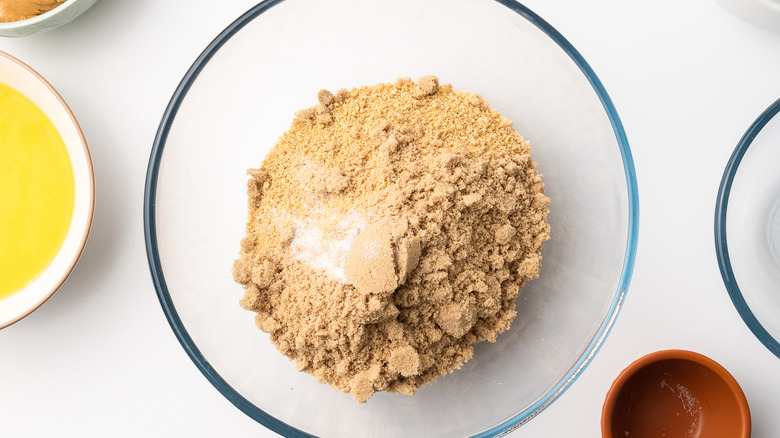
Line a baking sheet and combine cookie crumbs, brown sugar, and salt
For this recipe, you will need to use a 9x9-inch square baking tin. Line the tin with parchment paper to prevent anything from sticking to the bottom.
Then, take out a large bowl and toss in the cookie crumbs, the soft brown sugar, and cooking salt.
Add the butter, peanut butter, and vanilla extract
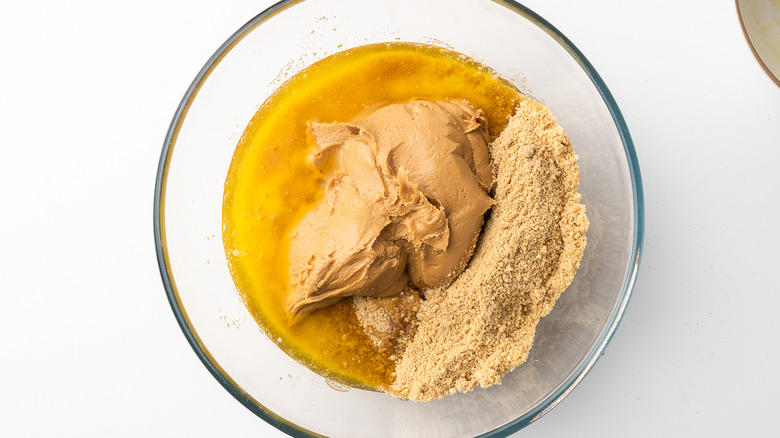
There are still a few more things that you need to add to the mix. First, toss in your melted butter but make sure it has completely cooled. Next, add the peanut butter and vanilla extract. Use a spoon or something similar to combine the ingredients well. This mixture makes the base of your bars.
Put the biscuit base into the tin
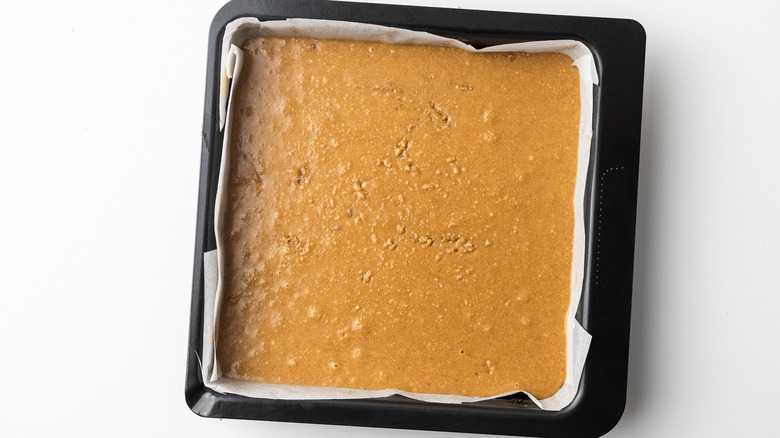
Now, you can go ahead and pour the dish's contents into the prepared baking tin and smooth it out to the top so it's even. Pop the crust in the fridge for about 30 minutes to allow it to set and harden.
Make the filling
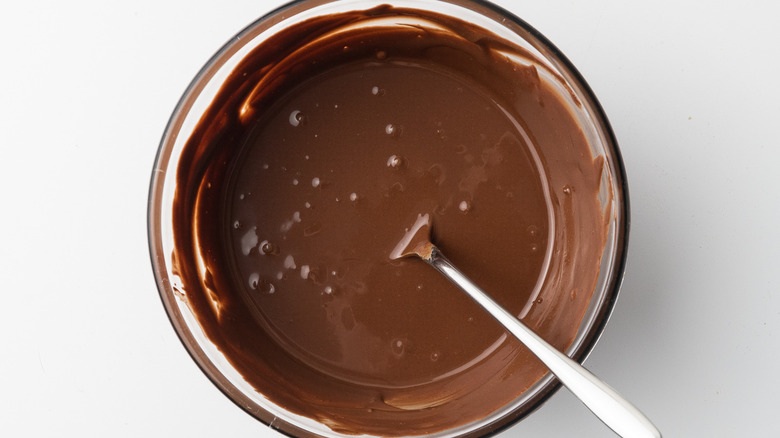
For this step, you will need a microwave-safe bowl. Toss in the milk chocolate and the remainder of the peanut butter. "You could definitely sub out the milk chocolate in this recipe for either dark or white chocolate, so you can pick whichever your favorite is and go for it!" Bryant shares.
Pop the bowl into the microwave in 15-second intervals. Be sure to stir after each interval and continue cooking until the chocolate, and the butter melt and are well combined.
Pour the chocolate on the biscuit base and add salt
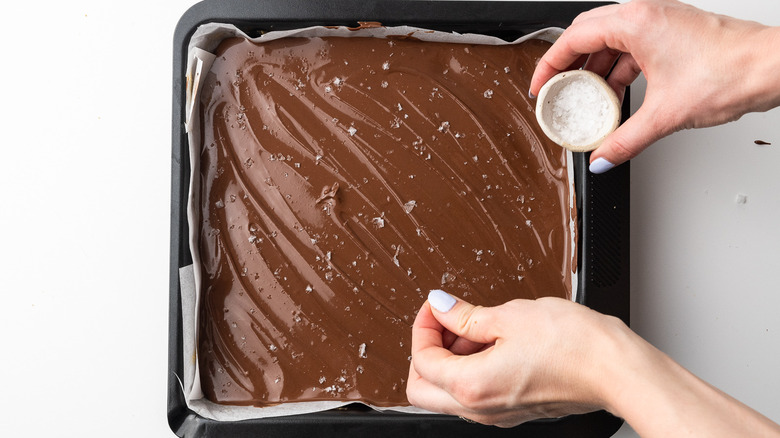
By now, your biscuit base should be thoroughly chilled. Remove it from the fridge and pour the chocolate mixture on top. Use a knife or something similar to smooth out the chocolate.
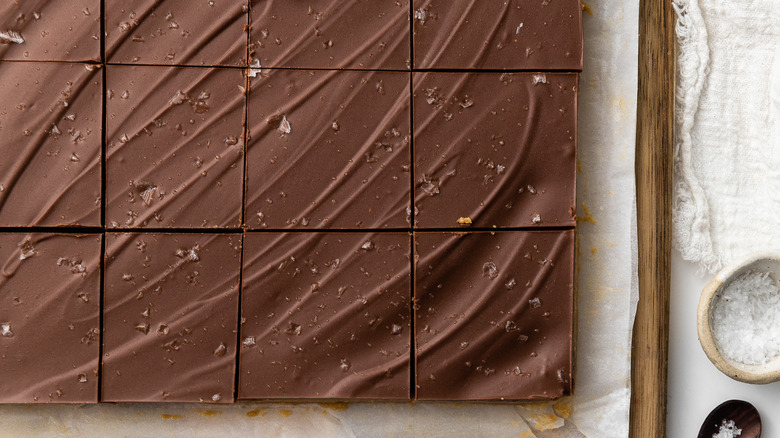
While the chocolate is still wet, add the sea salt on top, so it sticks. "I think the salt is the secret ingredient in these peanut butter bars because it really makes the other flavors pop, and it balances out the sweetness so well," Bryant shares. "There's only a little of it in the recipe, but it really is a star, don't leave it out!" Pop the mixture back into the fridge for at least an hour.
Slice and serve
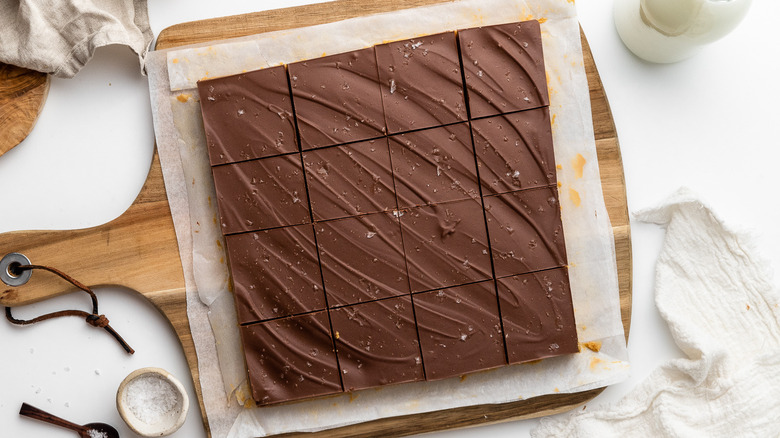
Once you remove the bars from the fridge, slice and serve the bars. "These are great as a mid-afternoon snack or as part of an afternoon tea," Bryant suggests. "They are a great sweet treat to offer guests for dessert or to take to someone else's house as part of a potluck dinner. My favorite way to serve them is alongside a cup of coffee or tea."
If you have anything left, be sure to keep the leftovers. "These bars keep well for up to a week in the refrigerator and can also be frozen!" Bryant notes. "Just make sure to wrap them up well so that they don't get freezer burn."
Salted Peanut Butter Bars Recipe
Learn how to make these salted peanut butter bars that use a graham cracker base and are topped with flaky sea salt, which helps all the flavors pop.
Ingredients
- 2 ½ cups graham cracker or cookie crumbs
- 1 ¼ cups soft brown sugar
- ¼ teaspoon cooking salt
- 1 cup unsalted butter melted and cooled
- 1 ½ cups creamy peanut butter, divided
- 1 teaspoon vanilla extract
- 10 oz milk chocolate or semi-sweet chips
- 1 teaspoon flakey sea salt
Directions
- Line a 9 x 9 inch square baking tin with parchment paper.
- In a large bowl, combine the cookie crumbs, the soft brown sugar, and the cooking salt.
- Add the cooled melted butter, 1 ¼ cups of creamy peanut butter, and the vanilla extract to the dry ingredients, then mix until everything is combined.
- Pour the wet biscuit base into the prepared baking tin and smooth out the top. Place this in the fridge for 30 minutes to harden.
- In a microwave-safe bowl, combine the milk chocolate and the remaining ¼ cup of peanut butter. Microwave the bowl in 15-second intervals, stirring in between each break until the chocolate is completely melted and combined with the peanut butter.
- Remove the biscuit base from the fridge and pour the chocolate on top. Smooth it out and then sprinkle the teaspoon of flakey sea salt on top. Place this back into the fridge for at least 1 hour before removing it from the baking tin, slicing, and serving.
Nutrition
| Calories per Serving | 321 |
| Total Fat | 22.2 g |
| Saturated Fat | 9.7 g |
| Trans Fat | 0.4 g |
| Cholesterol | 25.1 mg |
| Total Carbohydrates | 27.1 g |
| Dietary Fiber | 1.6 g |
| Total Sugars | 18.9 g |
| Sodium | 136.7 mg |
| Protein | 5.6 g |