Don't Toss That Old Wooden Cutting Board — Here's How To Restore It
We may receive a commission on purchases made from links.
If you've got an old wooden cutting board lying around, think twice before you throw it out. As an indispensable kitchen tool that receives regular use, wear and tear is inevitable, but in many cases a little restoration can go a long way to prolong its life. Though they don't last forever, a properly maintained wooden cutting board is a safe alternative to plastic cutting boards, which aren't as safe as you think, serving your chopping, slicing, and food prep needs for up to ten years. But first, you have to determine if it's actually salvageable or not, which comes down to health and safety.
Cutting boards can be a breeding ground for bacteria, which is not readily visible to the naked eye. Some clear red flags that your board is not worth saving are cracks, splits, and deep knife grooves — all excellent places for microbes to lodge. Mold, extreme warping, permanent discoloration, and odors that won't go away with cleaning are also signs that it may be time to formally retire the cutting board.
However, things like minor warping, discoloration, odor, an excessively dry appearance, a little softness to the touch (as if wet), and shallow knife grooves and marks can be remedied. Take in the severity of the damage and use your best judgement, erring on the side of caution. Once you've determined your wooden cutting board is probably a candidate for restoration, the process can be both fun and rewarding.
How to restore a wooden cutting board
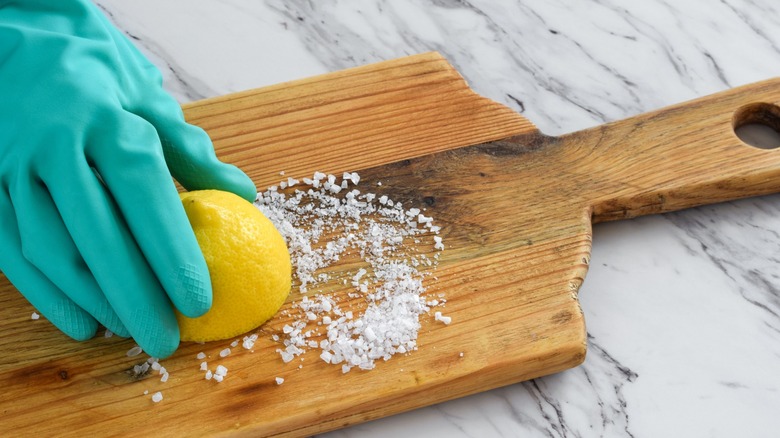
Restoring a wooden cutting board is a multi-step process. You begin with a basic cleaning. Warm water and mild dish detergent is all that's needed, although some people use white vinegar diluted with water. Allow the board to air dry before moving on. The next step uses two kitchen staples to deep clean the board, removing any remaining odors and discoloration. It's the first thing you should do with a vintage cutting board. Just coat the board with coarse salt and then, using half of a lemon, give it a good scrubbing. Allow it to sit for up to fifteen minutes with the lemon and salt before rinsing with warm water. Once again, allow it to air dry completely (several hours) before proceeding.
Now you're ready to re-establish a smooth surface. To do this, you'll need some 100-200 grit sandpaper, depending on how deep those knife slices are. Maintaining even pressure, rub the sandpaper across the board going with the grain of the wood. Brush off the dust with a soft cloth. Repeat this step a couple of times if necessary, beginning with coarser grade paper and progressing to a finer grit.
Lastly, be sure to season your wooden cutting board with a food-grade mineral oil to hydrate the wood while protecting it from absorbing moisture and harboring bacteria. Pro Tip: Fix minor warping by applying this oil to just the concave side, allowing the board to sit, weighted down, on a flat surface for a week.