7 Ways To Keep Baked Goods Safe When Traveling

We may receive a commission on purchases made from links.
It's that time of year again: That time when you need to pack the car to visit every family member and in-law that lives within driving distance of you to sing carols, exchange gifts, and, perhaps most importantly, indulge in an indescribably delicious holiday feast. Or maybe you're bound for the airport in the coming weeks, in which case, you're probably holding your breath over how bad the security lines will be. Taking the time out to travel over the holiday season is a privilege, but every journey also comes with its share of headaches. For example, if your loved ones are expecting to receive a batch of your famous cupcakes, the challenge of how to safely pack them can just about drive you up the wall.
We're here to ease some of your worries, though. The truth is, bakers travel across the country all the time to deliver their creations to customers, usually at weddings or large events. Some folks even manage to take sourdough starters on the plane with them, keeping their babies alive throughout vacation. All it takes to safely transport baked goods is a little bit of foresight and a few simple materials. In this article, we'll suggest precautions you can take in the car and on the airplane to keep a wide variety of baked goods — including cakes, cookies, and breads — from going stale or getting smushed.
Layer with parchment paper, wax paper, or bee's wax

There's a good chance that parchment paper and wax paper are already staple products in your kitchen. The former is heat-resistant and therefore used to line cookie sheets and cake pans. The latter should be kept far away from the oven, but it can nevertheless be used as a stencil or to line the counter before rolling out any kind of dough. One purpose that both products have in common? They can be used to separate layers of baked goods from one another when stacked in a container. After all, you don't want little crumbs from the bottom of your cookies to rub off and mar the frosting layer of cookies underneath.
In this scenario, products made from bee's wax (such as those sold by the Bee's Wrap brand) offer a reusable alternative to parchment paper and wax paper. Bee's wax wraps come with an initial investment, but they last for about a year — so if you think you'll use them often enough, treat yourself to an early present and buy a set. Plus, they may be safer than plastic wrap.
Each of these products is lightweight and flexible, helping preserve the integrity of your baked goods without crushing them. However, it's worth noting that as an alternative to layering, you could break out the tin foil and individually wrap each item. This would help protect your treats from moisture, and it is a common trick used to protect and transport cookies.
Transport cakes in individual layers
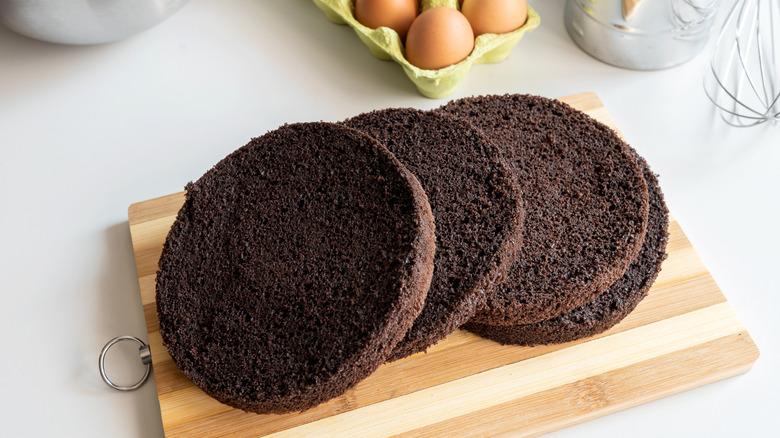
Bakers often transport cakes in individual layers to wedding receptions, where they glaze, assemble, and decorate them. After all, if a tiered cake were already assembled, one turn taken too quickly could result in hours of decoration going to waste. This method of transport is frequently adopted for large cakes with elaborate designs, while other precautions are taken for smaller, simpler cakes. Nothing is stopping you from transporting a two-layer cake in separate sheets. As long as you have the time and materials to assemble the cake at your destination, doing so can reduce the wariness you feel around delivering a flawless cake. Besides, the further you have to drive, the higher the risk you will need to brake quickly or swerve to avoid a hazard on the road. So if you are embarking on a long road trip with cake, you should definitely transport it in separate layers.
To keep a cake layer moist and protected, wrap it in plastic wrap and then further safeguard it with a layer of foil. Slip the layers into large plastic bags for more convenient handling, and if possible, place them in sturdy boxes. Finally, have a plan in place for how you will decorate your cake once you reach your destination. You may wish to prepare a jar of neutral glaze or simple syrup in advance for coating each layer. Frosting ingredients can be packed and then combined on-site, or you can make frosting ahead of time and insulate it for the car ride (more on that later).
Invest in cake and cupcake carriers
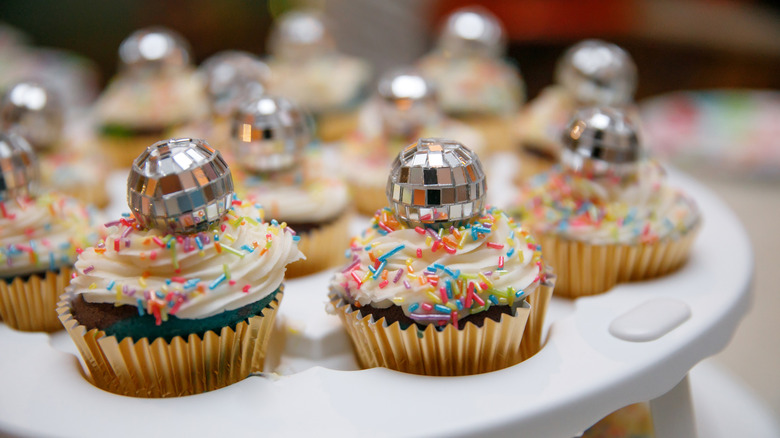
After meticulously packing a cake or batch of cupcakes for a long journey, you might end up wiping your brow and regretting the fact that you didn't choose to bake a sturdy batch of cookies instead. Cakes and cupcakes are some of the most difficult baked goods to transport safely, but that's where dedicated cake and cupcake carriers come into play. You'll soon wonder how you ever lived without these handy tools — they are ideal for traveling, as well as convenient for storing and displaying baked goods at home.
To protect your precious cargo, we suggest investing in a product like the HYLCWTH cake carrier. It is suitable for round cakes up to 10 inches in diameter, and it features a non-slip base to keep your cake from sliding around. Three snaps firmly attach the base to the lid so that even heavy cakes won't fall through. Plus, the container fits into a specially designed insulated bag, which is key for longer journeys. The fact that this cake carrier can also be used as a portable cupcake display and snack tray is the cherry on top.
If you don't want to shell out money on a reusable cake or cupcake carrier, place your baked goods in a single-use pastry box. For an even simpler approach, store cupcakes in a 9-inch by 13-inch baking pan and cake on a very large plate. In both cases, you'll want to cover your baked goods with plastic wrap and leave the frosting job until your arrival.
Make sure your containers are airtight
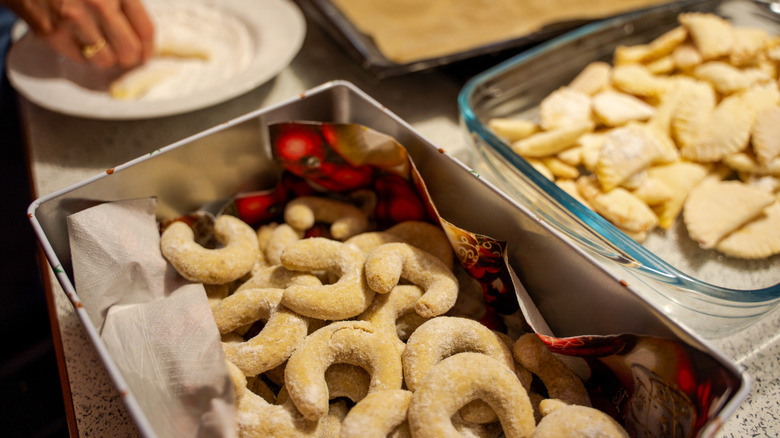
There's a good reason why bakeries often sell day-old items at a discount: In less than 24 hours, a baked good can noticeably dry out and lose its luster. Different baked goods benefit from different storage options, but airtight containers are usually recommended. Plastic boxes, glass containers, and cookie tins are all fine options, with each having its own pros and cons.
Plastic containers are convenient for travel because they are lightweight and don't pose a significant risk of breaking. Alternatively, you might be tempted to instead pack baked goods in glass containers. If you do choose to do so, consider adding a layer of bubble wrap to protect the glass from cracking. The lids of both plastic and glass containers often feature seals for improved performance. Lastly, cookie tins are popular during the holidays and look splendid on countertops alongside other holiday decorations. They also eliminate the need for gift wrapping if your baked goods are meant as a present. Ikea sells a budget-friendly set of tins that are wonderful for year-round use.
As a final note, when packing multiple baked goods in the same container, make sure they match up in texture; crunchy biscotti, for instance, should not be stored with pillowy soft snickerdoodles, lest they affect each other's moisture contents. You can, however, place a piece of bread in a container with cookies to help keep them moist. We also recommend packing any strongly flavored baked goods, like espresso cookies or lemon bars, in their own containers.
Stow baked goods in your carry-on luggage
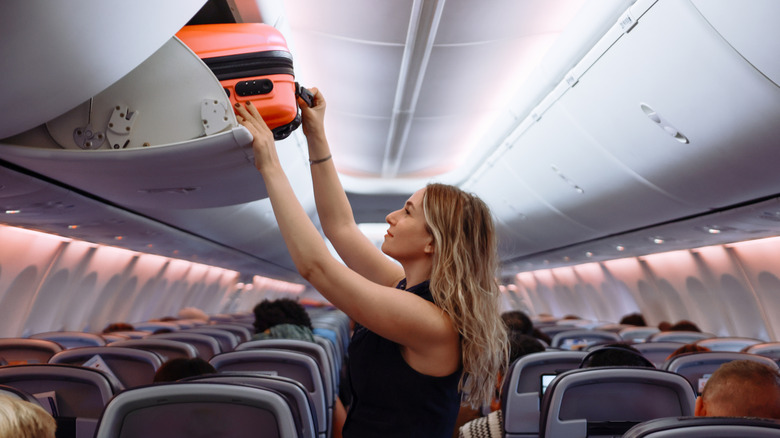
Though TSA employees typically search carry-on luggage for items like guns, knives, and liquid containers over 3.4 ounces, they may also be curious about what sweet treats you are carrying. Baked goods, including cookies, pies, and cakes, are permissible in carry-on luggage, but TSA staff might do a quick swab to check for explosives. As long as you haven't been naughty, they'll likely make a joke about sharing a few brownies with them before sending you on your way. Although TSA does not explicitly search for marijuana, law enforcement officers could become involved if it is found during screening — so we recommend against infusing your cookies with it.
While you might be tempted to pack baked goods in your checked luggage to make room for other items in your carry-on luggage, there's no telling how that luggage will be handled as it is inspected and stowed underneath the cabin. We're not saying that employees will eat your cookies, but even if they politely open your suitcase for inspection, a heavy bag could later be placed on top of it and smush your precious snowball cookies.
Whether you choose to pack your baked goods in your carry-on or checked luggage, place them in an airtight container and pad them with soft items like clothing for additional protection. Hardtop suitcases can be a wise choice, but carrying baked goods by hand and then sliding them underneath the seat in front of you is perhaps the best option.
Be strategic about where you place baked goods in the car
Throwing items willy-nilly into the trunk not only makes it challenging to find what you need later on, but it could also result in items being damaged during the drive as they shift and settle. If you need the extra impetus to be a safe, responsible driver, remember that braking quickly for a stoplight or taking a turn too quickly could displace your baked goods. Life happens, though, so here are a few steps you can take to protect baked goods during a car ride.
First and foremost, don't stack heavy items on top of your treats, and ensure that other bags and boxes are secure. Slide a silicone mat or yoga mat underneath items to stabilize them. We don't recommend storing baked goods on seats, either. Their inclines, however slight, could allow lighter packages of baked goods to shift little by little until they eventually fall. The floorboard is more ideal, though you should take care that any items stored on the seats overhead are firmly in place. If you aren't driving with a co-pilot, place your baked goods on the floorboard in front of the passenger seat so that you can keep an eye on them.
Once you arrive, unpack your baked goods immediately. An overly helpful family member may rush to help you unpack the car, grabbing your baked goods before you have the chance to carefully remove them yourself. Besides, items might shift as you unpack, so it's best to get the delicate items out of the way first.
Insulate baked goods during longer journeys
If you are driving out of town, consider buying a high-quality cooler. Items with less moisture, such as cookies, are generally fine to transport at room temperature. Frosted cakes and pumpkin pies, however, need to stay cool to preserve their structural integrity and remain safe for consumption. Even in cool weather, items with chocolate chips may melt if exposed to direct sunlight or an overly ambitious car heater.
A hardtop cooler or an insulated bag can help keep your items cool during transportation. If your trip spans multiple days, you can refill the cooler with ice from grocery stores or hotels. Coolers can only do so much, though, so avoid keeping them in direct sunlight to maximize their efficacy.
We suggest tapping into the temperature of baked goods before you even depart. Bakers sometimes opt to freeze cake layers in plastic wrap and foil shortly after pulling their pans out of the oven. It helps keep moisture from escaping, and chilled cakes are far easier to decorate than room-temperature ones. When it comes to refrigeration, though, take heed: Even if you place your cake in an airtight container, it may soon dry out in refrigerated conditions. So while refrigerating or freezing a cake with buttercream shortly before departure may help preserve its structure, know that its quality may deteriorate when kept cold over a multi-day journey. Finally, don't refrigerate fondant; it may sweat or suffer in texture.