The One Ingredient You Need For Perfect Mickey (Or Minnie) Mouse Ears On Candy Apples
We may receive a commission on purchases made from links.
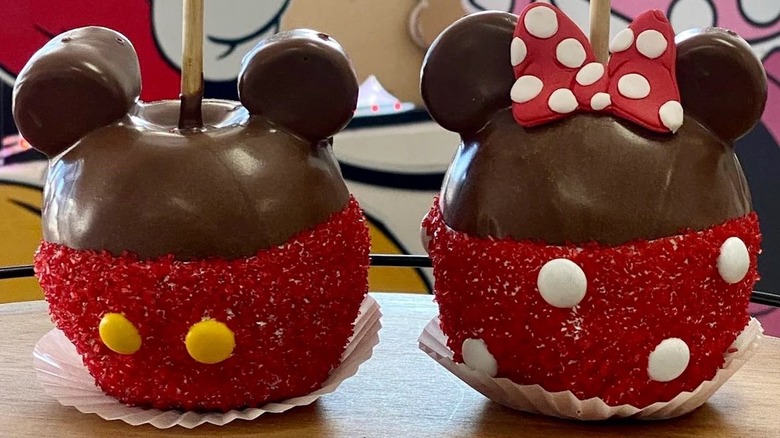
Candy apples are the perfect crisp and sweet treat to enjoy any time of year, but the candy apples at Disney theme parks have an extra bit of magic and charm. Whether you're visiting during the dog days of summer or the holiday season, there's always a whimsically decorated apple that's almost too adorable to eat. One of the most popular versions is the Mickey and Minnie candy apples, available in a range of colorful and themed styles from candy corn versions during Halloween to snowflake designs during the winter season. We know this treat starts with an apple base, but how do they add those delightful mouse ears to create a Mickey-shaped snack? The not-so secret ingredient is marshmallows.
It makes sense, right? They're round, sweet, and fluffy — perfect additions to the caramel and chocolatey crunch of the candy apple. The trick is to dip your apples into the caramel first and then cut a portion of the marshmallow with scissors. This makes it easy to stick them on and recreate the signature Mickey look. After that, they're dipped in melted chocolate, decorated with colorful sugar or candy, and left to dry. For Minnie-themed apples, the finishing touch is adding the bow, made from a mold, in between the ears. While nothing compares to biting into a freshly made candy apple at the park, recreating it at home is easier than you think — and you can go wild with designs you'd never find in the display case.
Recreating Disney's candy apples at home
You don't need a park ticket to conjure a bit of Disney joy in your home. All you need is an apple, a treat stick, caramel, chocolate, marshmallows, colorful toppings, and a little imagination. But what is the best apple to use when making candy apples? You can go with the classic Granny Smith to get that sweet-tart contrast — which is what the confectioners at Disney use — or opt for a Honeycrisp or Fuji for an all-around sweet experience.
Once you have the right apple, you'll want to dip it in warm caramel, ensuring the apple is evenly coated. You can gently scrape off a little excess around the apple with a spatula to prevent dripping. Then, it's time for the signature move — making the marshmallow ears. You'll cut about a fourth off lengthwise so you get a side that can easily stick near the top of the apple to form that Mickey or Minnie silhouette. The sticky caramel helps hold them in place.
If you have trouble adding on the marshmallow ears or prefer to take a different route and use toothpicks to hold them in place. From there, all that's left to do is dip it into chocolate and decorate.
Bringing your Mickey or Minnie candy apple to life
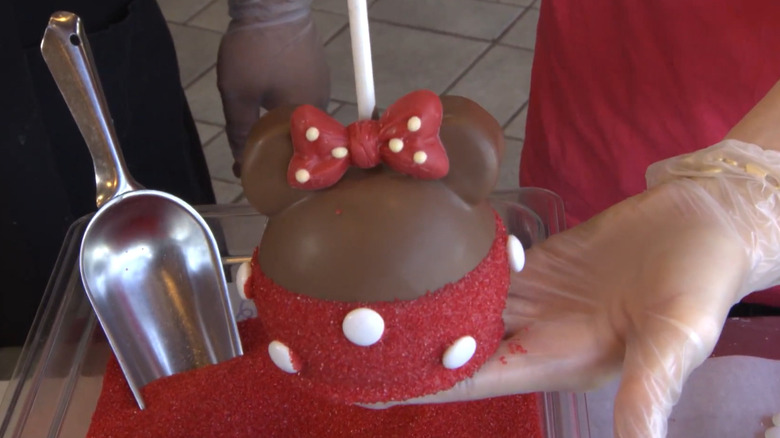
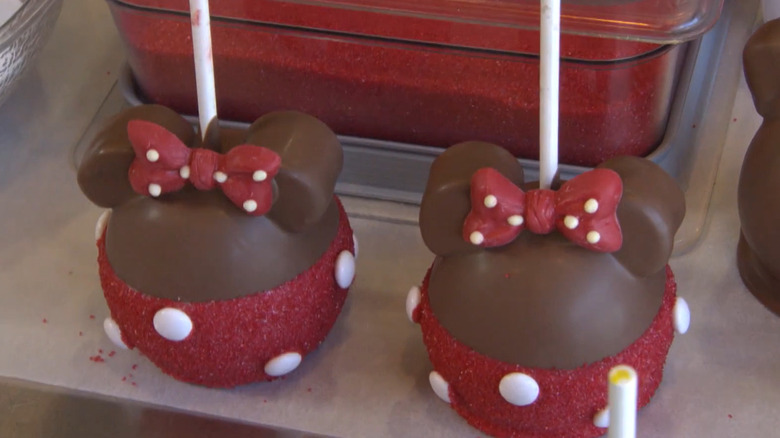
Once you have the marshmallow ears in place and the chocolate is dried, use kitchen scissors to trim any extra chocolate from the top for a smoother edge. Then, dip the bottom half of the apple in melted white chocolate to form either Minnie's skirt or Mickey's shorts. Add a couple of white M&Ms on the front for Mickey's buttons or more all around to get Minnie's polka dot look. To get that bright red hue for the shorts or skirt, sprinkle red sanding sugar over the white chocolate portion, working from the top down so the sugar doesn't smear the coating.
If you're making a Minnie candy apple, the final touch is to add her bow. This can easily be made using a bow-shaped silicone candy mold. Once the bow is firm, simply dab a little melted chocolate on the bottom corners as glue and press it between the ears until it sets. Once you get the hang of it, you can try new designs and even expand beyond the classic characters to recreate Jack Skellington candy apples, Snow White's poison apple, and much more. However you decorate them, they're sure to bring smiles to your friends and family.