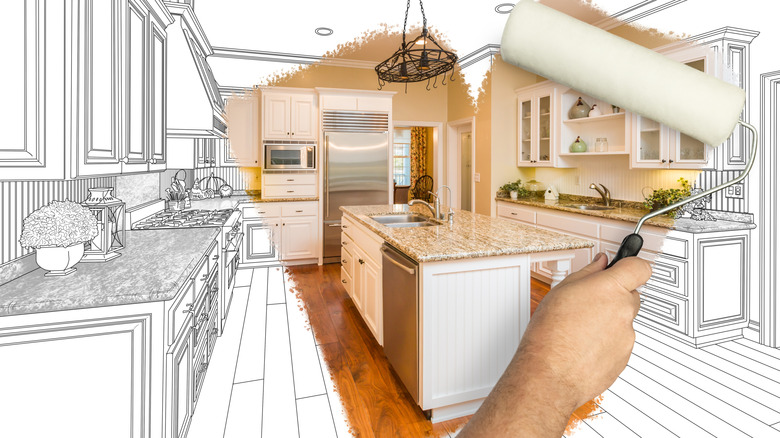
10 DIY Kitchen Upgrades You Can Actually Finish Within One Weekend
Trends come and go, materials get worn down, and lifestyles change. There are several compelling reasons to give your kitchen a little makeover, but not all upgrades are created equal. Some upgrades will happily dial up the value of your home, while others are not worth the money. Once you have sorted the wheat from the chaff and narrowed down the additions that will give you maximum bang for your buck, there is another important factor to consider: time.
The thought of tiptoeing through carpentry tools and swiping renovation dust off your favorite coffee mug for weeks on end may not appeal, but fortunately, help is at hand. Kerrie Kelly, CEO and creative director of Kerrie Kelly Studio, believes that it is possible to refresh your kitchen within the span of a weekend — as long as you choose your projects wisely. Instead of attempting to install a completely new backsplash, you can add peel-and-stick wallpaper for a quick upgrade. Cabinets can be repainted and finished with modern, on-trend hardware. Even simpler measures, such as replacing outlet covers, can make the space feel more personal. Throw in some open shelving and under-cabinet lighting and come Monday morning, you will be walking into a space that feels better than new. Here are some of the simple, DIY upgrades that you can make happen in a weekend.
Change cabinet hardware
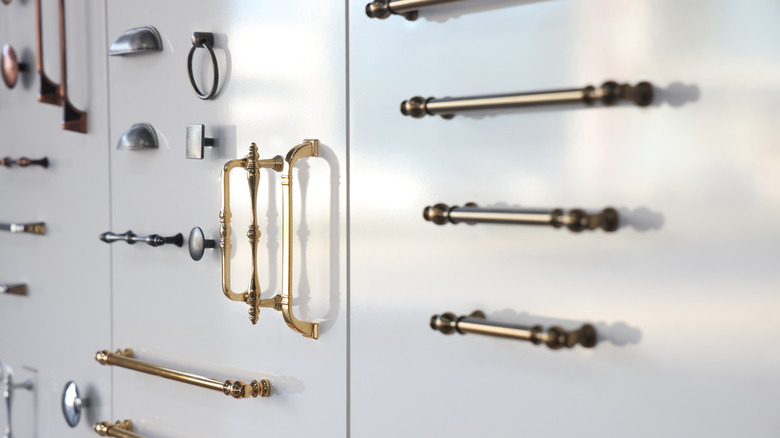
Big-ticket projects, like ripping out flooring and installing custom cabinetry, may come to mind when you think of kitchen makeovers. However, small changes can also make a big impact, like updating drawer pulls and knobs. "Think of hardware as the 'jewelry' of the kitchen — swapping it out gives the entire space a quick style refresh without demolition," creative director Kerrie Kelly says.
With all the tugging and yanking that happens on busy mornings, it comes as no surprise that cabinet hardware gets worn down quickly. While sagging handles and chipped finishes should be replaced immediately, you can also consider an upgrade if your current hardware feels otherwise uninspired. Extremely ornate handles, traditional oil-rubbed bronze, and builder-grade brushed nickel are topping Kelly's list of no-nos. Instead, she recommends keeping an eye out for materials in soft brass or matte black — you can even work in some mixed metals for contrast. "Knurled textures, slim bar pulls, and oversized knobs feel fresh and sophisticated, elevating cabinetry instantly," she says.
Once you have found the drawer pulls and knobs that add some excitement to worn-out cabinet doors, you can rejoice in the fact that this makeover project shouldn't take more than a few minutes, depending on how many cabinets you have. Simply unscrew your existing hardware with a screwdriver and add in your new purchases to give your cabinets an aesthetic facelift.
Add peel-and-stick backsplash
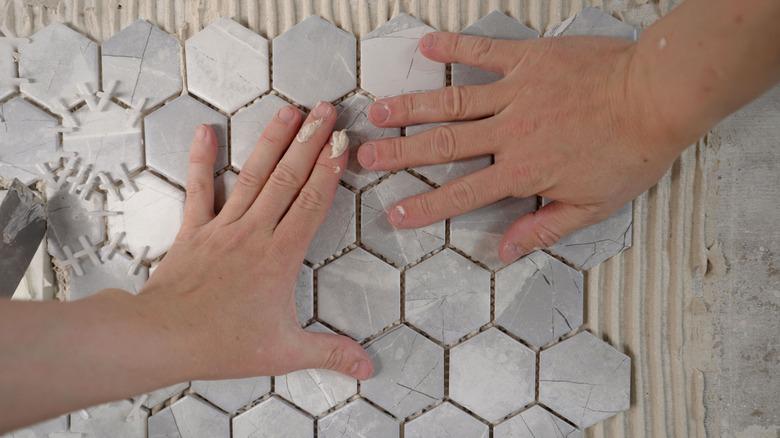
If your backsplash has been looking a little worse for wear, the good news is that replacing it doesn't need to break the bank — not if you have this guide on affordable backsplash ideas up your sleeve. But what if you are working on a time crunch and don't have the bandwidth for a larger renovation project? You'll find some time-efficient options coming to your rescue, including adhesive backsplashes.
Once made with low-quality materials and overly glossy finishes, Kerrie Kelly believes that peel-and-stick backsplashes have since progressed by leaps and bounds in terms of realism and durability. "To achieve an elevated look, timeless subway patterns and textured stone or marble looks in warm whites, soft taupes, and charcoal offer both sophistication and longevity. For bold homeowners, a terrazzo or zellige-inspired pattern brings artisanal character," she says.
For those hoping to finish this project within the span of a weekend, Kelly recommends following some key basics. You'll need to ensure that you start with a clean, dry surface to ensure stronger adhesion to the wall. When applying the backsplash to the wall, she finds that it helps to apply pressure from the center moving in an outward motion to negate any bubbles. Once done, you'll need to trim the excess material from the edges with a utility knife. Bonus points for using caulk in a coordinated hue as a sealant for any gaps to achieve a seamless finish.
Repaint cabinets
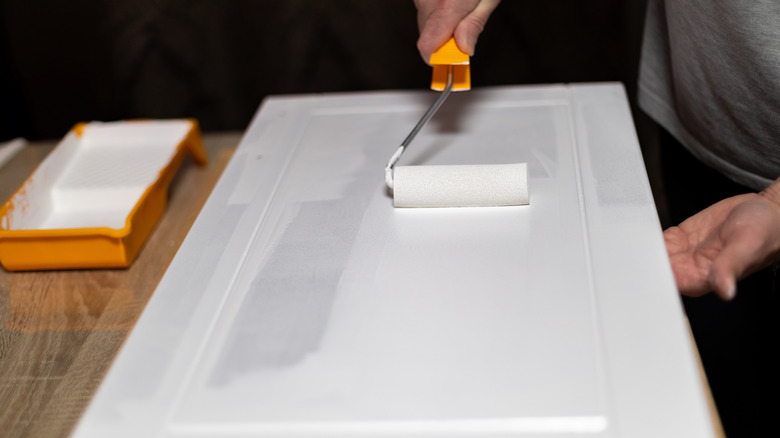
If you don't have the time to redo old kitchen cabinets from scratch, the good news is that you don't have to. A quick paint job can breathe new life into chipped, outdated cabinets. In fact, don't be surprised if you feel like taking it a step further and painting your appliances as a budget-friendly way to refresh your kitchen. So, what are the on-trend hues you should be swatching at the store? Kerrie Kelly says, "Cabinet colors trending now lean toward soft organic neutrals like clay, warm white, and cream; earthy greens and muted blues for a sense of calm; and rich charcoals or inky blacks for drama."
Kelly has some suggestions to ensure that this makeover gets done within a weekend — so that your family doesn't have to hop over dried paint cans and brushes for breakfast every morning. Prep is non-negotiable: you'll need to label your doors, clean the surface thoroughly with a degreaser to get rid of any residue or build-up, and sand the doors lightly. With the help of a bonding primer and fast-drying enamel paint for durability, you'll be able to transform your cabinets in no time. "A paint sprayer or foam roller ensures a smooth finish without brush strokes, while painting doors flat on sawhorses allows you to work efficiently in batches," she says.
Install open shelving
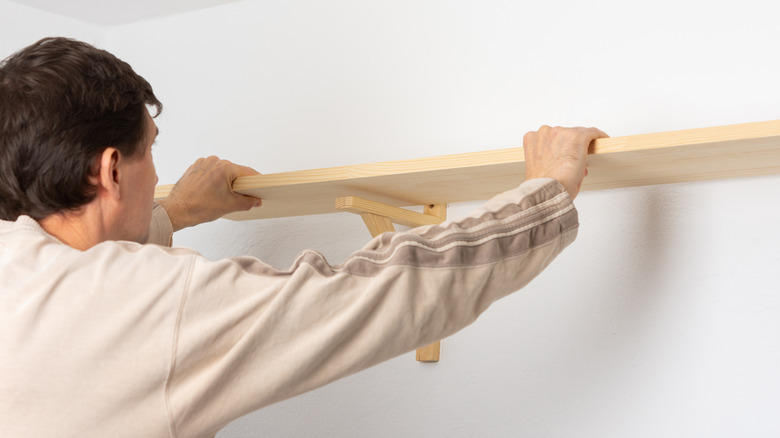
Looking to add some personality to your kitchen? Open shelving makes for a quick, easy-to-install addition and a willing canvas for displaying your personality. "Floating shelf systems are ideal for a clean aesthetic and can be installed in just a few hours with the right anchors," Kerrie Kelly says. The best part? These shelves can be easily redecorated based on the season or whenever you are in the mood for something new.
To get this project done within an afternoon, you'll want to start by marking the placement of the shelves with painter's tape. However, you'll need to bear in mind that open shelves can't be added onto any blank expanse of wall in the kitchen. "Avoid areas directly above sinks or cooktops where moisture, steam, and splatters can damage both shelves and display items," Kelly says. Instead, you can look to any empty space above the countertops or next to the range hood to keep your shelf out of the direct line of heat and steam from the gas stove. Once you are satisfied with the positioning, you can drill a hole in the wall for the brackets. After the brackets have been screwed to the wall, the shelf can be placed securely on top and decorated with a thoughtful curation of ceramics, succulents, and cookbooks.
Add under-cabinet lighting
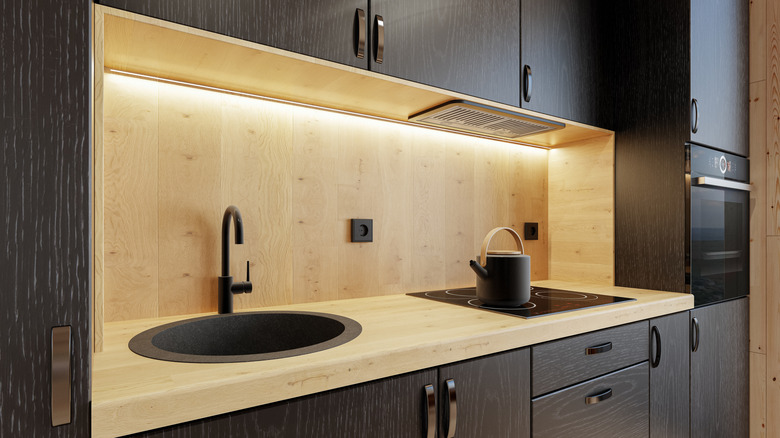
The modern kitchen relies on multiple light sources — each serving a different purpose — and under-cabinet lighting is a crucial piece of this jigsaw puzzle. Although it is easy to write off this humble strip of lighting that runs under the cabinets, it plays an important role in illuminating every inch of your countertop for intricate tasks, such as chopping. "Under-cabinet lighting transforms both function and mood — instantly making prep spaces brighter and elevating the kitchen's nighttime ambiance," Kerrie Kelly says.
Once you have read up on all the kitchen lighting mistakes to avoid, you'll know that choosing the right color temperature is important. "Warm white (2700 to 3000K) LED strips offer a cozy glow that flatters finishes, while cooler light works well in ultra-modern spaces," Kelly says. With battery-operated and adhesive plug-in strips flooding the market, she believes that this serves as an easy one-day project that can significantly upgrade the visual impact of your kitchen.
While the installation process is as easy as routing the LED strip through the bottom of your cabinet, special attention needs to be paid to keeping the placement discreet. "To conceal strips, tuck them behind the cabinet lip or use simple U-channel diffusers that hide cords and create an integrated look," she says.
Change light fixtures

Layered lighting can give your kitchen an elegant look with almost no effort — but nailing the right mix of ambient, task, and accent lighting can be a tricky tightrope to walk. If you are working with the wrong color temperature or outdated fixtures, the kitchen can feel like it is lacking warmth and dimension, which is why Kerrie Kelly recommends taking the weekend to swap out any light fixtures that may be weighing your kitchen down visually. "Swapping pendants, flush mounts, or semi-flush fixtures is an achievable weekend project — especially if existing wiring is in place," Kerrie Kelly agrees.
So, what are the trending styles that will instantly elevate your kitchen? Linear pendants perched over islands score highly in Kelly's book. She also recommends keeping an eye out for globe or drum silhouettes, while woven or pleated shades can infuse your space with an earthy, inviting warmth. To get this project done within a weekend, she advises against recessed lights and large chandeliers as they require a baseline of professional experience and electrical know-how. "For a quick but striking update, consider replacing a dated fixture with a statement pendant in brass or matte black — it becomes a focal point that sets the tone for the room," she says.
Replace outlet covers
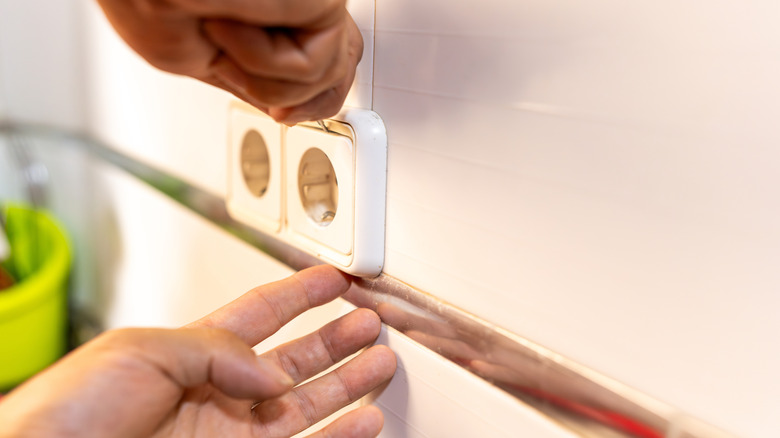
There are some dead giveaways that your kitchen hasn't seen a remodel in a long while, and outlet covers are chief among them. Despite occupying a minimal footprint in your kitchen, old, cracked, or yellowed outlet covers can make the space feel dated. A quick swap for fresher designs will instead demonstrate your attention to detail — one that can be achieved without having to dial the electrician. "Swapping outlet covers is a high-impact, low-effort refresh," Kerrie Kelly says. To give your kitchen an instant refresh, she advises opting for sleek white, black, or metallic covers — you'll even discover screwless plates for a minimalistic finish.
The process of upgrading your outlet covers is easy. Kelly recommends turning off the power at the breaker before starting and double-checking with a voltage tester to ensure that the electrical circuit is dead before you begin working on it. She also finds it helpful to work on replacing one outlet cover at a time to ensure that each one goes into the right spot without any mix-ups or confusion. "This subtle update modernizes the kitchen and ties in with updated hardware and lighting for a cohesive look," she says.
Update the window treatments
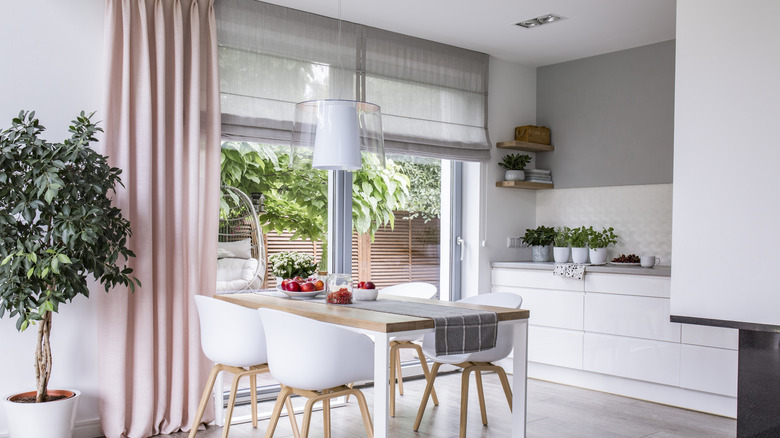
Whether you favor the quaint charms of café curtains or the opulence of classic drapery, the right window treatments can play a key role in dictating the mood of your kitchen. Window treatments in any room require a certain level of maintenance, but this is especially true in the kitchen. The constant exposure to sunlight and proximity to food spills and splatters can make your favorite curtains look stained, faded, or frayed.
If you have been putting off updating the window treatments in the kitchen, you'll be happy to know it isn't a time-intensive project. Simply drill a few holes at opposite ends of the window frame to secure the mounting brackets. Once finished, you can attach the blinds or shades and step off the ladder to marvel at a job well done. Since you'll only need to drill a few holes, it makes for a renter-friendly project as well — even if you may not be able to carry these to your next home, since two windows are rarely ever the same.
While installing window treatments isn't a hard task, you'll want to choose your fabrics with care. Kerrie Kelly says, "For durability in heat and humidity, performance fabrics or treated natural fibers are excellent choices — they resist warping and are easy to clean. A tailored Roman shade in a performance fabric can also soften the space without overwhelming it."
Add a magnetic knife strip
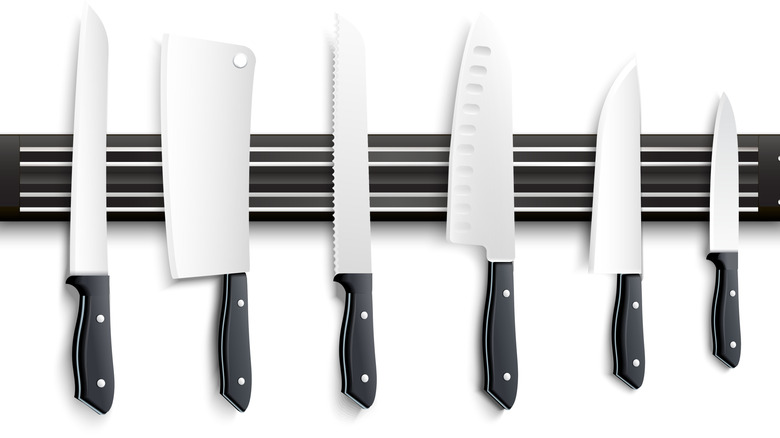
Upgrading your existing kitchen design can refresh the look of the space, but you'll also want to consider new additions that can make a strong visual impact. A magnetic knife strip will infuse restaurant-style flair into the simple act of tossing together a salad for dinner, but that is not all that it can do. "Magnetic knife strips free up counter space and look sleek when installed thoughtfully," Kerrie Kelly says. Modern adhesive options also take the hassle out of installation, making for a quick, time-efficient upgrade.
When adding a magnetic knife strip to your kitchen, the key lies in choosing the right placement. Kelly recommends choosing a spot between the countertop and the upper cabinets. "Install the strip at a comfortable height for easy access but out of reach of children," she says. Before you get started, you'll want to ensure that your chosen spot has been thoroughly scrubbed to get rid of any greasy residue that will interfere with the adhesion of the wall tape. While adhesive options work well on tiles, you will need to opt for screws if your kitchen has wallpaper or textured paint. Once done, Kelly prefers to place the knife blades in alternating directions to minimize the risk of accidental cuts.
Install a range hood cover

The range hood over your gas stove plays a bigger role than you'd expect in dispelling toxic pollutants and improving the air quality in the kitchen. However, since this kitchen appliance is often designed for performance rather than style, you might be dealing with a chunk of industrial steel in the center of your kitchen. This is why getting creative with your choice of range hood cover can help. "For a polished, designer look without carpentry skills, use [prefabricated] wood panels, MDF with heat-resistant paint, or thin slatted trim kits that can be cut to size," Kerrie Kelly says.
For your choice of materials, she recommends betting big on ones that refuse to be cowed by moisture or heat, including sealed wood, metal, and engineered panels. There are several ways to DIY your own as well, whether you are looking to repurpose an antique headboard or glue on adhesive wallpaper for an instant facelift.
Regardless of which option you choose, Kelly advises keeping some safety measures in mind. "When installing a range hood cover, clearance and ventilation safety are non-negotiable — ensure the fan is functioning properly and maintain required distances from cooking surfaces," she says. With the addition of a decorative trim and a hand of paint that matches your cabinetry, you can achieve a cohesive finish within the span of a single weekend.