15 Microwave Tricks You'll Wish You Knew Sooner
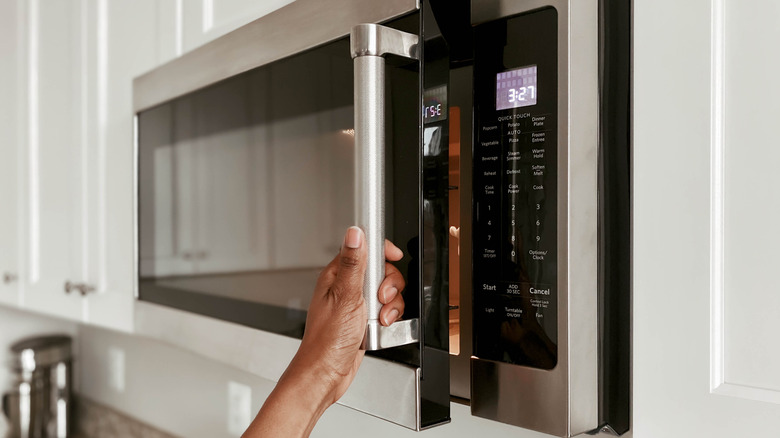
A microwave is a valuable addition to any kitchen, perfect for swiftly reheating leftovers, thawing frozen food, or even whipping up a speedy baked potato. This trusty appliance can make our food prep a whole lot more convenient, saving us a significant amount of time and often reducing cleanup, too. But despite their popularity, most microwaves likely aren't being used to their full potential.
When going about our daily home cooking, we often don't give the microwave a second thought, opting instead for the stovetop or oven. However, there's far more to this appliance than just reheating. You can use it to cook entire meals, bake single-serve sweet treats, or prep ingredients for chopping. It can even help you master the perfect eggs, give bread a new lease of life, or whip up a barista-worthy frothy coffee. With a microwave in your toolkit, there's endless potential for fuss-free kitchen creations. So, here are some of our favorite tips and tricks that'll help you make the most of yours.
Speed up garlic peeling

Peeling cloves of garlic can be fiddly and time-consuming, but thankfully, your microwave can help. Just separate the cloves and place them on a microwaveable plate, then microwave them on high for around 20 seconds. Once the garlic is cool enough to handle, use your fingers to peel away the papery skin. You should find that it now comes away far more easily than it would on a room-temperature clove. This is because the brief stint in the microwave causes the garlic to release steam, which helps the skin to separate from the clove.
If you're looking for a shortcut for roasting garlic, the microwave can make this easier, too. Slice off the tops of the whole garlic bulbs, drizzle them with olive oil and sprinkle with salt, then place them cut-side up in a shallow dish of water, so the bulbs are submerged approximately one-third of the way up. After microwaving the garlic on high for around eight minutes, it should be wonderfully tender. Once cooled, simply squeeze the softened cloves out of the skins and use them in your recipe as desired.
Get more juice out of citrus fruits
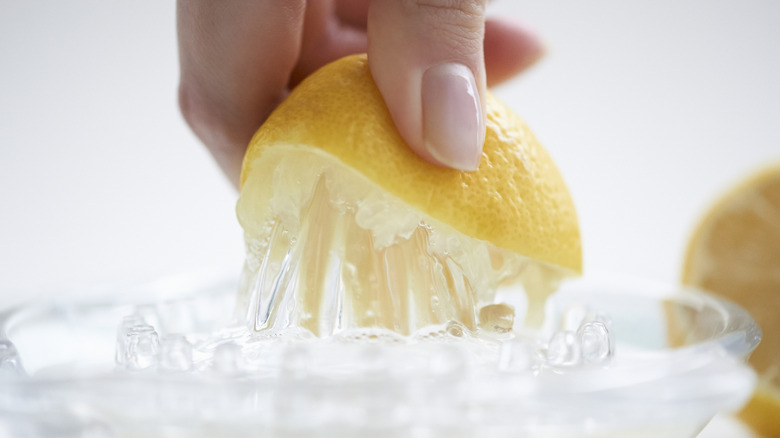
Ever gone to squeeze a lemon to be met with a rather disappointing drizzle of juice? Sometimes, citrus fruits need a little help to unleash their full potential, and this microwave hack makes squeezing a breeze. To extract more juice from a lemon, orange, or lime with a microwave, you'll need to gently warm it up. The idea is not to cook the fruit, but to heat it just enough that the juice capsules begin to burst, and the simplest way to do this is by microwaving the whole fruit for 20 to 30 seconds.
Once you've warmed it in the microwave, you can also give the fruit a quick roll on the countertop, pressing down gently with the palm of your hand. This will further assist with breaking down those juice capsules inside. Then, slice the fruit in half and get squeezing, using either your hands or a juicer. The fruit should feel lovely and tender, making it super easy to extract every last drop of juice and ensure that nothing goes to waste.
Steam vegetables
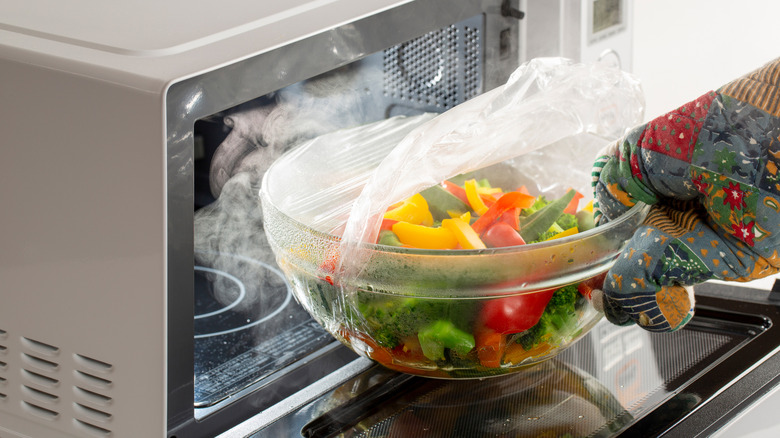
When you're short on time, you can still pack your plate with color and nutrients. With this handy microwave method, vegetables can be steamed to tender-crisp perfection in mere minutes. There's no need to boil water on the stovetop or wait out lengthy roasting times, and your veggies will come out just as delicious as with other more traditional techniques.
Step one is slicing or dicing the vegetables. For broccoli or cauliflower, this might be small florets, while carrots are ideal for cutting into rounds, and bell peppers work well in thin strips. Place the veggies in a large dish and pour in just enough water to cover the bottom of the dish. Lay a sheet of plastic wrap on top, leaving a small gap for some of the steam to escape, and microwave the vegetables on high. The exact cooking time will vary depending on the type of vegetables you're steaming, but start with two minutes and add more time if needed. Flipping the veggie pieces over about halfway through cooking can also help them to cook more evenly. You'll know they're ready once they can be easily poked with a fork.
Steaming your veg in the microwave is a healthy option, too. When boiled, vegetables can lose a significant portion of their vitamin and mineral content (up to 70% in some cases). However, the microwave method preserves the nutrients more effectively, with one study showing that microwaved spinach and carrots retain over 90% of their vitamin C content.
Cook bacon
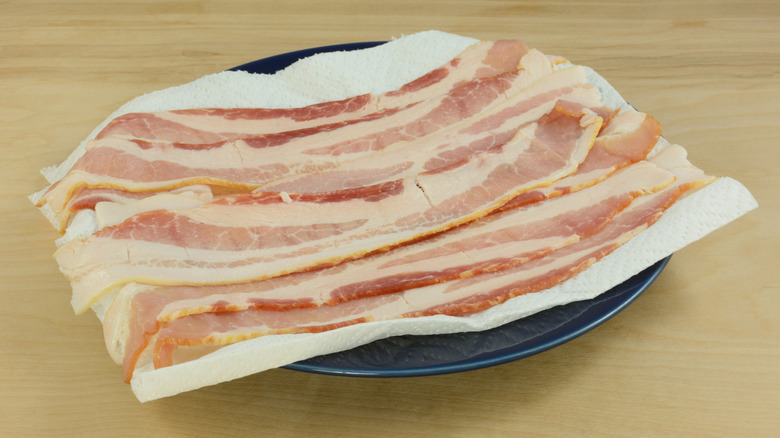
You might be skeptical about cooking bacon in the microwave, but this approach does actually yield an amazingly crispy and flavorful result. In fact, you'd never know that those smoky strips hadn't been cooked in a frying pan. This method is wonderfully quick and mess-free, and once you've tried it, it'll fast become your go-to.
The first step is to line a large microwave-safe plate with paper towels. Place the bacon strips on top in a single layer, then cover them with more towels. Pop the plate into the microwave, and cook the bacon on high for three minutes. If the bacon still looks like it has some crisping to do, continue microwaving in 30-second bursts until your desired texture is reached. Much of the excess grease will have already been absorbed, but it's a good idea to give the bacon a final drain on some fresh paper towels before serving.
Another effective trick is to drape the bacon over an upturned bowl before microwaving it. With the bowl set on top of another dish, the idea is that the grease will run down the sides and be caught in the dish beneath, helping the bacon to achieve that all-important crisp finish.
Toast nuts

When toasting nuts, most of us reach for the oven or stovetop, but there's an even easier way to give nuts that moreish crunch. Using the microwave is an effective, time-saving hack, since there's no preheating time to worry about. This technique involves spreading the nuts on a microwavable plate and tossing them with a small splash of neutral oil, such as vegetable or canola. You could go for almonds, pine nuts, walnuts, pecans, or just about any type of nut that takes your fancy. Just microwave them on high in one-minute intervals, stirring between each burst, until the nuts are fragrant and golden.
Adding oil to the nuts helps them to cook a little quicker on the outside than they do inside, which is key to that wonderfully browned, toasty finish. Without the oil, the nuts will still become crunchier and more aromatic, but won't develop quite as much flavor or color. This is because the intense power of the microwave cooks the exterior and the interior of the nuts to a relatively equal degree.
Dry herbs
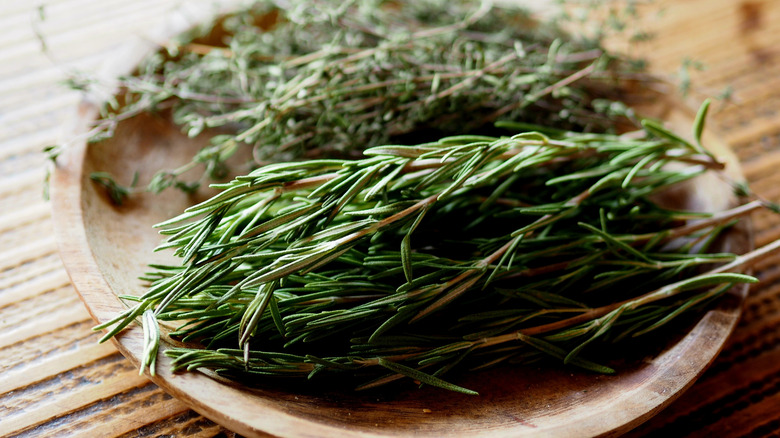
Got a surplus of fresh herbs? Drying them out is a great way to extend their shelf life, and you don't need any fancy tools to do it. Your trusty microwave can absolutely be used to dry fresh herbs, and you'll be amazed at just how speedy the process can be.
Herbs with thick, sturdy leaves like rosemary, thyme, and oregano are ideal for drying, as they retain their aromatic compounds well upon heating. Grab your choice of fresh herbs from the fridge, and prepare them by picking off the leaves and discarding the stems. Place the leaves onto a paper towel-lined plate, cover them with a second layer of towels, and microwave everything on high for one minute. If they haven't dried out completely, continue microwaving the herbs in 20-second bursts until they crumble when you crush them between your fingers. The microwave method is amazing for preserving the herbs' natural color and bold taste, since it rapidly removes water from the leaves while keeping pigments and flavor compounds intact.
You can then crush the dried herbs roughly using a mortar and pestle, or blitz them up into a fine powder using a spice grinder. They can be stored in the pantry in an airtight container for around 12 months.
Bake a single-serve cookie

Sometimes, you just need a sweet fix, and there are few options as tempting as a freshly baked chocolate chip cookie. Sadly, there isn't always the time to prepare an entire trayful of these beauties from scratch, but if you have a microwave and a few minutes to spare, there's no reason why you can't whip up a single-serve treat.
To make an individual cookie, first combine small quantities of melted butter, sugar, and milk in a bowl. Then sift in flour, add a pinch each of baking soda and salt, and stir until you have a dough-like mixture. Fold in the chocolate chips or any other add-ins of your choice, such as toasted nuts or M&Ms, and shape the dough into a single ball. To bake the cookie, place it on a parchment-lined, microwave-safe plate, and microwave it on high for one minute. It'll spread and crisp up on the outside just like its traditional oven-baked counterparts, with those chocolate chips becoming gloriously melty and gooey. Make sure to let it cool a little before taking that first mouth-watering bite.
Revive stale bread
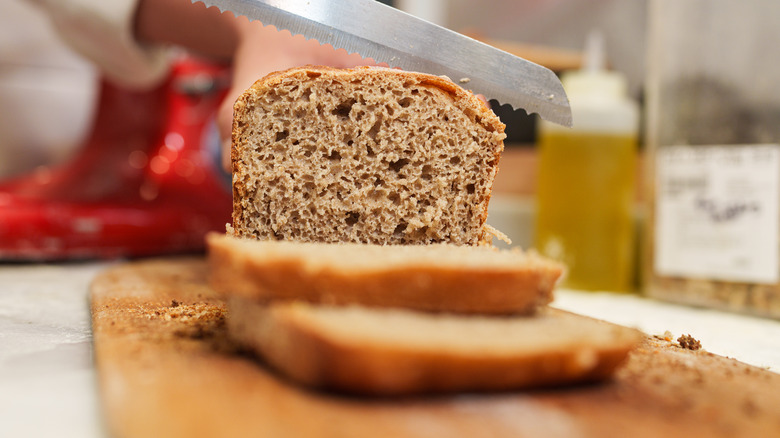
Stale bread doesn't make for a particularly appetizing sandwich, but if your loaf is a little past its best, your microwave can help to revive it. Of course, bread with visible mold or an unpleasant odor is not safe to consume, but if the loaf is simply feeling a little harder and drier than you'd like, it can absolutely be salvaged.
The key to reviving stale bread is adding moisture back into the crumb. This can be done by wrapping the loaf or slice in damp paper towels, ensuring it's fully covered, and microwaving it on high for between 10 and 30 seconds, depending on the size of the bread. As everything heats up, the moisture in the paper towels will gently steam the bread, allowing the starch molecules to reabsorb moisture and revive that tender texture.
This technique works well with both small, whole loaves and individual slices of bread. If you're reviving a baguette, a top tip is to pop it in the toaster oven post-microwaving, to get that crust delightfully crisp and golden and keep the center lovely and fluffy.
Make potato chips
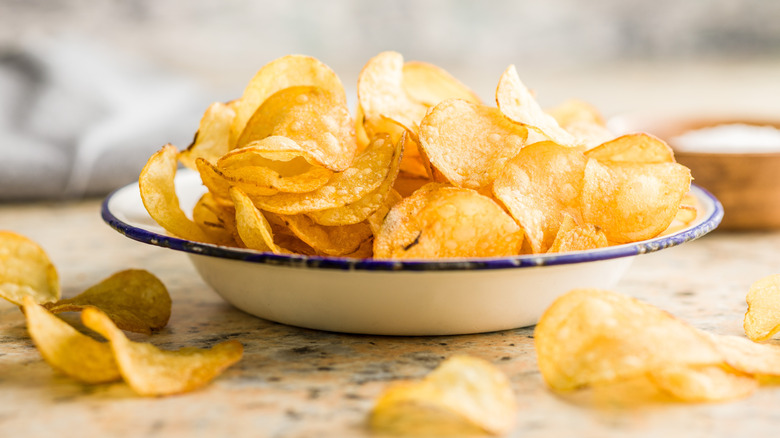
Crunchy, salty, and oh-so-moreish, potato chips always make for a satisfying snack. While a store-bought packet delivers on convenience, making chips from scratch is far more rewarding and offers plenty of opportunity for customization. Homemade potato chips don't require deep-frying or oven-baking, either. Here, the microwave is the star of the show, producing a batch of perfectly crispy snacks in minutes.
Once you've scrubbed and dried a large russet potato, slice it into rounds as thinly as possible, preferably using a mandoline. Rinse the slices in cold water to remove the excess starch (this will help them to crisp up later), then pat them dry with paper towels. Next, line a microwave-safe plate with parchment paper, brushing the paper with a little canola oil before laying the potatoes on top in a single layer. Brush more oil onto each slice, then microwave them for around seven to eight minutes, flipping the chips halfway through cooking. Once lightly browned and firm, the chips can be tossed with your favorite seasonings, such as paprika, garlic powder, salt, and pepper. They'll reach their peak crispiness once fully cooled.
Proof dough
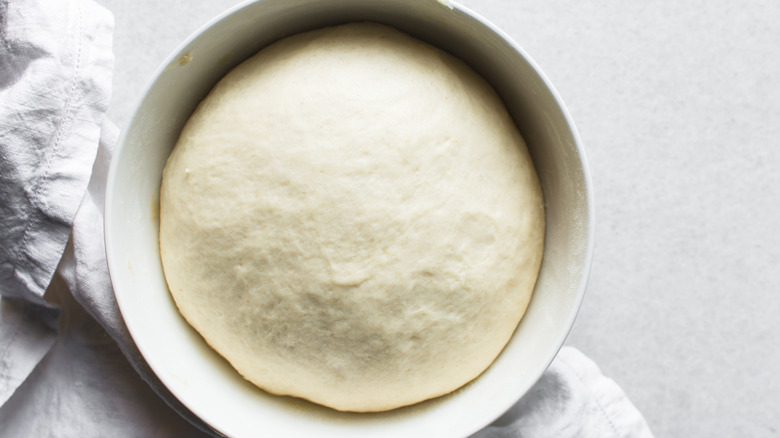
Homemade bread recipes often include one or more rounds of proofing, where the yeast ferments sugars in the mixture, releasing carbon dioxide gas that causes the dough to rise. This is a vital step for achieving an airy crumb and rich flavor. To activate the yeast, the dough must be left to rise in a warm place, ideally at a temperature of around 72 to 78 degrees Fahrenheit. However, for the average home baker, who doesn't have access to a fancy temperature-controlled proof box, it can be tricky to find an appropriate proofing spot. That's where your microwave can come in, because this humble appliance can be easily transformed into a highly effective, makeshift proof box.
Start by microwaving a cup of water in a microwave-safe cup on high for two minutes. Then, cover your bowl of dough with a linen cloth and place it into the microwave alongside the cup of water. Close the door, and allow the steaming hot water to work its magic. The moisture and warmth create the perfect conditions for the yeast, and the dough should double in size within half an hour or so.
Make risotto
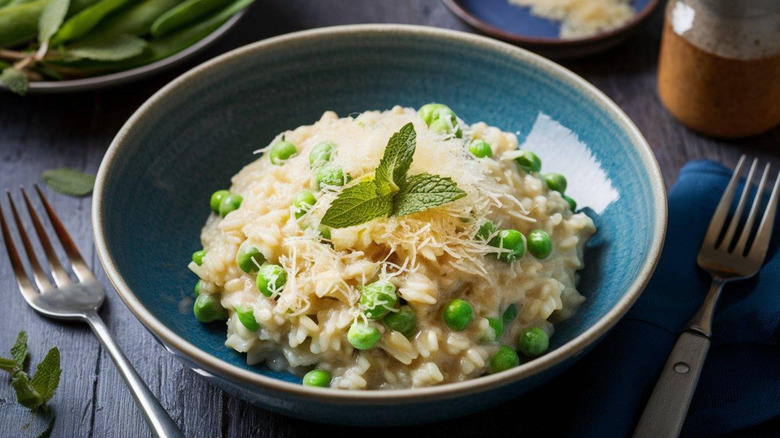
Risotto is a dish that's renowned for being somewhat time-consuming to prepare, usually requiring 30 minutes or so of near-constant stirring on the stovetop. Alternatively, a far more convenient approach is to use the microwave.
For a classic cheesy microwave risotto, first chop an onion and mince some garlic, then add the aromatics to a microwavable bowl with some butter. Microwave these ingredients on high for three minutes, then separately heat another bowl of chicken or vegetable broth, which should take around two minutes on high. Pour the hot broth into the onion mixture, add some arborio rice, and stir everything well. Then, cover the bowl with a plate or plastic wrap, and cook on high for around 15 minutes. If you'd like to incorporate a splash of white wine into the risotto, add this around six minutes into cooking, and frozen peas also make an excellent addition. Before serving, stir in lashings of grated Parmesan cheese, and the creamy risotto will taste fantastic topped with a sprinkling of lemon zest or fresh herbs.
Poach eggs
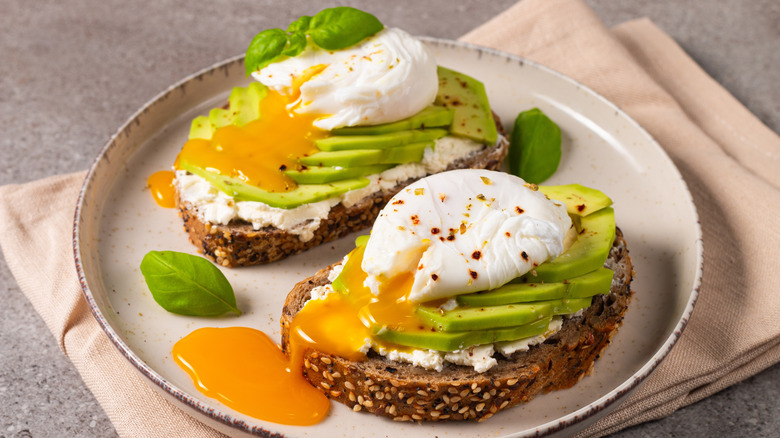
If poached eggs aren't your strong suit, you're not alone. These runny delights can be tricky to master, but with your microwave on hand, you'll be whipping up a spectacular brunch plate in no time.
To poach eggs in the microwave, take a suitably sized mug and fill it with a quarter cup of water. Microwave this on high until steaming but not boiling, which should take around 45 seconds. Then crack a fresh, chilled egg into the water and gently poke a toothpick into the yolk, which will prevent it from exploding during cooking. Place a saucer or some plastic wrap over the mug, and microwave everything for another 35 seconds. The egg should now be poached to perfection, with a fully set white and gorgeous runny yolk within. Gently scoop the egg out with a spoon and drain it on some paper towels, then serve it up with a sprinkle of salt and pepper and all of your favorite sides.
Foam milk

Finishing your coffee with frothy milk gives it an irresistibly creamy mouthfeel, and you don't need a dedicated steamer or frothing wand to achieve that foamy texture. Creating milk foam involves first agitating the milk to create bubbles, and then heating it to lock in that newfound airy consistency. This can be done with a simple mason jar and your microwave.
Pour your usual portion of milk into the jar, firmly secure the lid, and shake everything vigorously. Keep going until the milk has doubled in volume, which should take around a minute. Now, you can unscrew the lid and microwave the milk on high for 30 seconds. This stabilizes the foam, separating it from the liquid beneath and ensuring it doesn't immediately collapse. Low-fat milks will yield the frothiest results here, since they're often fortified with extra protein, which further contributes to the stabilization of the foam.
Decrystallize honey
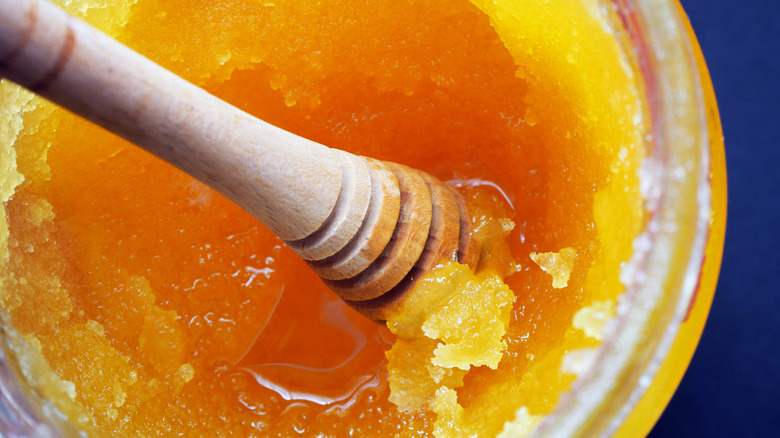
Even when stored in a cool, dry place, honey has a tendency to crystallize, especially if it's a raw, unprocessed variety. This happens when the natural sugars in the honey begin to separate from the water they're dissolved in. While it might be inconvenient, crystallized honey is completely safe to eat, but if you want to revive your honey's drizzling potential, just pop it in the microwave.
It's important to warm the honey gently, as overheating it can impact its nutritional quality and flavor. Set your microwave to 50 percent power and heat the unlidded jarful for 30 seconds. The honey should now have returned to a liquid state, ready for stirring into yogurt bowls, drizzling atop toast, or blending into dressings. Do keep in mind that the honey will likely recrystallize relatively quickly, so you may need to repeat the process next time you want to use it.
Make butternut squash easier to peel and chop
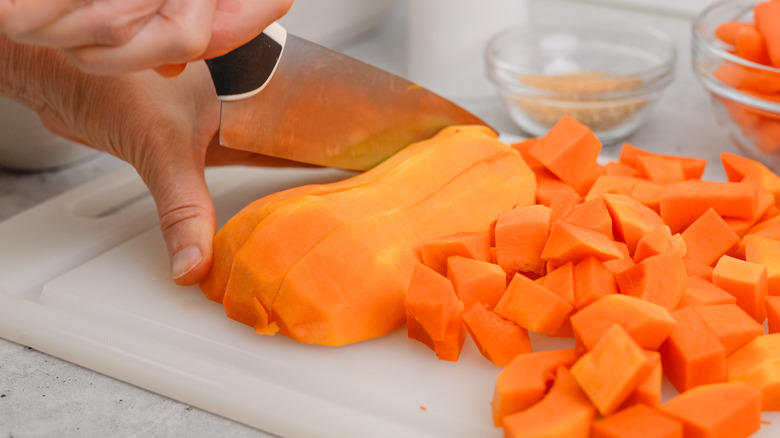
Preparing a butternut squash is no mean feat. This vegetable's large size, tough skin, and firm flesh make it particularly tricky to peel and chop. By softening the squash in the microwave beforehand, you'll significantly reduce the effort required to dice it up, all while getting a head start on cooking.
Before microwaving the squash, grab a fork and poke holes all over the skin. This will allow steam to escape during cooking, preventing any unwanted explosions. Cut off both ends of the squash, place it on a microwave-safe plate, and cook it on high for around three to four minutes, depending on its size. You'll then need to leave the squash to cool until you can comfortably handle it. The skin should now peel away with ease, and your knife will glide through the flesh with minimal effort. Start by slicing it in half and scooping out the seeds, before slicing or dicing the squash as directed in your specific recipe. It's perfect for roasting, tossing into soups, or even boiling and pureeing for use in baking.