18 Tips To Take Your Pie Crust To The Next Level
As the summer months wane into a cool, crisp fall, we have only one thing on our minds. It's neither pumpkin spice nor the turkey on the table for Thanksgiving. It's pies.
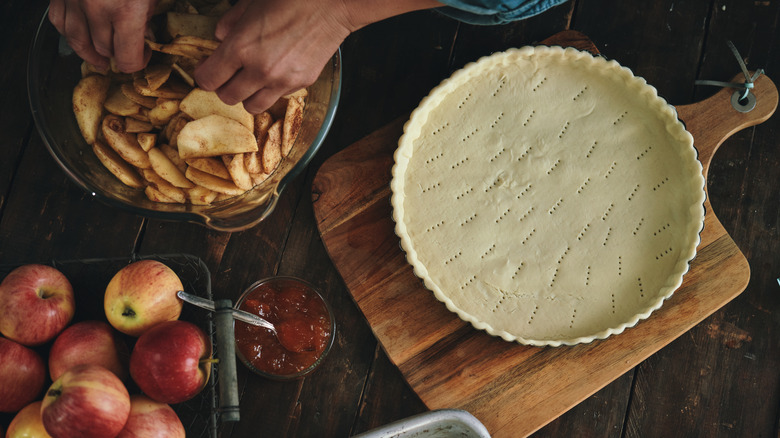
Pies are a versatile, timeless home baking venture that needs to be in your repertoire. You can get creative with the sweet or savory fillings and craft this dessert into a statement at your next gathering or celebration. The key to nailing the perfect pie isn't just about mastering the filling, either. The star of a great pie is in the crust. The base of this critical pie component is often a combination of flour, fat, and water, yielding a texture that breaks off with a fork but has some pockets of butteriness and tenderness. We've gathered some of the most essential kitchen tips and tricks for making an award-willing flour-based crust perfect for a rustic, latticed apple filling or a savory quiche.
Utilize the fraisage method
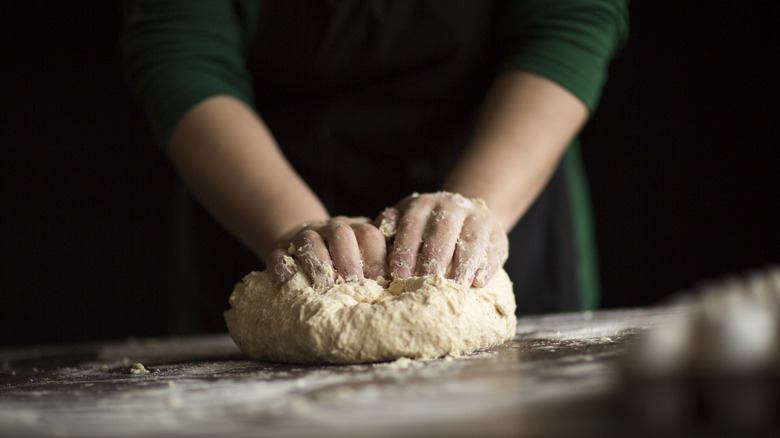
The ideal pie crust is perfectly flaky and filled with layers of butter. This texture melts in your mouth, making your pie-eating experience nothing but ethereal. The key to developing this hallmark structure is mixing the ingredients together diligently.
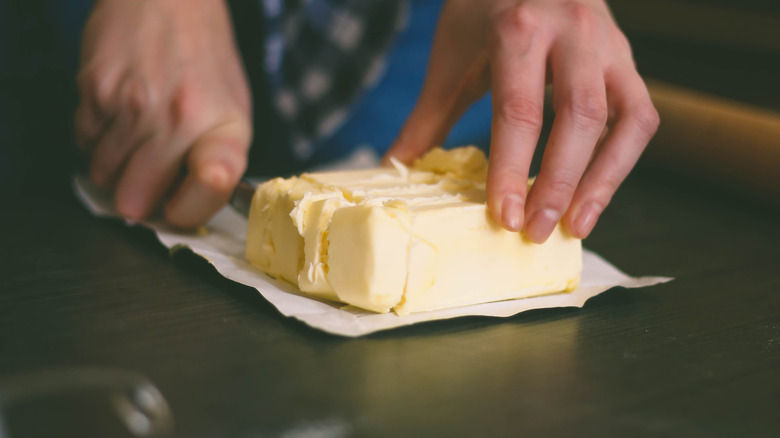
Instead of cutting butter into the flour with a pastry cutter or a food processor, you should consider getting your hands dirty — via the fraisage method. The fraisage method will forever change the way you make pie crust because it forces the butter into streaks, which will melt to form the pocketed layers. To do this, cut cold butter into half-inch cubes and use the heel of your hand to streak the butter throughout the dough. Then, flip the dough over and repeat on the opposite side. The perfect dough texture will be shaggy rather than soft and slightly tacky to the touch and have fat distributed throughout.
Stud your crust with shortbread cookies
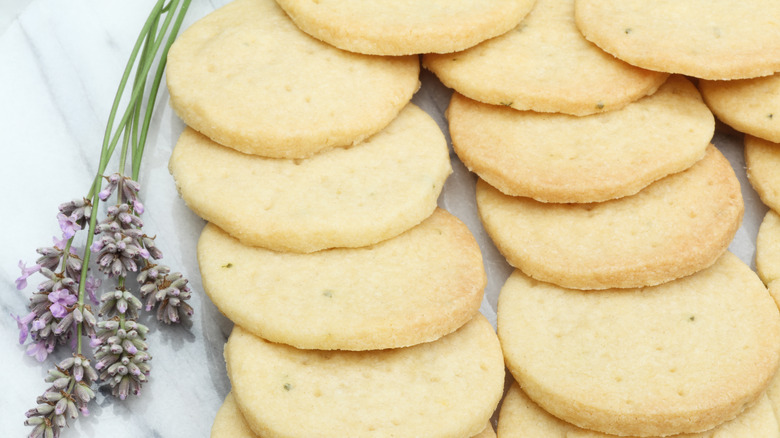
We can't blame you if you'd instead pick up a store-bought pie crust instead of making your own at home. But that doesn't mean you'll have to settle for a lackluster, bland crust. The easiest way to improve the texture and the flavor of any crust, whether store-bought or not, is to seek some help from crumbled shortbread cookies. These cookies have a high butter content and a sublimely sweet flavor, making them perfect for adding to pie dough.
Crush your shortbread cookies in a food processor or use the old-fashioned rolling-pin-and-a-bag technique. Then, gently press the crumbs into your pie shell before adding your filling. The cookies will release butter as they bake, add sweetness, and provide a critical amount of moisture to prevent your pie crust from drying out. If you want to amp up the butteriness of your crust, you can also add a swipe of melted butter over the crust before baking it.
Cut some of the butter with lard
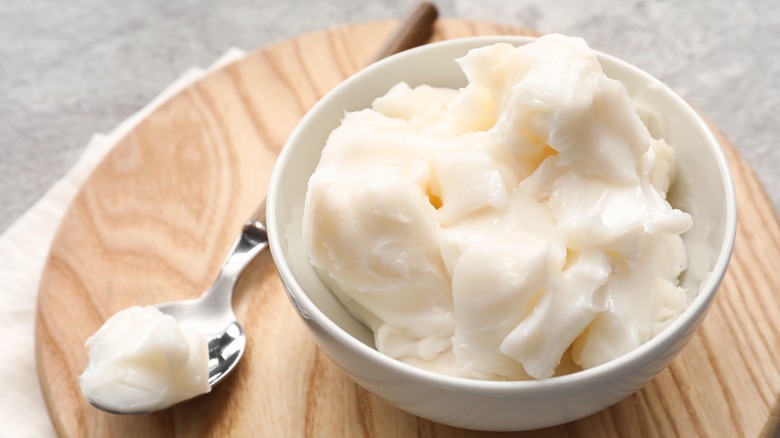
Butter is often the go-to fat for baking for a reason. It's easy to chill down, meaning the butter will melt and spread its sweet flavor while baking. But, the fat you should consider using to help your pie crust is a baking classic: lard. Lard is a solid fat derived from pigs, so it is not suitable for plant-based bakers. But, for those without those dietary restrictions, baking with lard is sure to enhance both the flavor and texture of your pie.
Lard will keep the crust tender and impart a mild, porky flavor that works well for sweet and savory fillings alike. This is because lard has a higher melting point than butter, which makes the dough less easy to overwork than an all-butter crust. To get the best of both worlds, consider using a blend of 70% butter to 30% lard in your next recipe.
Flatten the butter when you add it to the crust for defined layers
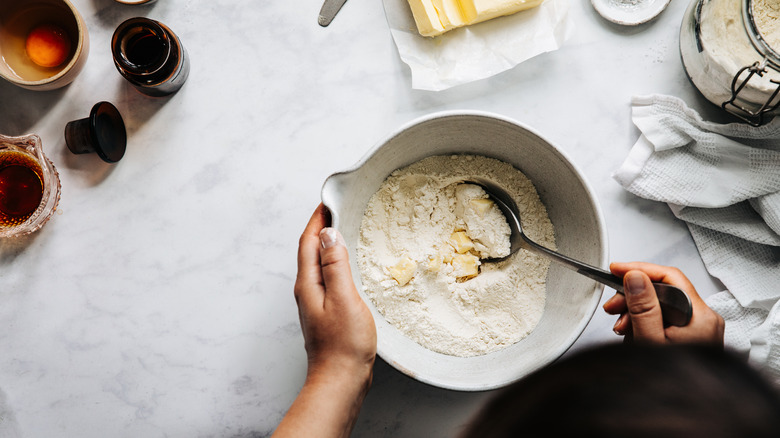
Who doesn't love an extra flaky pie crust? This characteristic structure forms as the butter, made of fat and water, melts down and releases steam. These air pockets give the crust a little bit of a height boost and also create delicate structures and intricate folds. As a baker, you'll need to control the temperature of the butter since warm butter won't generate enough steam, and the size of the pieces, because butter that is too small will just mix with the flour and not create the pockets.
To maximize this quality in your next recipe, add your butter strategically. The first portion of butter should be cut into the dough so it's pea-sized, while the second round should feature larger discs of butter folded in with your fingers. You'll get both the buttery tenderness and the ideal structure of an award-winning crust.
Use more than just white flour
The standard base ingredient for pie crusts is white, all-purpose flour. This variety is the workhorse of the kitchen because it has a moderate gluten content and acts as a blank palate of flavor that you can complement with any filling. However, only using white flour doesn't really do anything to improve the flavor of the pie crust itself.
You should try a blend of flour for the pie crust instead. If you want a soft, plush crust, consider using a 50-50 blend of all-purpose flour and pastry flour. The latter contains much lower gluten, which means that the dough won't get as tough as if you used all-purpose flour alone. You can also make a rustic fruit pie by substituting some of the white flour for whole wheat. This flour choice gives the recipe a nutty profile and highlights fruits like apples, blueberries, and peaches.
Add suet
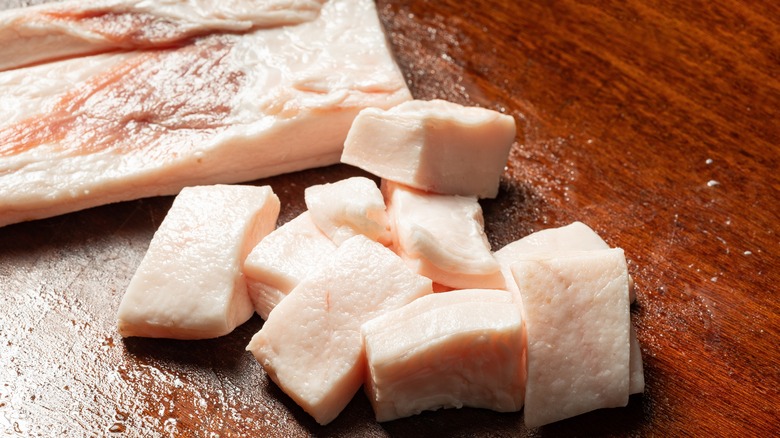
Although it might be an unconventional ingredient, you should consider adding suet to your next pie crust to improve its texture. This is a dry, crumbly fat rendered from the kidney region of cows, sheep, and goats. Although it's rare to find the ingredient used in American cuisine, it's a staple for British and Scottish pastry and savory dishes.
Suet has a much drier consistency than other fats, which means that it doesn't get as greasy. It also has a less porky flavor than lard, which meshes better with sweet fillings. You'll benefit from having fat with a high melting point, which means, like lard, you're less likely to overwork the dough and melt out the fat. If you're baking a sweet pie, it would be best to use a blend of both suet and butter to get the perfect flavor, but you can stick to a suet-only pie for a meat or veggie filling.
Grate your butter in for optimal distribution
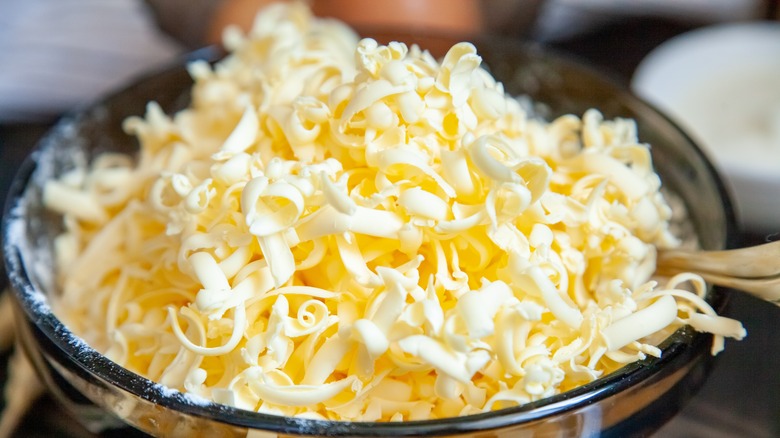
You shouldn't underestimate the importance of adding cold butter to your dough. Cold butter releases steam slower than warm butter, which will help your pie flake perfectly. Plus, when the butter melts, the water will mix with the gluten proteins in the flour and cause it to seize up and get tough.
The best way to add butter to your pie crust is to adequately chill the butter before adding it to your pie crust. If you're using a food processor, that means placing the butter in the freezer for a few hours before you pull out your tools and start working. If you're planning on mixing the butter with your hands (which is a more reliable indicator to tell you when the dough is borderline overworked), freeze the butter and grate it in with a box grater. Mix only enough to bring the shaggy dough together.
Get boozy with vodka
Although getting a little tipsy with a shot or two may make baking more fun, that's not what we're suggesting using the vodka for. You should consider adding vodka to your pie crust because it has a high alcohol content, which does not activate the gluten proteins like cold water would. The water, or in this case, vodka, is a critical ingredient to combine with the fat and flour to bring the dough together.
A dough made with vodka tends to be easier to work with and won't make the dough soggy because the alcohol will cook off more quickly than water alone. Most of the alcohol is cooked out from the pastry as the pie bakes, but home bakers looking to infuse more flavor into their dough can consider playing with other spirits, too. Rum, whiskey, and gin can also be used in place of vodka.
Double-chill your pie dough for the best flake
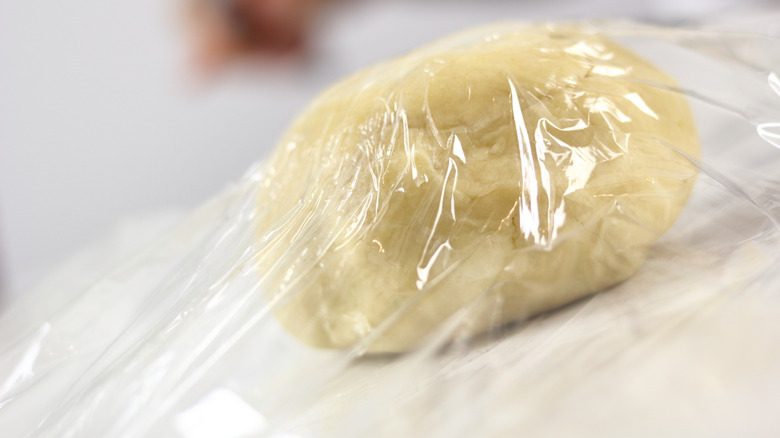
Pie crust is by no means a recipe you'll want to rush. This includes using butter that's been frozen for a few hours, and chilling your dough to give it enough time for the gluten to slack and the butter to solidify after being exposed at room temperature. But you shouldn't just chill your dough just once.
It's important to double-chill pie dough, both after you've mixed the ingredients together and after your pie dough is shaped and in the tin because it will lead to optimal pie texture. Wrap your dough in plastic wrap to prevent the outside of the dough from losing all of its moisture, and place it in the refrigerator for at least 15 minutes. This will allow you to preheat your oven, prepare your filling, and ensure that your pie crust comes out deliciously flaky every single time.
Roll your pie crust with a frozen vodka bottle instead of a rolling pin

When you need to roll out and shape your pie crust, your go-to tool is likely a rolling pin. But there's another item in your kitchen that's even better for rolling your crust into the perfect shape. A frozen vodka bottle is the key to an ultra-flaky pie crust because it keeps the butter super cold — which slows down the melting process before your crust hits the oven.
Since you want your pie to have a thin, consistent roll, opt for a bottle with a long, cylindrical shape. Place the dough in between pieces of parchment paper (both to prevent it from sticking to the bottle and to reduce the residual moisture). This will ensure your dough maintains its soft, flaky consistency rather than becoming too wet and gummy to handle. From there, transfer the dough to a pie tin and bake as directed.
Be mindful of how hard you're rolling the dough
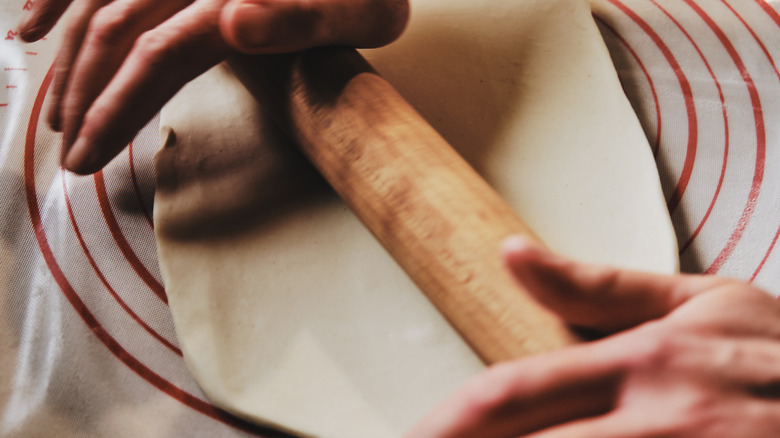
Naturally, we all get excited to bake something delicious in the kitchen. However, don't let that excitement to crank out your pie dough ruin its consistency.
The trick to rolling out pie dough evenly is to avoid overworking it. When the dough is rolled constantly in the same spot and with a lot of pressure, it can cause the gluten proteins to act up and get tense, resulting in a bread-like crust instead of a pastry one. Instead, roll your dough gently and rotate it in between so each part gets rolled out sufficiently. You should also always start in the center and roll the pin away from your body. The absolute best thickness for pie dough is about two-quarters thick — or about an eighth of an inch. If your pie dough is too thin, it risks tearing. Too thick, and you'll have a crust you can't easily cut with a spoon or a fork.
Don't just toss your crust scraps
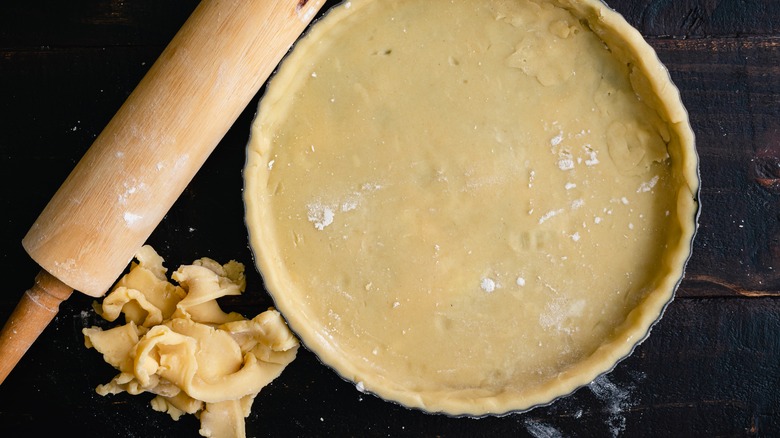
When you finish placing your pie into the dish and trimming the edges neatly with a sharp knife, you'll probably have some spare pie dough. Rather than spoon it into the trash can, you can use up the leftover pie crust with a bit of creativity and a rolling pin. Start by adding all the crust pieces into a ball and chilling it in the freezer to allow the butter to solidify and the gluten to slack.
You can make a crispy cracker snack with your dough; it's perfect for spooning into hummus or serving with soft cheese. Roll the dough out, slice it into squares, swipe on an egg wash, and add your favorite herbs or sea salt topping. You can also make a little brunch quiche appetizer by placing sliced dough rounds into a muffin or mini-muffin tin and filling it with a seasoned egg mixture.
Add a wash before baking
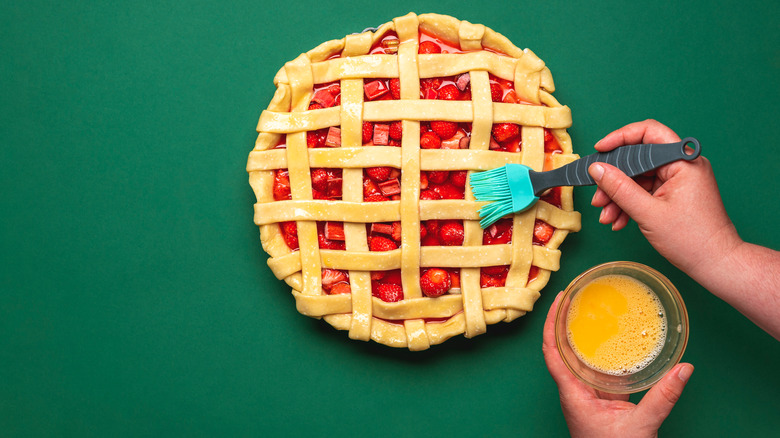
The wash is a critical step that many bakers forget, and it makes a big difference in the color and appearance of your pie. Wash is used to help stick pieces of the pie together, like if you added a couple of pieces of crust as accents, or to help coarse sanding sugar stick to the dough as it bakes. Regardless of the type of wash you use, you should always add it sparingly with a pastry or silicon brush. Don't try to drown your crust; just a quick swipe will do.
It's important to pick the right wash for your pie crust because each will produce a different hue and consistency. Eggs mixed with water are one of the most common types of wash; they will make a golden, flaked crust. If you're after a lustrous shine, use milk or cream instead. Dairy-free and vegan alternatives include almond milk mixed with some coconut oil.
Use a baking steel for crispy crust
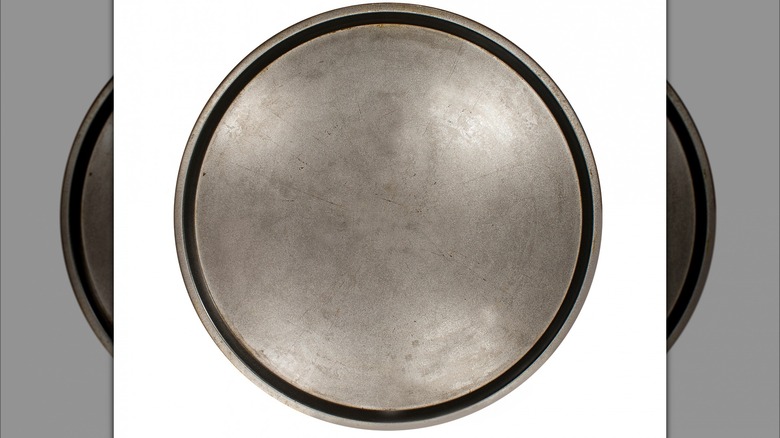
The best pie crust is crispy. After all, nobody wants a soggy bottom! And the often overlooked kitchen tool to ensure crispy pie crust might even be already in your kitchen.
You should use a baking steel to help concentrate the heat on the bottom of your pan. It's a flat, oven-safe pan that many home cooks often cook pizza on. The baking steel conducts heat easily so that it will keep a concentrated warmth on the bottom of your pan. Such is especially true for blind-baking pie crusts, which is often done for pies where the filling either doesn't need to cook as long as the crust or the baker wants to ensure that the filling doesn't seep through the bottom layer.
Opt for a crust alternative
A standard flour crust isn't your only option when it comes to baking pies. Some of the best alternatives for pie crusts can elevate the flavor and texture of your recipe. If you want to stick with a more traditional pie crust texture, you can substitute sheets of store-bought puff pastry, which results in a croissant-like consistency. If you're baking a chocolate cream pie, you can also consider making a hybridized dessert with a brownie crust.
There are also many savory applications for quiche lovers out there. One of our favorite ways to make breakfast or brunch extra special is to substitute the flour crust with a potato hash. You can buy bags of frozen potato hash, season it to your liking, and park-bake before adding in your egg filling. The texture of this alternative is sublime and can turn your meal into a one-bite-wonder.
Apply a crust dust to prevent seepage
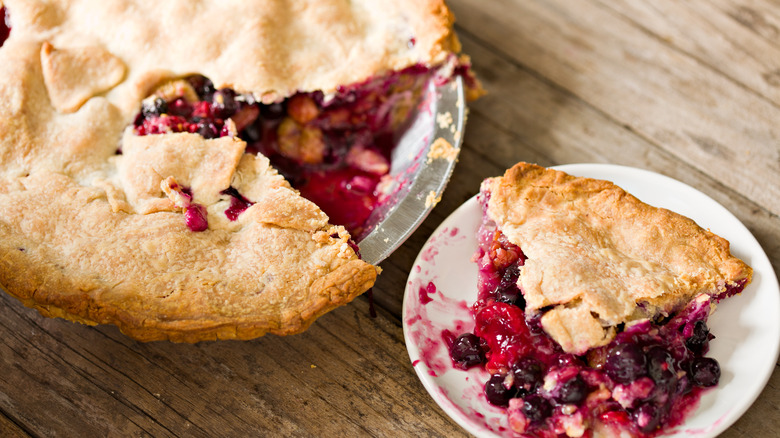
Although we absolutely love eating blueberry pie, the bottom crust always comes out a bit more liquidy than we'd like. If you don't budget for the moisture of the fruit, you can end up with a pie crust that's soaked through and not entirely distinguishable from the fruit layer.
For wet pies, you'll need to use a unique concoction of flour and sugar before spooning in your filling. It's a game changer for your pie crust because the powder soaks in any extra juices and will keep the bottom of your dough crispy. Mix together equal parts of granulated sugar and white flour and sprinkle it on both the bottom and the sides of the crust. If you find that this isn't enough, you may need to consider letting your pie rest for longer (since fruit pies may require up to a few hours) or add more cornstarch or tapioca to your filling to help it solidify.
Bake it in an alternative vessel
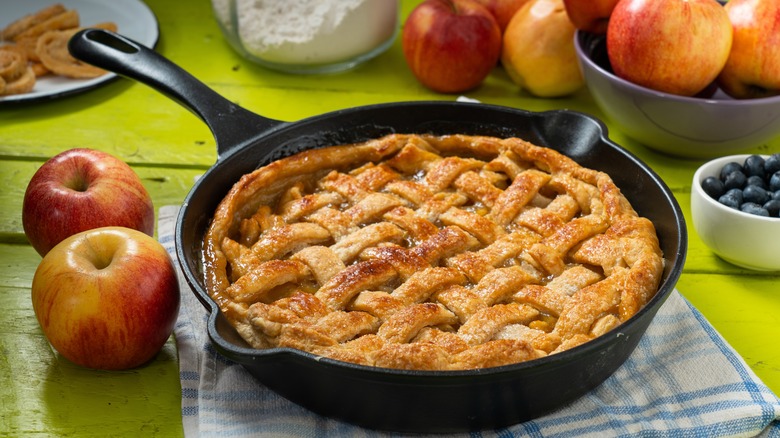
What is the best vessel for baking pie crust? Many home bakers swear by their glass pie plates — which hold heat well and allow you to check the bottom for doneness — but you should get a little more creative with your choice. A cast-iron skillet can help you make better pies by holding the heat in, producing evenly-baked, distinguished crust layers. You'll also have taller edges on the sides of the pan, which allows for more filling. Just be sure to budget for a little extra dough to cover this added surface area.
For a perfectly crispy pot pie crust, consider using a Dutch oven. You can pre-cook your filling in the Dutch oven and just slap on a piece of pie crust to finish it off. You won't have to worry about doing any extra dishes, and the coated ceramic material makes for a perfectly baked crust.
Protect your pie with a ring or tent
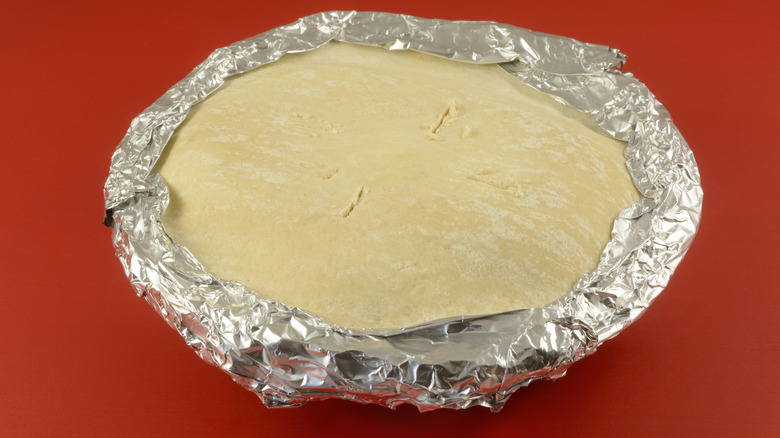
One of the most notoriously tricky parts about making pie crust is that it doesn't cook evenly. The edges of the crust tend to brown faster than the rest of the pie, which can leave you scraping off burnt pieces while the bottom of your pie is raw. To prevent burnt pie crust, grab your aluminum foil and make a shield. Once you cut a square of foil large enough to encase your pie, fold it into a smaller square, and cut two concentric curves to create a ring. Then, you can place the ring on the crust for the last 20 minutes of baking or opt to leave it on in the beginning and take it off for the home stretch.
If you want to protect the entire top of your pie crust, you can also add a sheet of foil to the top of the tin, crimping gently along the sides. It's easiest to apply the tent before the pie is in the oven and remove it after the pie is mostly baked rather than the other way around.