How To Debone Chicken Thighs Like A Pro
There's a saying in the software and engineering worlds that "you can pick any two of good, fast, or cheap." It doesn't work quite the same way in cooking, but there's a definite interplay between convenience, your grocery budget, and your cooking skills. If you know how to debone a few popular cuts of meat and poultry, for example, you don't have to pay extra for the convenience of buying them already boneless.
In my case, I'm a trained chef and former restaurateur, so I have the skills. But truthfully, when it comes to cooking frugally, those skills were already well honed before I ever got to culinary school. If I wanted boneless chicken thighs, it was usually cheaper to buy the thighs bone-in and debone them myself. Also, buying them bone-in gives you more flexibility: If you look through a list of chicken thigh recipes, you'll typically find uses for both bone-in and boneless versions.
The good news is that deboning chicken thighs is about as easy as it gets. It takes just a few minutes to debone four or six thighs for a meal, so you can even do it on a weeknight. Here's how.
Things you'll need
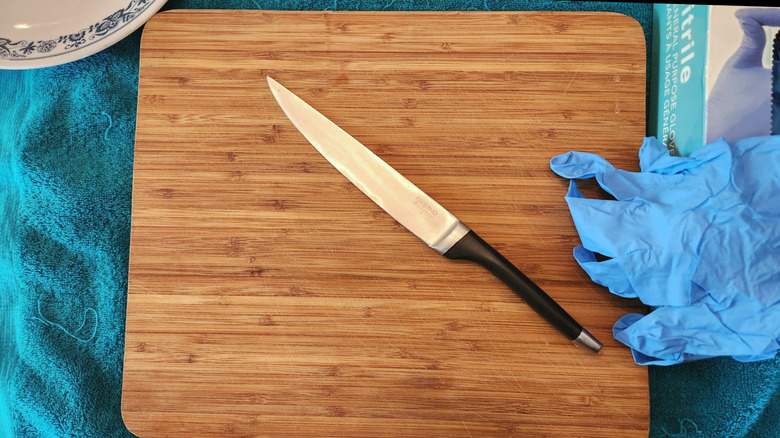
You'll need a clean work surface, one that's large enough to hold the bone-in thighs in their packaging (or on a plate) and a few other bits and pieces. It's a simpler job than deboning chicken wings, but you'll need the same basic items:
- A cutting board
- A sharp knife, ideally a boning knife, though a sharp paring knife also works pretty well
- Disposable kitchen gloves, for food safety (and the "ick" factor)
- A plate or bowl for the deboned thighs, and optionally another for the bones
- A kitchen towel to keep the cutting board from sliding as you debone the thighs
It's always a good idea to put a damp towel under your cutting board before you use your knife, to stabilize the board and keep it from sliding. A wad of moistened paper towels will also do the trick, and I've seen people use textured shelf liners, as well. The last thing you want when you're working with a sharp knife is for the board to be slipping and sliding around and putting your fingers in danger.
Step 1: Remove the skin from the chicken thigh (if desired)
Some recipes are best with a skin-on thigh, and some call for skinless. I'm a big fan of chicken skin, and for me, one of the perks of deboning my own is that it's usually the only way to get a thigh that's both boneless and skin-on. (Most stores don't sell them, so you have to ask the butcher and pay a premium).
If you're going to remove the skin, do that first. It comes off easily while the thigh is intact, but if you wait until the end, you risk tearing up your boneless thigh. To start, pick a spot on the edge of the thigh where the skin is visibly loose and gently pull it away. You'll find resistance at a couple of places, where fat or tendons hold the skin close to the muscle, and you can carefully sever those with the tip of your knife.
Don't throw away the skins when you're done, because they're a great ingredient in their own right. Put them between sheets of parchment and bake them with a weight on top, and they make a crisp, savory element you can crumble over salads and casseroles or even use to upgrade your BLT. Alternatively, you can put them with your other poultry scraps and render them for schmaltz, which is a great trick for roasting potatoes, as well as for frying hash browns or (of course) classic latkes.
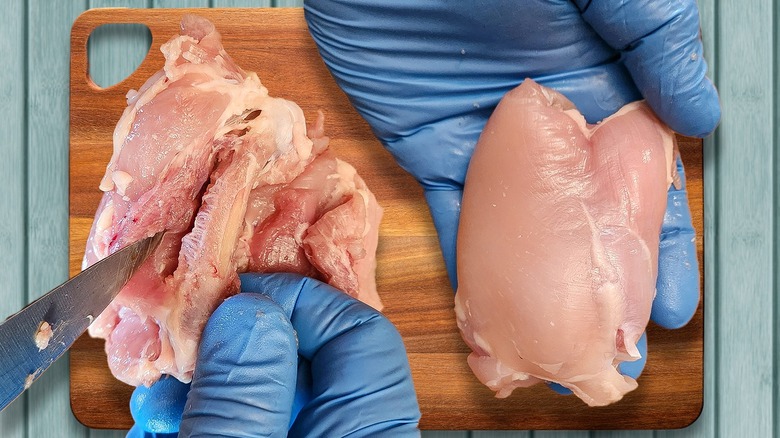
Step 2: Place a thigh skin-side down on your cutting board
You'll always want to debone chicken thighs with the skin side down, for a couple of reasons. One is that the deboned thigh will look neater this way, even if you later remove the skin, because the large muscles are all on the skin side, and you'll want to keep them intact. The second is that with the thigh upside down, it'll be easy for you to see where the lines of the muscle groups are. That makes it easier to follow them with your knife.
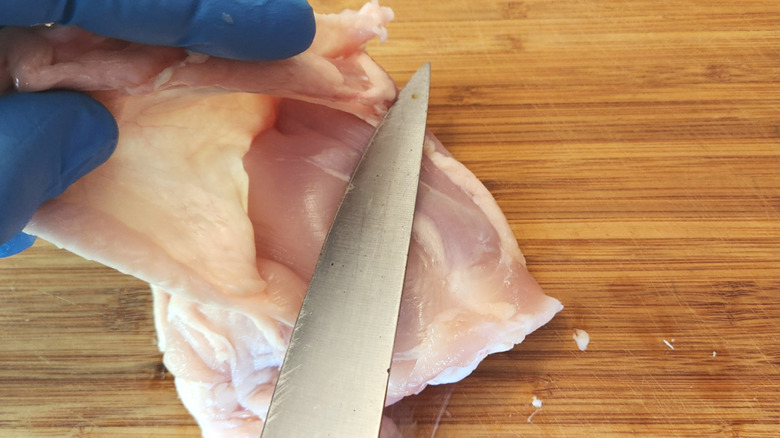
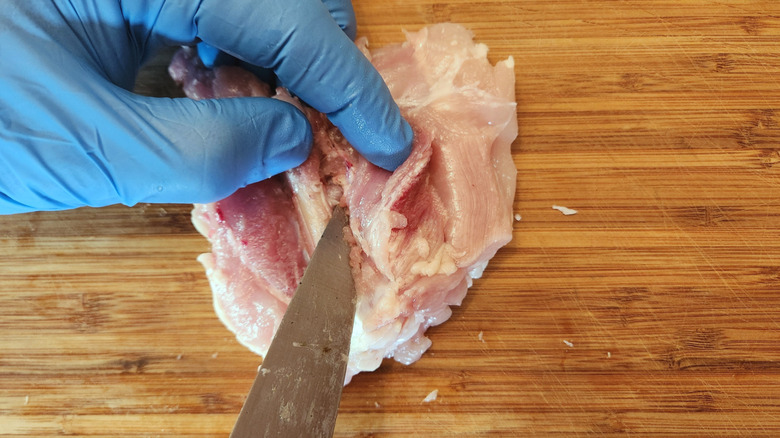
Step 3: Cut down one side of the thigh bone

There's a visible seam in the thigh muscles, near one side of the thigh bone. Follow that with the tip of your knife, feeling for the bone and then following it. Whenever you're deboning a piece of meat or poultry, try to angle your knife toward the bone as you go. That way, you'll always remove the most meat you can from the bone, which, in turn, means getting the best bang for your buck. Even if you have a plan for using the bones — and you should, so we'll come back to that momentarily — it's still best to get as much of the chicken as possible into your main recipe.
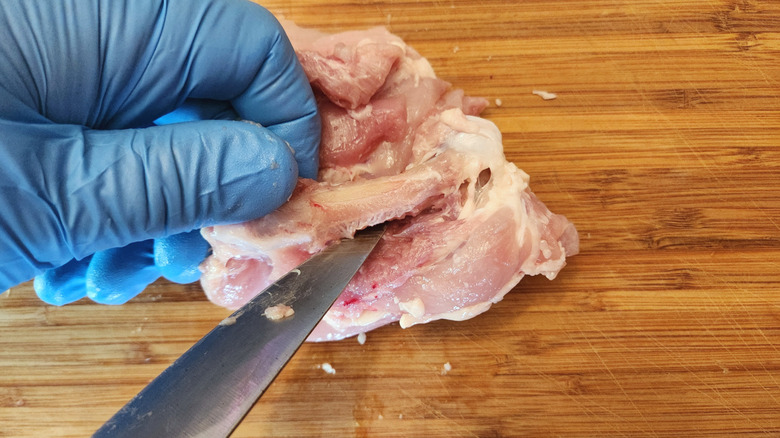
Step 4: Debone the top and other side of the chicken thigh
Next, slide the tip of your knife along the top of the bone, scraping it along the surface so that it severs the little tendons and ligaments anchoring those leg muscles to the bone. Give the bone a bit of a twist with your non-knife hand and then follow the curve of the bone around from the top to its other side. Slice along the second side, the same way you did for the first. When you're done, most of the bone should be sitting bare on top of the now-butterflied thigh, except where it's still attached at either end.
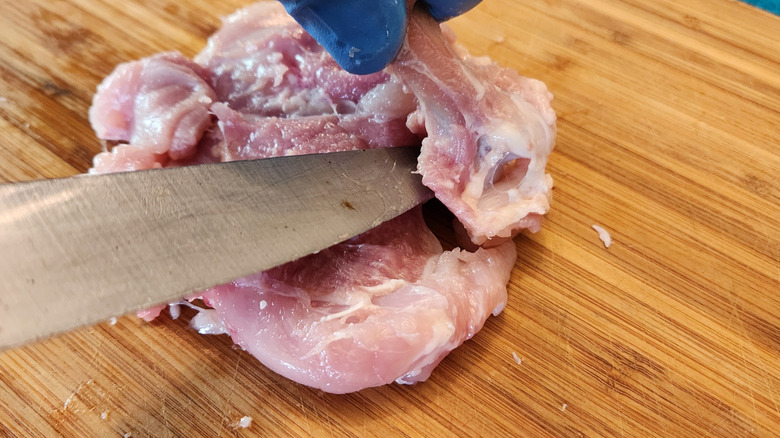
Step 5: Cut horizontally underneath the thigh bone
Now, you'll need to free those large muscles at the top of the thigh from the thigh bone. To do that, slide your knife tip horizontally under the bone (again, with the blade angled slightly so it's working toward the bone) and cut along the underside. This frees the bone from the rest of the thigh muscles, so now the joints at either end will be the only places where it's still attached.
You may want to rotate the bone slightly up from the cutting board as you work so that you're cutting at a more natural angle. I always find it awkward to bend my wrist so that I can keep the blade parallel to my work surface, and that definitely helps.
Step 6: Free the ends of the bone
The bone has a joint at either end, the larger hip joint and the smaller knee joint. It doesn't really matter which one you do first, though you'll spend a little more time cutting around the hip joint because it's slightly more work to trim it cleanly (depending on where you stand on the frugality versus impatience continuum).
So, pick an end and then cut around and underneath the joint with your knife tip to sever it from the meat. Now stand the bone up at an angle, so it's clear of the thigh, and then cut away the other end, in the same way. Now you'll have a boneless chicken thigh on your cutting board and a chicken-less thigh bone in your hand. Set the bone aside.
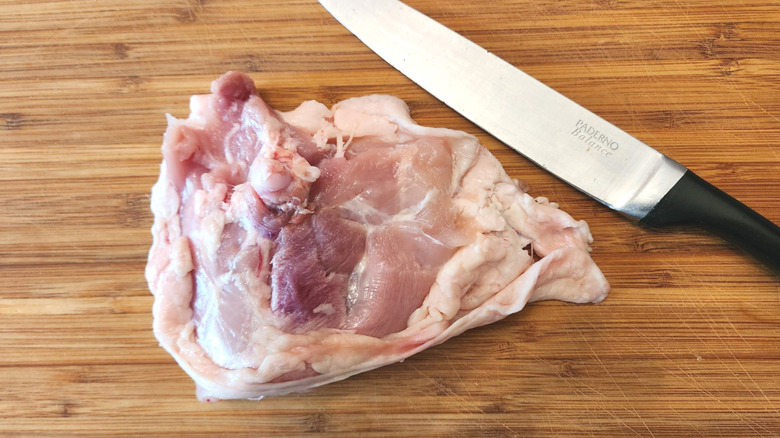
Step 7: Check and clean up your boneless thigh
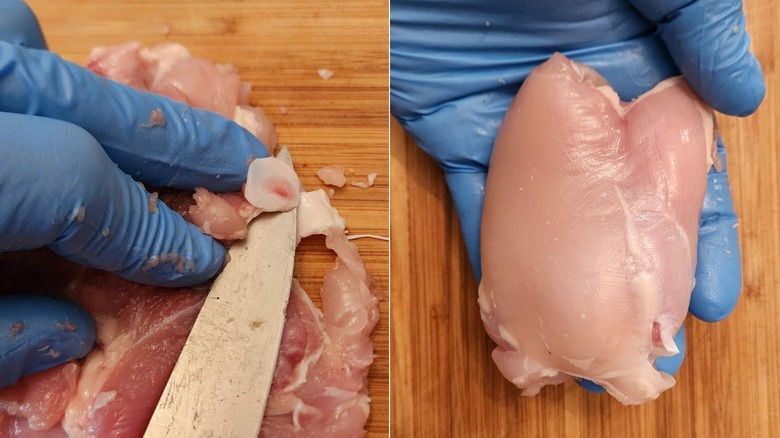
At this point, especially if you're new to the process, there's a pretty good chance that your deboned thigh has at least one or two small pieces of cartilage or gristle, or maybe even a bone fragment or two, still attached to the meat. That's normal, even for experienced chefs or butchers, though you'll find that practice makes ... better, if not perfect.
So, check the thigh with your fingertips, and if you find any hard scraps that shouldn't be there, you can simply cut them away with the tip of your knife. You may also find that you've left a strip or two of muscle on the bone. If they're large enough to bother with, by all means scrape them from the bone and nest them back into the rest of the thigh. If you're cutting the thighs up, a loose piece won't matter, and if you're cooking them whole, that sliver should stay in place just fine. Place your finished thigh on the waiting plate (or sheet pan, or whatever) and repeat the same process with the remaining chicken thighs.
Make use of the thigh bones
One reason I usually buy bone-in meats is that I find the bones useful. Making broth or stock is the obvious thing to do with them, and you can't go wrong having homemade broth on hand. I use my Instant Pot because it extracts more flavor and rich collagen from the bones than normal simmering. It's especially helpful if you're a bone broth aficionado, as doing bone broth in your Instant Pot saves you that extra-long simmering time. I love the smell of simmering chicken as much as the next guy, but you can have too much of anything!
If you don't have enough bones for a decent batch of broth, just bag and freeze them until you accumulate enough to work with. A less common use for them is to make deviled bones: As a rule, a food is called "deviled" if it's got a lot of pungent, spicy flavors, and that's exactly how this works.
Start by mixing breadcrumbs with salt and pepper and a combination of spices and dried herbs that you like. (Try a bit of cayenne, some smoked paprika, and a pinch each of thyme leaves and dried ground or fresh minced rosemary, as a starting point.) Then rub the bones with Dijon mustard or hot mustard, roll or shake them in the crumbs, and roast them in your oven or toaster oven. They make a nice "chef's treat" you can nibble to reward yourself for learning a new skill.
Static Media owns and operates Tasting Table and Daily Meal.