15 Mistakes You're Making With Scones

Scones are undoubtedly one of the most underrated breakfast, brunch, lunch — and really anytime — treats. Although they are well-loved in many countries, scones may have a different identity depending on what part of the world you order one. While American scones are typically loaded with sugar, a distinct glaze, and specks of chocolate or fruit, the British version is more subdued with a drier, and certainly less sweet, flavor — almost like a traditional Southern biscuit. It also has a much deeper history. The pastry was at the height of fashion in the 1840s when it became associated with the afternoon tea ritual and has remained a paramount part of British culture since.
You can always stick to ordering scones at a café with your morning beverage of choice, but they are a relatively easy and customizable baked good to make at home. Just make sure to avoid these common pitfalls.
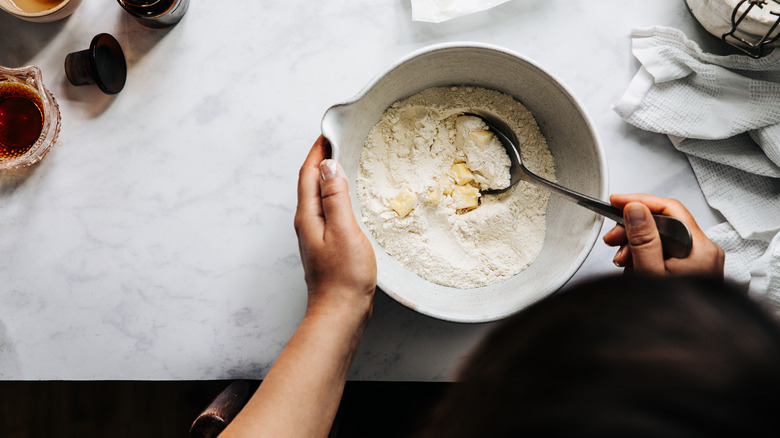
Using warm butter
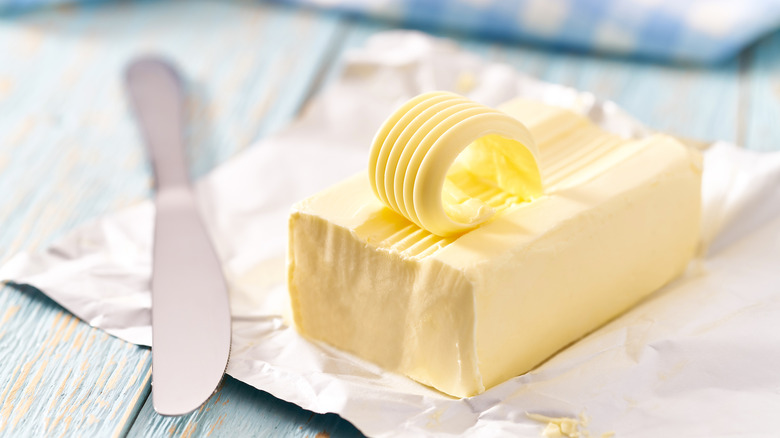
Many baked goods benefit from room-temperature ingredients. This ensures that everything is incorporated better with one another and it will make the batter easier to work with. However, scones prefer to keep things a bit more chill. Specifically, your scones will taste better if you use cold butter in your recipe. This is because when your butter is cold, it will melt in the oven and release steam which will cause your treats to inflate and develop a bit of height to them.
As to what kind of butter you should use for your scones, you'll find that most recipes recommend using unsalted butter. You should almost always use unsalted butter for baking because you will have better control over flavor, as the salt content of different brands varies. In addition, unsalted butter contains less moisture, which will activate the gluten in your recipe less. You should also plan to use cold eggs and cold cream for your recipe. This will ensure that your scone dough stays chilled, thus maximizing its puff in the oven.
Using high-gluten flour
If you're baking a sourdough loaf or fancy ciabatta, high-gluten flour is the way to go. But if you're working with scone dough, you must be very careful of the amount of gluten in your flour. Gluten is a compound made up of glutenin and gliadin proteins. When you mix your wheat flour with any sort of liquid, the proteins start to link up and form a network that produces highly-elastic proteins. The more that the dough is mixed, the stronger the gluten becomes. And when you bite into an overworked, gluten-ized scone, you'll find it has the texture of sandwich bread rather than the soft, delicate bite of a proper scone.
The standard all-purpose flour used for most recipes has a comparatively high concentration of gluten in it compared to other flour varieties. To offset some of the gluten content, you should try using a blend of all-purpose flour and a lower-gluten flour, like pastry flour, in your scone dough.
Forgetting an acid

Acid is the hidden weapon for making scones with the perfect texture, as it tends to tenderize the gluten in the dough and helps activate the baking soda — which allows the scone to puff. You have many different options for what kind of acid you can add to your biscuits. Since scone dough is similar to traditional biscuits, we recommend going with the classic buttermilk. It will keep your dough soft and fluffy and won't impart an astringent taste to your pastry. If you don't have any buttermilk handy, you can make your own by combining one cup of milk with a tablespoon of vinegar or lemon juice.
Ensure you bring the milk to room temperature to prevent your homemade buttermilk from curdling. Alternatively, you can also add the juice of one lemon or a splash of vinegar straight to your dough with the rest of your wet ingredients.
Adding the milk all at once

The quantity and order in which you add ingredients to your scone dough will alter its texture and consistency. If you add too much liquid, it will come out wet and not hold its shape. Skimp out on the liquid, and you risk dry, crumbly scones that taste like biting into a ball of flour.
One simple step that will help avoid tough scones is to incorporate the milk gradually rather than pour it all at once. Start with only adding half of the milk (or buttermilk, depending on the recipe), and slowly stir in more as you need it. Ideally, you'll only want to add enough liquid to bring the dough together, not so much that it comes out like a silky cake batter.
Humidity is an important factor affecting how much liquid your dough will absorb. During wet, humid days, the flour will more readily absorb liquid than on dry days. By adding the liquid incrementally, you'll have significantly more control over the consistency of your dough.
Skimping on the leavening agents
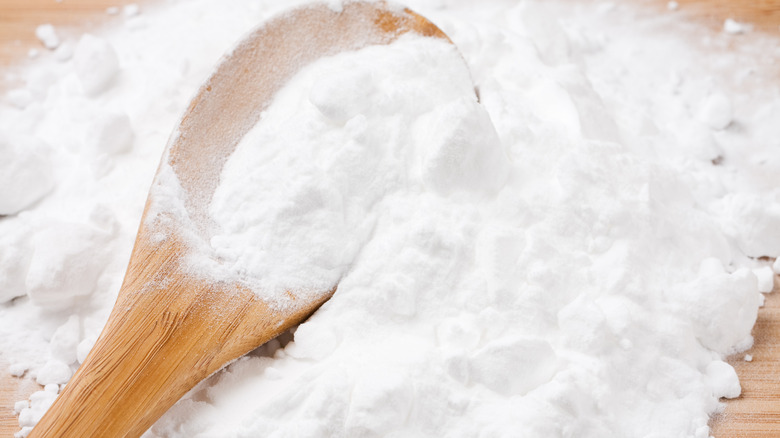
There are many different leavening agents in the world of baking. For example, yeast shines in a bread recipe or pizza crust. But for quick bread (which scones are technically classified as, although they aren't entirely "bread"), the star ingredient is a chemical leavening agent like baking soda or baking powder. When making scones, it's essential to accurately measure the amount of leavening agent you're using to ensure that your dough has the correct puff when it hits the oven.
Even if you use a special ingredient like sourdough, don't neglect your chemical leaveners. You can elevate your next batch of scones with some of your leftover sourdough discards — but it is essential to remember that the yeast in the starter really just impacts the flavor rather than the rise. Add your sourdough discards and allow the dough to rest in your refrigerator for at least 15 minutes before baking. You can also leave your dough sans egg and leavening agents on your counter for up to 12 hours before baking to increase the tangy flavor.
Keeping everything sweet

Savory scones often get overshadowed by their sweet cousins — but we admit there should be significantly more appreciation for the versatility of cheese, meat, and herby varieties. Consider the classic combination of cheddar and chives. The butteriness of the dough contrasts the cheese's sharpness and the herb's vegetal notes. Dill and green onion are also ideal cheddar companions. For a salty and smoky boost, we recommend chopping up cooked bacon and adding it to the scone dough right before baking for a flavorful snack.
Another cheese that adds value to your dough is gruyère. Coupled with caramelized onions, the pair bring an unparalleled depth of flavor that will make you think twice about sticking with the same old blueberry recipe at your next brunch gathering. One of our favorite ways to enjoy these treats is with a quick swipe of butter — but they're good to eat plain and toasted too.
Not accounting for the moisture in your ingredient additions

Moisture control should be on every scone baker's radar. And more often than not, adding fruit or other ingredients will always add moisture to your scone dough. This is often why scone recipes will call for dehydrated fruit like dried apricots and raisins instead of fresh morsels.
The moisture tips to remember before adding fruit to scones are to avoid overripe fruit and to rinse and dry it well. This is because juicy fruit, like peaches and pineapple, tend to just leak into your dough and upset the precarious balance of dry-to-wet ingredients. When you're ready to add the fruit to your dough, always remember to fold the pieces in gently to prevent rupturing the outside of the fruit and leaking the juice into your dough. You can also toss your fruit in a flour coating to absorb any lingering moisture. If your recipe calls for you to add fruit purée to your dough for a bright hue, always be sure to monitor the consistency of your dough and err on the dry side.
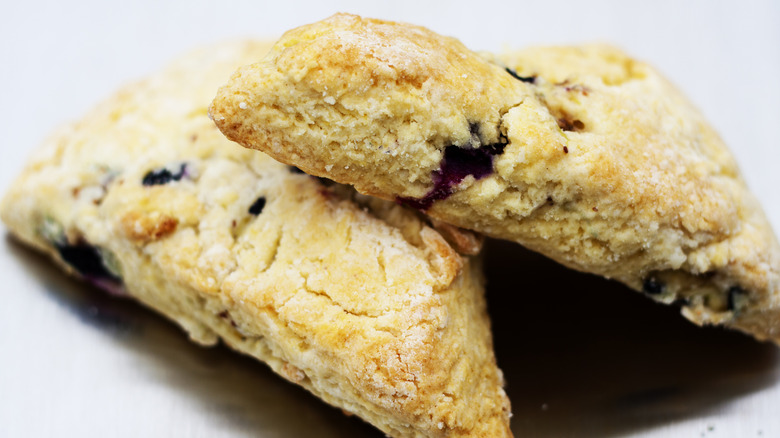
Using fresh berries

Choosing frozen over fresh is the berry tip you need for perfectly fruity scones. That's because the sturdier frozen fruit holds up much better after being stirred, and as a result, won't release as much liquid as its fresh counterpart during the mixing and baking process. Another significant benefit of using frozen berries is that the temperature will help keep the rest of the scone dough cold. This will slow the rate at which your butter melts and ensure your dough stays tender, flaky, and puffed.
If you're worried about your berries leaving a hue in your dough, you can rinse them under cold water until the water is clear. Like working with fresh berries, you'll want to dry the fruit wholly and gently to avoid disrupting the moisture balance in your dough.
Mixing past the point of no return
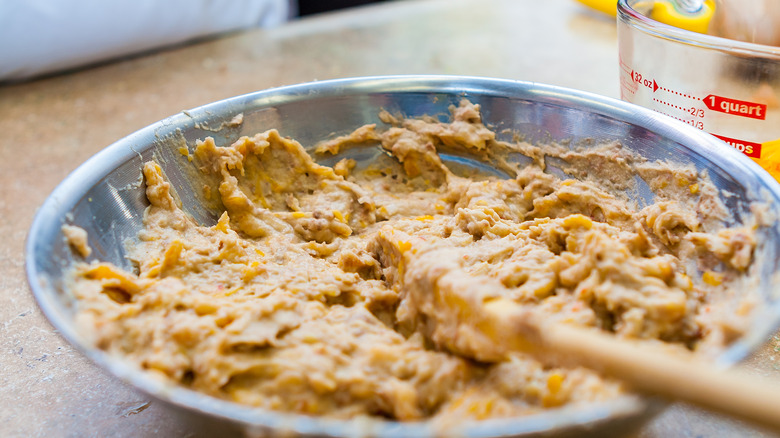
When it comes to mixing any type of dough, bakers often want a silky, indistinguishable dough with no lumps, bumps, or "imperfections." However, if you stick to this expectation with scone dough, you'll get a disappointingly bready pastry without that signature crumble. This is because stirring the dough to remove the lumps will cause the gluten to activate even more and make your dough stodgy.
When you add the wet ingredients to the dry, only stir enough to fold everything together. Use a gentle motion with either a sturdy spatula or a bench scraper; using a stand mixer or kitchen appliance will only over-mix the dough. You should also avoid using your hands to mix the butter into the flour since the warmth from your hands will cause the butter to melt. A few spots of flour and pockets of butter are preferable to a smooth dough.
Rolling out your dough too much
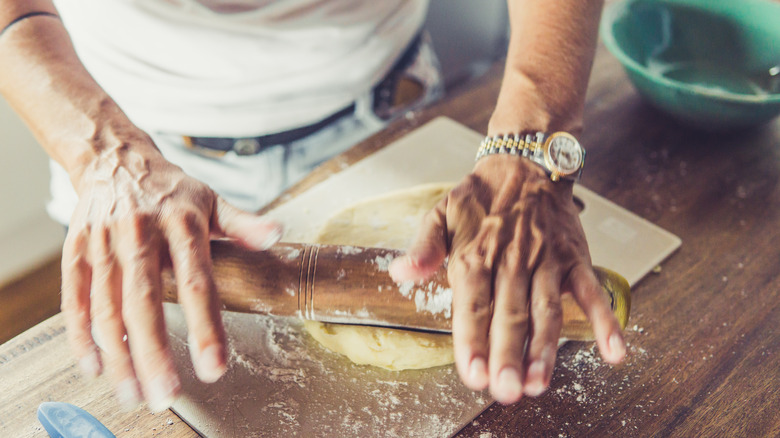
There are two standard methods for shaping your scones. You can use a specialized pan to make equally shaped triangles that are crusty on all sides. Although this method is the most fool-proof, you may not want to have yet another one-use pan in your kitchen.
Another option is to roll your scone dough out into a round and slice it into individual pieces with a bench scraper or sharp knife. This method will give you even edges that allow the scone to have an impressive rise. If this is your go-to, avoid rolling the dough out more than one inch thick, as this will produce scones that brown too much on the edges and resemble a cookie.
If you have a phobia of rolling pins, you can use your hand to flatten your dough. But, scones that have been rolled into a ball and pressed tend to crack on the side or produce an uneven rise. While the bake may not be pretty, it still tastes just as good.
Incorrectly spacing your scones on the baking sheet

After your scones have been adequately shaped, it's time to bake. You'll need a standard baking sheet and a layer of parchment paper to ensure that your pieces won't stick and burn to the bottom of the pan. To become a scone-making master, you'll need to allocate at least one inch of space on all sides of your cutouts. This will ensure that your triangles (or blobs) can rise up to their fullest potential.
Equally as important as proper spacing for your scones on the baking sheet is to ensure that they are thoroughly baked before you remove them from the oven. The exact baking time will depend on how moist your dough is, but the standard is between 18 and 23 minutes at 425 F. If you notice your scones are browning exorbitantly fast, you can place a layer of tin foil on top. The pastry is finished baking when a toothpick comes out clean.
Forgetting a wash before baking
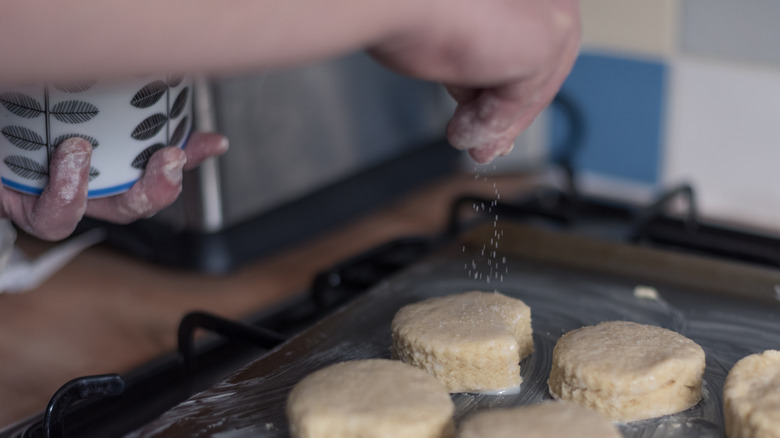
Washes aren't just for pie crusts. Adding a quick wash to the top of your unbaked scones before putting them in the oven serves many purposes, including improving the color and acting as a glue for any topping you plan to add. Many recipes call for swiping a layer of milk or heavy cream on top. Although eggs can be used for washes, these are typically reserved for pies and similar bakes because the egg wash will give the bake a shine, which is not characteristic of scones. Alternatively, you can use non-dairy milk or oil to produce a similar golden hue.
Sweet scone recipes may call for a sprinkle of sugar before baking. It is important to note what type of sugar the recipe is calling for since granulated sugar tends to disintegrate when sprinkled on top of the wash. Instead, use sparkling sugar, Demerara, or turbinado sugar if you want your scones tops to retain their crunch.
Baking immediately after preparing the dough

It's almost time for brunch, and you are swarmed with everything you must do before company arrives. If you're serving up a plate of scones, you might try to get the tray in the oven ASAP. But, rushing through your resting process may have detrimental impacts on the consistency of your bake.
For fantastically flaky scones, allow your shaped dough to rest in the refrigerator before putting them into your oven will help solidify the butter a little bit since it has likely already started melting with the ambient temperatures and friction from your hands. You don't have to rest your scones for too long, mainly because you are working with a leavened dough that will deflate if left alone for too long. Place the entire tray in the fridge for ten minutes while your oven is preheating — you'll feed two birds with one scone.
Eating stale scones
Some foods are better on the second day — but scones are not one of them. You shouldn't bake scones ahead of time because these breakfast treats tend to fade quickly. Put them in the oven as close to when you want to eat them as possible, even if it means rushing around in your kitchen the morning your brunch company arrives. Scones will only last one to two days in an airtight container at room temperature; you should avoid refrigerating them because the condensation and temperature change can cause them to go stale faster.
If you want to have scones on-demand, one potential solution is to make your dough, sans eggs and milk, ahead of time and keep it in the fridge or freezer. When you're ready to bake, add in your extra ingredients and bake. You can also freeze your pastry right after they finish cooling for up to a month. When you're in the mood for a scone, let it defrost at room temperature for an hour before warming it in your oven for five to 10 minutes.
Neglecting the clotted cream

The two quintessential toppings for scones are clotted cream and jam. You will likely come across the latter at your local grocery store, but finding clotted cream is a needle in a haystack. This buttery spread is as indulgent as it is elusive and can be used as a spread on a biscuit or a chunk of baguette.
To make your own homemade clotted cream, you'll only need to buy a single ingredient: heavy cream. Add your cream to an oven-safe dish so it is ½- to 1-inch in depth. Then, bake the cream for 12 hours (yes, you read that right) at 180 F. You'll know your clotted cream is finished baking when a thick film has formed on the top. After the cream has cooled to room temperature, refrigerate it for another 12 hours and scrape off the thickened top layer of the cream. After a quick mix, your clotted cream will be ready to spread on your warm scone.