Pie And Mighty
These autumnal latticed beauties are almost too good to eat . . . almost

Thanksgiving is around the corner which means it's officially Time to Celebrate. All month long we're bringing you recipes, tips, tricks and stories that are equal parts memorable and delicious.
There's no better way to embrace autumnal bounty than in the form of pastry. As Thanksgiving approaches, you're going to be seeing pies left, right and sideways, so we're here to give you a little reprieve from the same old apple and pumpkin varieties, and offer something new and improved this fall.
Juicy D'Anjou pears tossed with cinnamon and crystallized ginger make for a spiced fruit pie that will make you forget all about apple (see the recipe). And because one is never enough, we're taking advantage of those late summer plums and adding in dried lavender to create a warm, comforting pie that is perfect for these cooler months but still packs one last taste of summer (see the recipe).
Inventive filling settled, we know that's only half the battle. There's one more element standing between you and pie perfection: the crust. "The perfect crust absolutely has to have the elusive qualities of being crisp and fork-tender, baked through and dry, yet containing a juicy or custardy filling," Elisabeth Prueitt, co-owner of Tartine Bakery in San Francisco, explains.

Striking that balance is the challenge. Which is why we break down each component for you, with tips and tricks from our favorite pie experts along the way, ensuring you get a picture-perfect pie that's as delicious as it looks.
Passion of the crust.
Crust is the entry point to your fruit filling, so quality is crucial. "You shouldn't need a knife to eat your pie!" Petra Paredez, owner of Petee's Pie Company in NYC, tells us. The perfect piecrust should be tender and flaky, yielding to nothing but a fork.
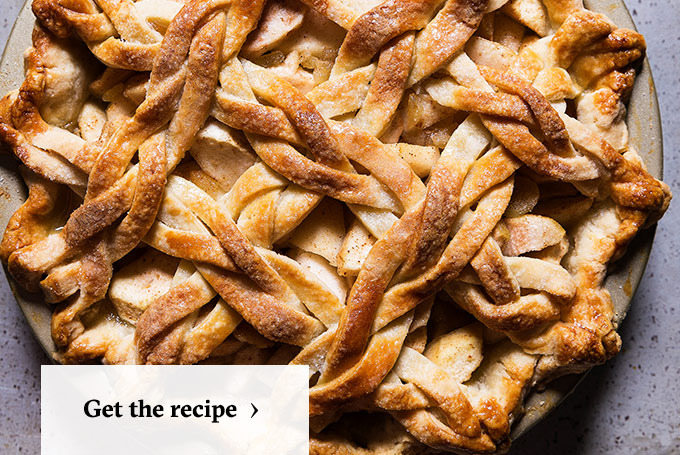
Lucky for you, we already have the perfect crust recipe, which we will stand by until the end of time. To help you add a little holiday pizzazz to your pies, nothing says "I'm a pro baker" like a stellar lattice crust. So we have step-by-step instructions illustrating how to build not only a traditional lattice crust but also a braided lattice. Trust us, your pie is going to turn heads the second it hits the table.
RELATED Flaky Piecrust "
Juicy fruit.
As you probably know, if you've ever made a fruit pie, starch is the key component to the filling. "I think that allowing sufficient time for the starch to do its work—whether you use cornstarch, tapioca, arrowroot, whatever—is so important for a fruit filling," Paredez explains. "The filling has to bubble for a while in the oven for the starches to activate so that the juices can thicken. Without that, the juices remain runny and can make the crust soggy."
We take this process one step further by macerating the cornstarch-coated fruit with sugar, then straining the juices and thickening them on the stove before folding them back into the fruit. This helps ensure your filling will thicken perfectly in the oven.
De-cor values.
Making a lattice crust (especially a braided one) is definitely enough to win you a seat at the head of the Thanksgiving table. However, if you're feeling inspired, there are certainly ways to take a dessert to the next level.
"Whole cinnamon sticks and star anise are beautiful when used sparingly," Prueitt advises. "And I like to use candied pecans, pistachios or almonds to garnish pies as opposed to plain toasted nuts."
Paredez adds that you can also use up the piecrust scraps to create decorative leaves to garnish the top of the pie.
Take on the challenge of making a killer lattice pie this fall, and all, ahem, pies will be on you and your beautiful creation.
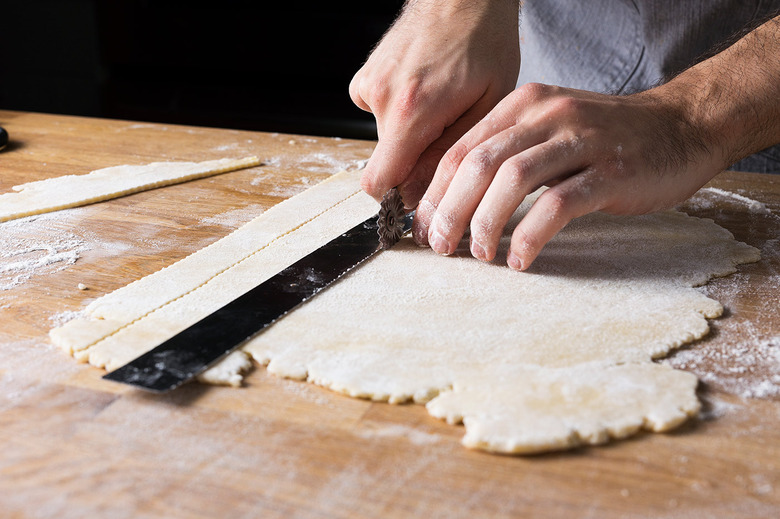
Roll out the dough into a 10-inch square. Using a knife or a fluted pastry cutter, cut strips of dough.
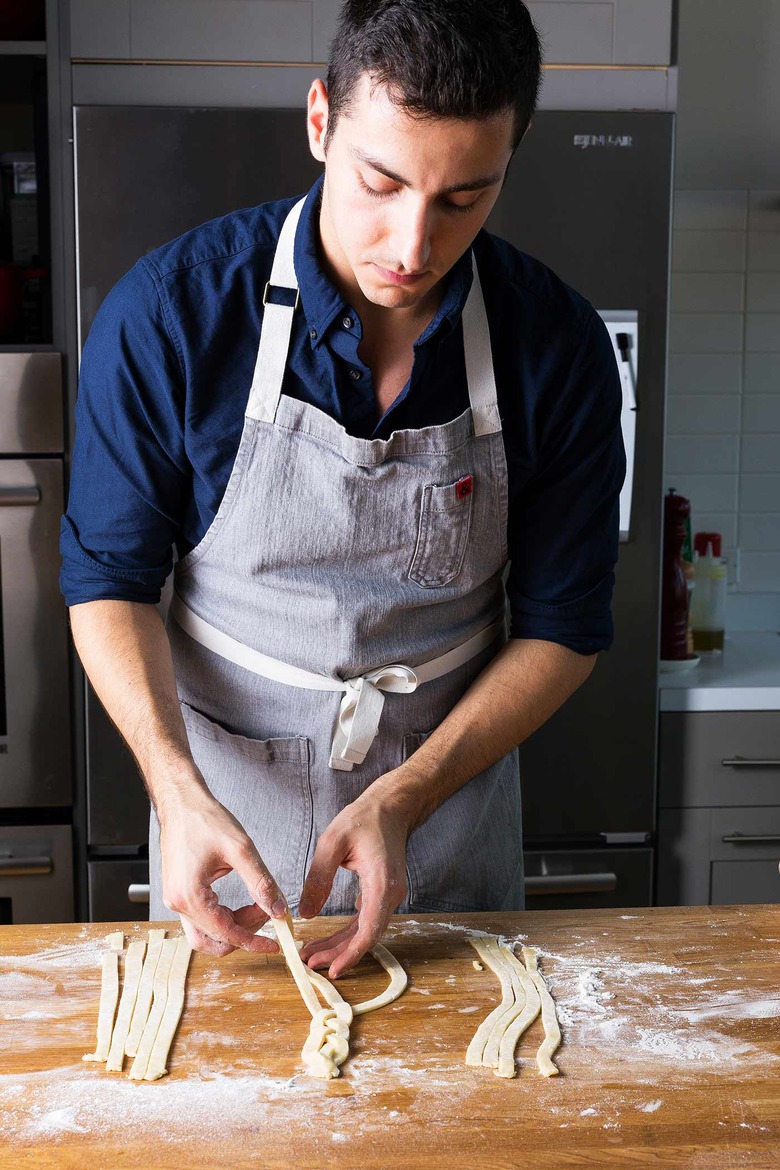
If making the braided lattice version, take 3 strips of the dough and braid into 1 strand.
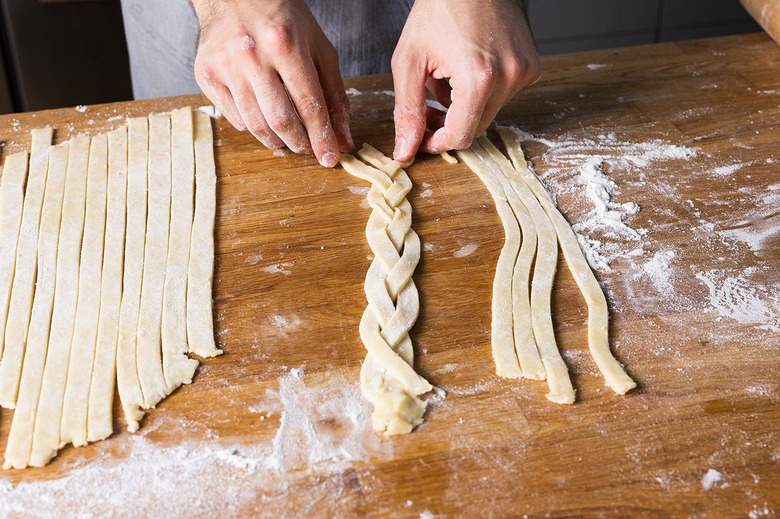
Repeat this process until you have 6 braided strips.
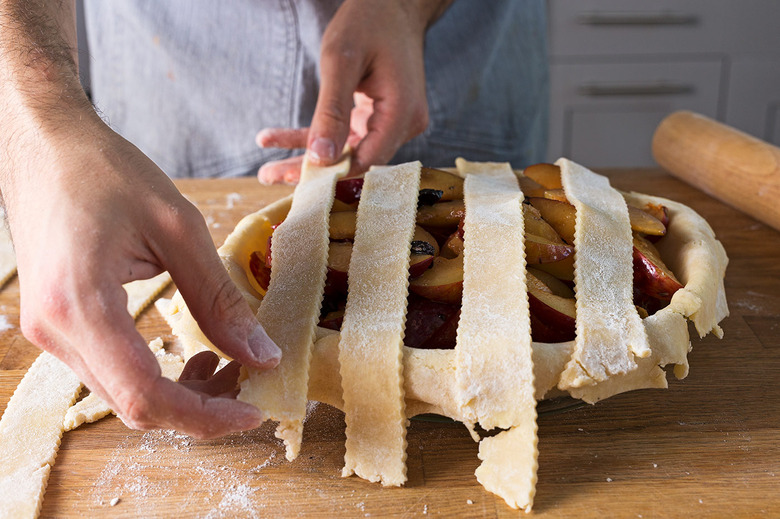
Place 4 strips of dough horizontally across the filling. If you're making the braided version, place 3 strips horizontally across.
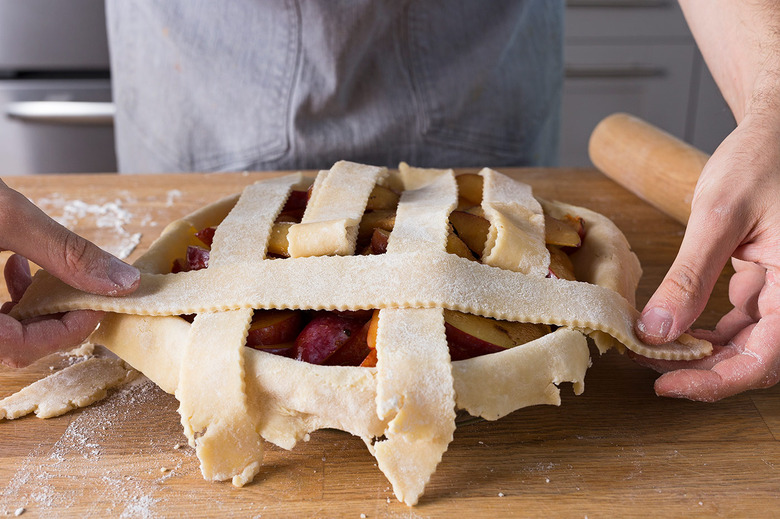
Then pull alternating strips back and lay the additional strips perpendicularly.
Pull back the other 2 vertical strips of pie dough three-quarters of the way from the other side and lay another strip of dough perpendicularly.
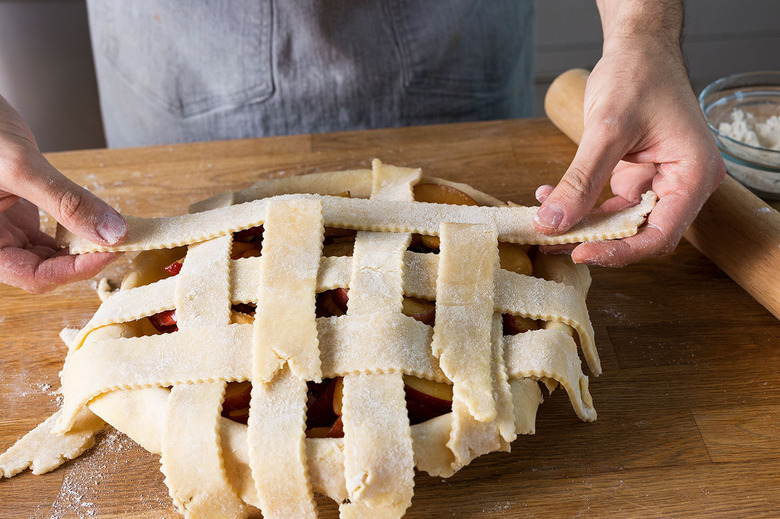
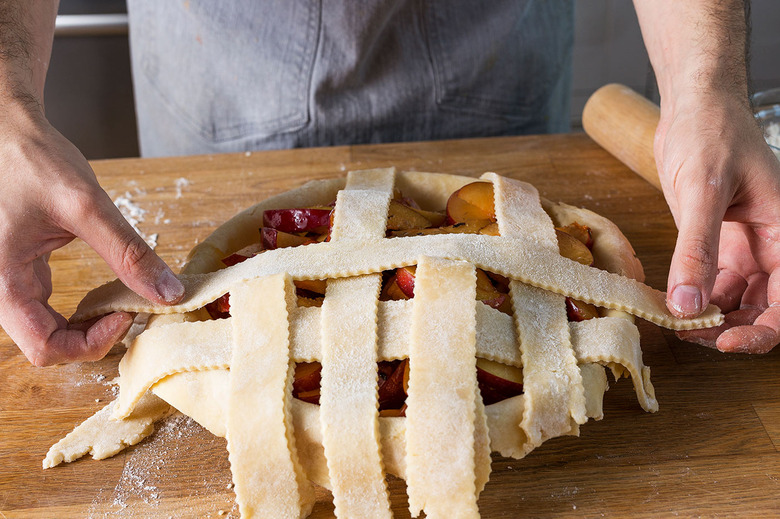
Continue alternating strips.
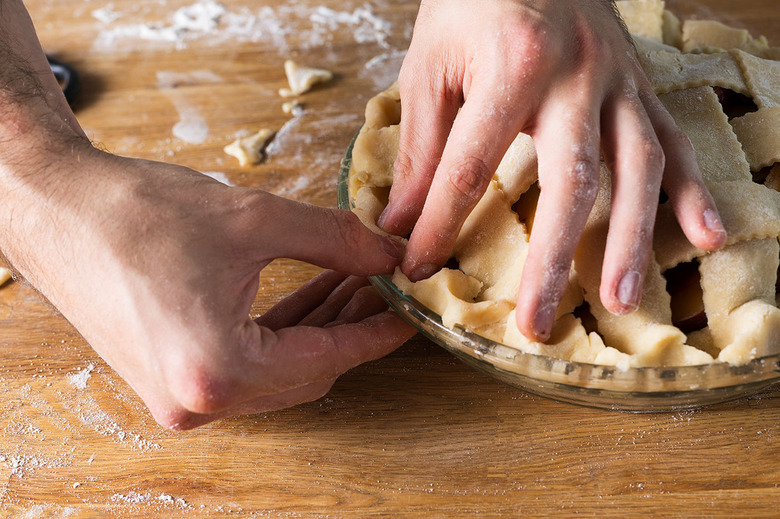
Trim off the extra dough, then roll up the edge to make a rim around the dish. Using your fingers, crimp the edges of the pie.
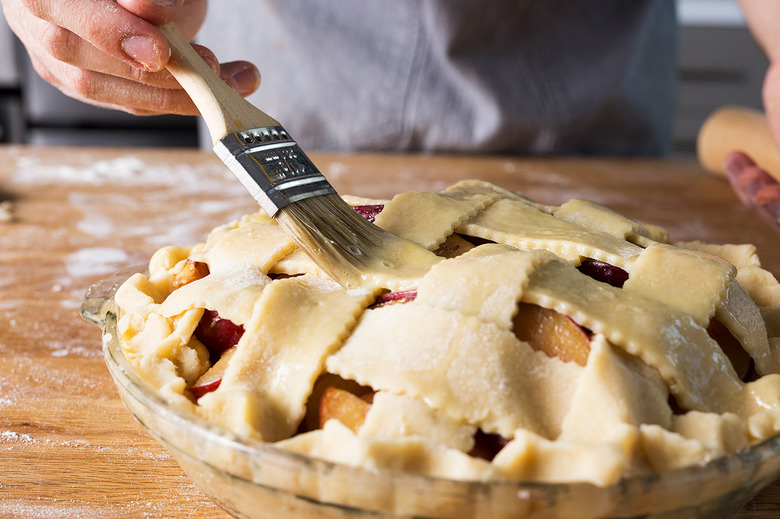
Brush the entire surface of the pie with an egg wash, making sure to get into every crack.
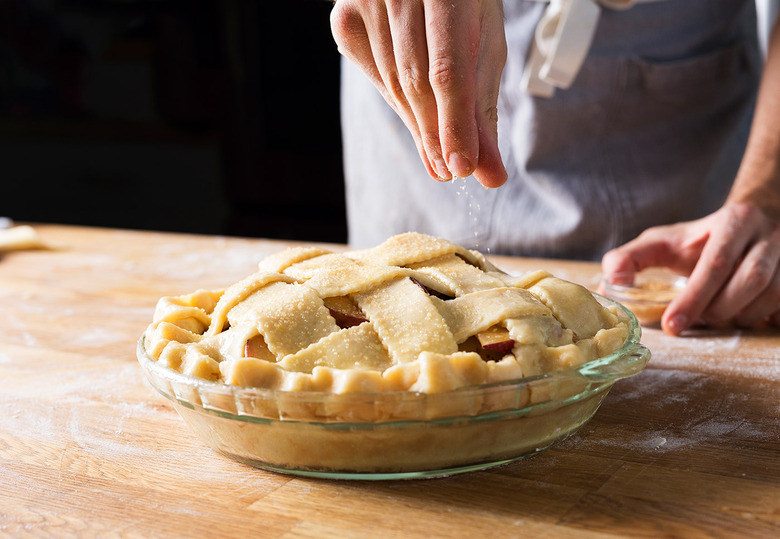
Turbinado sugar adds a coarse, eye-catching finish to the pie.

Your pie is ready for the oven!