12 Basic Knife Skills And Techniques You Need To Know
To balance the busyness of our daily lives, we naturally seek ways to save time. Frantic family and work schedules leave little room for cooking, let alone simple pleasures like learning new culinary techniques. From choosing recipes to purchasing and preparing ingredients, it makes sense why America's delivery habits are increasing.
Convenience aside, nothing beats a home-cooked meal: the smell of fresh herbs, the warmth of a preheated oven, and the sound of bubbling water. Who can deny the satisfaction of making something that truly knocks your socks off? According to Public Health Nutrition, cooking at home is also associated with a healthier diet. And the facts are clear: You can consume more with time.
A surprisingly overlooked way to carve out more time for cooking is by learning basic knife skills. While chopping herbs can easily add an hour to a recipe, with the right tactics, you can be in and out of the kitchen quicker than you can snap a pea. To help you enjoy more homemade meals, below is a list of knife techniques that'll cut prep time in half and sharpen your cooking skills.
Every kitchen should have these knives
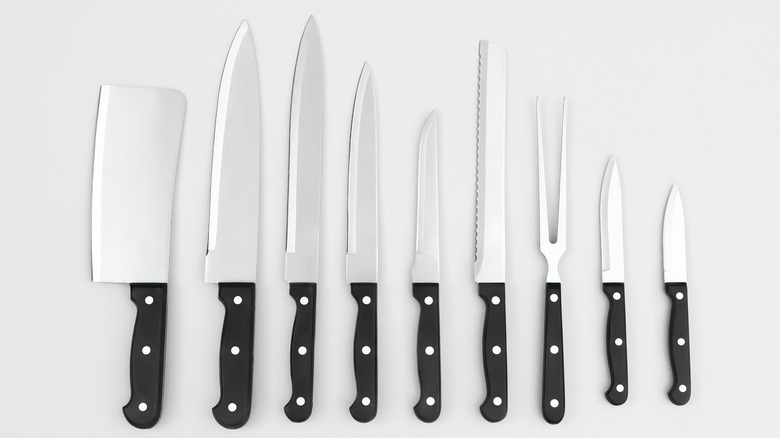
Wherever your culinary adventures lead, there's a knife especially suited to the job. The catch is knife sets can be pricey and often include more options than necessary. Unless you're a professional chef, it's simply better to purchase quality knives that work for a range of things. You can easily avoid the extra cost and cut right to the chase with as few as three recommendations.
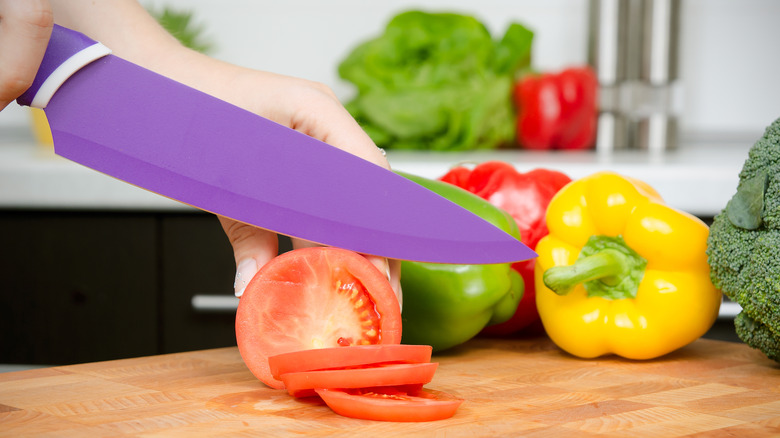
First up, considered one of the most important knives to own by celebrity chef Alton Brown, is the chef's knife. It's the centerpiece of any set because of its blade; it curves towards the tip and can handle many cutting jobs. The shape allows for a rocking motion that's well-suited for chopping, slicing, and dicing ingredients. Next is a paring knife, also known as a peeling knife. It's a smaller version of the chef's knife, yet it is made for more delicate jobs that larger blades are less suitable for. It offers additional precision and works great for peeling, trimming, and cutting produce. To complete the trifecta, you'll need a serrated knife. Unlike the smooth edge of a chef's or paring knife, its blades are saw-like. When you need to cut hard-crusted bread or slick tomatoes, serrated knives make the job quick and easy (via Misen).
Make sure your knives are sharpened
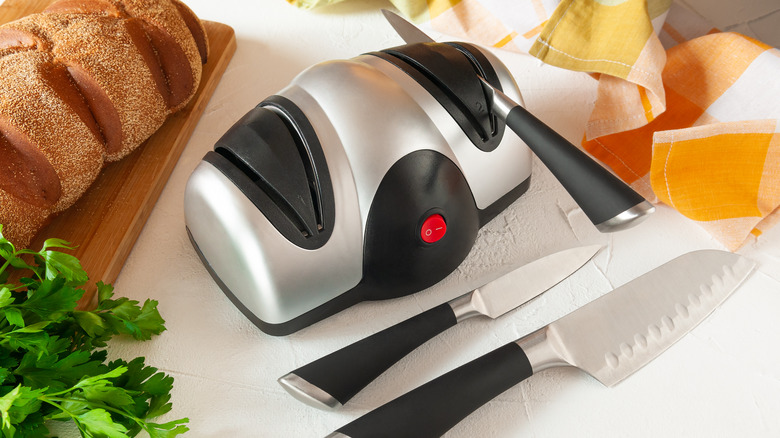
Blades require maintenance because they naturally bend and curve with continued use. Ironically, many believe dull knives are safer, but, in fact, there's a higher chance of them slipping and causing injury. Cutting should be hassle-free; only a little pressure should be necessary to easily slice through ingredients, and an adequately sharpened knife can help. How often you sharpen your kitchen knives depends on how much you use them. Under the normal wear and tear from average use, the edges only need touching up every few months.
To avoid turning your fingers into baby carrots, the best way to maintain your knives is by using a whetstone or electric sharpener. Going electric may seem most appealing initially, as it does most of the work for you. That said, whetstones are also popular because they're inexpensive and wear less on blades over time. As the name suggests, whetstones must remain wet. According to food content creator Joshua Weissman, one hand should grip the handle to control the angle of the blade while the other applies pressure so it sharpens (YouTube). Using a back-and-forth motion, work your way across the edge, starting towards the handle, then repeat the same on the opposite side. The learning curve may be sharper, but it will certainly provide lasting quality.
Understandably, if you'd rather skip the manual labor and don't mind paying, take your knives to a professional sharpening service.
Choose the right cutting board for the job
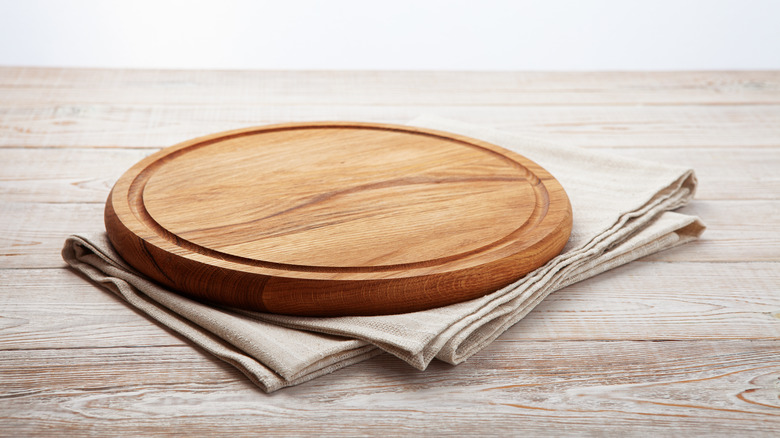
Simply put, a good knife deserves a good cutting board. Available in a range of styles, sizes, and materials, choosing the right one for the job is essential. In truth, certain types may work better for meats than produce and vice versa.
Many people use the same cutting board for everything. However, this actually presents a safety risk. Juices secrete when slicing meat, poultry, and seafood, filling the crevices in the surface of chopping boards, resulting in bacteria growth. That's why it's recommended to have separate boards for each food category. According to a CDC report, an estimated 48 million Americans get sick each year from food poisoning. So, while it may seem tedious to use several cutting boards, it helps prevent potential cross-contamination.
Chopping boards are available in a variety of materials, each with its own pros and cons. For example, although porous, wooden ones are the most durable and have softer surfaces that help maintain knife sharpness. Plastic and glass types are non-porous and less likely to lead to cross-contamination but aren't as durable. Regardless of the kind of cutting board you use, make sure that you clean them thoroughly. After each use, they must be washed with hot water and soap, then rinsed clean and dried. Also important to remember: Overly worn boards should always be promptly replaced.
Have your hand in the right position when holding your knife
You might be surprised to find that you've been holding your knife the wrong way. Don't worry–you're not alone: It's a common mistake among many home chefs. As simple as grasping a handle seems, there is a particular method that will allow for more confident chopping. It begins with the initial grip: a choke-like placement that includes thumb support for the blade. With your index finger securing the hold from the opposite side, the handle should rest cozily against the cushion of your palm. Now you're equipped for longer, quicker, and more accurate cutting.
A common mistake is placing your index finger on the blade as you slice. Along with less stability, holding that position over longer periods of food prep leads to fatigue, potential wrist issues, and higher chances for accidents (via YouTube). Although these recommended adjustments seem minor, they'll make all the difference and greatly improve your knife technique.
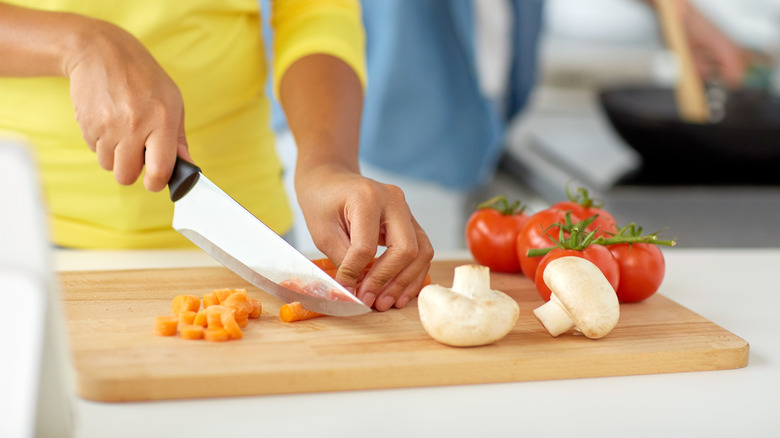
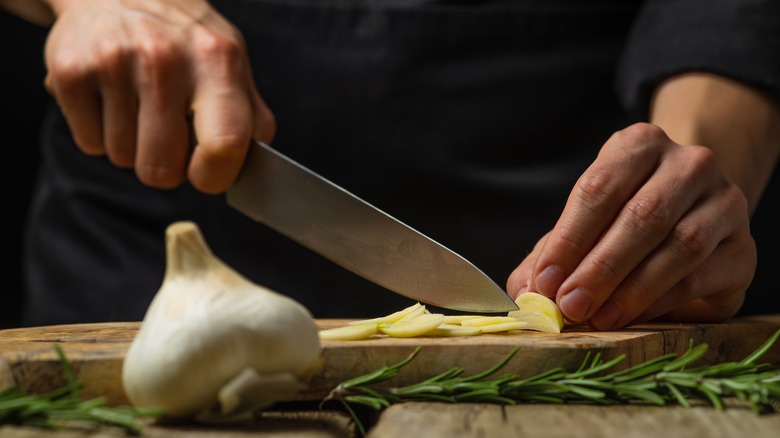
Apply a claw grip to cut food safely and accurately
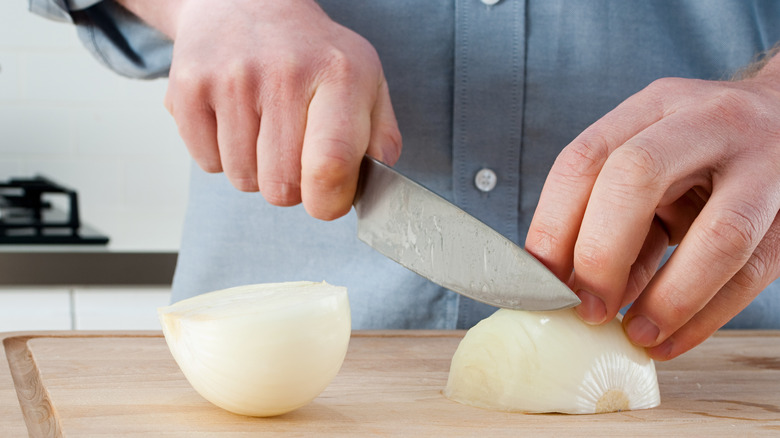
Since you now know how to properly hold your sharpened blade and have chosen a cutting board, it's time to learn the claw grip. With only your fingertips, this method allows you to safely prepare ingredients that any recipe calls for. It's considered a standard form by professional chefs and a valuable addition to honing your knife skills. Take it from Gordon Ramsay: a claw grip is one of the best things a home chef can learn. The technique effectively holds produce in place and positions the blade for even cutting. It also comes in handy if sharp knives make you nervous and will help you overcome any fears of injury. After all, the goal is to keep all of our fingers intact.
You can use a hand-sized apple or onion to practice correct placement. While chopping, your knuckles should always face up with fingers gripped around the produce. Using your index and middle finger knuckles as guards, you can safely slice at a close range along the widest part of the blade (via YouTube). Cut produce near the knife's handle side to avoid knicks. As you begin, move the knife in a rock-chop motion while your other hand steadies ingredients with the claw grip. After some practice, this technique will prepare you for more improved chopping, dicing, and mincing.
Chopping creates small pieces of produce quickly
Dinner parties will never start late using this technique. Chopping is a time saver and the first cutting method every cook should learn. However, although it is quick and efficient, it can impact the sharpness of your blade over time. So to preserve the edge of your knife, it's recommended you avoid metal, glass, and ceramic cutting boards; wood or plastic work best.
A clever hack for a slip-free experience is to place a damp hand cloth underneath the board. On the off chance your kitchen inventory is missing cloths, non-stick mats and wet paper towels will suffice. As mentioned, the chef's knife is perfect for chopping. With it, you can employ various chopping methods for different needs.
Use the cross-chop if you desire speed over perfection. It involves placing your subordinate palm atop the blade and pressing down in sync with your dominant hand's movements (YouTube). To slice stalk or thinly shaped produce, reapply the claw grip with your thumb as a brace from behind. Using a rocking motion, slice while gradually moving your fingers away from the blade. The final method is aptly named the rock chop. Use it to mince or finely chop fresh ingredients. It's similar to the cross-chop, except you place your subordinate hand towards the blade tip, rocking it up and down on your cutting board like a seesaw.
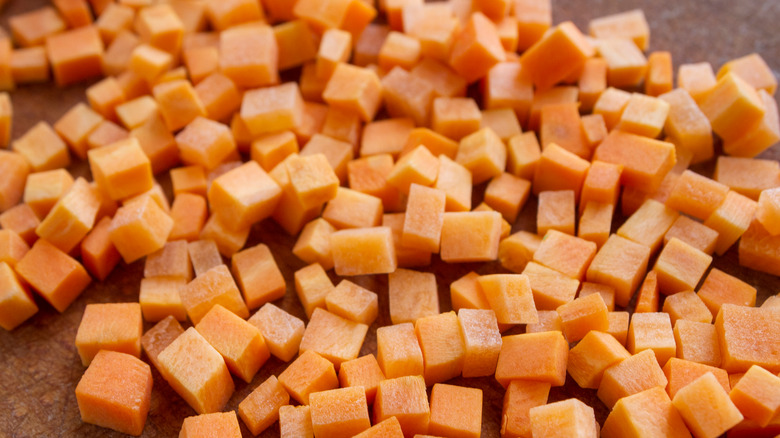
Dice produce for precise small pieces
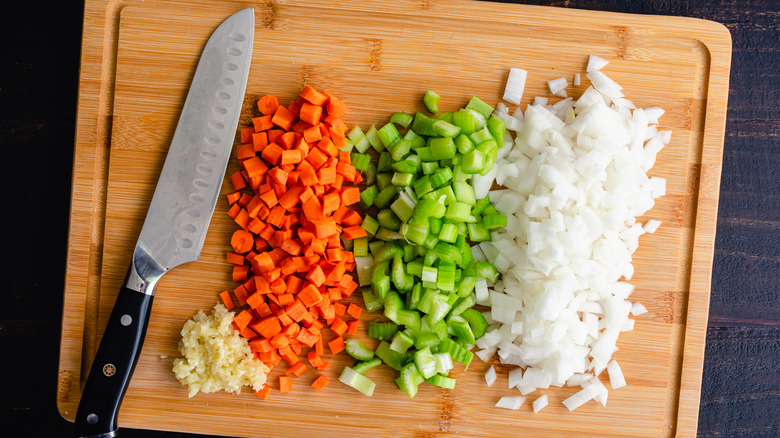
If your presentation is higher on your prep priorities list, you should dice rather than chop produce. The biggest difference between the two techniques is that the former creates more uniform cuts, giving your home dinners a fine dining aesthetic. Unlike the quickness of chopping, dicing takes time and requires more attention.
This impressive cutting technique works great for salsas or a classic French mirepoix: a mix of carrots, onions, and celery. In professional cooking, you'll find that dicing allows for several sizes: ¼ by ¼ inches, ½ by ½ inches, and ¾ by ¾ inches. The medium ½ cut is most commonly used. While these measurements are specific, one only requires a keen eye and a bit of focus to successfully use the dicing method.
To dice, first remove the rounded sides of your produce, creating a cube-like shape. Once you have a square, half it through the middle, rotate the pieces, and repeat the center cut at a right angle (YouTube). This should give you multiple portions of finely diced, cube-shaped produce. Adjusting the measurement slightly, you can use the dicing technique for any vegetable your recipe requires.
Enhance flavor and presentation with the julienne style
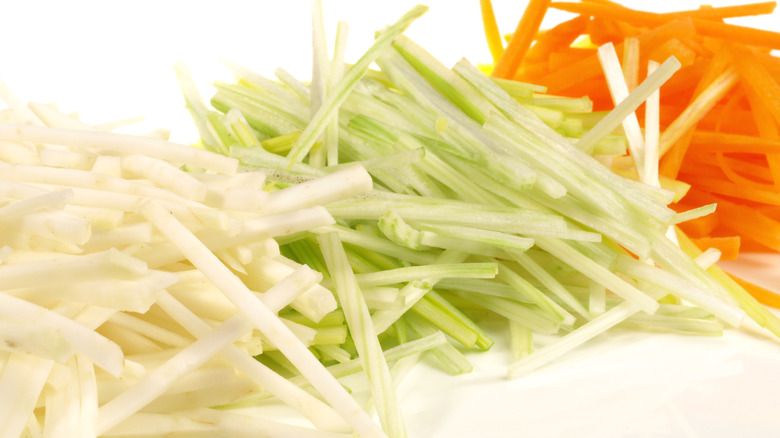
The julienne cut is a staple of French cuisine that will expand your knife skills. It creates long, thin, uniformly shaped strips that cook quickly. Employing it enhances not only flavor but presentation as well. Whether adding texture to a salad, elevating a dip, or infusing a delicious marinade, the technique can be used in various recipes.
To practice this cutting method, grab a veggie like a carrot and start by peeling the skin. Once removed, divide your produce into lengths that measure two to three inches. Next, place them cut side down and trim the rounded sides until the pieces resemble a rectangle. Now that you have nicely cut rectangle pieces sit them flat on their longest side. This will allow you to slice uniformly sized planks to about ⅛-inch across. After you've cut your vegetable into planks, stack a few pieces and repeat the same cuts at the opposite angle. According to Evolving Table, this will give you perfectly julienned veggies, ready to spruce up your stir fry.
If you're in a time crunch, there's also a quicker way to add some julienne pizzazz to your platter. Rather than cutting your vegetables into rectangles, you can use a bias cut, an angled technique that creates flat slices. From there, the slivers can be stacked and sliced into ⅛-inch julienne strips.
Turn produce into tiny cubes with the brunoise method
Another cut that results in small and uniform pieces is the brunoise (pronounced "broon-wahz") method. It's actually considered the finest measurement for dicing and works best following a julienne cut. More advanced, successfully brunoising your produce requires patience and precise measurement, as it typically results in sixteenth-inch-sized cubes.
To use this dicing technique, begin with the julienne cut, shaping your produce into thin strips. For the next step, apply the claw grip to secure the vegetable. Once held into position, you can easily brunoise the strips into tiny cubes (YouTube).
Pull this culinary magic out of your hat next time a recipe needs an aromatic boost. The resulting cubes are a welcome addition to sauces, garnishes, and consommés. They can also be used for recipes like pumpkin risotto, filet mignon with sauce brunoise, or as a savory base for tomato concasse.
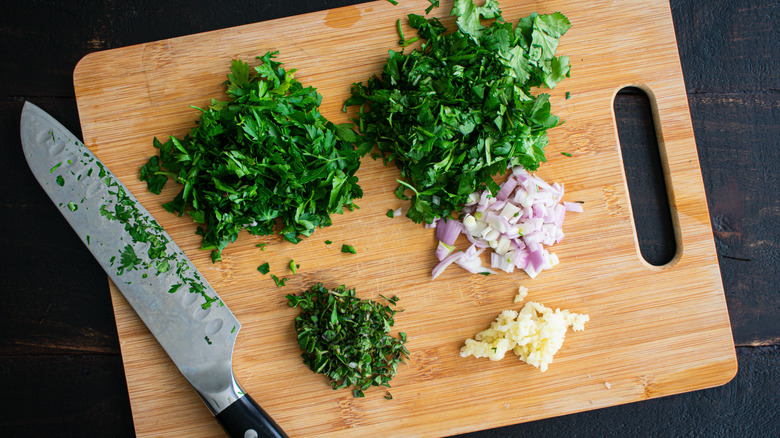
Use the mincing technique for an even distribution of flavor
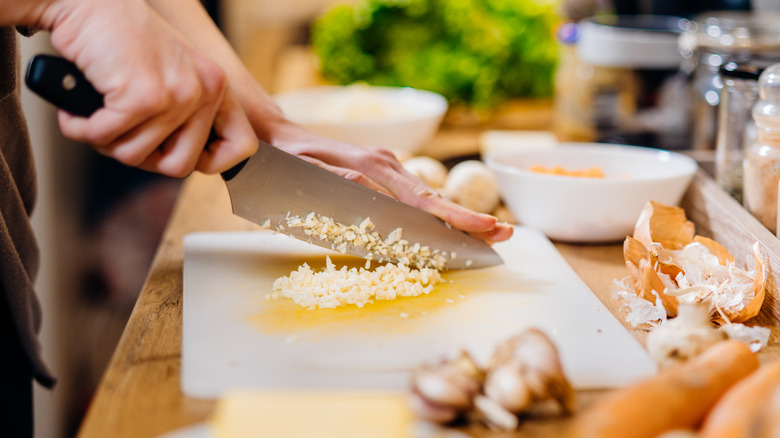
Now that you know the difference between chopping and dicing, it's time to further refine your knife skills with the mincing technique. Interestingly enough, how you cut an ingredient impacts its flavor. As the smallest cut type, mincing creates tiny, even pieces that melt into your recipe. Ingredients are often minced because they add more flavorful distribution through a dish and blend seamlessly.
Hone this technique, and the only thing you'll mince is your guests' words, impressed by your cooking skills. To use this cutting method, begin by removing a ¼ inch from the stem side of the produce and a thin slice off the root end. This is easily achieved with a small vegetable such as a shallot. Next, with the cut side down on your board, slice it in half lengthwise. Now you can easily remove the skin.
Placing the ingredient down flat, position your knife parallel to the cutting board, above the surface at about ⅛ of an inch. Then, make your first cut into the produce, stopping just short of the root, and pull it out towards you. Repeat the second and third cuts at ⅛ inch above the previous, consecutively. Continue this slicing method from a vertical position, then when finished, mince the veggie using a criss-cross pattern (YouTube).
Maintain the full benefits of herbs using a chiffonade cut
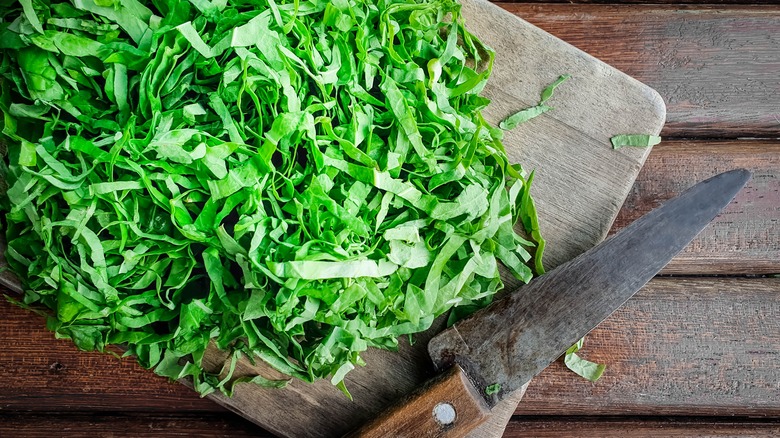
Some ingredients lose flavor when chopped, diced, or minced and require a more delicate touch. Leafy herbs, in particular, benefit from a chiffonade technique. Ribbon-like and visually appealing, the French-based cutting style provides an even distribution of the herby aromatics. Not only does it improve overall flavor, but when preparing a garnish, it helps the item complement pretty much any dish.
Chiffonade herbs require immediate use, as the cut edges tend to darken rather quickly. That said, certain herbs are more ideal for this style than others. Broad-leafed herbs like sage, mint, and basil work best. The first step to unlocking the fresh herb-filled flavor of basil–or other leafy greens–is to soak the leaves in cold water. After a few seconds, remove and dry them by softly patting them with a paper towel. Making sure to cut the stems, stack the leaves together, and roll them tightly. With the basil securely rolled, you can now use the rock chop method to finely chiffonade (via YouTube).
Explore which type of knife you like to use most
As your skills improve and your technique becomes more refined, explore the world of knives. While stainless steel is the most common type, there are several popular ones to choose from. Other varieties, like carbon steel or ceramic knives, have unique qualities that make them useful for different things. A little exploration will equip you with everything you need to find the perfect knife.
Let's start with the most common type: stainless steel. It features carbon, iron, and chromium, making it rust-resistant, easy to maintain, and long-lasting. You'll find that the cost of these knives is typically based on the amount of chromium they contain, which is the main factor behind their rust resistance. However, despite those attractive features, stainless steel falls short in the sharpness department. For a sharper edge, carbon steel is one way to go. The carbon levels in knives determine their hardness. The harder the blade, the thinner it can be sharpened without breaking. Unfortunately, carbon steel rusts easily, so these knives require careful maintenance. Ceramic knives are also very sharp and maintain their edge longer than stainless steel. However, unlike steel, they lack flexibility and tend to chip, meaning they're only suitable for straight cutting (via Knives and Tools).
Whichever your preference, each of these different types can get the job done, so weigh the pros and cons to determine which is best for your kitchen.