How To Spatchcock A Turkey For Thanksgiving
Each November, families across America sit around the dinner table to relish mountainous piles of mashed potatoes with gravy and bubbling hot casseroles fresh out of the oven. The all-alluring centerpiece makes its way to the table before it's carved, but more often than not, that beautiful turkey lacks in the texture and flavor category. For your next Thanksgiving dinner, try to spatchcock a turkey — it's a tried-and-true technique that will help deliver a roast that looks and tastes incredible.
There's one particular problem with roasting a turkey the traditional way, and it's all about the bird's natural physique. Turkey is comprised of two different types of meat (dark and white), which often cook at different times, and variances in the size and depth of the roasting pan can limit proper heat circulation to all of the turkey (per USDA). The breasts typically cook faster because they sit on top and receive direct heat exposure. At the same time, the thighs and drumsticks are hidden underneath and take longer to reach a safe internal temperature.
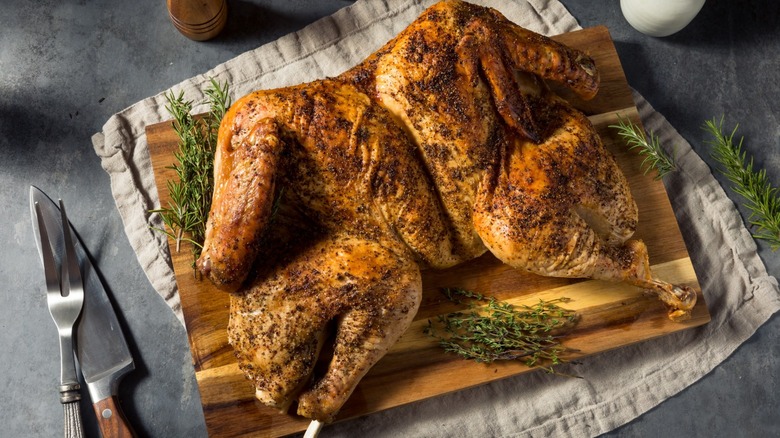
If you're tired of dealing with turkey breast that tastes like shreds of sawdust, then spatchcocking is your answer. Spatchcocking a turkey means splitting and opening up the whole bird by removing the backbone and roasting it flat. The technique offers benefits like quick and even cooking. Beyond succulent meat all around, you will find spatchcocking a turkey provides several advantages over a traditional roast.
Why you should spatchcock your Thanksgiving turkey
If you take the idea of butchering your Thanksgiving turkey at home and combine that with the name "spatchcock," we understand why you might not feel so tempted to try this method. Before you get all squeamish, though, we're here to remind you that the slightly unappealing cooking job is one you won't regret, especially once you taste the results.
Several consider this method the right way to roast a turkey, and the finished product, which boasts juicy meat, is proof of that. When you remove the backbone and cook it flat, it cooks more evenly because it has a uniform surface area. So rather than biting into the overdone piece of sliced breast, you will get to enjoy a juicier and more tender version. You will also reach golden-brown skin all around thanks to direct heat exposure. Plus, the roasting time is reduced by at least half thanks to the slimmer profile (per USDA).
One of our favorite reasons to try this Thanksgiving dinner hack is that the removed backbone can be used to make gravy from scratch. Sure, the gizzards and drippings do a fine job, but adding the spine makes for a much more flavorful broth in your homemade gravy.
Spatchcocking isn't that difficult, but if you still aren't convinced to try it, call your local butcher and ask for assistance. That way, you can skip all the work but still reap the benefits of a flawlessly roasted turkey.
What you need to spatchcock a turkey

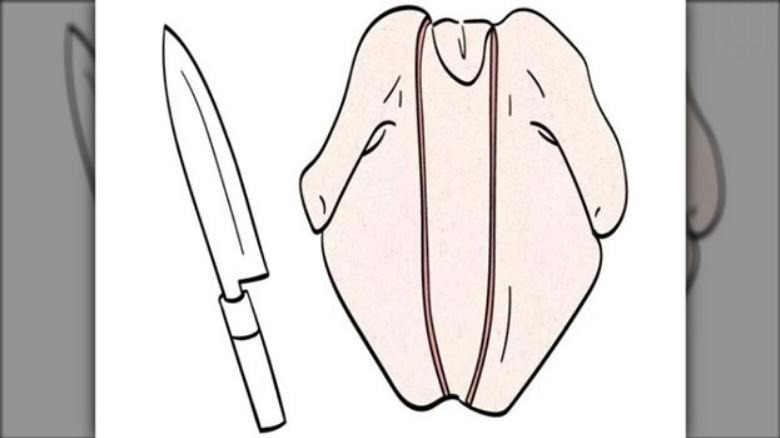
You will only need a few standard kitchen tools to spatchcock a turkey, and chances are that you already have everything you need to do the job. A cutting board, a reliable kitchen knife, a pair of kitchen shears, and a sheet pan with a fitted wire rack are all you need to get the bird in the oven.
Wondering which knife to use for the job? Tasting Table set up a poll and asked home cooks which knife they use most for home cooking purposes. While there are some mixed results, over 40% of people used the chef's knife for most slicing and dicing. If you already own a culinary workhorse of that sort, then go ahead and use that. Otherwise, any sharp, nonserrated knife will do, as you will only use it to score lines across the bird's back. It will also come in handy later when it's time to carve the cooked turkey.
You will also need a reliable pair of kitchen shears to remove the backbone and a sturdy sheet pan with a fitting wire rack (aka cooling rack) to place over the sheet pan. The rack will elevate the turkey so the heat can reach the bottom side and promote all-around even cooking. If you plan to wet-brine your turkey, you will also need a large stock pot to submerge the bird overnight.
Brine the turkey before you spatchcock
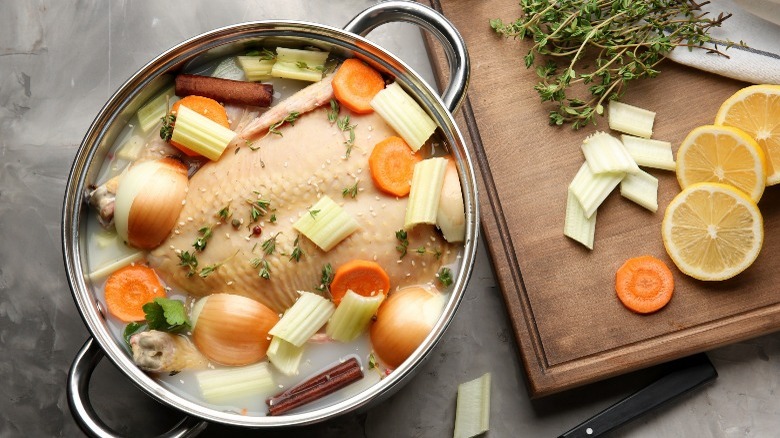
Brining turkey before roasting is a long-standing tradition in many homes, and there are two main ways to do it. You can either go with a classic wet brine, which involves submerging your turkey into a large vessel filled with salt water and letting it sit for some time. Otherwise, you can try dry brining, which is all about rubbing salt and other spices over the turkey, then letting it sit in the fridge for several hours or days. Both methods work to break down the proteins to create really tender results (per Masterclass).
But that leads us to a couple more questions, of course. Is there an advantage to wet brining or dry brining your Thanksgiving turkey, and which method works best for a spatchcocked turkey? While your personal preference plays a significant role, you might find the latter a superior option when you opt to spatchcock your turkey. Wet brining involves taking up precious space in your fridge with a massive pot of water, and some say the oversaturation of salt water changes the texture of the meat (via Reddit). Dry brining does not involve soaking, so you will have no trouble avoiding soggy meat, and the turkey won't take up as much space in the fridge.
If you're dead set on going traditional with a wet brine, that's totally fine. At the end of the day, a brined turkey (no matter which method you choose) is better than a nonbrined turkey.
Or try dry brining the turkey instead
If you're open to trying another new technique for Thanksgiving, skip the wet brine, and go for a dry brine instead. It tends to be the preferred choice for many home chefs today for a few reasons. There is no saltwater bath necessary for the job, plus the salt still penetrates the meat without causing it to get soggy.
Feel free to get creative with your dry brine. While salt is the key ingredient, herbs, spices, and even citrus zests are welcome here. Simply sprinkle your dry brine blend over the entire bird (including the inside) and rub it into the meat, then let it sit overnight.
Combining a dry brine with a spatchcocked turkey is a sure way to make a prized centerpiece for your feast. The brine will help create tender and juicy results, while spatchcocking the bird will ensure even cooking and gorgeous golden-brown skin. This spatchcocked Sichuan-spiced dry-brined turkey recipe is an excellent example of how to combine both dry brining and spatchcocking to create a stunning turkey that everyone is sure to enjoy.
If you go the dry brining route, make sure to rinse and pat dry the brined turkey before moving on to spatchcocking your turkey.
Step 1: Flip the turkey and slice
Spatchcocking is a cooking technique that will get you the perfect roast turkey or chicken every time. However, anyone who has not tried this method before might find it a bit intimidating. We promise the task is actually pretty straightforward, and it only requires three simple steps.
If you brined your turkey, make sure it's rinsed and patted dry before starting. Now, go ahead and grab your cutting board, a chef's knife (or any sharp kitchen knife), a pair of kitchen shears, and a sturdy sheet pan. Once all of your tools are ready to go and the turkey is thoroughly dried, it's time to get to work.
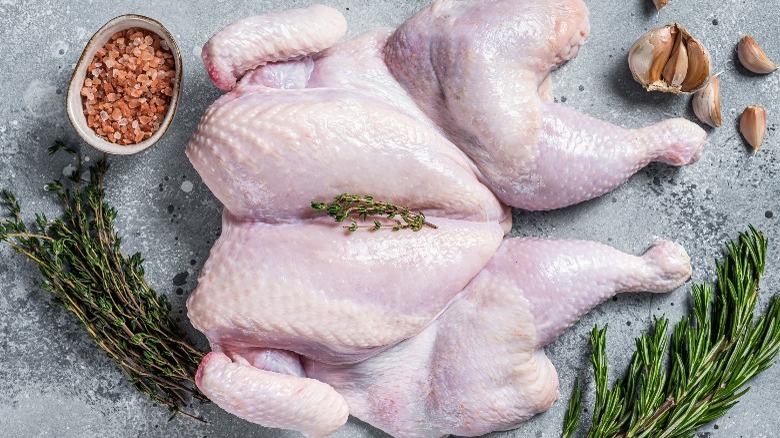
Start by positioning the turkey on a cutting board with the breast facing down. Use your sharp knife to score a line down one side of the backbone, starting at the neck end and working your way down to the tail end. Score a second line in the same manner down the other side of the turkey's backbone. You will use these score lines as a guide when removing the backbone with kitchen shears.
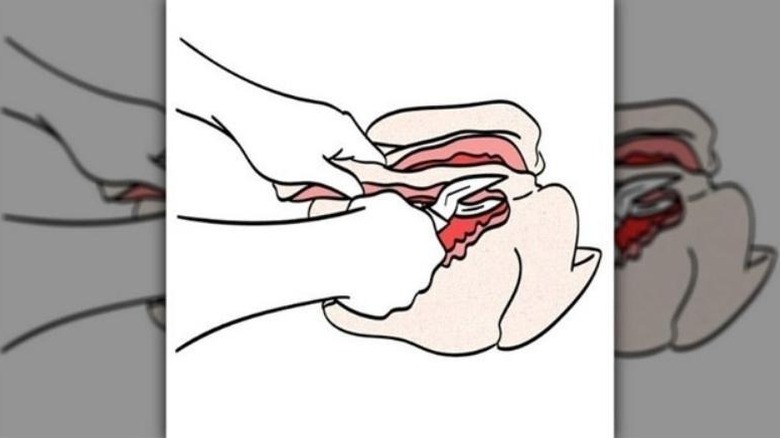
Step 2: Cut and remove the backbone
Next, you want to cut through the backside of the turkey to remove the backbone. Make sure your shears are very sharp before doing so. If the shears seem even the slightest bit dull, you can get the blades back into tip-top shape by using aluminum foil to sharpen them. While this strategy isn't perfect, it helps get rid of residual grime that may have built up over time. Simply fold over a sheet of foil several times, then cut the foil into multiple strips. It's worth trying if you want to get the most out of your kitchen shears.
Starting at the tail end of the turkey, use sharp kitchen shears to cut along the score lines that you made on both sides of the backbone. A sharp set of shears should have no problem cutting through any bones.
Speaking of bones, don't discard that spine just yet. Instead, you can use it to create a delicious homemade gravy in a bit. Place the spine in a food-safe container for later.
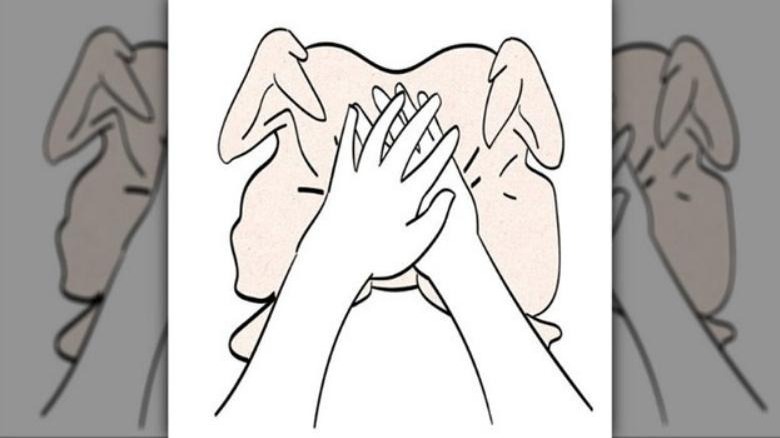
Step 3: Flatten the turkey and crack the chest bone
Once you have removed the backbone and set it aside in a sealed container, use the shears to trim off any excess fat towards the neck end of the turkey. Avoid discarding any meat trimmings for the same reason you set aside the backbone. Both the bones and fat trimmings make an excellent addition to a homemade broth, and you can't make an impressive scratch gravy without that precious turkey broth. Place the trimmed fat in the food-safe container holding the backbone, replace the cover, and store it in the fridge.
Use both hands to flip the turkey back over onto the cutting board, spreading the legs and thighs outward. Place your hands over the breastbone of the turkey and firmly press down until you hear a cracking sound and the turkey sits flat.
Now give yourself a pat on the back (after washing your hands, of course). You just spatchcocked a turkey!
Season and cook your spatchcocked turkey
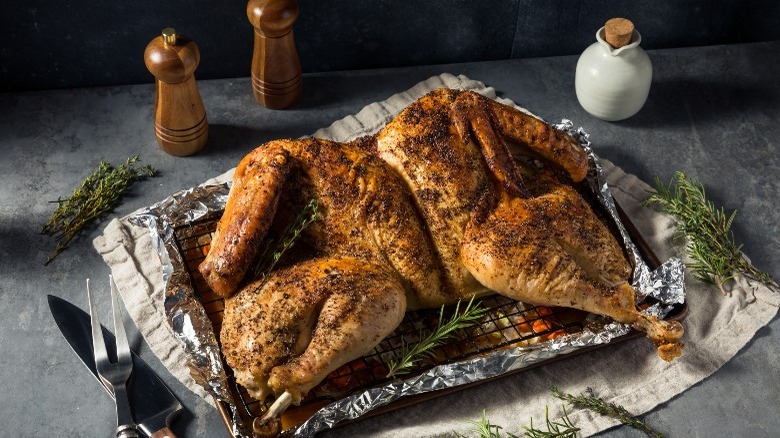
Now that the butchering is all done, you will want to get the bird in the oven. First, set your sheet pan up with a wire rack. This is a great time to scatter aromatics and fresh herbs across your baking sheet. A chopped mirepoix (onion, carrots, and celery), along with a few cloves of garlic and some fresh rosemary or thyme sprigs, work great for a traditional base. Place the wire rack directly over the spread of chopped vegetables.
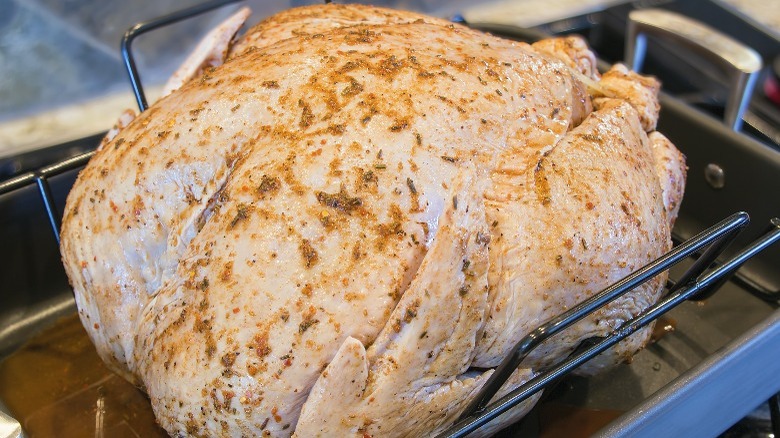
Position the turkey on the wire rack, skin side up, then enhance the turkey with seasoning or compound butter. Bring a few tablespoons of minced garlic and herbed compound butter up to room temperature, then rub it all over the skin. Otherwise, feel free to season it with kosher salt and freshly cracked black pepper. Note that if you dry brine your turkey, you can skip adding salt before roasting in order to avoid an overly salty-tasting turkey.
Place the turkey in an oven that is preheated to about 425 F, and rotate it every 30 to 40 minutes. Insert an instant-read thermometer into the thickest part of the breast to check the doneness of the meat. Once the turkey breast reaches 160 F, take the turkey out of the oven. As the turkey rests, it will continue to cook and reach the poultry's safe internal temperature of 165 F (per FDA).
How to handle stuffing when spatchcocking a turkey
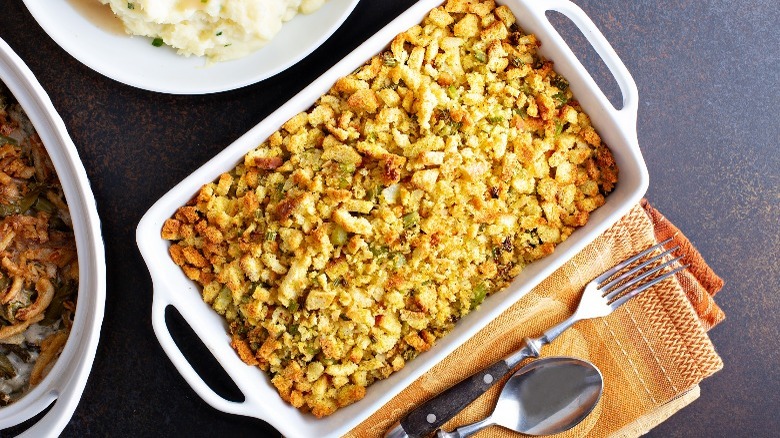
The thing about Thanksgiving stuffing is that it's super customizable. With so many stuffing recipes to try, you have the opportunity to wow guests each year until you reach a new bread-filled concoction the whole family loves. The only faux pas about it is not serving stuffing at all, so grab your traditional recipe or even the boxed version for the sake of stuffing lovers sitting at the table.
Quite obviously, there is no place to, well, stuff a spatchcocked turkey. Yet, this makes for another unique twist to a traditional Thanksgiving bird. Since you opened up the turkey and laid it down flat, you will have to make your stuffing in a casserole dish. Even when cooking a traditional roast turkey, this is a safer route because placing it inside the turkey exposes your stuffing to raw meat (via Webstaurant Store).
Beyond that initial uncooked meat exposure, stuffing should never go inside a turkey because the turkey doesn't get hot enough within the cavity. Those dangerous salmonella juices that soak into the stuffing can cause food poisoning, which nobody wants to endure, especially during the holidays. So, it's safe to say spatchcocking saves the day once again.
Make gravy with the trimmings and drippings
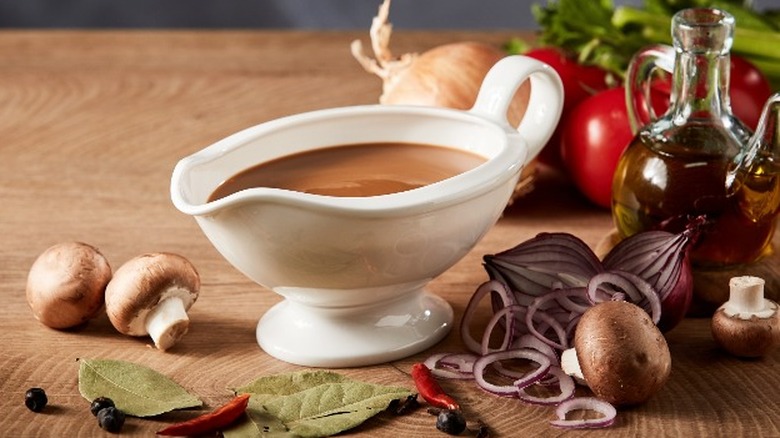
If you typically whisk up a packet of gravy powder or tend to take shortcuts with the jarred version, we strongly urge you to make gravy from scratch instead. The overall richness and flavor are far superior to any brand-name gravy you would buy off the shelves and making it is easier than you think. Also, all those turkey parts you didn't discard will come in handy.
Chop up the neckbone, backbone, trimmed skin, and giblets. Add a tablespoon of oil to a large saucepan, and bring it to medium-high heat, then add all the cut-up turkey pieces and cook until they begin to brown. Add in some aromatics, like mirepoix, garlic, and fresh herbs, and continue to cook until the vegetables start to soften. Add a few cups of chicken or vegetable stock and simmer for about an hour. That's the broth you will use for your Thanksgiving turkey gravy.
Strain out the liquid from the solids and set the broth aside. Make a roux by heating equal parts of butter and flour, and slowly whisk in that lovely broth until you reach the desired consistency. Feel free to add turkey drippings or salt and pepper to taste for additional flavor. A bit of heavy cream will give it an extra creamy mouthfeel as well, and a couple of dashes of soy sauce is the secret ingredient you want to add to your gravy for just the right touch of umami.
How to carve a spatchcocked turkey
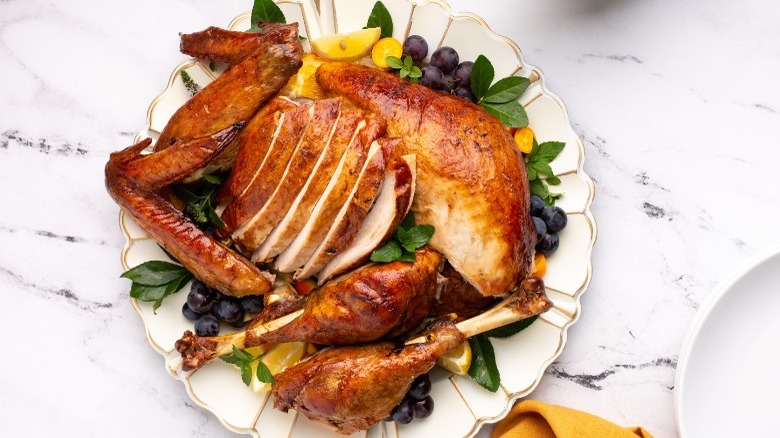
Carving a spatchcocked turkey is less demanding than carving a traditional roasted turkey because the entire bird is laid out and easier to access. Once your turkey has rested for at least 10 or 15 minutes, carefully transfer it to a large cutting board.
Start by cutting off both legs by slicing through the joint where the body and thigh meet. Cut through the joint between the thigh and the drumstick and work to pull them apart. Pull the wings back, slice through the joint near the breast, then remove the wings.
Use your fingers to find the breastbone that runs down the bird. Work your knife along both sides of the breastbone, using the tip to track along as you peel away the breast. You will notice that the breast falls away nicely. Once you remove both breasts, slice the meat horizontally into serving sizes for guests. Place your sliced breast on a warm platter, along with two thighs, two drumsticks, and two wing pieces.
Make sure you save the carcass. You can pick off additional meat the following day and use it for soups, leftover casseroles, and sandwiches throughout the week.