13 Ways To Make Homemade Bread Better
We may receive a commission on purchases made from links.
While it's absolutely possible to go to almost any store — even the gas station — and pick up a loaf of bread, there's something extra special about making it yourself. Baking might be a science, but pulling a hot, delicious, golden loaf of bread out of the oven after stirring up just a few ingredients is as close to magic as we might ever get in this cynical old world of ours.
But, just like magic tricks and science, baking a loaf of bread can go, well, less-than-ideally. Even if it comes out of the oven as just a perfectly fine, acceptable loaf of bread, you're not doing your own baking to just get "fine." You're looking for that "Wow!" and that loaf of bread that's not just going to outshine the rest of the meal, but is going to have anyone you share it with asking you to make it again and again.
Fortunately, there are a lot of different ways you can elevate even your most favorite, tried-and-true recipes into something extra-stellar. Whether it means changing the way you start the process or adding a few things in at the end, we promise that none of these tricks are hard, and it'll make your treats just that much tastier.
1. Always use a scale
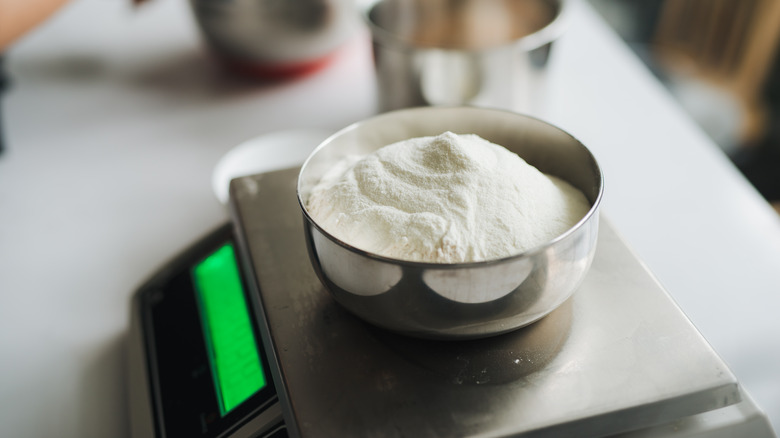
A truly amazing bread is all about getting the texture right, and that's true whether it's challah bread, banana bread, or a loaf of white bread. And here's the thing — while we might be sort of pre-programmed to reach for measuring cups when we're reading a recipe that's clearly written in cups, using a kitchen scale to measure out ingredients is going to make a world of difference.
Former pastry chef and member of The New York Times's Wirecutter kitchen Marguerite Preston explains that the key here is flour. There's a lot of wiggle room when you're scooping a cup of flour: Did you tap it down all the way, did you pack this cup tighter than the last cup, did you level the top off or leave it not quite as flat this time? Use a scale, though, and you'll get the same amount of flour each and every time, because while the appearance of volume can change, weight does not.
That's also true for odd-shaped ingredients — think of things like nuts and raisins — or sticky ingredients like butter, maple syrup, and honey. Pro tip? Don't scrape things like honey out of a measuring cup, just place your entire mixing bowl on the scale, zero it out, and pour directly in. You'll be spot on every time, and without the mess!
2. Experiment with flavor-infused sugars
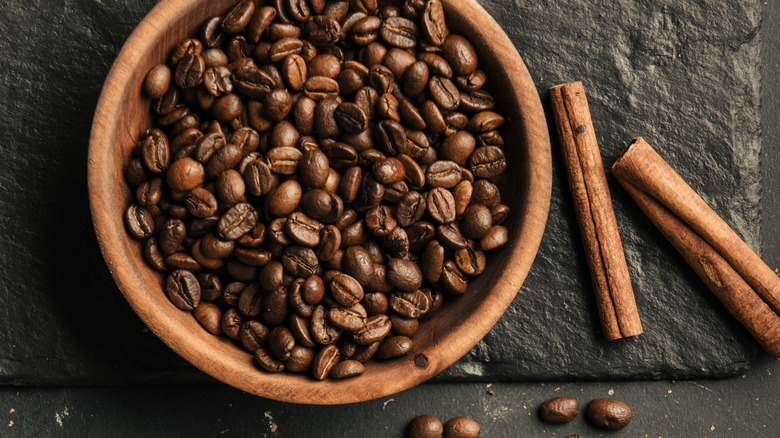
Not all breads call for sugar, but for those that do — think of your challah breads, and sweet breads like banana and zucchini — there's a super easy way to add an extra dose of incredible flavor. (Even better? It's one that works with scores of different recipes, not just bread!)
In a nutshell: Flavor-infused sugars.
We know, right? According to the King Arthur Baking Company, there's a few different ways to infuse granulated sugar with flavors, and the easiest one is simply to mix them with the source of the flavor you're looking to infuse, and let them sit for a while. This doesn't work with every flavor, of course, but it's brilliant with things like vanilla pods, coffee beans, and dried herbs and flowers, like mint, rose, and lavender.
It can take a while to infuse sugar that way — think in terms of weeks — but you can always refill the jar as you do, so some is always working away. Alternatively, you can opt to blend the ingredients together — but keep in mind this is going to change the texture of the sugar as well as the taste, and might not be ideal for all applications. For some, however, it's nothing short of amazing. Banana bread with vanilla-infused sugar? Yes, please!
3. Pre-shape the dough
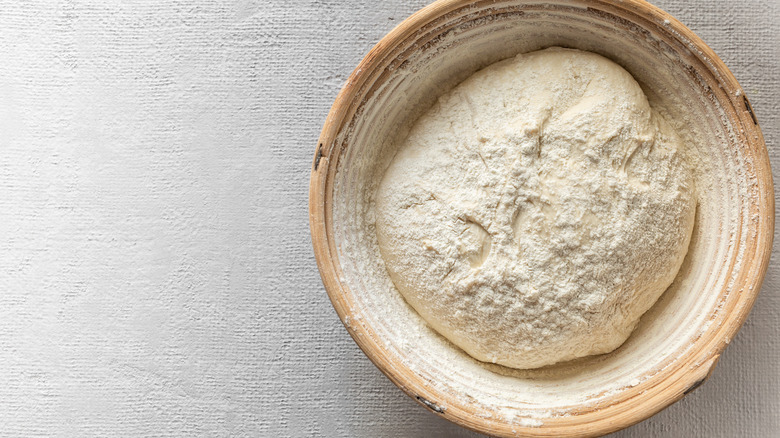
If you're going through all the trouble of making bread, then it just makes sense to make a few loaves, right? Here's where pre-shaping comes in. When you're making a recipe that's going to be divided into a few loaves, it might just call for a period of rising, then dividing the dough into sections for each loaf, and letting it rise again before shaping and baking. The Perfect Loaf suggests there should usually be another step in there, though: After it's divided, shape it into the ball or baguette it's destined to be, then let it rest.
There are a few reasons to do this, and perhaps the most important is that it'll make your final product more even in shape. It'll also help make the dough stronger, and with a stronger "skin," it's going to more easily keep that desired shape. (It can make such a difference that if your dough doesn't feel quite right, it could even fix some problems and help it hold shape correctly.)
Busby's Bakery suggests there's another bonus here, too: It'll help you perfect your shaping skills. It can be tough getting a loaf of bread shaped perfectly, with no bumps and lumps and odd proportions. Not artistic? Practice during the pre-shaping!
4. Add a seeded crust
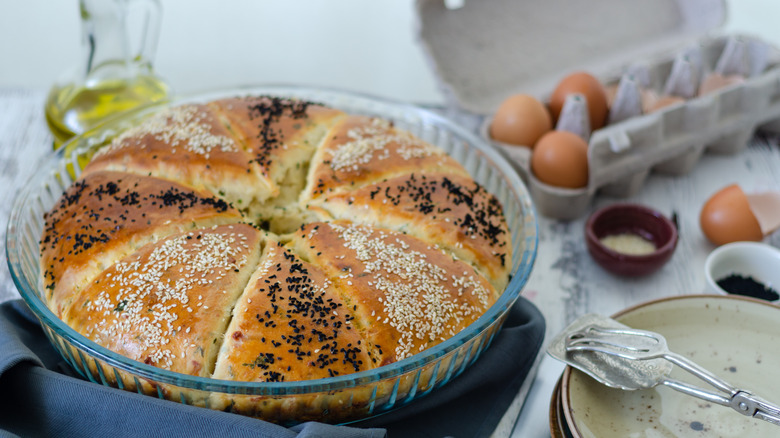
First off, there's nothing wrong with a perfectly smooth, gorgeously golden crust. But imagine walking into an artisan bakery, and you know it's the bread with the funky crust that catches your eye, right? There's good news: Making your own seeded crust is much easier than you might think.
King Arthur Baking Company explains that there's definitely a trick to it, but it's a simple one. Lay out your toppings — whether it's chia seeds, poppy seeds, oats, or even some other fun grains — out on a tray. (A cookie sheet is perfect, and it'll help make clean-up easy.)
Then, moisten the top of your loaf with a damp towel, and transfer it into the tray. Press the top into your seeds or grains, rock it gently back and forth, then let it sit for just a minute. In most cases, you can bake as usual, but for some high-fat seeds — like sunflower — you'll need to keep an eye on them to make sure they don't burn. Feel free to experiment, but remember that whole grains can get very, very tough: Make sure they're milled, and you're good to go.
5. Choose the right butter
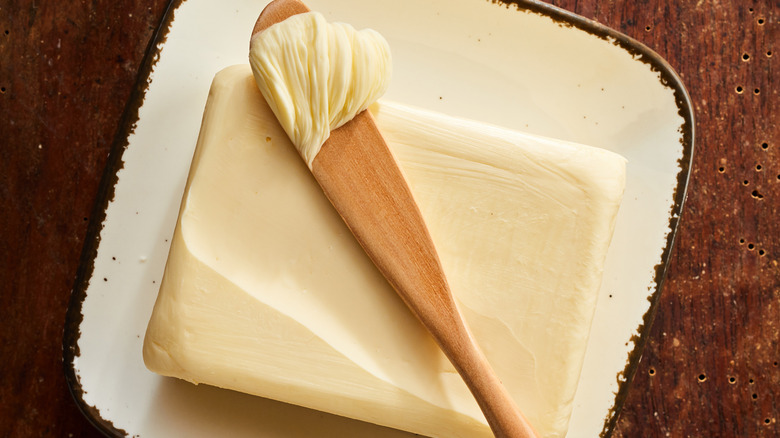
Butter is another ingredient that doesn't show up in all breads, but when it does, it's a big deal. Brioche would be nothing without butter, and what about the BBQ staple of cornbread? Butter, says MasterClass, can make or break your recipe.
Picking the right one is important because not all butter is created equal. Do you want the butter to add a rich, caramel flavor? Or faint notes of green grass? Butter is also what gives buttery breads their texture, so don't use just any old butter — and even if you're trying to make healthier decisions, don't reach for a low-fat butter. European-style butters are, by nature (and by European laws) higher in fat, and that's exactly what you want. Opt for unsalted butter, too — salted butter can throw the ratio of your ingredients off, and if that's all you have, don't forget to reduce the added salt by at least half.
6. Consider adding powdered milk
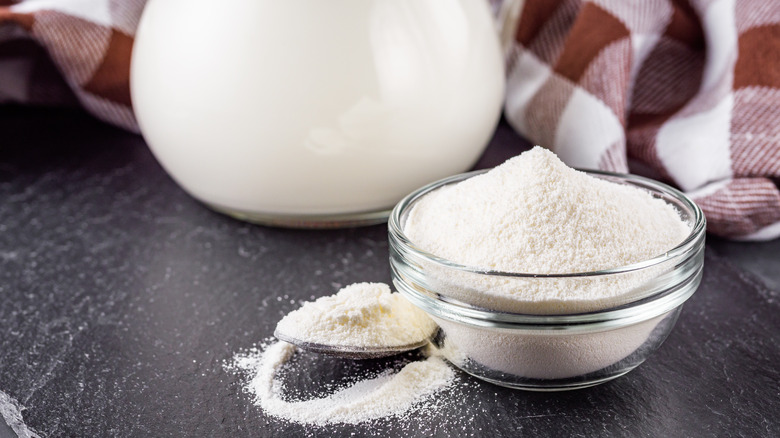
Powdered milk can be a lifesaver in a pinch. Since it's shelf-stable, there's no need to be afraid of running out of it. But the experts over at Epicurious say there are other reasons you should consider keeping it on hand, and using powdered milk not just in your bread, but all your baked goods.
Ramin Ganeshram is the author of "Sweet Hands: Island Cooking from Trinidad & Tobago," and she swears by powdered milk for breads. The secret, she says, is in the difference between the way liquids and powders behave in a dough. Milk is used in recipes for the addition of milk proteins and sugars: When it's in a liquid form, it's also adding water that can skew the proportions of everything, and change the texture of your finished bread. Adding about two tablespoons of milk powder to your recipe will make the loaf rise better, and it'll add some extra flavor, too — all without losing texture.
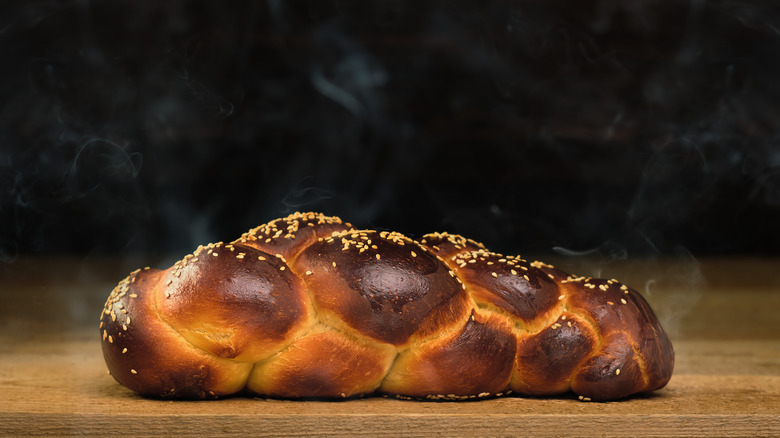
7. Don't forget to use a wash before you bake
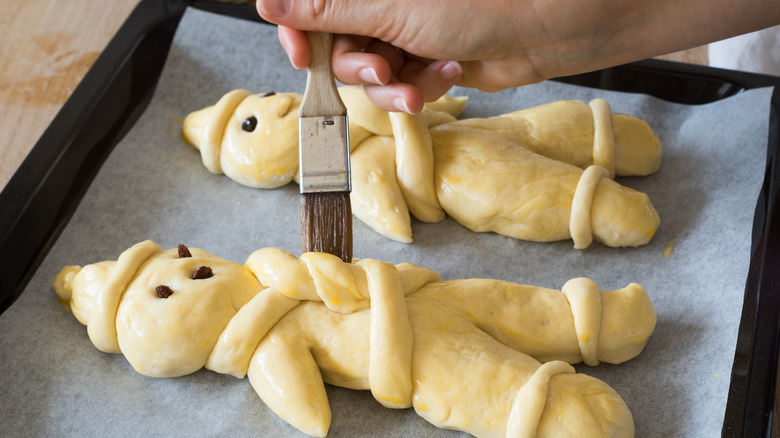
The first bite, it's said, is with the eye. Right or wrong, we tend to have a pretty good idea about how good something is going to taste just by looking at it, and here's where glazes and washes come in.
Applying a glaze or a wash to bread before it goes in the oven can have a huge impact on the final product, says Delishably. It's as easy as using a pastry brush to apply a coating of liquid to the bread's surface, and what happens depends on what you use. An egg wash is the most commonly used kind of wash, and it'll help the loaf develop that golden brown crust all bakers want. That's not the only option, though: Adding milk or cream to that egg will help the crust darken even more, for example, and using a wash of melted butter will help keep the crust soft. Want to go the other way, and get a crunchier crust? Use oil or water!
Finally, a pro tip: After you apply the wash, add a sprinkling of herbs. It'll look downright lovely, and taste even better!
8. Keep in mind your perfect dough temperature

Oven temperature is important, but according to ThermoWorks, the temperature of your dough is important, too — and here's why.
In order for yeast to work, it needs to be between 110 and 130 Fahrenheit. Any lower and it'll add some nasty flavors to your bread, and any higher will simply kill it. That makes sense, and water is the logical source of heat. But what about your flour?
It turns out that it's not just water that can push your dough out of that comfort zone, and you should also take into account where your flour is coming from — especially those whole grain flours that you might be storing in the fridge. They're going to be way too cold just out of the container, and then, there's also the impact of friction.
Wait, what? If you're using a mixer, the friction of that mixer is heating up your dough. Add water that's too warm, and you're out of that comfort zone again. Fortunately, there's a formula for figuring this out, and it might take some initial legwork. You'll need to find your mixer's friction factor (which you might find online, or by reaching out to the manufacturer). Then, work backwards. Take the temperature you want your dough to be, and multiply that by three. Then, subtract the temperature of your flour, the environment, and the friction factor, and the number that's left is the temperature of the water you should add for that perfect loaf.
9. Try a chocolate version
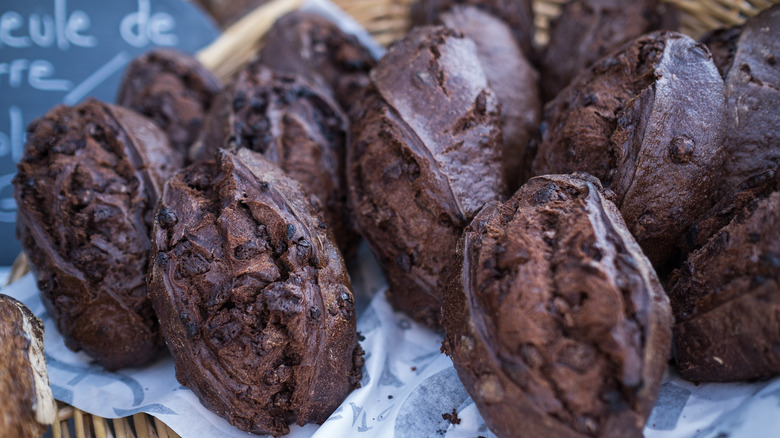
Have a favorite recipe that you feel might benefit from a bit of a freshening up? Try a chocolate version!
According to King Arthur Baking Company, it's actually easier than you might think to whip up a chocolate version of your favorite bread — and it's not just limited to things like brioche. Milk bread, croissants, and even standard yeast breads can all benefit from the addition of cocoa powder and some chocolate chips.
This isn't for the faint of heart, though, as there are a number of things to take into consideration. They found that the ideal ratio was somewhere around replacing 10% of the flour weight with cocoa powder, and 15% chocolate chips. (This can definitely vary by taste.) From there, it's all down to understanding how dough works. For example, a dough that's already fairly well hydrated might be fine with the switch, but if it's too firm with the cocoa replacement, you might have to adjust the water.
Some cocoa powders might be stronger or more bitter than others, too, and might require some adjustments there. Practice, as they say, makes perfect!
10. Invest in a baking stone
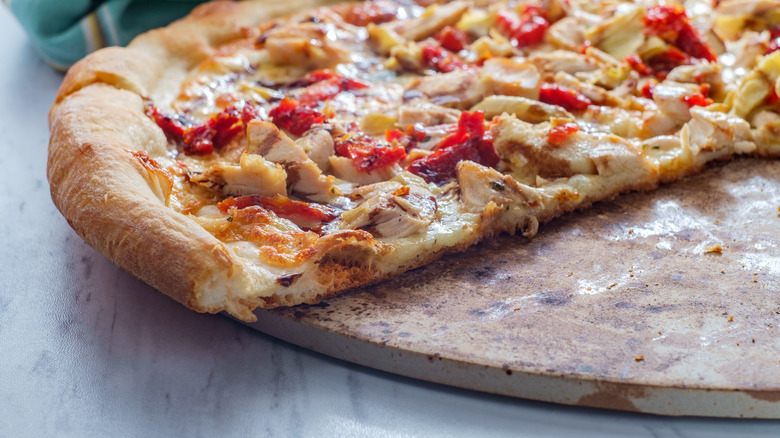
If you're still using your grandmother's old baking pans, there's definitely nothing wrong with that. It's kind of cool, actually! But according to Fine Cooking, there's one simple tool that you might want to invest in if you're looking to up your bread game, and that's a baking stone.
Baking stones aren't metal like grandma's old pans, they're clay that's been pressed and baked in a kiln. They're a simple thing (that are great for making restaurant-quality pizzas in your own home oven), and there's three big benefits to using them over metal pans. For starters, the way they hold and radiate heat will give a newly-introduced dough what's essentially a kick-start to baking. (It's a term called "oven spring.") That same radiant property will also help keep the temperature inside the oven even all around, and that's so good for baking that you might just want to leave it in all the time. And finally, the natural surface will also absorb some of the water that's on the bottom, and it'll cause a crispier, not-at-all soggy bottom. (Again, this will also up your pizza game about 100%.)
Baking bread is an exercise in patience, and while getting your baking stone up to the proper temperature will add around 20 minutes onto your oven preheat time, it's totally worth it.
11. It's all about the steam!
Stop into any artisan bakery and it'll quickly become clear that they have not just a bag of tricks, but an entire boatload — and here's one that anyone can take advantage of right in their own home oven.
One of the key components to getting any loaf to come out of the oven with an incredible crust is steam. According to King Arthur Baking Company, you're not imagining it: Commercial ovens really are different from what you're working with at home, and bakery ovens have a steam injection feature. Fortunately, there's a super easy way to duplicate that steam, and all you'll need to do is put a frying pan on the shelf underneath your bread, and add about a cup of already-boiling water.
You can also opt to put a bowl over the loaf in the early stages of baking, but don't go over-fill the water or leave the bowl on for too long. All you want is steam at the beginning: let the inside of the oven dry as the bread finishes baking, and you'll get a crisp crust every time.
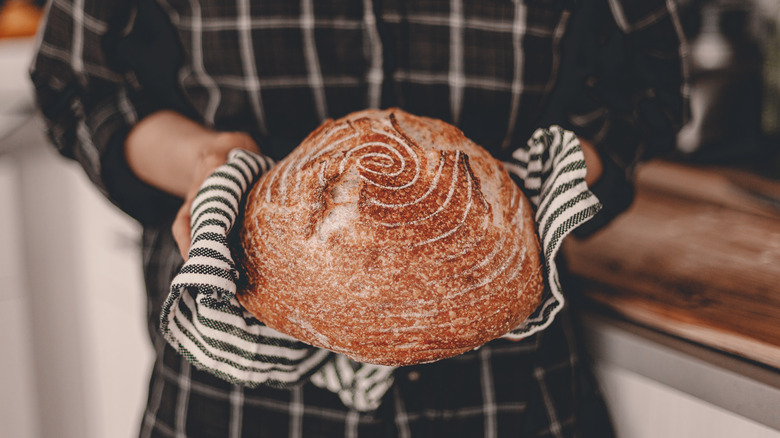
12. Scoring will help you get that perfect loaf
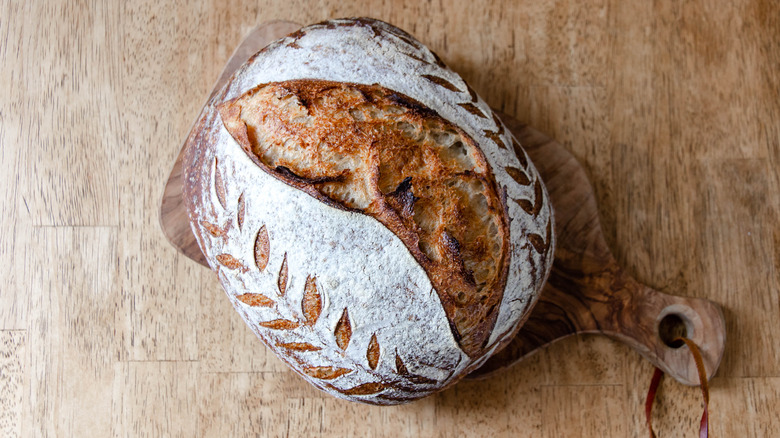
Many artisan loaves come with designs forming a pattern on the top. Simple or intricate, those designs are actually there for a reason.
As bread bakes, the magic that causes it to rise in the first place releases gases. Those gases need somewhere to go, so scoring allows for the expansion of the loaf in a controlled way (via King Arthur Baking Company). If it's not scored, it's going to get all lumpy and weird-looking ... even though it might still taste great.
Scoring can be done in all kinds of ways, and it's really a case of whatever works best for each individual baker. All knives work in the same way (although scissors can be much easier to use if you've added grains to the crust), and some patterns you see on bread actually have a specific name. The wheat score, for example, is that oft-used (and easy to replicate) pattern that looks like a sheaf of wheat (via the BBC). There's no right or wrong way to add these stress-relieving cuts, though, so get creative!
13. Try something other than kneading
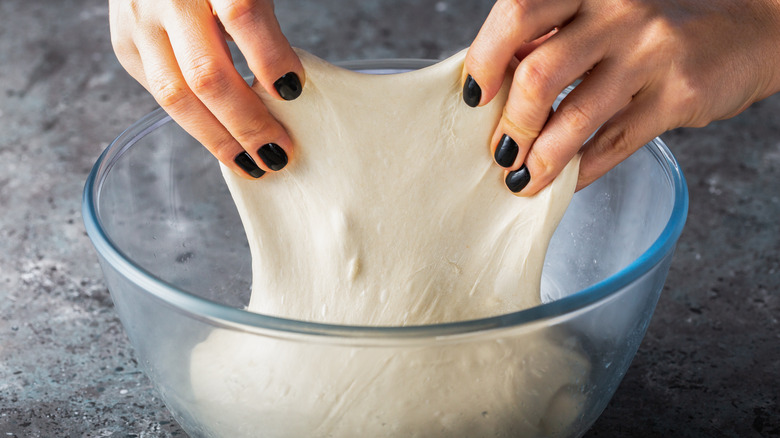
Kneading a loaf of bread is easily one of the most time-consuming, hands-on processes that any kind of baking or cooking involves, and it's definitely a love-or-hate sort of thing. If you hate it, here's some good news: King Arthur Baking Company experts say that it's not necessary.
They suggest that instead of kneading, you should fold: As the bread proofs, check on it twice an hour, folding it in half each time you do. They say there's a few reasons this works so well, but it basically comes down to water and yeast going through the processes that they're going to go through whether you're kneading away or not, and the shorter gluten chains that form with folding.
They also say that this method can work with pretty much any bread dough, and the only downside is that you're going to have to let it rise a little longer. Given that extra time is hands-off, that's not a huge sacrifice to make for the positives of fixing overly sticky doughs, encouraging the development of more flavor, and no back-breaking work.