Avoid These 10 Mistakes When Packing Your Kitchen For A Move

The kitchen undoubtedly calls for your undivided attention when packing for a move. Step inside, and you'll find a diverse array of items with unique packing needs. There is the fragile, touch-me-not glassware that needs to be sufficiently cushioned against impact, the liquid items and spices that are happy to spill and stain everything, and pricey appliances that won't take too kindly to being bumped around roughly in the moving truck. But the good news is that it is possible to get all your kitchen items to your new place in one piece with proper preparation.
One of the most compelling reasons to adopt an individualized approach to the specific packing needs of different items is to avoid damaging them. Breakage complicates the unpacking process, leading to additional stress, risk of injuries from broken shards, and high replacement costs. Avoiding leaks and spills can also minimize clean-up, allowing you more time for unpacking and decorating your new kitchen. These tips for cleaning out your pantry and fridge before a move are a good place to start, but you'll also want to avoid some crucial packing mistakes that can detract from your efforts. By keeping a laser focus on safety and sealing, your transition into your new place can be smoother than you expect.
Using the wrong packing materials
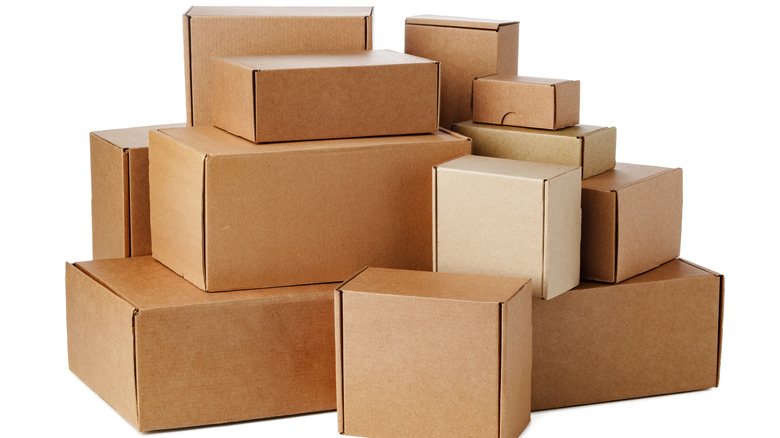
Since the kitchen houses a plethora of delicate, fragile, and spillable items, this room is likely to monopolize the majority of your packing efforts. If you fail to invest in the right packing materials, you could be facing damages, injuries from broken items, and high replacement costs for expensive appliances.
The first order of business is understanding which packing materials to avoid completely. It is essential to first test cardboard boxes for strength and durability, as flimsy options are likely to collapse under weight. The walls of the box should feel sturdy to the touch and shouldn't bend or warp easily. Wooden crates may seem like an attractive option but can often take up unnecessary space in the moving truck.
Next, you'll want to reach for paper-based bubble wrap as an eco-friendly alternative to disposable plastics. Beeswax-treated cotton wrap also makes for a sustainable alternative to traditional plastic wrap. Old newspapers might appear convenient, but they can leave inky residue on your glassware. Your arsenal of packing basics will also need to include heavy-duty packing tape to ensure that sealed boxes stay that way. Having ample markers and labels on hand will help you add the finishing touches with ease.
Not packing knives safely
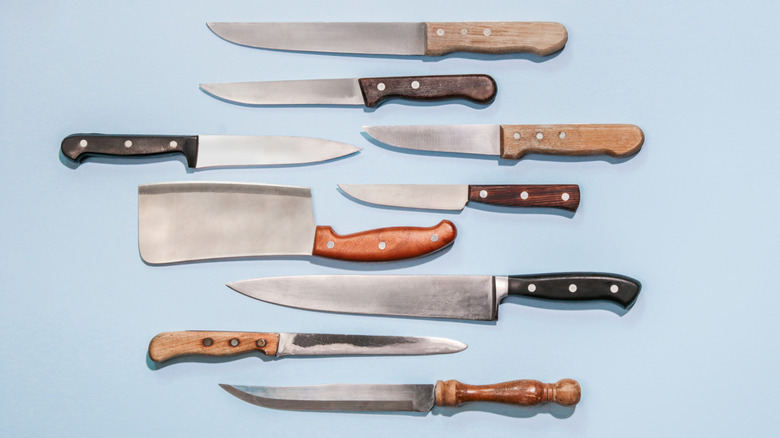
When packing your kitchen for a move, the fragile glassware often tends to get all the attention. However, if knives aren't packed securely for transit, any exposed blades can cause injuries while unpacking. Beyond nicking your fingers, haphazard knives are also a threat to other items in the box — you don't want a jagged line across your new Le Creuset collection.
Begin by getting rid of any old options that have been camping out rent-free in your kitchen — here's a look at the safe and easy ways to dispose of unwanted kitchen knives. If you already have a knife block, you don't need endless rolls of bubble wrap for protection. Simply place each knife in its designated slot in the block and secure its position with packing tape. Any gaps or empty space in the block can be filled with packing paper to prevent movement during transit.
If you don't have a knife block, it helps to wrap each blade individually. Start by grouping your knives together by size and roll two or three layers of packing paper over each piece. An additional layer of bubble wrap will offer cushioning against impact. Remember to add the label "sharp objects" on the knife box — this will remind the moving crew to load and unload it safely from the truck.
Not packing spices securely
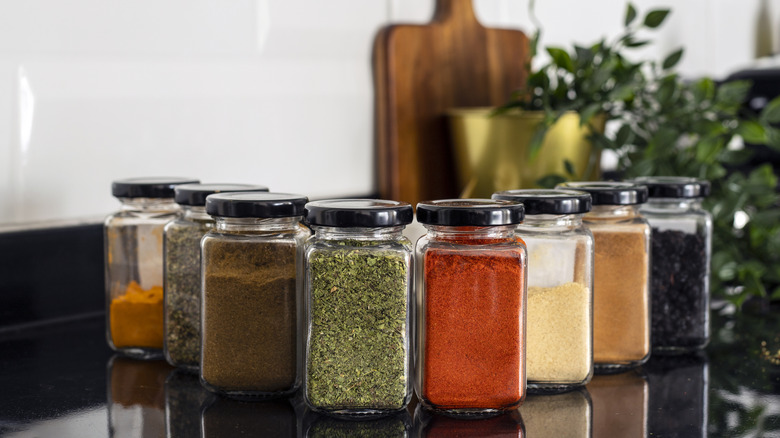
When you have invested time and effort in curating your spice collection, you won't want to leave its protection up to an indifferent packing crew. After all, a haphazard approach toward packing spices can come with significant consequences. For starters, spills and messes are not easy to clean. Heavily pigmented spices can stain other items in the box, and the odors can transfer easily as well — and heaven forbid that you accidentally get cayenne pepper in your eye during clean-up. Unnecessary exposure to light and moisture during transit will also take a toll on the freshness and flavors of your spice collection.
Stay one step ahead of any mishaps by first getting rid of any expired options to ensure that you aren't carrying dead weight. Next, you'll need to secure the containers with care — any flimsy lids can be sealed with tamper-proof tape. Aluminum containers can make for a shatter-proof alternative to fragile glass jars.
Group similarly sized jars together in a box and fill in gaps with biodegradable foam peanuts to prevent anything from moving around in transit. Half-used paper towel rolls can also offer cushioning. Once you have unpacked your carefully wrapped containers, check out these tips on how to organize your spice rack to make it the focal point of your new kitchen.
Not packing appliances with their spare parts
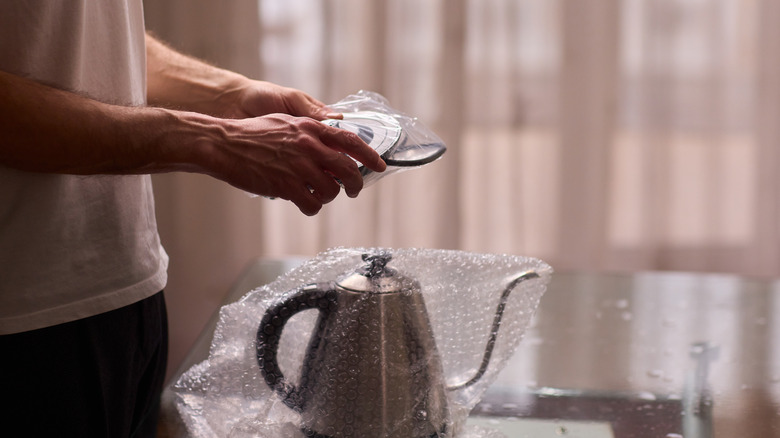
You should dedicate great care to ensuring that your appliances, gadgets, and gizmos arrive in one piece. However, if left unattended, vital spare parts and power cords can easily vanish in the jumble of packing. Despite being delivered safely, appliances are then rendered unusable — leaving you spending time and money to chase down spare components. The quickest way to avoid this quandary is to pack each appliance along with its corresponding parts before moving.
The work of packing kitchen appliances starts long before the moving truck has arrived. Wipe down the exteriors to get rid of any grease or food residue. Next, carefully detach any loose cables or parts and take careful inventory of the spare parts that go with each appliance; coffee machines usually have an array of filters, food processors come with additional blades and discs, and mixers will have whisks and splash guards. Once everything has been grouped together, it will become easier to ensure that each appliance is packed with its essential components and nothing is lost in the chaos of moving day. Instruction manuals and warranty cards can also be packed together with each appliance to simplify the setup process in your new place.
Not packing pantry foods by weight
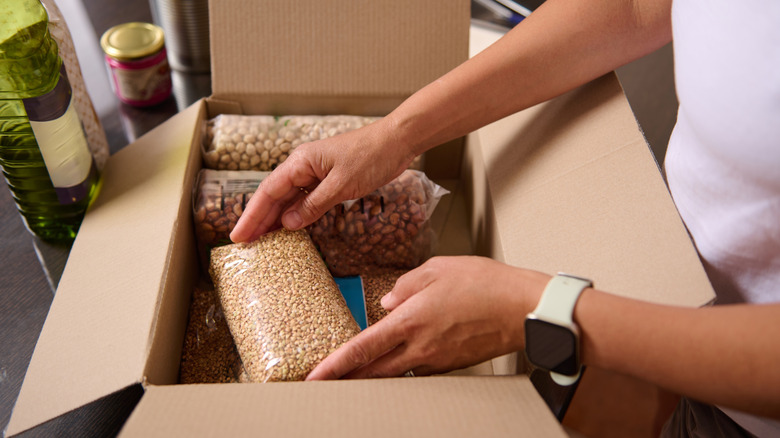
When packing perishable goods of different weights, size does matter. After all, the last thing you want to see after a long day of unpacking is crushed bottles and broken containers littering the bottom of your pantry boxes. If lighter items are smothered under a dense layer of canned goods and cooking oils, you are simply begging for accidents to happen.
The rule of thumb is to opt for small- or medium-sized boxes for packing pantry goods — this will ensure that you aren't overpacking an individual box. Once you have found the right container, it is essential to sort items by weight. You will have heavy bags of pulses and grains, medium-sized frozen foods, and lighter snacks and spice containers. To create a stable pile, the heaviest items need to be placed at the bottom of the box. When the weight is distributed evenly across the box, it won't collapse suddenly when lifted. Taking the time to label the box "heavy" can also ensure that the movers take due care when putting it on the truck. Once you have created a sturdy base, medium-sized items can then be placed on top. Finally, any gaps or empty space can be filled in with non-fragile, smaller items.
Not labeling everything
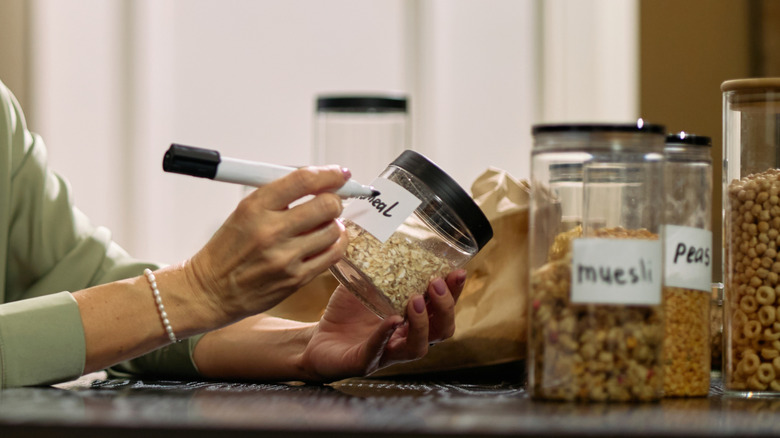
The bedrock of any efficient kitchen is a labeling system. Writing on the lid is the best way to label home-canned goods, and you'll want to extend the same courtesy to your packing endeavors as well. When boxes are not labeled clearly, there is a greater chance of breakages and damage. Boxes containing fragile, sharp, or liquid items especially need to be labeled so that the packing crew can take adequate care while transporting them. You'll also find that detailing the contents of each box saves precious time while unpacking.
And we aren't talking about a scrawny scribble in a corner, either. The golden rule is to label clearly in all capitals on two sides of the box as well as the top. You can start by specifying the area the contents of the box belong to and then narrow it down to the specifics, like "upper cabinet, plates and mugs." This will make unpacking boxes a breeze. Those essentials that you will require as soon as you move in will need an additional label titled "Open first." Alternatively, you can develop a color-coded labeling system to dictate the unpacking order: red for high-priority items and green for low-priority or seasonal items that you won't need right away.
Not cushioning glassware
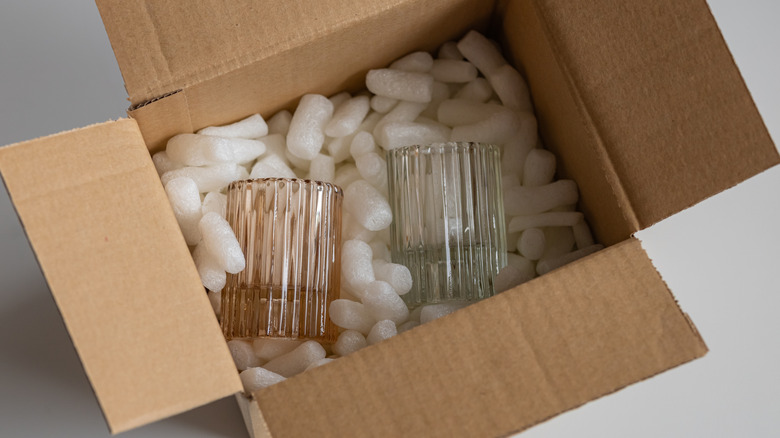
Glasses and plates are among the first things you'll look for after moving into a new place, but you'll need to be careful that you don't nick your finger while unpacking. Broken shards due to vibrations during transport, cracked rims, and chipped edges are common yet avoidable hazards when moving glassware. By ensuring that fragile items are adequately cushioned, you can save yourself from injuries, damage, and cleanup later.
When packing glassware before a move, your work starts by assembling the right packing supplies. Honeycomb packing paper is a must, but you'll also find that old dish towels can help cushion fragile items. Begin by creating a cushy base by crumpling up large wads of packing paper. Individual items can then be wrapped with multiple sheets of packing paper until you can't feel the edges anymore. Pointy corners and sharp edges can chip quickly in transit, so don't hesitate to cushion these further if needed.
The same rule of packing by weight applies here. The heaviest items go at the bottom, while lighter items need to be placed at the top; this will ensure that a delicate salt shaker isn't crushed underneath a bulky platter. If you can hear things rattling or rolling around freely inside the box, it is your cue to go back in and fill the empty space with old sponges or cleaning cloths.
Not double-bagging liquid items
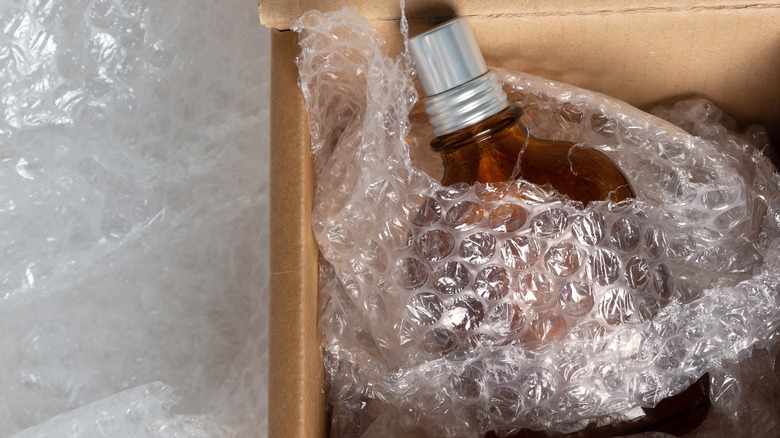
The modern kitchen plays host to a wide arsenal of liquid items, from vinegars and sauces to cooking and finishing oils. If you are looking to skip the cleanup nightmares while unpacking, be sure to double-bag any liquids. Bottles can crash against each other, and lids can pop off during transit, but adding an additional barrier can keep liquids from spilling and contaminating each other.
Start by grouping similar items together — oils need to be packed with oils, while liquid soaps and detergents belong next to each other. This way, any accidental spills won't jeopardize the contents of the entire box. To prevent leaks, remove the lid of individual bottles, cover it with plastic wrap, and then screw the top back on as securely as possible. However, don't rely on this layer alone to shield your liquid items. Individual bottles should be placed in sealed bags and then grouped together into larger bags. While this simple step requires additional time, it will ensure that you are protected against any spills or leakage.
Finally, your double-bagged liquids can be placed inside a plastic bin — a waterproof option that won't get soaked the way cardboard boxes do. For additional insurance, fill up any gaps inside the bins with old towels to absorb any leaks at the source.
Not using pots as storage
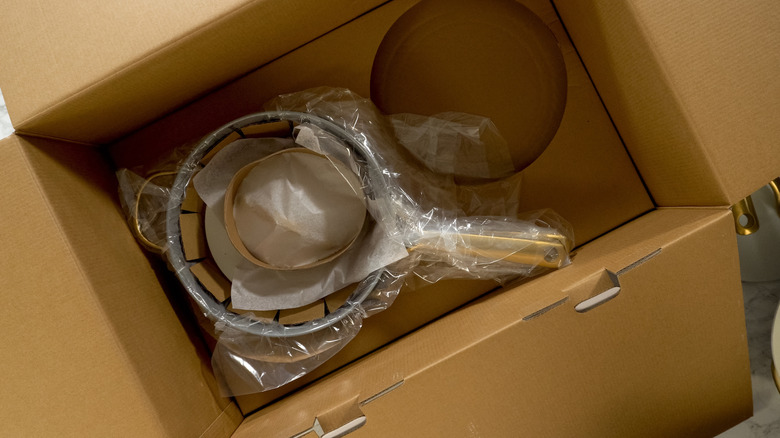
Every inch of free space is precious when packing up your kitchen. After all, more boxes equal higher moving costs as well as a more laborious unpacking process. But what do you do about those large, oddly sized pots that don't play well with other items? You can put the unused interiors to work as additional storage for smaller fragile items.
Packing each pot together with its lid is the easiest way to waste space. The go-to reflex is to nest pots within each other, but the sturdy walls of larger pots can also provide a home for smaller items. Start by filling the bottom of a packing box with crumpled paper, and then place your pots inside with a sheet of packing paper wrapped around them. Items that won't scratch the surface can be placed here; think dish towels, cleaning rags, sponges, table runners, and placemats. Fragile items are also welcome here as long as they are wrapped in a protective layer of cloth, such as spice jars, measuring spoons, and appliance charging cables. When sealed securely, liquid detergents and hand soap can also nest cozily within larger pots. When you are done packing individual pots, fill in any gaps in the box with spare oven mitts to prevent any bumps or scratches when on the road.
Not creating a first night box
While all your efforts are devoted to getting your kitchen items safely transported to your new place, it helps to consider what you'll need once you get there. In the absence of a clearly labeled box of essentials, you'll find yourself embarking on an unwilling treasure hunt through endless boxes to find that baby formula your little one can't sleep without. This is where a first night box — a handy, clearly labeled carton of staples that will get you through the first 24 hours in your new place — can help.
So, what needs to go in your first-night box? You'll want to start with the essential supplies you can't live without in the kitchen: plates, cutlery, drinking glasses, mugs, and possibly your favorite coffee brew. Basic snacks and munchies will keep you powered through the unpacking process, and it also helps to keep dish soap, paper towels, and trash bags on hand to mop up any spills and get rid of waste. To ensure that this survival kit isn't lost in the avalanche of packing boxes, it helps to keep it with you in the car rather than in the moving truck.