Don't Make Pastry Cream Without These 8 Pro-Tips
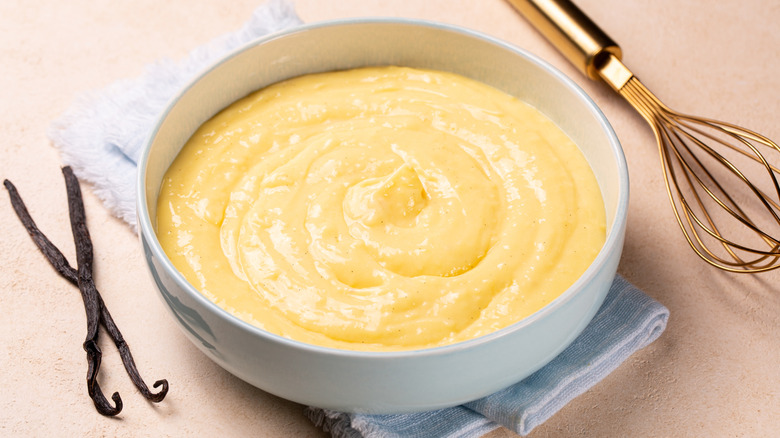
Whether it's layered in a Boston cream pie or used as a filling in a chocolate eclair, nothing makes for a more decadent dessert than pastry cream. This creamy dessert component is somewhere in the middle between a custard sauce, which is its thinner cousin known as créme anglaise that is typically poured over souffles, cakes, or other desserts, and baked custards like créme brûlée or flan. Pastry cream is too firm for pouring but not as stiff as baked custards. It's the perfect, creamy addition to everything from classic French fruit tarts to Italian lobster tail pastries.
Pastry cream is made by carefully whisking warm milk, egg yolks, cornstarch, and sugar together in a pot over gentle heat. The trick is monitoring the temperature at all times to prevent the warm milk or the heat from the stovetop from cooking the eggs because scrambled egg pastry cream is as awful as it sounds.
I learned this lesson the hard way in culinary school, where pastry cream was an important part of the pastry curriculum at the French culinary school I attended. The goal is to heat the pastry cream so that it's hot enough to gently cook the eggs and activate the cornstarch's thickening powers, but not hot enough to scramble the eggs. When done correctly, the result is a smooth and luscious concoction you'll want to slather on cakes, cookies, or pies. These tips will help make pastry cream perfection a reality.
Warm the milk, don't boil it
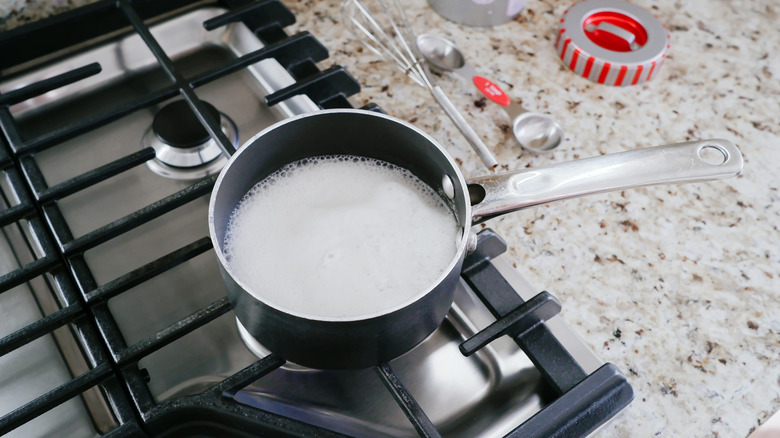
When you're making pastry cream, your recipe will likely instruct you to warm the milk. Your first instinct might be to microwave it on high for a minute or two or to add it to a pot on the stove and crank the heat to speed things along. While both of these tactics will heat the milk, you'll likely set yourself up for a pastry cream disaster in the form of overcooked eggs. You need to heat the milk to help cook the raw eggs in the pastry cream, but the goal is to do it gently so that they don't coagulate. If you add boiling milk to cold or room temperature eggs, the texture and the taste of the eggs changes, and no amount of straining will get rid of the unpleasant bits. Also, there is no solution for the scramble-like flavor.
For best results, bring the milk to a gentle simmer. This should take no more than three to five minutes. Be careful not to bring the milk to a boil. Remove it from the heat when it first begins to move in the pan. If you still go overboard, do not add scorching milk immediately to your egg mixture. The solution is to cool it down slightly before you temper it into the eggs.
Infuse the milk to add more flavor
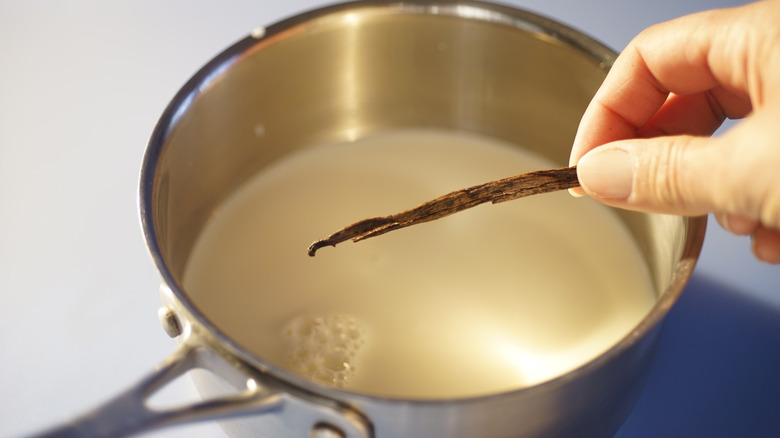
Vanilla is the most common way to add flavor to pastry cream. Most recipes suggest adding vanilla extract once the pastry cream is removed from the heat. Alternatively, some chefs use a whole vanilla bean and add it to the pot while the milk is heating. Both of these methods infuse a the cream with a subtle yet distinctive vanilla flavor that perfectly complements its smooth texture. However, there are many other suitable flavorings if you want to step away from tradition. Most of these ingredients can elevate your pastry cream into something special, and you most likely have them in your pantry.
Generally, when you want to impart flavor by infusing the milk, there are not many restrictions when it comes to the ingredients. Consider using spices, herbs, citrus zest, or coffee to give your pastry cream an unexpected flavor twist. When you heat milk, add spices like cinnamon, ginger, or nutmeg for a warming fall flavor, or add a bag of your favorite tea. Heat the milk and your add-ins and take them off the heat to give them time to steep. This is when the flavor transfer happens. You'll be surprised at the flavor difference, as even a few minutes is enough to achieve the desired flavor profile. If you used loose spices, herbs, or tea, strain the milk before adding it to your pastry cream. You may have to reheat the strained milk to make sure it's still warm.
Temper the eggs carefully
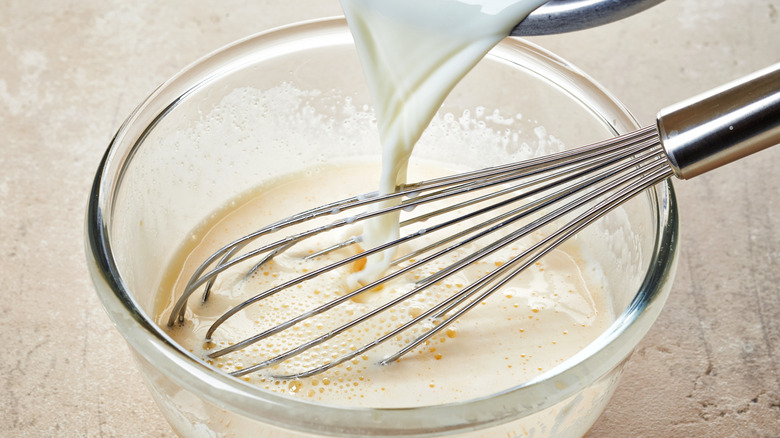
A quick skim through a recipe for pastry cream may give you the impression that it's surprisingly simple to prepare. The instructions usually claim to combine several simple ingredients in a pot and cook them until they thicken into a pastry cream. Making pastry cream is simple if you have a command of a few basic culinary techniques, namely tempering.
Tempering is the process of carefully blending two ingredients of different temperatures. The goal is to bring the ingredients to a similar temperature before combining them to blend safely and easily. If you want to avoid ending with a pot of sweetened scrambled eggs instead of pastry cream, it's imperative that you temper the eggs carefully.
The first step in the tempering process is to warm the milk. The eggs and other ingredients should be at room temperature, as hot milk and cold eggs can be a bad combination. To safely combine them, add some of the warm milk to the egg mixture while whisking constantly to keep the eggs from scrambling. Adding warm milk gradually increases the temperature of the eggs, so it's less of a shock when the remaining milk is added. Because you bring the ingredients to the same temperature, it's less likely that you'll scramble your eggs in the process.
Whisk it constantly
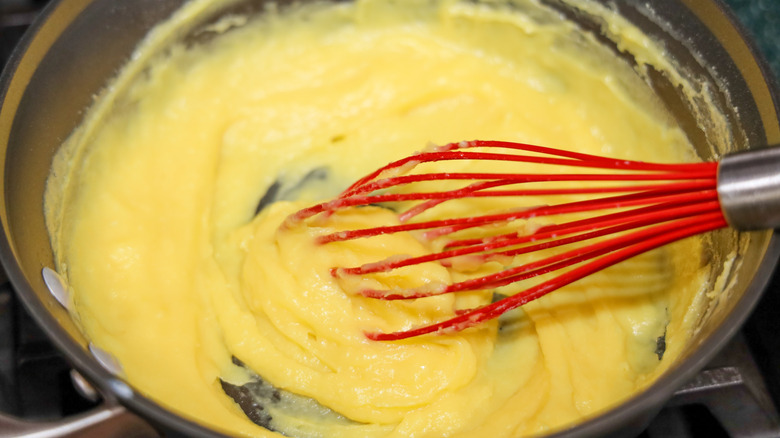
Once you've safely combined your milk and eggs, a whisk and constant motion are the dynamic duo you need to keep your pastry cream from burning. Consistent whisking will also prevent any unpleasant lumps from forming. Though this is an integral part of the tempering process — the constant motion minimizes the risk of cooking the eggs — it's just as important to continue mixing the cream even after you finish the tempering process.
When your pastry cream recipe directs you to whisk constantly, you should follow those instructions to a T. Even though the eggs and milk are combined, it's still possible for the eggs to scramble if they get too hot and using a whisk to keep them moving minimizes this risk. This also prevents the pastry cream from sitting idly on the bottom of the pan, which can often result in burnt cream. Also, the motion keeps the cornstarch from settling into lumps as it thickens. Essentially, once you start, keep the whisk moving until your pastry cream is done.
Don't overcook it

When you think of foods that are easy to overcook, pastry cream may not be the first thing that comes to mind, but overcooking is one of the biggest mistakes you're making with pastry cream. When you're making pastry cream, the goal is to cook it until it's thick, smooth, and glossy. Overcooking will turn the luscious cream into a grainy, stiff, and dull mess. To avoid this, it's important that you remove it from heat as soon as it reaches the right consistency. But how do you know when you got it right? The best way to determine this is to pay close attention to bubbles and texture.
In order to activate the cornstarch to thicken your pastry cream, the starch has to be heated to a temperature of around 200 degrees Fahrenheit. As it approaches this temperature, it will start to bubble. Those bubbles are an indication that your pastry cream should be on its way to thickening properly. Once you spot the first bubbles, continue whisking constantly for about a minute. The entire process should take about 5 minutes from start to finish. In terms of texture, dragging the whisk along the bottom of the pan will help you gauge the thickness. You'll be able to see and feel the change in consistency. Once you notice the change in texture, it's time to get your pastry cream off the stove and out of the pan.
Use a fine mesh sieve for the smoothest pastry cream
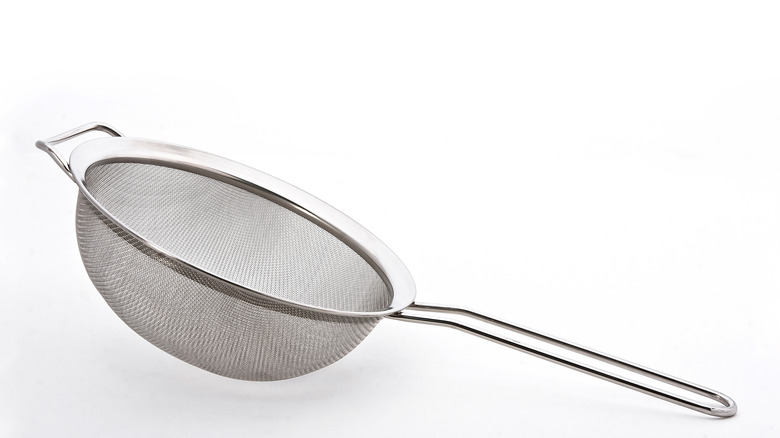
A silky smooth consistency is the hallmark of a perfect pastry cream. Ideally, if you follow the recipe and prepare it properly, your final product should be velvety smooth. However, in the real world, you sometimes need a backup plan to achieve the best results. When it comes to perfect pastry cream, that backup plan is a fine mesh sieve. Also known as a strainer, a fine mesh sieve has numerous purposes in a home kitchen. They make draining and rinsing pasta or canned beans easy, and of course, they are ideal for sifting flour.
Fine mesh sieves are also perfect for straining pastry cream to make sure it's lump free. As it passes through the mesh, any lumps of congealed cornstarch, bits of spice, or miniature clumps of solidified egg are separated from the pastry cream. The smaller the openings in the sieve, the smoother your pastry cream will be. This may seem like an unimportant step in your recipe, and you may be tempted to skip it, but don't. This is a surefire way to ensure your pastry cream is as smooth as possible.
Don't skip the ice bath
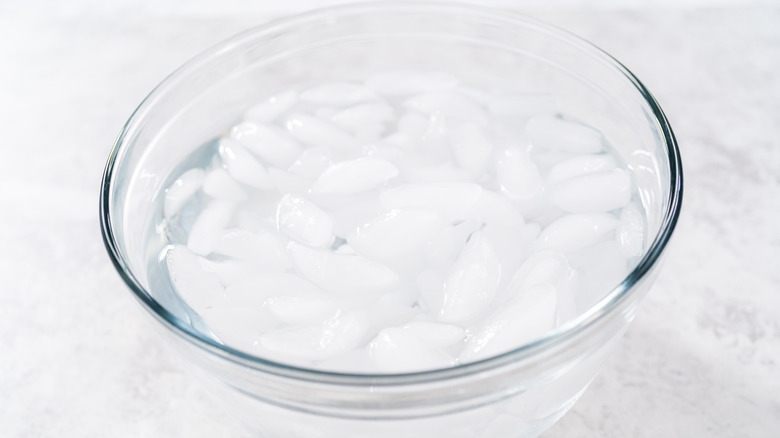
Temperature is crucial for a successful pastry cream. Monitoring temperature keeps you from boiling the milk, scrambling the eggs, and scorching the pastry cream as you thicken it. Once you've strained your pastry cream, there's still a chance that it can overcook due to the residual heat. Removing food from a heat source doesn't mean the food will immediately stop cooking. The temperature can continue to rise, which puts your pastry cream at risk of overcooking. To prevent this, you need to cool the pastry cream down as quickly as possible.
The easiest and fastest way to accomplish this is an ice bath. An ice bath is simply a bigger bowl filled with water and ice that's used to quickly cool down hot food. Once you've strained your pastry cream into a bowl, carefully place the bowl in the ice water bath, making sure the water doesn't spill into the pastry cream. Chill the pastry cream for about 30 minutes before transferring it to the fridge.
Cover it with plastic, the right way
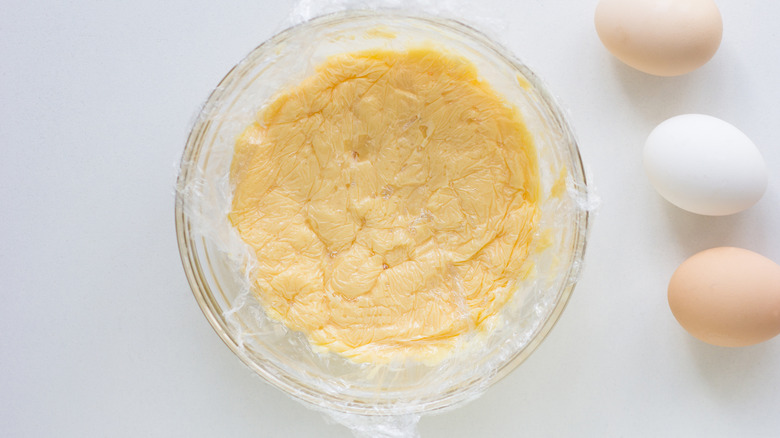
You may think you have a handle on how to use plastic wrap in the kitchen, but when it comes to pastry cream, you'll need to apply a slightly different technique. For most foods, it's enough to simply cover the food or container and press the plastic wrap around the sides to set it in place. In order to properly protect your pastry cream, there's an extra step you shouldn't skip.
In most cases, you'll need to chill your pastry cream completely before it's ready to use. Once you remove it from the ice bath, you'll need to dry the bowl and cover it with plastic wrap before refrigerating it. Instead of pressing the cling wrap on the rim of the bowl, you need to press the plastic wrap directly on top of the pastry cream. This protects the cream from getting in contact with air. Otherwise, if exposed, thin, rubbery skin will form on the surface of the cream. Though this skin is harmless, it will probably ruin the smooth consistency that you were able to attain.