The Big Apple
Forget regular-size pies and make a massive apple galette
This November, Tasting Table is going to party like it's 2015. Join us.
We've decided that instead of squabbling with our aunts over which three pies to bring this holiday season, we're just going to make one extra-large crowd-pleaser to cover all our bases.
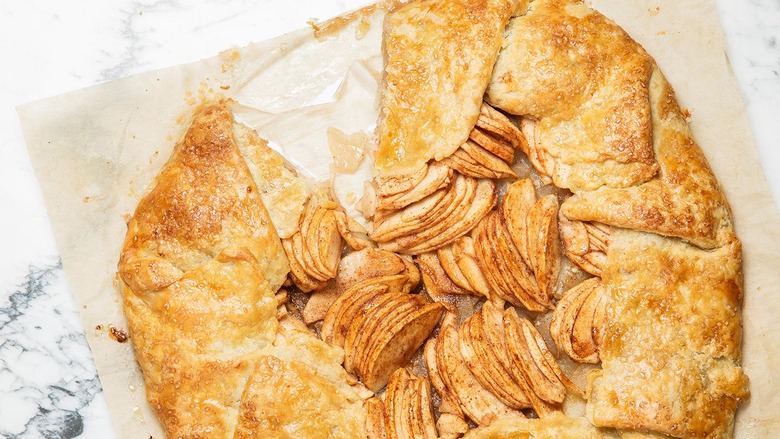
The problem with a standard pie—pumpkin, pecan, even apple—is that even the biggest ones measure only 10 inches across, never quite enough for the whole gang. This year, we're going BIG and ditching the pie plate altogether in favor of one large-format apple galette (see the recipe). It's like a standard apple galette, but at 18 inches in diameter, you can be sure you'll have enough to serve dessert to a crowd plus breakfast for the next couple of days. It's big, yes, and though we respect those with the patience to arrange a decorative fruit pattern on pies and tarts, this one demands a more casual approach.
Keep these pro tips top of mind this season, and you can throw one of these together any time friends or family gather.
The dough: We like a basic brisée dough with no more than flour, salt and butter. Add a little sugar if you like (we like).
Use a light touch when making the dough. When you're cutting butter into flour, remember that you want most of the flour to come into contact with the fat. Yes, you want "pea-size" pieces of butter remaining, but you also want some a little bit bigger and lots a little bit smaller. That way, when you add water to bring the dough together, you need to add only enough to make those buttery pieces of dough stick together (tender) versus saturating the dry unincorporated flour (tough). The good news is you have to wrap up and deal with just one big piece of dough, so there's no awkward dividing of crumbs.
The roll: Go ahead and clear the counter. We'll wait.
While most standard pies and galettes ask you to roll the dough to an 11-to-13-inch circle, we're going big—20 inches big. It's not any harder, but you need space.
Remember, dumping a ton of flour onto your work surface to avoid sticking is not the answer. It's more about getting your dough to the right temperature before you start rolling. It should give when you roll, but only under moderate pressure. If it's too soft, stop. Stick it back in the fridge for 10 minutes, then roll again. Also, a bench scraper is your friend: Use it to loosen the edges and all the way under the dough as you roll.
To transfer, fold the dough in quarters—we promise you, this is easier than rolling it up onto your rolling pin—then unfold it onto a parchment lined baking sheet.
About that baking sheet: Most standard jelly roll or half sheet pans will be too narrow for this. But a pizza stone or rimless cookie sheet is ideal. If you don't have one of those, just turn your half sheet pan over and bake the galette on it upside down, so the edges aren't in your way.
The trim: Once you're on the baking sheet, you have two options: Trim the edges for a tidy presentation or leave them ragged. Kierin Baldwin, pastry chef at New York's Locanda Verde, likes to place an overturned bowl over top of the pastry, then trim around that for a clean edge. "Not only does it make a more uniform finished galette, it also exposes all the beautiful layers of flaky buttery crust once it's baked, which is pretty impressive when it's finished," the dough pro says. So if you have those tender-flaky skills, go ahead and show off. If not, just leave the edge untouched and call it rustic.
RELATED How About Dem Apple Pies "
The filling: First and foremost, it's imperative that you taste the fruit before you bake with it. This will help you gauge how much sugar to add. Taste it raw, taste it seasoned and adjust the sweetness accordingly.
Second, because their fillings are exposed, galettes and single-crust pies can tend to bake up dry. For a tender, moist filling, listen to Nicole Rucker, chef and co-owner of L.A.'s Cofax Coffee and national pie championship blue-ribbon winner. It's a two-tiered approach that starts by using a mix of apples in the filling: some tart, sour and firm; some sweet, soft and juicy. "I precook the tart/firm apples in a little sugar and water very slow until they are soft and clear. Basically apple confit. I mix that 50/50 with fresh juicy, crisp apples. It helps the whole thing keep its shape, because there is less juice to evaporate and the cooked apples caramelize at a different rate than the fresh," Rucker explains. It all results in layers of luscious texture and flavor.
The bake: Promise us this: You will take this galette to the edge. All too often have we seen the loveliest pastries go into the oven only to come out two-thirds of the way to deeply golden brown with undercooked fillings and soggy bottoms. Because we're making an extra-large version, this is really important. You must give the big guy time. Claire Ptak of London's Violet Bakery begs, "Bake it well. I would rather a tart with burnt bits than an anemic crust." Use a timer, if you're nervous, to add a couple of extra minutes at a time, but we promise that a little over is better than a little under, even if that means baking longer than this—or any—recipe indicates.
The finish: Apples are the star of this show. There's no rich heavy filling, just pure autumn appley flavor. That way you have the option to pair it with your favorite sweet creamy dairy product or not. No pressure, because it's damn fine on its own, but we like it warm and à la mode for dessert and with a dollop of Greek yogurt for a (somewhat) virtuous breakfast.
Bonus round: Want to put all those apple peels and cores to use? Try this old Chez Panisse trick: Place the apple detritus in a pot and sprinkle with some sugar (like a quarter cup per pound of apple cores and peelings), plus a cup or so of water. Let it simmer, stirring occasionally, until the juices are pink and syrupy. Drizzle it over the galette or use it on hot cereal or yogurt.