Yes We Can
Learn how to preserve jams and pickles
We may receive a commission on purchases made from links.
There's no getting around it. Canning is a process. It takes time and patience. But the payoff is worth the effort: You fill your pantry with lots of good stuff to get you through the long cold season ahead.
And there's something wonderful about setting aside a few hours on a Sunday afternoon and toiling away at making your own raspberry jam, pickled carrots or whatever other recipe catches your eye.
Like most things in the kitchen, the key to canning success is being prepared. You'll want to assemble your canning tool kit (see below). Get everything washed and sterilized and ready to use. You want to be able to get your ingredients into the jars as quickly as possible.

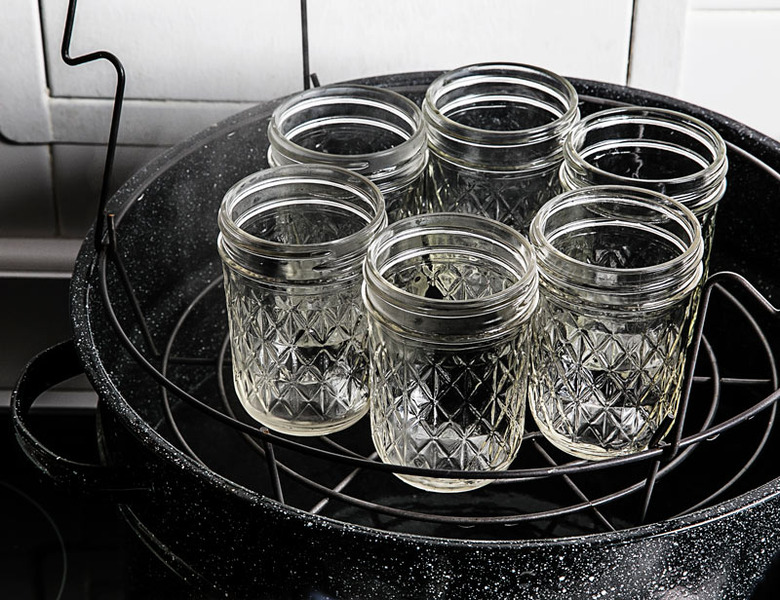
Boil jars and lids in a large stockpot for ten minutes. Remove them and, while they're still hot, fill them with the warm mixture of jam or pickles using a funnel and leaving at least a ¼-inch of space at the top. Wipe the jars clean and seal them each with a lid and band, then return the jars to the water bath in the stockpot. Follow the recipe instructions for boiling time. When they're ready to remove, do so with caution (boiling water! glass! metal!).
Now leave them alone. Seriously. Let them be. They need to seal and cool completely. The lids should pop (like a Snapple bottle cap opening) not long after you remove them from the water, but why not just leave them for eight hours? To test the seal, carefully remove the screw-top once the jar is cool and lift the bottle up gently by the lid.
If the seals didn't hold, don't freak out. If it's just one jar, throw it in the fridge and use it within a month. Got a whole batch? Check the lids for any cracks or faults and swap in new jars if necessary. Repeat the process with the same boiling time.
Get some practice with this jam made from Italian prune plums (see the recipe). It's great on biscuits or as a nice sweet-spicy addition to a cheese plate. The fruit is macerated for an hour with sugar, lemon juice, chile de àrbol, orange peel and thyme, then cooked down for a not-too-sweet, slightly spicy jam with floral notes from the orange and thyme.

Follow the rules
Stick to the recipe instructions as they're laid out. "Just because you're a confident cook doesn't mean you know your way around canning and preserving," says canning pro Marisa McClenna, author of Food in Jars. Don't try to improvise when you're just starting out—these types of things are more of a science than an art. Don't even try to double the recipe, says jam maker Beth Linskey.
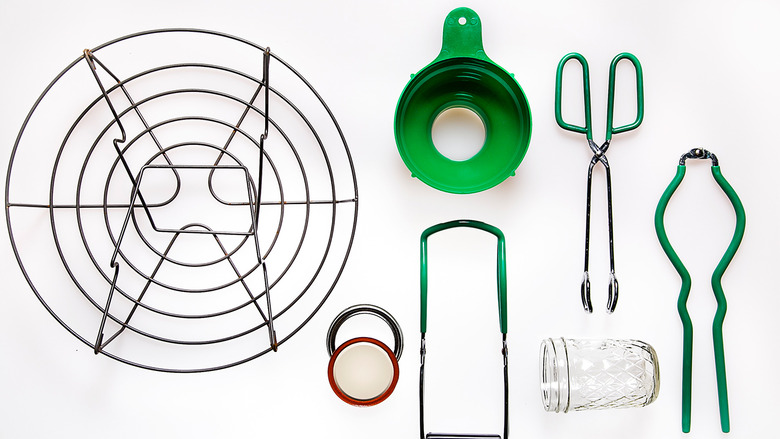
Get the gear
Ideally, you'd stock up on the whole kit: a heavy stockpot, a rack, a funnel, tongs and a jar lifter. But if you're only going to invest in one item (besides the requisite canning jars and lids, of course), make it a jar lifter. Pulling jars out of boiling water with standard metal kitchen tongs is tricky. If you don't have one, McClennan suggests wrapping rubber bands around the ends of metal tongs to get the grip you need.
If you forgo the rack at the bottom of the pot, use a kitchen towel or, as Linskey recommends, a round cake rack to line your pot instead. The bottom of the jar should never rest on the bottom of the pot.
RELATED The Best Places to Pick Your Own Apples in America "
Stick to jams and pickles
Unless you have a pressure canner, stick to high acid things, like jams, jellies and pickles. Lower acid means higher risk of botulism and spoiling. Says McClennan, "You're never going to kill anyone with jams and pickles." Well, that's a relief. Speaking of which...
Keep it clean
Sterilizing the jars and their lids is a must to prevent the preserves from going bad. You also have to make sure the top of the jar is completely clean before applying the lid (otherwise a proper vacuum won't form).
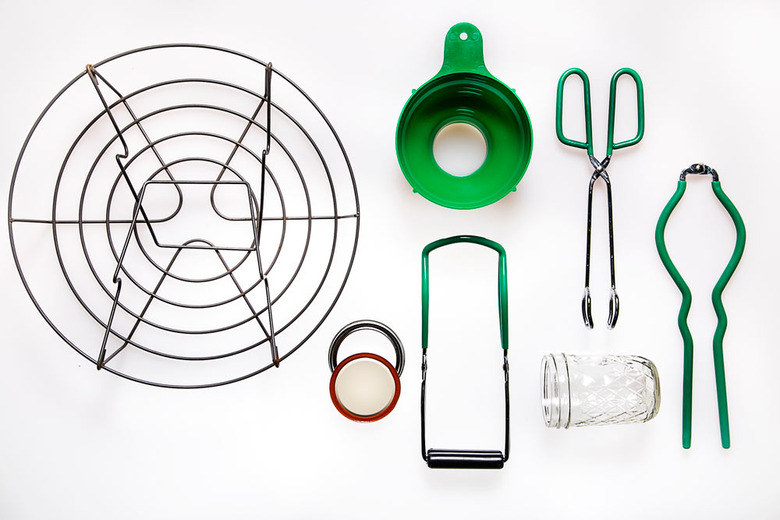
Ready all your gear before you even begin: a canning rack, funnel, tongs, jar twister, jars, jar lifter and lids. Get the whole kit (including a pot) at target.com, $35
Before what you're preserving hits the jars, sterilize them (and the lids) for 10 minutes. Make sure they're still warm when you're ready to can.
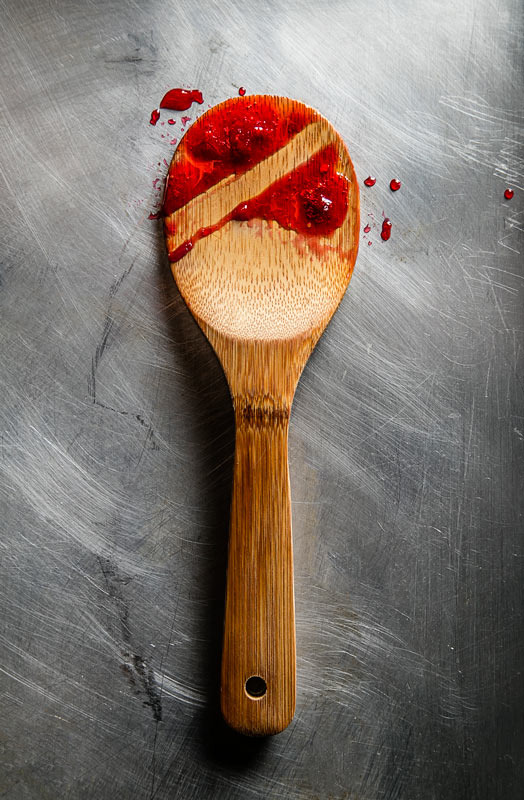
If you're making jam, simmer until it thickens, stirring constantly with a wooden spoon to avoid any scorching on the bottom.
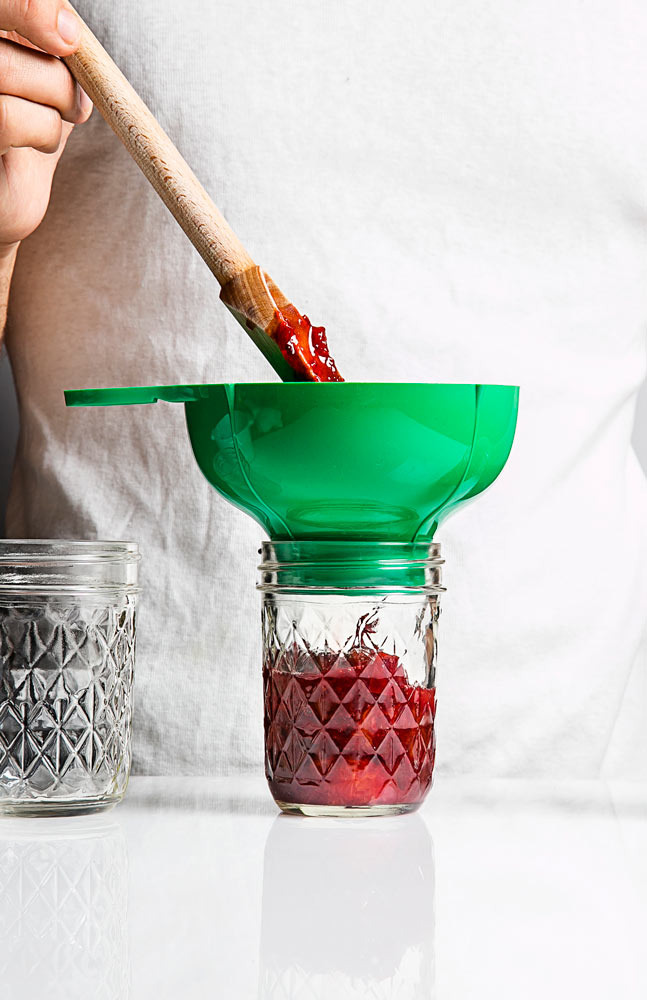
Any sort of jam or liquid on the rim prevents a tight seal. Keep it clean by using a funnel when transferring to jars.
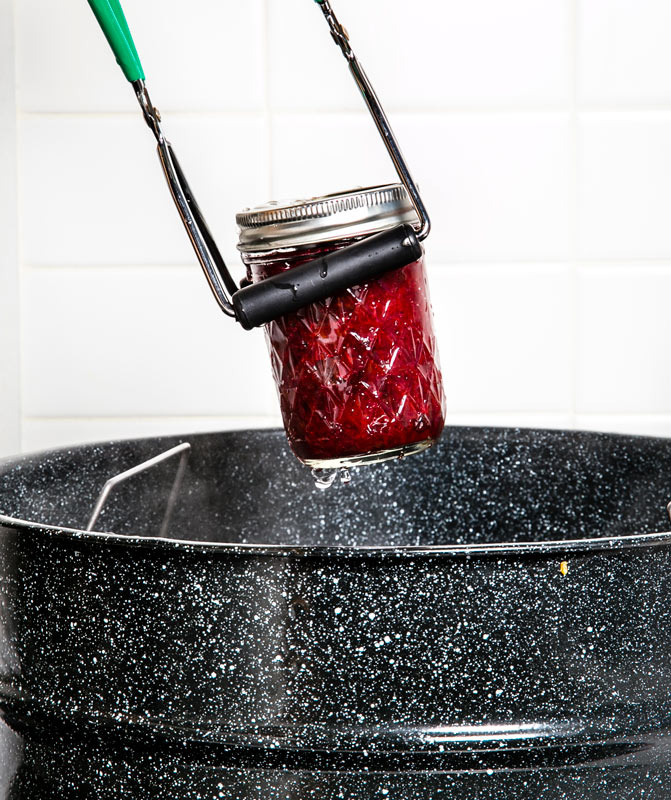
After submerging your filled jars in boiling water for the required amount of time, use a jar lifter to remove from the water bath.
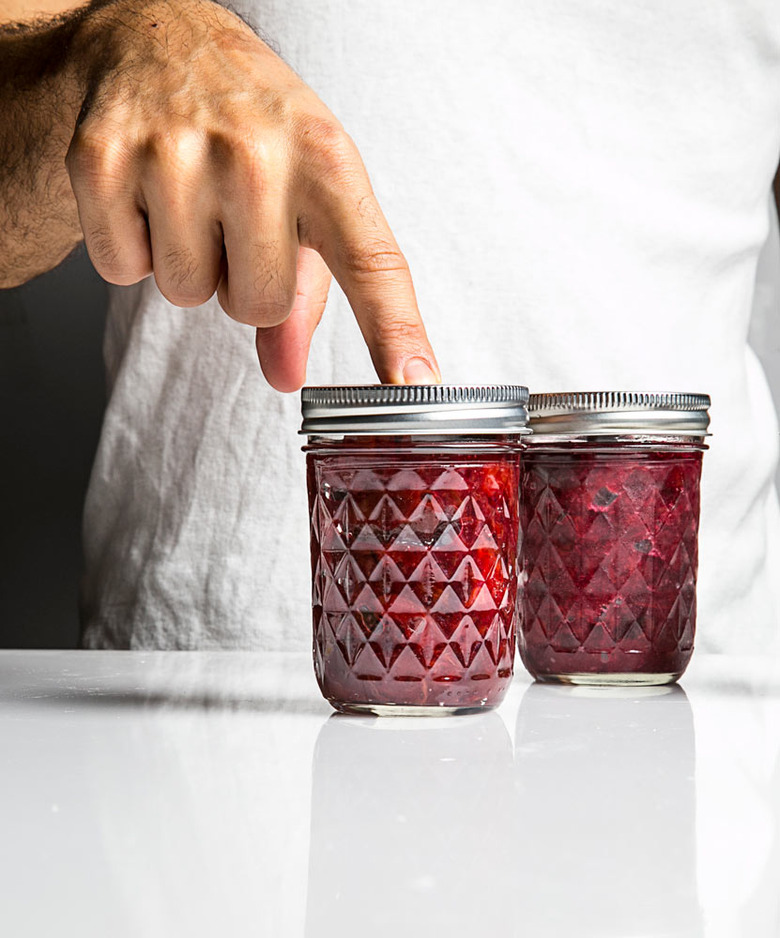
Test the seal to make sure it remains depressed (concave) to ensure it's properly sealed. If it's not, don't worry! Simply repeat the process.