Stovetop Vs Slow Cooker: Which Is The Best Method For Making Caramel Sauce?

When it comes to making a sweet treat at home, self-doubt can creep in if you are not an avid baker. But there are ways to whip up dessert without turning on the oven, like making a hot fudge or caramel sauce to pour over ice cream. Homemade caramel sauce only requires a handful of ingredients, but the method is what trips people up, because cooking sugar isn't always straightforward. I've cooked dozens of caramel sauce recipes in my years as a professional recipe developer, and even for someone with hefty experience, I've had my inexplicable failures. The sugar can crystallize and harden before ever cooking to a smooth amber, or you can under or overestimate the color of the sugar, leading to a bland or bitter finished sauce.
Enter: dulce de leche. All you need is some time and one ingredient to make a rich, deeply flavored caramel-esque sauce. Dulce de leche isn't exactly the same as caramel, but it scratches a very similar itch and can flavor frosting or no-churn ice cream, or be served warm as a dipping sauce. There are several ways to make dulce de leche, and I wanted to find out if the method impacted the end result. I made one batch on the stovetop and one in a slow cooker to see how they compared.
What is dulce is leche?

Dulce de leche is a sweet, thick, brown spread that translates to "sweet from milk" in Spanish. Like many foods with a long history, the origins are not clear, with credit ranging from Napoleon's cook to Indonesia. Regardless of how or when it was first made, it has become a popular and common ingredient all over South America where it's used for a variety of things from being a toast topper to a filling for alfajores, a traditional sandwich cookie. The main ingredients in dulce de leche are milk and sugar, and it's made by carefully simmering the two together until they thicken and caramelize.
Although the end result is similar to a classic caramel sauce, dulce de leche differs in a few key ways. The first is that the base of caramel is cooked sugar. Dulce is leche is milk based. Milk and sugar are slowly cooked until the water in milk evaporates, and the flavors concentrate and caramelize.
What is sweetened condensed milk and why does it work for making dulce de leche?
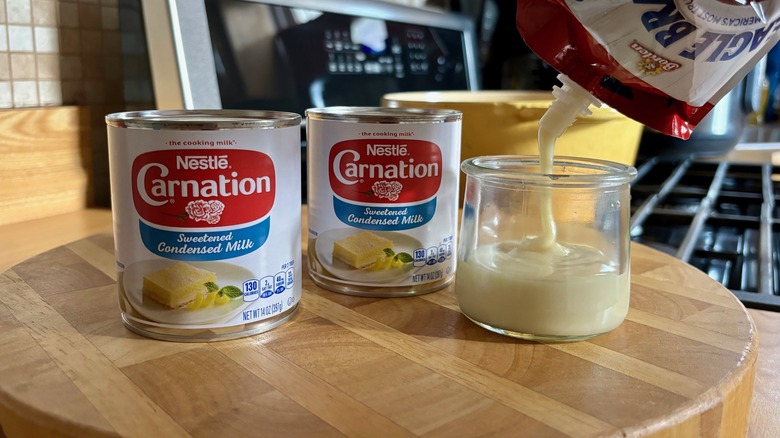
Sweetened condensed milk is a versatile, shelf-stable sweetened milk product sold in cans and pouches. The ivory, thick liquid is made from just two ingredients: milk and sugar, which are the same two ingredients in dulce de leche. To make sweetened condensed milk, milk and sugar are cooked together until thick and syrupy. If the mixture were to continue to cook it would eventually further concentrate and brown into dulce de leche. So, while you can make dulce de leche with milk and sugar, starting with sweetened condensed milk is a logical alternative since it already has the ingredients you need and has been partially concentrated.
The most important thing to know about sweetened condensed milk is that it is not the same as evaporated milk, and should not be used interchangeably. Evaporated milk is milk that has been gently reduced to remove around 60% of the original water content, and does not contain added sugar. Though it's not the right choice for making dulce de leche, it has plenty of other uses and is easy to make at home.
What are the different ways to make dulce de leche?
There are multiple ways to turn a can of sweetened condensed milk into dulce de leche. You can cook it in a pressure cooker, in the oven, on the stove top, in a slow cooker, or in the microwave. Each method has its pros and cons with varying cooking times and steps.
The microwave method requires the condensed milk to be removed from the can and cooked in a separate dish. The milk is cooked for several minutes, stirred well for even browning, and then cooked and stirred again and again until the desired color and texture is achieved. The majority of oven methods also call for the milk to be transferred to a baking dish and then cooked in a water bath, covered, until thickened and browned. The pressure cooker strategy has several different approaches, including in a sealed can covered with water, a canning jar, and pouring the milk into a separate dish that fits inside a pressure cooker. The pressure cooker is the fastest option and the slow cooker is the longest. If a pressure cooker is new to you, check out some helpful tips to get started.
For this comparison, I focused on the two most similar methods: cooking on the stovetop and in a slow cooker. For both methods you submerge an unopened can of sweetened condensed milk in water and slowly cook for several hours.
The equipment
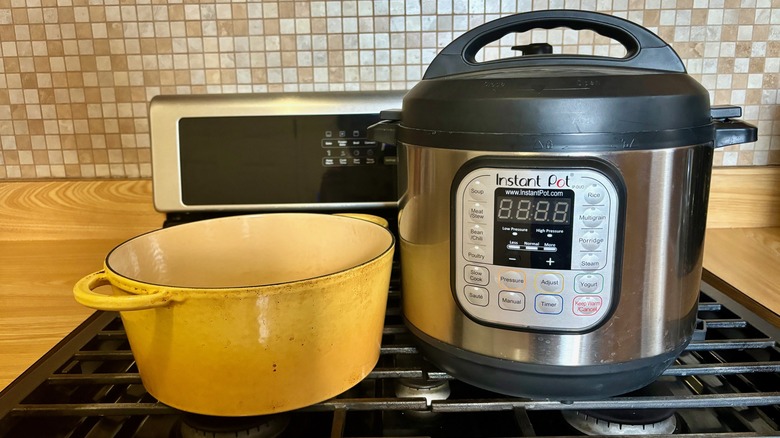
For this cooking comparison I needed a slow cooker and a large pot. The most important factor in selecting a pot isn't the width but the depth, because the can needs to be totally covered by water, preferably by 1 to 2 inches, to avoid accidentally exposing it during the cooking process and abruptly removing the can from its pressurized environment. I only had two pots that would fit the bill, a stock pot and an enamel coated Dutch oven. I chose the Dutch oven because the lower height made it easier to view the water level, even from across the room, but either would have been fine. In hindsight, the stock pot would probably have been the better choice, because I could have used a lot more water from the start.
I use my 6-quart Instant Pot when I slow cook. There are a lot of uses for this multi-cooker, including using it as a slow cooker. I have read mixed feedback on this function because there are differences between how slow cookers heat, brand to brand, but I have always had success slow cooking in my Instant Pot whether it's dried beans or tough cuts of meat. The Instant pot does not say high and low like most slow cookers which has led to some confusion as to what setting to select. It's best to consult the manual for each model and use the correct setting so the milk cooks properly.
About this method: Stovetop
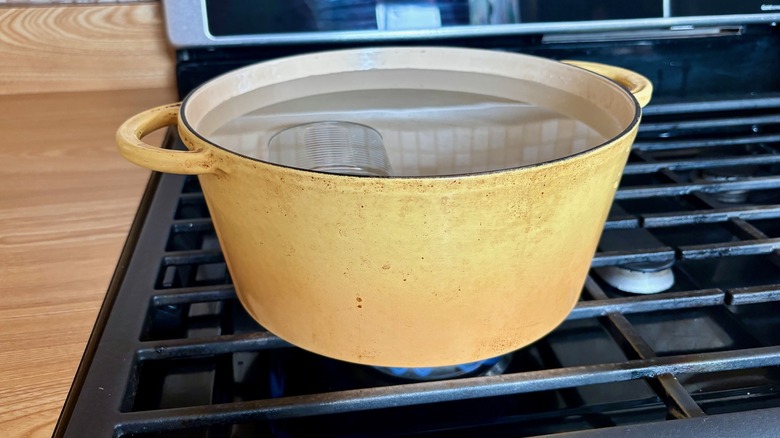
To make dulce de leche on the stovetop, first remove the label and any glue or adhesive from the can. Make sure the can isn't dented or otherwise damaged which could lead to issues once the can is simmering. Place the can on its side or on its end and cover with water by at least 1-inch.
Bring the water to a boil over medium-high heat, adjust the heat to maintain a steady simmer, and cook for two and a half hours to four hours depending on how thick and dark you want the dulce de leche. Add more water as needed during the cooking process so the can is always completely covered. You can cover the pot with a lid, which will slow down how quickly the water evaporates, but don't forget to uncover and check the water level frequently. Then, let the can cool completely in the water before taking it out or opening it.
The cooking process works by building pressure inside the can, so moving it or opening it while still hot could cause the can to burst and spray out hot sugar. Open the can, stir the dulce de leche well, and it's ready to use.
About this method: Slower cooker

Setting up a slow cooker to make dulce de leche is very similar to the stove top set up. You cover the peeled and cleaned can with water by at least 1 inch in the slow cooker insert. Then, you cover the pot and set to cook on low for eight hours. Since the slow cooker takes longer to heat, it's important to cover the pot to retain that building temperature.
The pot insert for my Instant Pot isn't level, so I put a small rack on the bottom of the pot and set the can on the rack. This is totally optional, but I wanted to prevent the can from rolling around during cooking. Though water will evaporate at a slower rate since the pot is covered and the heat source is lower, it will still evaporate over time so it's important to uncover and check the water level occasionally, adding more as needed to keep the can submerged. Then, just as with the stove top method, the can should be left to cool completely, undisturbed, submerged in water before being opened.
How did it go making dulce de leche on the stovetop?
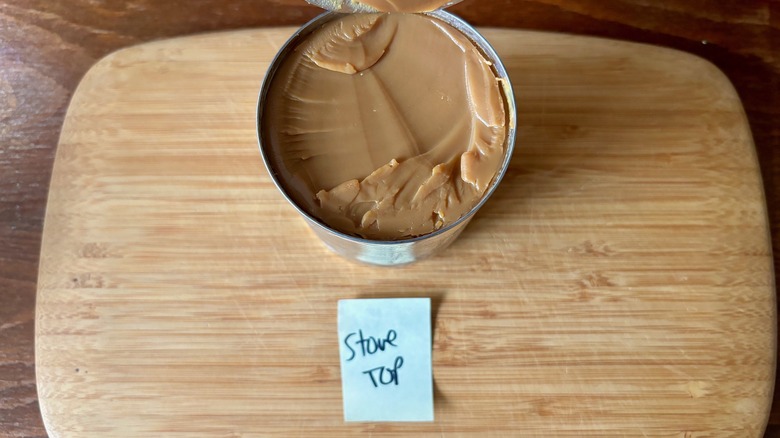
Making dulce de leche on the stovetop was a straightforward process and aside from the occasional rattle from the can moving inside the pot, there were no moments of doubt or hesitation. Bringing such a large volume of water to a boil took about 20 minutes, but once it was simmering there was nothing to do but start the timer and keep an eye on the pot. I found I needed to add more water every 20 to 30 minutes to keep the can well submerged and adjust the heat a little up and down for a steady simmer, especially after adding new water. I refreshed the pot with hot tap water to prevent cooling down the water too much.
I settled on a cooking time of three hours and 30 minutes. The majority of recipes I researched recommended a range of three to four hours, so I chose the middle ground since I would rather have the dulce de leche thicker than pale and runny. After time was up, it took about four hours before the water and can had cooled enough to remove it from the pot. This method was not hard, but I was glad I didn't have anything pressing on my calendar because I definitely needed to keep an eye on it.
How did it go making dulce de leche in the slow cooker?
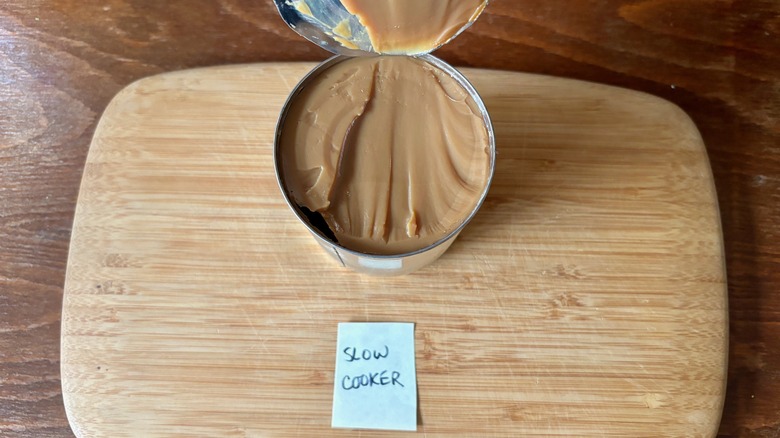
Using a slow cooker was a much longer process than the stovetop, but it required less attention. The inside of the pot has volume markings so that made it easy to note the water level and to judge when it was time to add more.
Since a slow cooker takes longer to heat the water than a stovetop burner, I started with hot tap water and added enough water so the can, placed on its side, was covered with water by more than 1-inch. I added the lid and set it to cook for eight hours on the equivalent of low. I checked it after the first hour and saw very little change to the water depth. I continued to let it cook, checking every few hours, and added more water after about five hours. The can was still well covered, but I didn't want to risk the level getting too low. Once the time was up, I remove the lid, turned the pot off and let it cool completely. Similar to the stovetop version, this took about four hours to cool.
The verdict: So which method made the best dulce de leche?
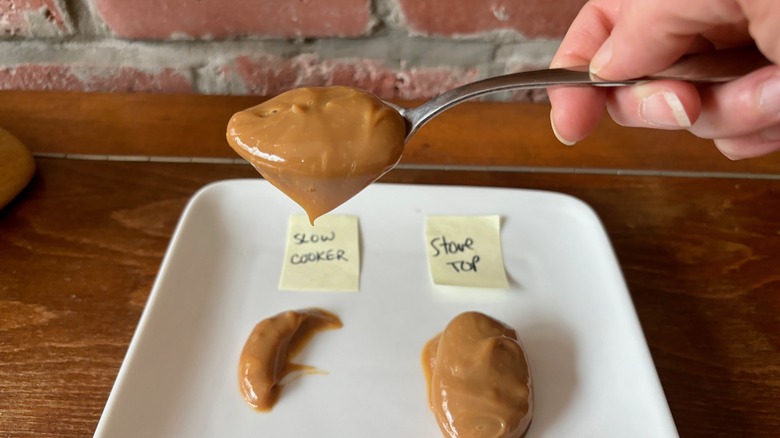
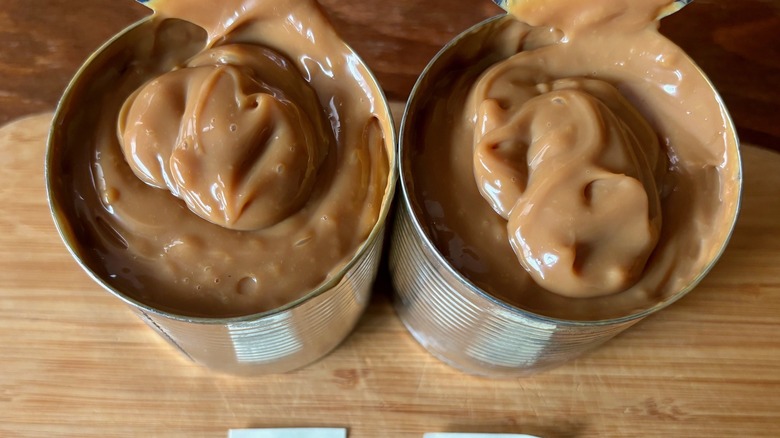
I did not expect this to be such a close race. The good news is that upon opening the cans, each revealed a thick, nicely browned pot of dulce de leche. I stirred both to smooth out any small lumps and then judged the texture and flavor. The stovetop dulce de leche was a smidge thicker and the lumps were firmer so they took longer to stir into a smooth sauce. After stirring, the texture was like velvet and it had a toasty, sweet milky taste that was deeply concentrated without being cloying.
The slow cooker dulce de leche was incredibly glossy and luscious with minimal lumps to whisk out. There was a slight floppiness to the sauce that perched off the edge of a spoon, threatening a messy drip that never came. The flavor was the perfect blend of cooked milk and caramelized sugar.
Ultimately, I cast my vote to slow cooker dulce de leche. The major downside to this method is the time involved. It's unlikely you can eat it the same day you make it, between cooking and cooling, but since the can is shelf-stable until opened, it's the perfect make-ahead recipe. Using a slow cooker requires less attention during the cooking process, and the flavor was ever so slightly superior to the stove top version, which was cooked milk heavy.