18 Mistakes You're Making With Homemade Bagels

Ah, the bagel. A humble ring-shaped bread with immigrant roots that has conquered America to become its breakfast champion. From its inception in Jewish communities in Poland centuries ago, the recipe has virtually remained unchanged. It's a mix of flour, water, sugar, salt, and yeast that's fermented, shaped, boiled, and baked. Yet its conceptual simplicity is deceptive: Much like looking effortless secretly takes a lot of effort, creating bagels from scratch actually requires a certain level of finesse.
I tried bagels for the first time in New York City in 2016, and since then, my life has been a quest for finding — or creating — a bagel with a crust of impeccable brown, a core of exquisite chewiness. This journey has led me to sample countless bagels, dabble in homegrown efforts, and, most recently, host a bagel brunch at Stricha, a Tbilisi-based vegan café. Now, we are happy to share our insights on creating the perfect homemade bagel (though don't expect to nail it on the first try, as it takes practice).
Using the flour you have on hand

Not everything that looks like a bagel will have a mouthfeel of a bagel. You can form any yeast dough into a circle with a hole in it, but guess what? A bagel's identity hinges on far more than its roundabout shape. Any bagel purist will tell you it's all about the gluten (i.e., protein content), and regular flour just won't cut it. The less gluten in flour, the more tender and crumbly the result will be, whereas high-protein flour will help you create an elastic, chewy dough with a tight crumb.
To craft a New York-style bagel, you'll need a high-protein flour, such as bread or whole wheat, with 12% to 14% protein content. In contrast, all-purpose flour lags behind at 10% to 12%, and cake and pastry flour, with their modest 5% to 10%, are a clear no-go. However, you could still use all-purpose flour for your favorite bagel recipe, ensuring it's on the higher end of the protein spectrum.
Not monitoring dough hydration
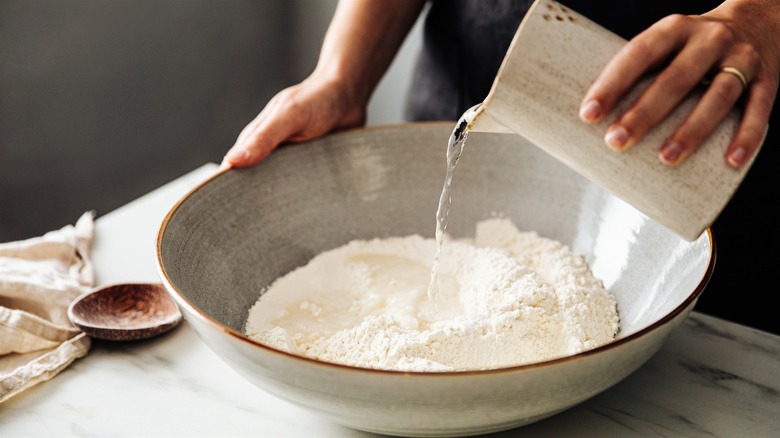
Most bagel recipes stick to strictly basic ingredients: flour, water, sweetener, yeast, and salt. Lack of fat and moisture from butter and eggs found in more tender members of the bread family results in a dough that's on the stiff and dry side of the spectrum. Kneading that mix into an elastic ball might take considerable effort, and adjusting the recipe by adding more water to help it come together might be tempting. However, you need to fight that temptation.
Bagel dough operates within a 55% to 65% hydration range, lower than your average bread. This frugality of moisture gives the bagel its characteristic chewiness and tight crumb. To calculate dough hydration percentage, you'll need to divide the amount of water by the flour, then multiply by 100. A wetter dough yields a crispier, breadier bagel that's easier to handle, but nudging the hydration down to 60% will create a more authentically chewy treat.
Kneading the dough improperly
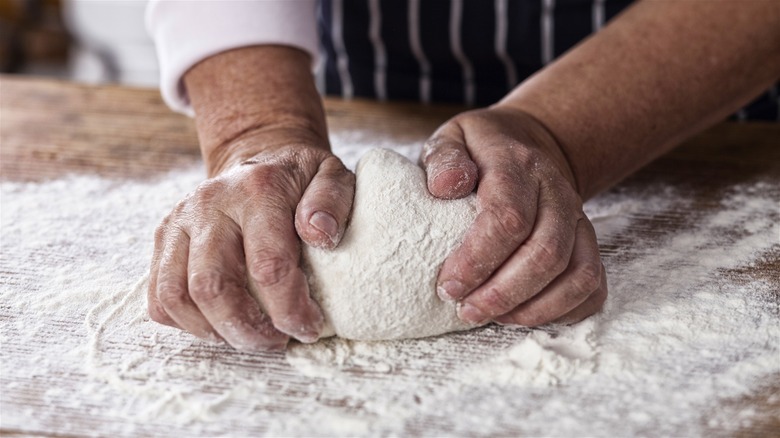
Given the low water content of bagel dough, kneading can be a challenge. There are several ways to go about it: by hand, using a stand mixer, or in a kitchen processor. Either way, you'll need to apply just the right amount of time and effort to ensure gluten develops properly.
Kneading is best done by hand unless you have a stand mixer with a dough hook, which can be done in 10 minutes. Avoid endangering your hand mixer with the dense dough. Instead, mix it with a sturdy spoon in a bowl until it forms a shaggy ball, then knead with lightly oiled hands for 15 to 25 minutes or until it doesn't rip when you stretch it. If you're short on time or lack muscle, a kitchen processor can help, too. Just remember to use the metal blade and limit the mixing to 45 seconds to counteract the heat from friction.
Skipping overnight fermentation
The single most desired feature of bagels is their chewiness. Every step revolves around it: using high-protein flour, kneading well to develop gluten, fermenting for an appropriate amount of time, and boiling the rings. Let's zero in on the fermentation step.
While you could let the yeast dough rise in a classic fashion — at room temperature for 60 to 90 minutes — then go straight to kettling and baking, the difference in flavor and texture when you let it rest in the fridge is palpable. This step is also known as retardation, and it can last up to 48 hours. Often skipped, it ups the chewiness and helps the yeast engage in the alpha-amylase reaction, developing a more complex flavor. Remember that lower proofing temperatures demand more yeast, while longer times require less. For flavorful results, try retarding for 12 to 18 hours at 35 F to 42 F.
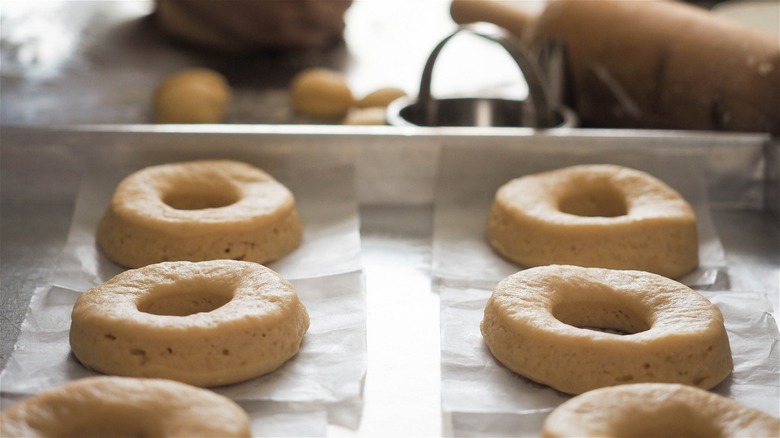
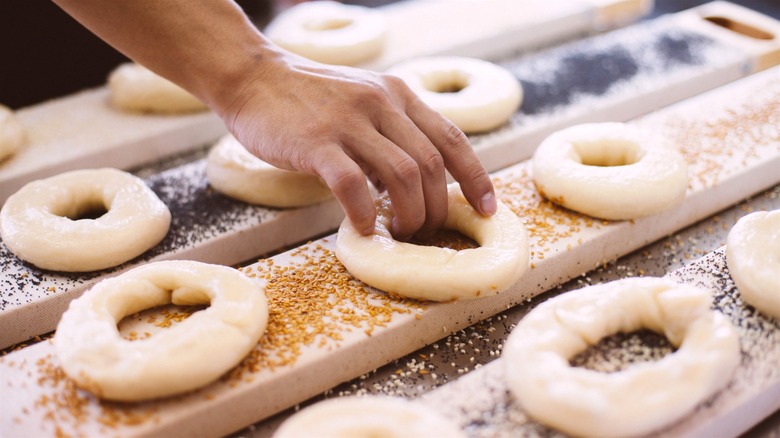
Shaping them carelessly
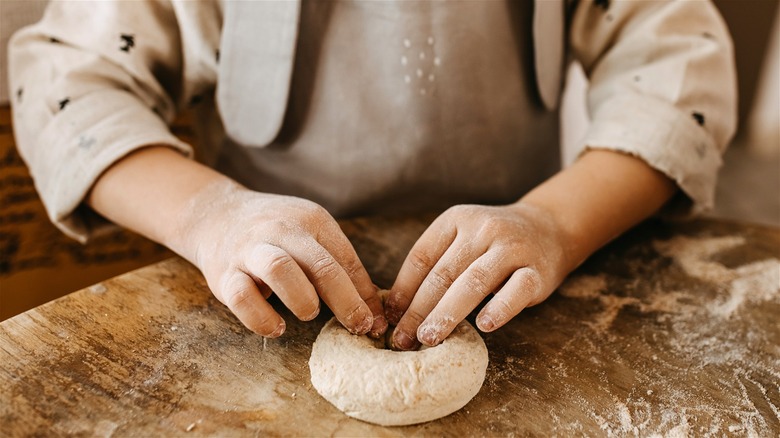
Shaping, the next step in the bagel-making process, is deceptively easy. What's there to master? Just shape the dough into balls and poke a hole in the middle, right? Wrong. First, you'll need to pre-shape the dough by placing your palm over a small piece and making circular movements against the table to create surface tension, forming a tight ball.
Next, you can go with the aforementioned poking method or the "rope-and-loop" preferred by professional bakers, which requires making logs out of dough balls, then dampening the ends and intertwining them. Rolling the overlapped ends with your palm will secure them. A spin on this bagel shaping method involves opening and flattening one end of the dough rope, then tucking the other end in. Either way, you'll need to ensure the seam is tight and the hole you make is big enough (around 2 inches) if you don't want it to disappear during boiling and baking.
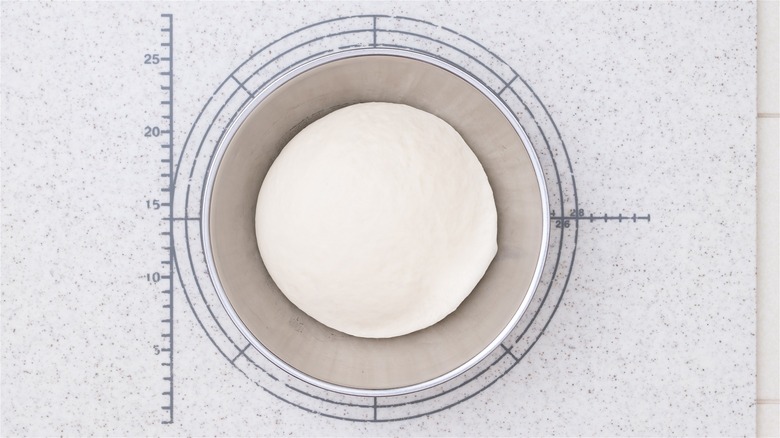
Over-proofing them
Bagels rise in two stages, each equally crucial to the final product. The bulk fermentation stage, when the unshaped dough rests and rises, can take anywhere from one hour at room temperature to an additional four to 24 hours spent retarding in the fridge. Proofing, or the final rise of the shaped dough pre-cooking, happens next, and it might be tricky.
With bagels, slightly under-proofing is better than over-proofing — leave them too long, and they will deflate and have an off texture after cooking. If you shape them directly after room-temperature bulk fermentation, they'll need about an hour to proof. If you shape them from refrigerated dough, you'll need an hour and 30 minutes to two hours of proofing at room temperature. If they were shaped before cold-proofing, they'll need a very brief warm-up before boiling. Since proofing time will always vary, you'll need to follow visual cues: They'll need to grow larger and spring back slowly when poked.
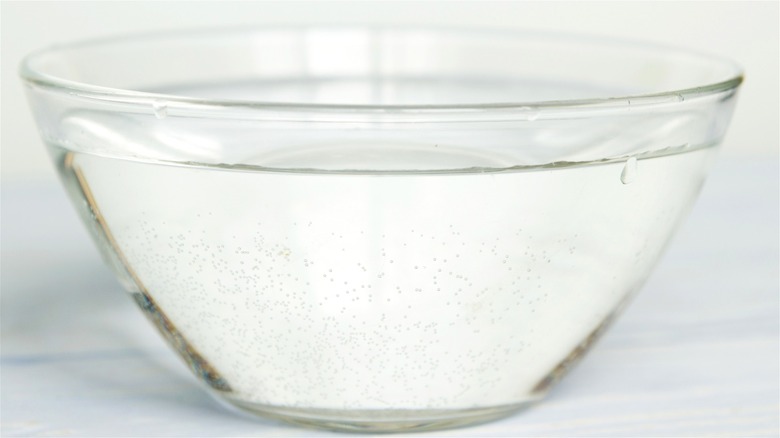
Not doing a float test before boiling
Since yeast dough recipes typically serve more as guidelines than strict instructions — what with the many variables that will affect your dough that the recipe authors can't fully predict — the kneading, fermenting, proofing, and baking times will vary. This is why it's crucial to know what cues to look for every step of the way.
Proofing is probably the most finicky part of the process, and it's easy to miss when things go wrong. Aside from visually assessing the dough and its ability to spring back when touched, a simple float test will help determine whether your bagels are primed for their boiling baptism. Place a small piece of dough or a fully formed bagel in a shallow dish of room-temperature water. If it bobs up, you've got the green light. If it sinks, be patient, proof a tad longer, and try again.
Skipping the kettling step
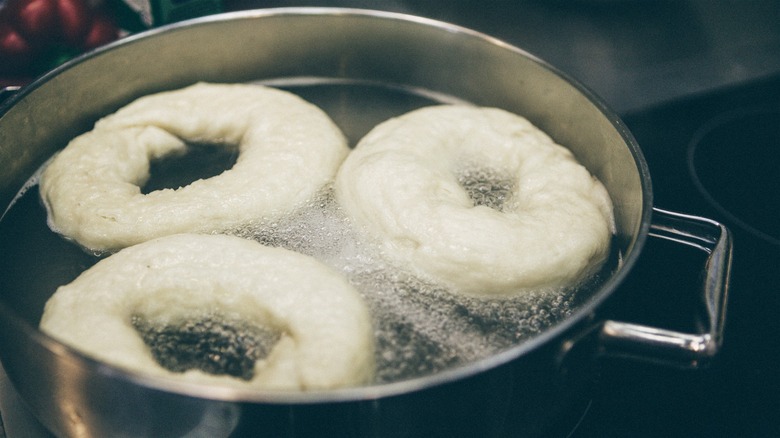
By now, you should already be getting a hunch about bagels: they're not like the other bread family members. While mixing, kneading, and proofing the dough has a lot in common with other yeast breads, one crucial step sets bagels apart: boiling. Otherwise known as kettling, this process is essential for getting the right look and mouthfeel.
While some bagel makers have stopped following this traditional step in favor of steaming them, you don't want to skip it. Steaming will gelatinize the starch to create the signature shiny look, but not necessarily the right texture. For a perfect homemade bagel, you want the heat to penetrate the surface and seal the moisture within, cementing their shape and size, and making the interior chewier. For bagels with a lighter, airier flair, curtail your boiling time to around 45 seconds. But if you're set on all-around chewiness, let them bathe a tad longer, about 90 seconds on each side.
Not seasoning the boiling water
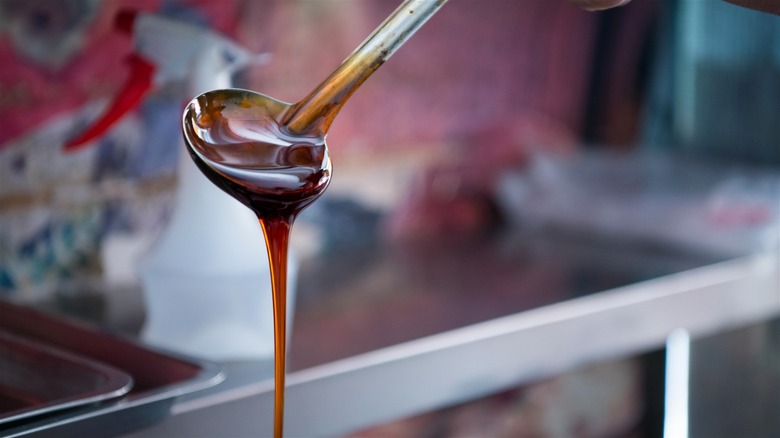
While the starches on the outer side of bagels will still gelatinize in plain baking water, adding one or two secret ingredients will really change their look for the better. More often than not, the water is sweetened with malt syrup, which promotes browning and gives the bagels their signature flavor. But while malt syrup is the most authentic add-in, it can be hard to find.
The good news is that you can achieve similar effects with pantry-friendly ingredients. Brown sugar, molasses, and honey are all viable substitutes for the kettling step. For those avoiding extra sweeteners, giving homemade bagels a baking soda bath will create a perfectly golden look — but you already know that if you're into soft pretzel-making. This alkaline ingredient is known for kickstarting the Maillard reaction in anything from cakes to caramelized onions. And you'll only need a teaspoon per liter, making it an economical choice.
Ignoring the temperatures
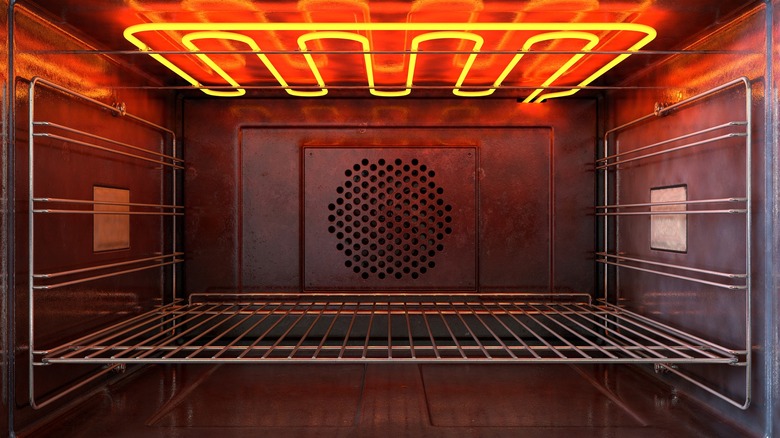
You might think that controlling the temperature of the dough and the environment around it is something out of a professional baker's handbook and not something you can easily do at home, but you're wrong. Baking will certainly be easier with a meat thermometer on hand. If you want the absolute best results, use it every step of the way.
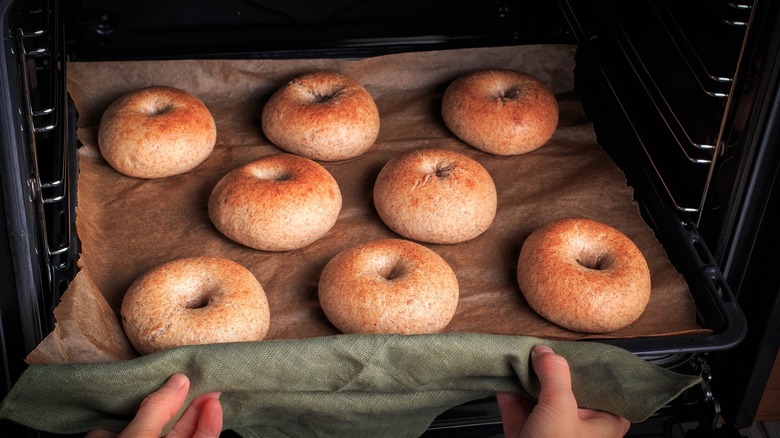
First, the water you add to the dough should be lukewarm if you're on the clock, and cold if time's a luxury. Post-mixing, aim for a dough temperature of 78 F to 82 F, a room-temperature range perfect for bulk fermentation. Remember, after a chilly retardation spell (35 F to 42 F), your dough needs to warm to room temp before proofing at 85 F to 90 F and the subsequent plunge into boiling (not just hot) water — a crucial step. And finally, don't shy away from a hot oven; 450 F might seem excessive, but it's non-negotiable.
Staying in your comfort zone

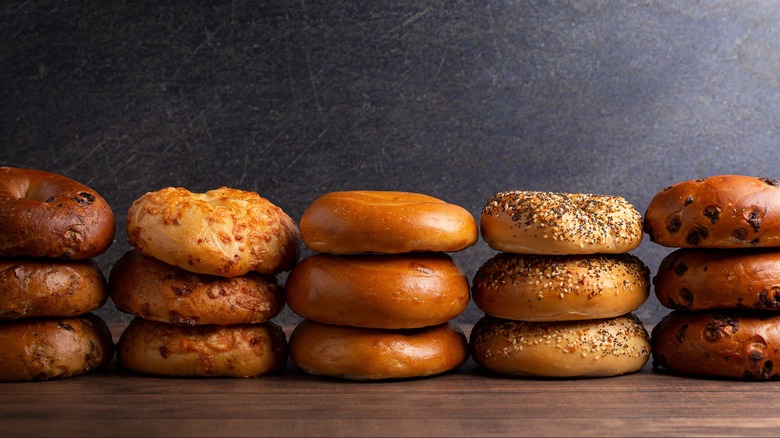
Once you've mastered the basics of bagel making, you might want to stop there. After all, it took you so much time and effort to perfect the plain bagel recipe, and you're tired. If you're already good at something, why change things up? Well, if you don't, you'll be missing out on some daring flavors, and hinder your bagel-making progress.
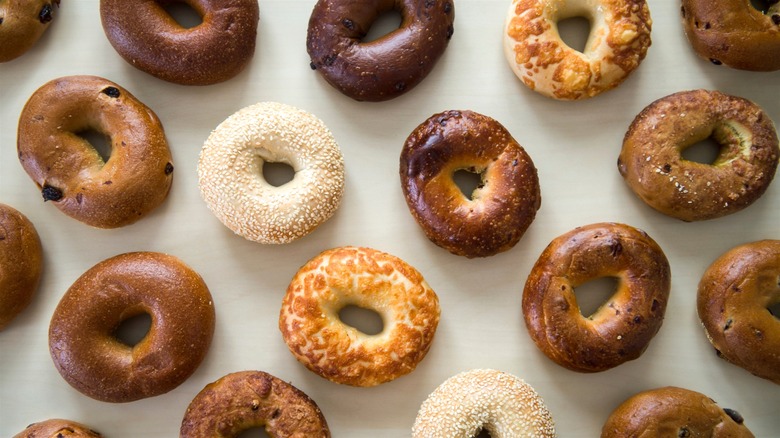
Imagine, there are 28 types of bagels you could try making — from sourdough-based and pumpernickel to geographically distinct varieties such as St. Louis, New York, and Montreal-style bagels. You can experiment with flours (just skip the gluten-free ones if you're an amateur), and employ a wide range of mix-ins, from cinnamon, chocolate, raisins, and blueberries, to alliums and cheese. So don't allow yourself to stagnate in the comfort of the familiar, and employ your basic bagel mastery to take them to the next level.
Adding mix-ins too late
Should you ever feel like mixing things up and adding flavorings to your favorite homemade bagel recipe, timing is of the utmost importance. It might seem like it's best to incorporate them last minute, somewhere between the proofing and boiling stages, but that will lead to subpar results. When adding them toward the end of the recipe, especially if it's something chunky like chocolate chips, you risk not incorporating them well enough and falling off or burning as a result.
In fact, the best time to add mix-ins to homemade bagels is early on. Once the dough comes together into a smooth ball — about five minutes before you're done mixing it — it's ready to take in those flavors. Remember, if you're adding freshly rinsed ingredients, like blueberries, or oil-doused sun-dried tomato chunks, make sure to remove excess fat and moisture before adding them to the dough.
Using store-bought seasoning
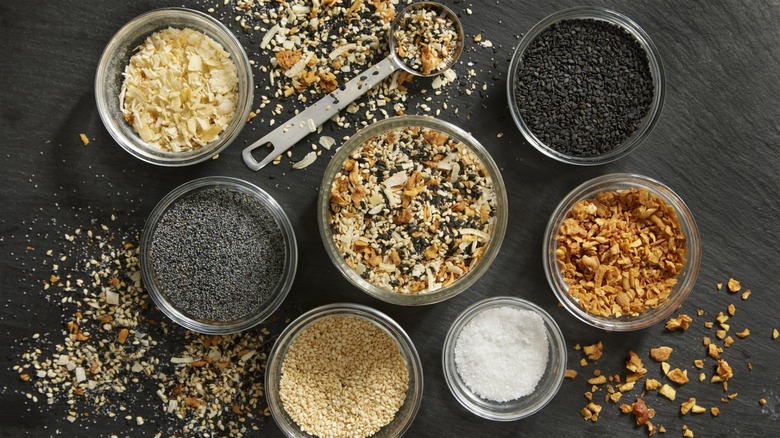
Let's be honest: Making authentic bagels at home is no easy task. With so much time and effort required, cutting corners can be tempting, but it always pays off if you don't. Toppings are another example of that — while you could use store-bought mixes, creating your own is preferable, giving you control over the flavor and ingredient ratio. And remember — the secret to a perfect DIY everything bagel seasoning lies in the crunchy, flaky salt.
Side note: Some toppings are better than others. When making homemade bagels, you'll want to avoid toppings such as oregano, sage, or onion flakes because they might (and probably will) burn at 450 F. However, if you must have these particular toppings, there are ways to go about it. Try coating the herbs in a bit of oil beforehand or covering the bagels with foil before baking (although that will hinder the browning).
Rushing to cut the bagels
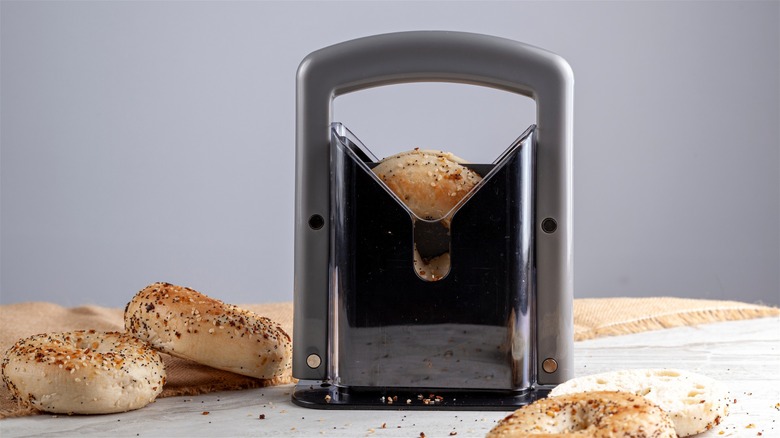
Fresh from the oven, the allure of a warm, aromatic bagel can be irresistible. After all the waiting and hard work, you want to reward yourself as soon as your baked treasure is cool enough to eat. But fight the urge to slice into it too soon. Patience is key. Let the steam escape and the bagel cool down for a perfect, clean split, then toast it again.
If you eat bagels regularly, you might want to invest in a special slicer under the threatening name "bagel guillotine." This nifty gadget offers a flawless cut, with no band-aids required. However, if you don't own one, there's a safe way to cut a bagel without a slicer. Lay the bagel flat, palm on top, and slice horizontally with a bread knife. Next, lift the half-sliced bagel, place the uncut side down, grip the already sliced upper half, and finish the job, cutting vertically this time.
Not sticking the seasonings on well
Plain bagels are great in their own right, but adding toppings makes them infinitely better, both in the visual and flavor departments. However, there are some secrets to getting it right so they stay on during baking. Since egg wash is not traditionally employed in most bagel recipes, the first step to making sure toppings stick is the hot water bath they receive before baking. The moisture on the surface of freshly boiled bagels acts as an egg wash substitute, so you'll want to top them right after getting them out of the pot with a slotted spoon.
Another trick is to place your desired toppings into shallow bowls before boiling the bagels, then pressing the hot rings into them rather than sprinkling them on top. Additionally, the natural oil content of seeds will help them adhere to the surface and toast without burning in a scorching hot oven.
Missing out on using pizza gear

Bagels have barely anything in common with pizza (if you don't count their love child known as bagel bites), yet they can benefit immensely from being treated with the same gadgets used for pizza-making. Suppose you're a homemade pizza aficionado with a pizza oven in your possession. In that case, try baking your bagels in it, since it's capable of creating the right amount of heat, breaching the gap between homemade and commercial bagels.
Don't own a pizza oven? Don't fret — there's a more affordable alternative. To create a really crisp exterior in a regular oven, you could try baking bagels on a pizza stone. Preheating it in the oven while you shape and boil bagels will increase the overall temperature in the vicinity, as well as help even heat distribution during baking, creating a perfect bagel crust.
Storing them on the counter
Most bagel recipes yield double digits, so unless you're making them for a big family or a brunch with friends, proper storage techniques are essential to enjoy them throughout the week without compromising quality. For short-term bagel storage, a paper or plastic bag (or a mix of the two) should do the trick. If you plan to eat them quickly, keep them on the counter in a rolled-up paper bag or place that bag in an airtight container to prolong their shelf life.
Placing bagels in the fridge is a major mistake, as it draws moisture out from this naturally dry bread. However, your refrigerator can still be helpful. The best ways to keep bagels fresh include wrapping them in foil or plastic wrap or placing them in an airtight bag in a freezer, where they will keep for several months, ready to be toasted any time craving hits.
Throwing stale bagels out
Should you ever commit the crime of storing bagels in the fridge or uncovered on the counter — in other words, let them go stale — getting rid of them might seem like the natural, though tragic, next step. But do you really want to contribute to the world's massive amounts of food waste when it's easy to revive and reuse them? We didn't think so.
First, you want to master this clever bagel toasting trick: Preheat the oven to 350 F and place your stale bagels inside for a few minutes. This will release the moisture trapped in the starches back into the bagel flesh. If your bagels are really dry, dip them in a hot water bath before toasting to bring them back to life. Finally, you can always repurpose old bagels by incorporating them into French toast or frittata or turning them into chips and croutons.
Static Media owns and operates Tasting Table and Mashed.