12 Clever Hacks You Need When Making Crepes
Breakfast foods are some of the most exciting because it's where sweet and savory come together. And some are not only great for a meal but also for dessert, such is the case with pancakes. It's hard to find anyone who doesn't love pancakes because they're completely customizable, and there are many different ways you can have them. Although considered different from American-style pancakes, crepes are an incredibly popular French type of pancake that is beloved all over the world, and for good reason. They're wafer-thin, light, and can be filled with sweet or savory fillings.
What makes crepes different from American pancakes is that they are larger in diameter and much thinner. Crepes also have no raising agent like baking soda or powder because they don't need to rise like pancakes. With pancakes, the air bubbles caused by the raising agent make them puff up into fluffy treats. However, we want crepes to be as thin as possible. Achieving that delicateness isn't always easy, and you need to know what you're doing. The batter has to be the right consistency, the heat has to be just right, you have to know how to spread an even layer of batter in your pan, and you need to know when and how to flip the crepe without tearing it. Don't despair, because you'll be able to perfect them with some insight. Here are several clever hacks you need when making crepes.
1. Use the right pan
You probably guessed that you need to be selective with the type of pan or skillet you use. Using the wrong type of pan can be disastrous with something as fragile and dainty as crepes. The first and most obvious choice is that your pan must be completely flat; any slight dip will stop you from being able to evenly spread out your batter. It also needs to be large enough to make a decent-sized crepe; remember, unlike with American-style pancakes, the crepe will be the exact size of your pan as the mixture covers the whole surface up to the edge.
Perhaps the most important thing that will determine the success of your crepes is that your pan has either a good non-stick or ceramic coating on it. This will aid in a smoother loosening of your crepes so that there's less chance of them sticking or breaking. A special crepe pan will make this easier, as the sides are shallow, making it easier to flip them. Lastly, your pan needs to have a handle because you'll be picking it up to spread out the mixture as you ladle it in, so never attempt to make crepes with a handleless pan.
2. Cook crepes on medium, consistent heat
Getting the right heat setting is another incredibly important step to making great crepes. Too much heat and your crepes will cook too quickly on one side, potentially even burning before you've had a chance to loosen the edges and flip. And heat that's too low will have you standing over them for much longer than needed, and it may not get you the pleasing golden lacey browning that we all love about crepes. The best type of heat is somewhere in the middle, meaning medium heat at most. A good rule of thumb is to put a drop of water into your pan before your first crepe goes in. A light sizzle and steam of the drop means your pan is warm enough to start.
Heat changes from the time you turn on your stove to the time you've lifted your final crepe. While it's essential to have consistent heat throughout, it's impossible to keep it absolutely consistent unless your stovetop is incredibly precise. Since heat can be cumulative on most stoves, the best thing to do is to monitor your pan, especially when your heat has reached a threshold by your second or third crepe; it tends to get hotter than you'd like. At that point, turning the heat lower is ideal.
3. Don't add your liquid all at once
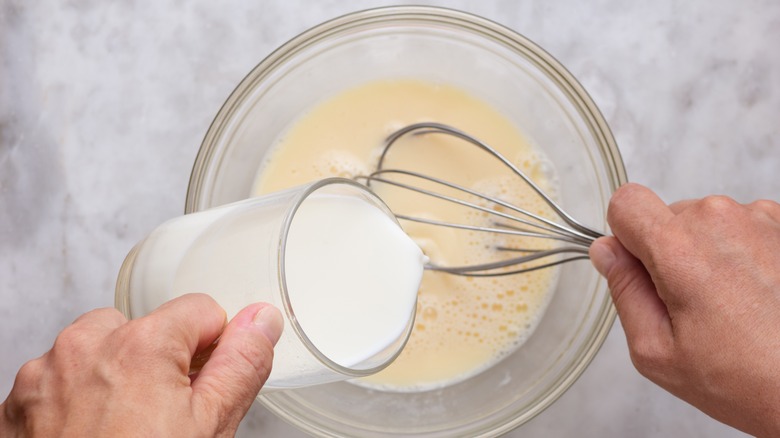
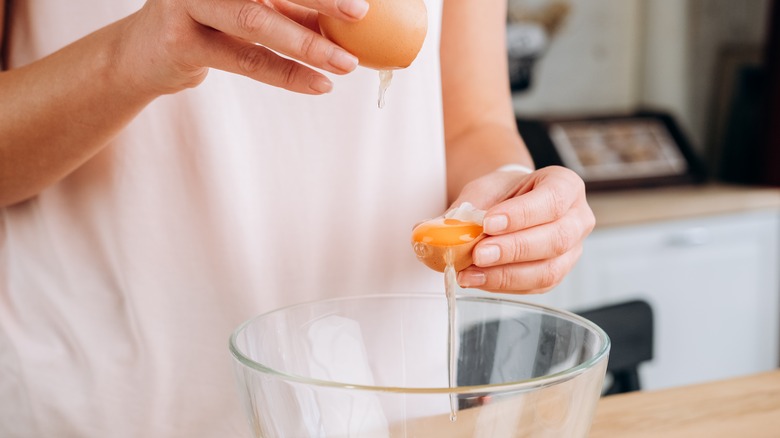
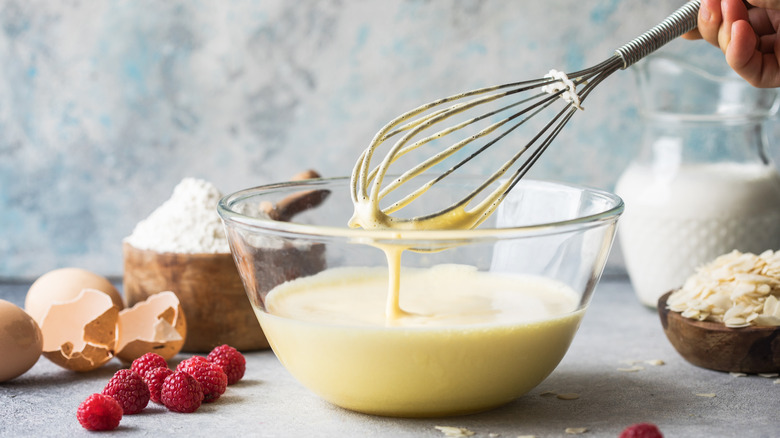
As with many baked goods and batters, you will want to separate your ingredients into dry ingredients and wet ingredients before mixing them together. With crepes, you combine your flour and salt first, whisking them dry or sieving them to help prevent lumps. The wet ingredients, like the eggs, milk, and butter, are mixed all at once until smooth. When it comes to adding the wet mixture to the dry, you shouldn't just dump it all in at the same time because it's going to be more difficult to get the lumps out.
While bakers all have different suggestions on just how much liquid to add at a time, you don't need to worry about exact measurements. Just add a little bit of liquid first and mix until you have a thick batter. While it may seem counterintuitive, with crepes, it's easier to get lumps out of a thicker batter than a thin one. Since crepe batter is extremely thin compared to other batters, it's imperative to mix really well as a thick batter first.
4. Use a blender to ensure a lump-free crepe batter
Getting lumps out of your batter can be the bane of your existence as a home baker. It's not always easy to do, but taking a bite of something delicious only to have a little puff of flour explode in your mouth is one of the most disappointing things when it comes to baking or pancake making. Crepes are even less forgiving compared to muffins or cake because their incredible thinness means there's nowhere to hide. Lumps in your crepe batter will show up as clear little bumps in your otherwise smooth surface and make the final product gummy in texture.
Luckily, crepe batter is the kind of batter that can be mixed in a blender. Simply pour all your ingredients into your blender and hit the start button. Blending your batter guarantees it to be lump-free. Plus, it stops you from having to mix everything by hand and doing so in stages. It couldn't be easier. If you don't have a blender or if you choose to mix your batter by hand, another idea is to strain it through a sieve as a final step of getting rid of any remaining balls of flour.
5. Transform your crepes with beer

There will always be interesting tricks as to how to make crepes better, and this one might surprise you. Beer is the unexpected ingredient for outstanding texture in crepes. It's a common addition to crepe batter in northern France, so it's not as out-of-the-box as it sounds since it's done in the country where crepes originate. The bubbles and yeast in the beer help the batter to loosen and relax, making the dough more tender and easily spreadable. It ensures that your crepes will be soft and not brittle, preventing unnecessary tearing or holes.
Don't worry, your crepes will have the tiniest hint of beer, but it won't be overpowering. In truth, it adds a maltiness to the flavor that's quite delicious. The flavor will be stronger if you use a very bitter beer, so stick to a light lager, and you'll have no issues.
6. Refrigerate your batter
When it comes to making crepes, patience and foreplanning will do wonders for your end product. Sure, you may decide you want crepes one minute and get right to making them, but the trick to foolproof crepes every time is to rest and refrigerate your batter. As annoying as it is to have to prepare the batter and then wait, it'll ensure your crepes to work out as you want them to. When you mix your batter, the flour creates gluten that becomes tougher as you mix. When you rest your batter, it helps your gluten relax, making the dough less tough and softer for eating. This will also help prevent tearing when you cook your crepes, which will also help when you start adding your fillings.
The best amount of time to refrigerate your batter is to leave it overnight, but if you're in more of a hurry, an hour at the minimum will work. Refrigerating will also give your batter time to fully absorb the liquid, which reduces lumps in your mixture. When it's time to cook your crepes, give the batter another whisk to make sure everything's combined evenly again and that any flour that's sunk down to the bottom is mixed in properly.
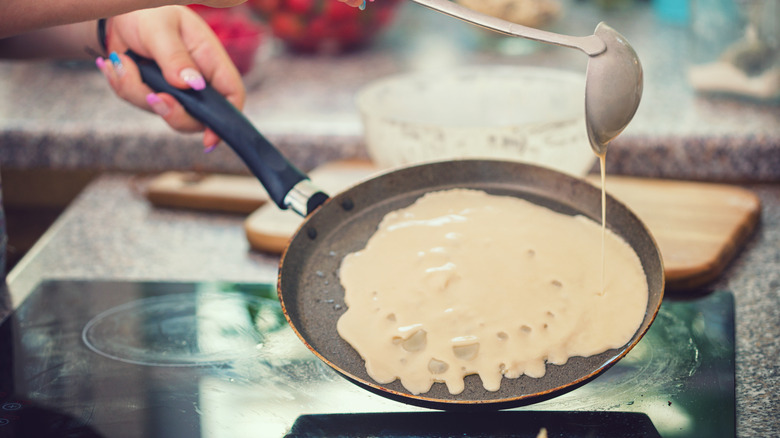
7. Dip your skillet into the crepe batter for uniform thinness
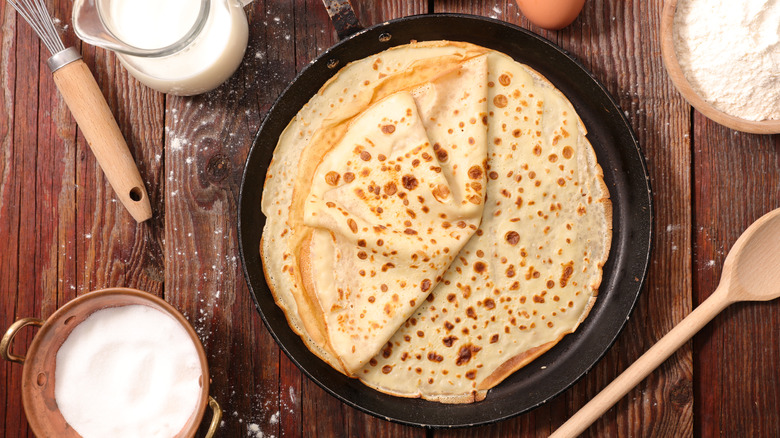
What makes crepes so special is how thin they are, but it's also what makes them difficult to make. Achieving the right thickness and having them be even throughout is a skill, and it's all to do with how you pour the batter into your pan or skillet. You have to move with speed, swirling your pan or skillet fast enough for the batter to spread out to the edge before it cooks. Doing so sometimes creates thicker parts where the batter has settled or even holes where you've missed a spot. You have to quickly fill in the holes with batter, making it all a very precarious and stressful few seconds. There's a way to avoid all that trouble. This hack will get you perfect crepes every time. Simply, dip the bottom of your skillet into the batter, and flip it upside down to cook.
You read that correctly. You're not using your skillet on the side you usually cook on. You're cooking your crepes on the bottom side. First, you'll need to heat your pan as you usually would over medium heat. Then, spray some non-stick spray over the bottom and then gently press it into the batter. Lift it up, turn it upside down over your hot plate, and allow it to cook for a few seconds until it starts to release. Your crepes will be cooked on both sides and be evenly thin.
8. Use ginger ale to make delicate ginger crepes

Much like incorporating beer in your crepes, using carbonated or bubbly beverages can help make your batter the right consistency. The bubbles work to soften your dough when it cooks, making your crepes succulent. One option is sparkling water, but you won't get any added flavor to your crepes, unlike with beer. And as good as flavorless water is, it's a missed opportunity when certain flavors can make crepes even more delicious. Take ginger, for example. The taste of ginger alongside maple syrup, honey, lemon sugar, or cinnamon is a match made in heaven. This is why you should try using ginger ale to make crepes.
Ginger ale works as a double agent: It introduces bubbles to your batter, which will make it lighter, and infuses your crepes with a spicy ginger kick. They'll be sweet and tasty on their own, or you can add any sweet topping of your choice. Simply cut some orange slices, or go a little more indulgent with some rum-spiked cream; you'll be delighted by the explosion of flavors.
9. Loosen your crepes with a rubber spatula
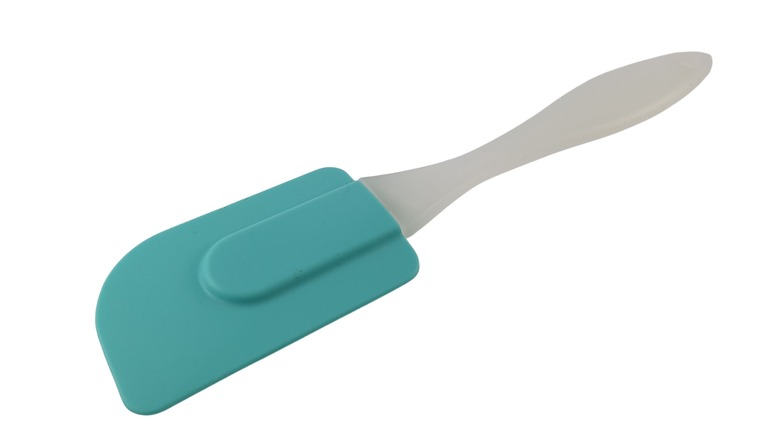
Flipping your crepes is one of the tricky parts of cooking them. It's the moment where everything can go wrong. The first step to flipping them is to make sure they are properly loosened from the pan. If any part of your crepe is still sticky on the bottom side, you won't get that even, smooth surface. One way to know whether your crepes are ready to be loosened is to keep an eye on the outer edge. When you see this part start to brown, you'll know it's cooked on the bottom side. The edge might even lift slightly, indicating that it's ready to be turned, and this is the best opportunity to try to loosen your crepe.
The best tool for this brave act is a rubber or silicone spatula. Of course, you can use any spatula, but a rubber one will protect your pan from getting scratched, and it'll be gentle on your crepe, which is too delicate to risk using a metal one and accidentally tearing the crepe. The flat surface of your rubber spatula will also be able to hold a good amount of your crepe as you lift it up to flip it.
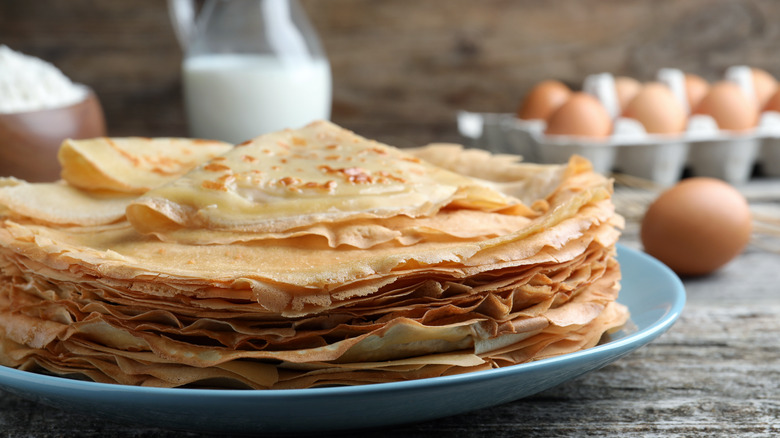
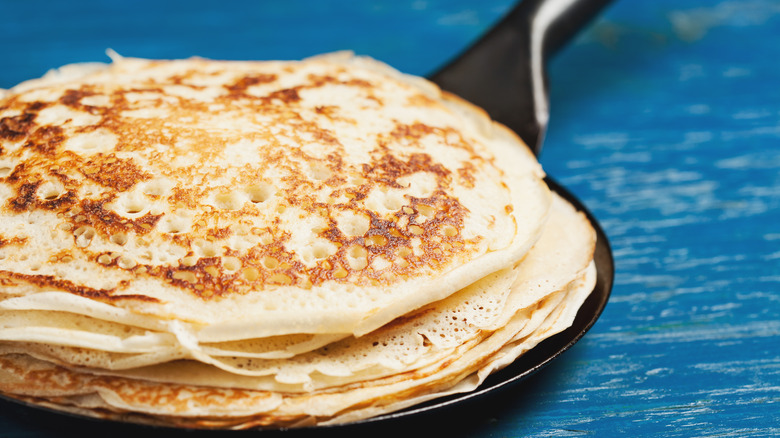
10. Stack your crepes on top of each other
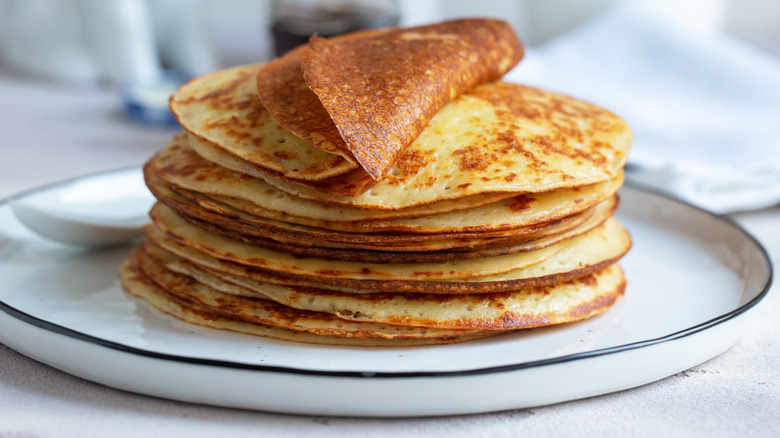
Many flat foods made of dough, like crepes, flatbreads, wraps, and rotis, can harden as they cool down. This makes them hard to fold or roll up. It's not always possible to eat them straight off the pan, especially when you're making several crepes at a time. One of the ways to ensure that they stay soft is that as soon as they're done cooking, they need to be stacked. You should always stack crepes directly on top of each other. This not only keeps them warm, but each crepe emits vapor, which will steam your stack of crepes and help them stay pliable for serving.
This might seem like an extra step, but after all the effort of making crepes, you want to eat them at their best. When it's time to enjoy them, even if they're cooled down completely, they'll still be tender, and you'll be able to roll them up or fold them with ease. Make sure you've got your stacking plate ready and reachable as you cook because there's nothing worse than cooking your first crepe only to frantically search for a dish to place it.
11. Add cornmeal to your batter

Something that people love about crepes is they can be eaten sweet as a breakfast or dessert or savory as a lunch or snack. There are countless possibilities for making a savory crepe, and popular fillings include ham and cheese, chicken and mushroom, spinach and feta, bacon, or even leftover chili. You can basically add any ingredient to a crepe, and it will be delicious. In France, traditional crepes can be eaten savory, but there's a buckwheat version, more commonly referred to as a galette, which has salty fillings like eggs and ham. While buckwheat crepes are delicious, not everyone has buckwheat at home, and it's a little trickier to find at the grocery store. Instead, there's an ingredient that most American households have that works just as well.
Cornmeal is the baking staple you need for no-frills savory crepes. The ingredient adds a little extra bite to your crepes, giving them a pleasant chew and a mild corn flavor that goes great with savory fillings. The heartier texture will also hold larger fillings well. You can use any type of cornmeal, whether fine or coarse grinds, depending on your preference for the texture of your crepes. Fine cornmeal can replace flour one-to-one, but if you'd still like to use flour in your creation, substitute at least a third of the flour portion with cornmeal. On the other hand, you don't need as much coarse cornmeal, especially if you want your crepes to stay intact.
12. Freeze extra crepes to have later

If you're going to go through the effort of making crepes, you might as well make a large batch. You don't need to worry about making too many and wasting them because one of the best things about crepes is that they freeze really well. You can freeze the batter, but it makes more sense to cook all of your batter in one go and then freeze the crepes. This is because the labor-intensive part is the crepe cooking and not the batter making, so if you're going to cook them, take it as a one-day thing and make them in bulk. This will save you time and effort the next time you have crepes. Your future self will thank you.
To freeze your crepes, wait for them to cool completely. Then, add some parchment paper in between each one because this will prevent them from sticking together in the freezer and save you from cracking them by mistake when you're trying to separate them. Afterward, wrap them in aluminum foil or seal them in a ziploc bag. When you're craving crepes, you can warm them up in the microwave or lightly heat them in a dry pan.