15 Tips You Need To Make The Best Homemade Waffles
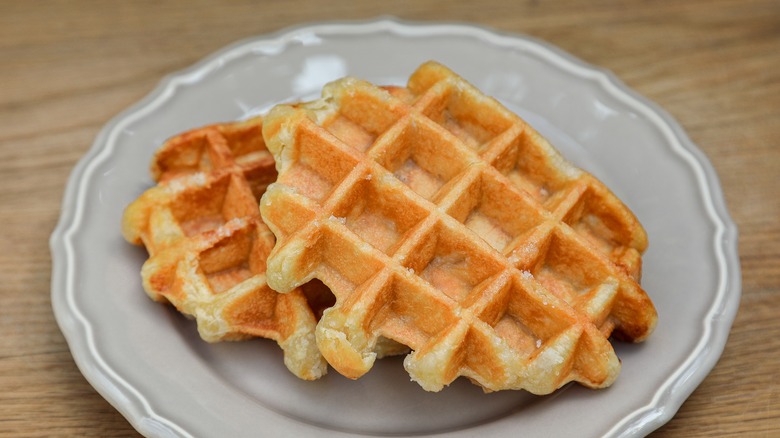
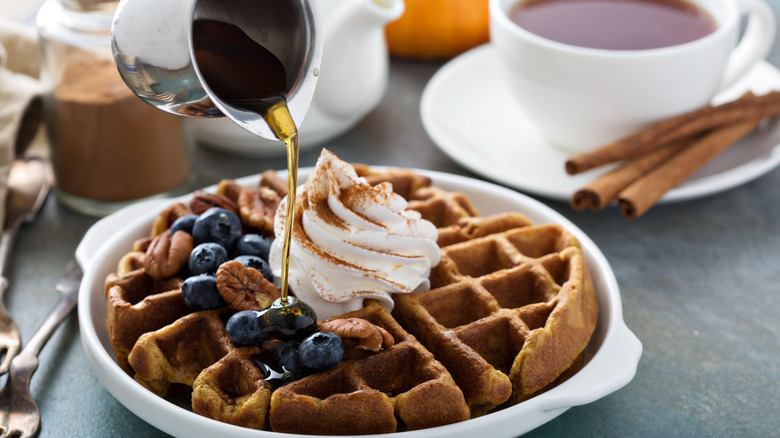
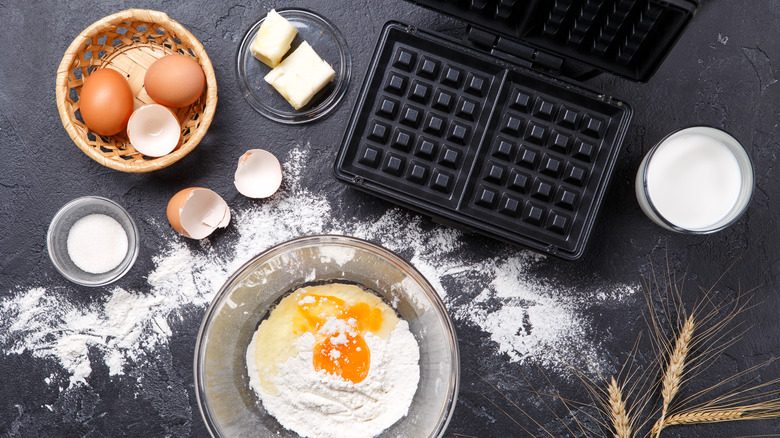
What's your go-to Sunday morning breakfast food? In our house, it's almost always waffles. These slightly sweet, crunchy squares are the perfect decadent breakfast to customize with playful toppings, pair with savory staples like fried chicken, or enjoy as the cookie component of a homemade ice cream sandwich. While you can always make homemade waffles with pre-made batter or opt for a frozen Eggo (that's what they're made for, after all), there's something very homey and satisfying about mastering the ingredients, technique, and process needed to make a crisp homemade waffle.
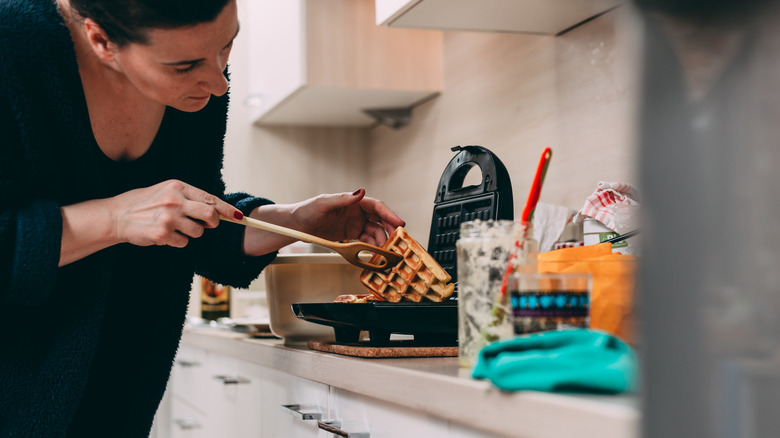
If you're going to make homemade waffles, the one unique tool you're going to need is a waffle iron. This tabletop electric kitchen appliance will cost you less than $50, and you can make more than just a waffle in your iron — which makes it an excellent investment for any home cook. So after you have your iron set up and you've read our tips, you'll be well on your way to having waffles as the star of your next brunch.
Add egg whites for a fluffy batter
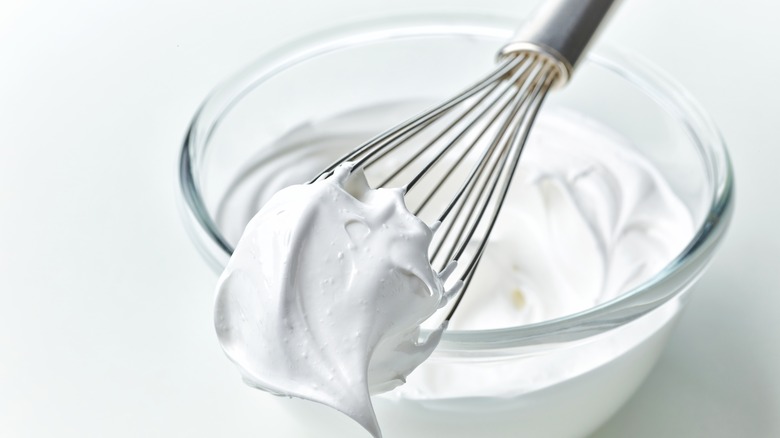
Waffles are one food that always seems to taste better at a restaurant than at home. Restaurant-quality waffles have an indescribable airiness and lightness that you may feel like you can't replicate in a homemade waffle mixture. The secret ingredient to these plush waffles is egg whites.
Egg whites provide numerous textural and structural benefits to your stack of homemade waffles. The protein structure of the egg allows it to trap air bubbles and hold them throughout the cooking process. In addition, waffles made with egg whites tend to brown a little better and crisp up better than those without them. Start by whipping your egg whites to stiff peaks using a handheld or a stand mixer. Then, gently fold the egg whites into the waffle batter to avoid squeezing out any of the air bubbles and reducing the volume of the batter.
Try a yeasted waffle for more flavor
Homemade waffles tend to come out dry and lack flavor when made with baking soda or baking powder alone. Making yeasted waffles, instead, is worth the effort because this tiny microorganism will create a more complex, tangy flavor in the waffle. These waffles, known as Belgian or Liege waffles, may also include a chemical leavening agent like baking soda or baking powder — but most of the rising is done with the help of yeast. The yeast can also improve the texture of the waffle, resulting in a fluffy interior and crispy exterior.
The major downside to using yeast as a leavening agent for your waffles is that you must prepare adequately beforehand. The yeasted waffle batter must sit overnight to ferment and develop funky flavors, while chemically-leavened waffles can be prepared on the same day. Once your yeasty batter has sat overnight, add a bit of salt and leavening to it before transforming it into a crisp, light breakfast treat with the help of your waffle iron.
Use seltzer water for a better rise

We're always keeping our eyes peeled for ingredients that transform any dish from ordinary to extraordinary. The miracle ingredient you should add to your waffles for an airy texture and perfectly brown exterior is seltzer water. Seltzer water is carbonated, which means that it is full of bubbles that help make the waffle batter lighter. When the batter is cooked on the iron, you'll find that the seltzer water also promotes an even color.
You'll want to take special care when adding your seltzer water to the waffle batter. The carbonation doesn't last forever, so you could be left with stodgy waffles if you neglect to cook your waffle batter quickly. To avoid making your batter too watery, substitute the seltzer for the same amount of milk or water in the recipe. If you're working with a boxed waffle mix, add ¾ cup of unflavored seltzer for each cup of dried mix.
Use mochiko flour instead of all-purpose flour
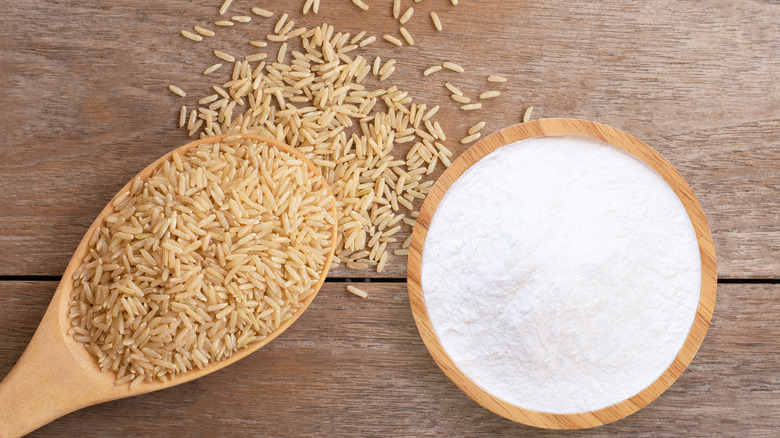
Waffles give you a lot of creative license, which is one of the reasons why we love making them so much. In chef and author Kristina Cho's recipe for irresistible pumpkin spice waffles, she substitutes mochiko flour for plain white flour. Although you may have never heard of this type of flour, you likely have heard of (or tried) one of its primary uses: mochi. Mochiko flour, or glutenous rice flour, is made by grinding sticky white rice into a fine powder. In an interview with People Magazine, Cho notes the waffles are "crispy on the outside with a bouncy, custardy interior."
You cannot make substitutions for the mochiko flour because of its unique texture — which produces a waffle with a light crunchiness that complements the inclusion of autumnal pumpkin ingredients in the waffle. Like traditional flour, the dry ingredients for this recipe are mixed before adding the wet ingredients before being poured onto an awaiting waffle iron.
Get creative with spices and extracts
Waffles open up a lot of opportunities for flavor and texture experimentation. The most common pairings for waffles include vanilla extract, cinnamon, and nutmeg, but you can also play around with more unique flavors to make your waffles more exciting. For example, one of our favorite seasonal dishes around the holidays is gingerbread waffles. These festive breakfast treats are filled with cinnamon, nutmeg, and ground and dried ginger for an extra spicy kick. The recipe also includes a few tablespoons of molasses for added complexity and a classic gingerbread cookie color.
If you want to blur the line between breakfast and dessert, you can always make chocolate cake waffles with boxed classic chocolate fudge cake mix, water, eggs, and oil. However, if you want to add a chocolatey flavor without delving too much into the realm of sweetness, consider adding cocoa powder to your dry ingredients. You'll get a subtle chocolate taste without disrupting the texture of the waffle.
Avoid over-beating your batter
One of the biggest mistakes people make with batter — whether for pancakes or waffles — is over-beating it. Not only does mixing your batter too much cause you to beat out all of those vital air bubbles that create a soft, fluffy waffle, but beating can also cause the gluten in the flour to set, which in turn makes the batter chewy and dense.
Recipes rarely clarify how much to mix the batter, which can lead to you second-guessing how much is too much. Therefore, there are many hacks out there to keep you from over-mixing batter. The first is to use a folding technique to scrape the bottom of your mixture from the bowl and gently place it on top, repeating until all the dry ingredients are incorporated. This method is much more gentle than the standard circular whipping motion that most people use for batters. You should also try to mix your batter by hand rather than using a machine; this makes you more aware of if your batter is starting to get tough. Finally, if you need to use a machine, always use the lowest setting and only mix until the dry flour disappears; a couple of lumps here and there are permissible.
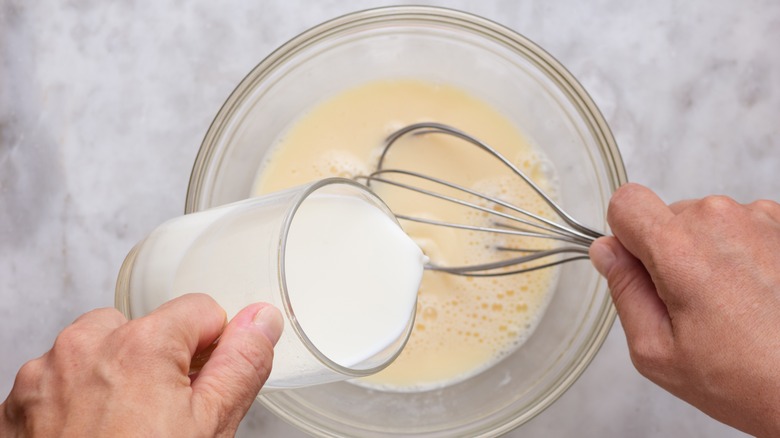
Bring your ingredients up to room temperature before cooking
The ideal waffle batter is smooth and well incorporated. However, if you use ingredients that are not at room temperature, you risk having a cloggy batter with chunks of butter floating around in it. To prevent making waffles wrong, read your recipe a few times and place your ingredients, most notably the milk, butter, and eggs, on your counter to warm up before you start cooking.
To warm up butter quickly, you can cut it into small cubes and let it sit on the counter at room temperature for about 10 minutes. If your recipe calls for melted butter, you can skip this step. But be sure to warm up your milk in the microwave before adding your melted butter; the milk can coagulate from the temperature difference. To warm up your eggs, place them in a bowl of warm water for a few minutes to ensure the proteins more readily combine with your other batter ingredients.
Add whipped cream to your pancake batter
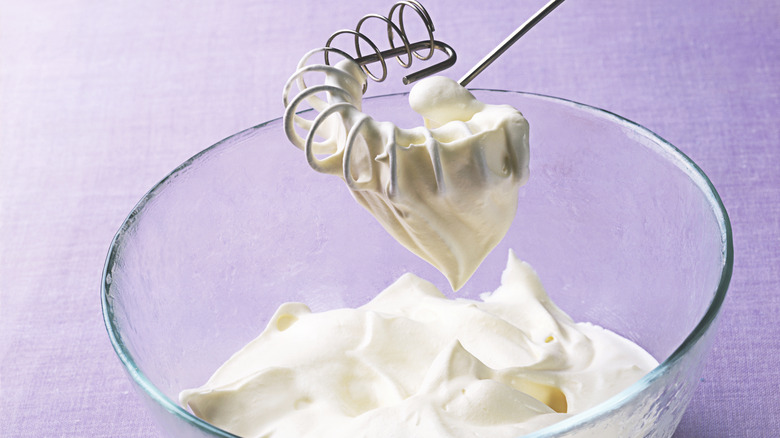
Your pancakes can benefit from the addition of a little extra fat. And we're not talking about the pad of butter that goes on top after you've pulled them from the iron. One way to avoid dense waffles is to lighten the waffle batter with a bit of whipped cream. The cream needs to be whipped for this to work, mind you — don't just add in some unsweetened cream and call it a day. The fat in the whipped cream holds air, similar to adding whipped egg whites, which can help keep your waffles light and fluffy. Like whipped egg whites, you'll want to use a gentle hand to fold them into the batter to avoid deflating.
If you are low on milk, you can make Dutch cream waffles using heavy whipping cream or just stick to substituting some of the milk in the recipe for it. Heavy cream and whipping cream tend to work best for waffles because they have a higher fat content (thus, greater stability) than half-and-half.
Oil is better than butter for color
Fat plays a critical role in baking anything from cookies to waffles. It is crucial to consider how much fat you're using and what type of fat is best for your recipe. If you choose to use butter, you may sacrifice a great crust on your waffle. Research published in Food Science and Nutrition reports that waffles made with rapeseed oil and corn oil had a much more even browning than waffles made with butter. Although most recipes include butter as a critical ingredient for flavor and fat, it does not have the same composition as the out-performing liquid oils. This is because butter contains water, whereas full-fat liquid oils do not.
High-fat levels promote browning and crispness in a way that an oil-water hybrid does not. If you like the flavor of butter but don't want to sacrifice a good waffle texture, you can always add a pad of butter after the waffle is done cooking.
Buttermilk gives a better tang

Buttermilk has long been a not-so-secret ingredient for great waffles. There are flavor and textural reasons why you should add buttermilk to your waffle recipe. Buttermilk has a slightly acidic chemical profile that can contrast the decadence of an otherwise sweet batter. The acid in the buttermilk is also essential because it interacts with the baking soda in the batter and causes a loftier rise.
If you are making vegan flax waffles, you can always make your own vegan buttermilk by combining dairy-free milk and a few tablespoons of apple cider vinegar. The acid will promote curdling and a similar tangy flavor to dairy-based buttermilk. If you have milk and lemon juice, you can also make your own buttermilk by combining 1 cup of milk with 1 tablespoon of vinegar or lemon juice, stirring, and allowing the mixture to curdle for five to 10 minutes.
Preheat your waffle iron before using it
Preheat, preheat, preheat. It's one of the fundamentals of baking (and cooking) as a whole. Waffles are no exception. Your waffle iron should be turned on and pre-heated by the time you're finishing up with your batter; for most standard irons, this can take anywhere from five to 10 minutes. A hot iron ensures that when your batter hits it, it will crisp up and turn golden brown.
As a common rule of thumb, always preheat your waffle iron longer than you would expect — which often means letting the iron keep warming up even if the indicator light has turned on. Plus, there's no such thing as preheating your iron too much. Another test you can perform is to flick a few water droplets onto the iron. The waffle maker is ready to go if the water sizzles and jumps around. If you're making multiple batches of waffles, you should be prepared to allow the iron to preheat in between. This will ensure your iron is always ready to go and your waffles are cooking evenly from batch to batch.
Grease your waffle iron before cooking with it
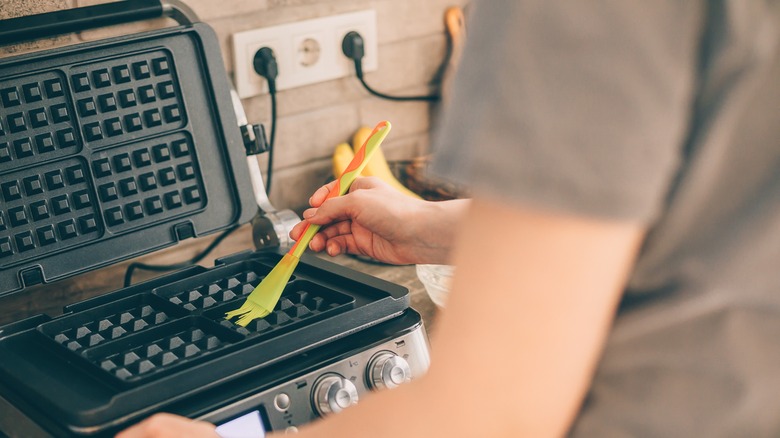
Don't fall for the "non-stick" claim — always grease your waffle iron before use. This will ensure that your waffles won't stick to the iron, resulting in a crunchier texture outside your waffle. Vegetable and canola oil are the two preferred types of greasing oil for your appliance because of their neutral flavor and high smoke point. Although you can use butter for greasing your iron, it is not always recommended for greasing waffle irons because it has a lower smoke point, thus, will produce burnt or bitter flavors when it reaches a high enough temperature.
One popular go-to method for applying oil to a waffle maker is to spray it with cooking spray. This method, albeit easy, does not get into all of the nooks and crannies of your iron where the batter is most likely to get stuck. Instead, use a pastry brush or paper towel to coat the iron before your first waffle and in between batches.
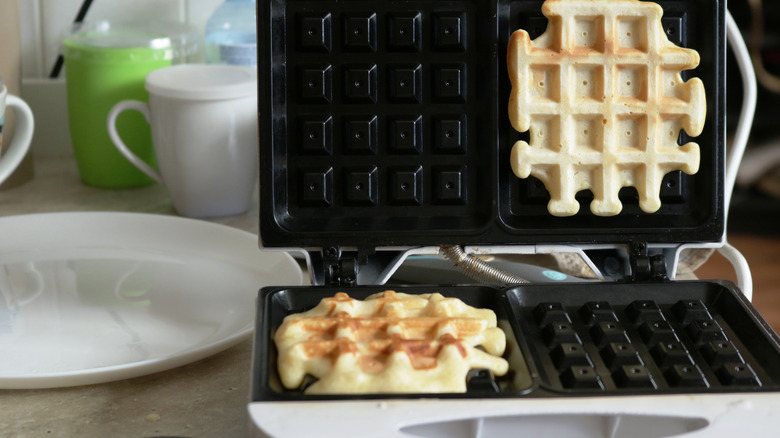
Don't open your iron until you see steam
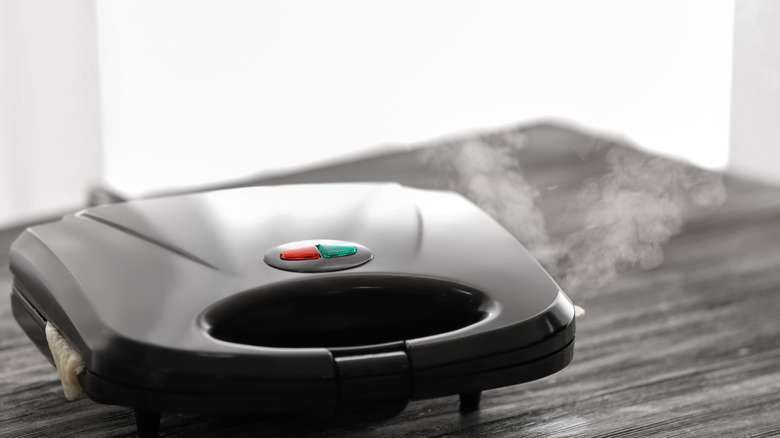
After you've gone through the legwork of preparing your batter and your iron, it's finally time to make your waffles. You seal the waffle maker, breathe, and wait for your waffles to be ready. But how do you know your waffles are done — especially if your iron's indicator is broken?
The key to knowing whether your waffles are done cooking is to look for steam. After about five minutes of cooking, your waffle maker should stop steaming. Next, try opening your waffle maker. If the lid resists opening, this may indicate that your waffles need another minute or so of cooking. If you don't want to stand over your waffle maker, you can always time the first batch, preheat, grease, and cook the second batch for the same amount of time. For a more consistent cook time, you should also try to use the same amount of batter between batches; a measuring cup is an excellent way to help.
Toss the waffle to remove steam
Nobody likes soggy waffles — and, luckily, our favorite business and entertainment mogul has a way to prevent them. Martha Stewart's clever way to avoid soggy waffles is to toss the waffle between your hands to remove the steam — similar to a game of hot potato. In one of her TikTok videos, Stewart pulls the waffle from the iron and transfers it daintily from hand to hand before plating it. She notes that this method helps keep the edges of the waffle crunchy.
Although this tip might seem a little silly (and a little precarious for your hands), it does help ensure that your waffles can be reheated with the same crispness as when you first pulled them from the iron. The best way to reheat waffles and keep them crispy is to use your toaster. Thin waffles will most likely fit seamlessly in the slots, while a toaster oven can help accommodate larger waffles.
Utilize your oven to finish your waffles
Making waffles for a crowd is no easy feat. And unless you like standing over your waffle iron for hours on end, you'll need to find a tool that allows you to crank out waffles quickly — and help retain the waffle's delicious texture. To ensure crispy batches of waffles, try using your oven. First, preheat your oven to 200 degrees Fahrenheit while you cook your waffles on the iron. Then, transfer the waffles right onto the oven or wire rack. The circulating heat from the oven will reduce the dreaded steam and prevent the waffles from going soggy.
It is vital to avoid stacking the waffles in the oven, as this will trap the steam and cause the waffles to go limp. You also don't need to cover them in foil, which will further trap the moisture. Once you're ready to remove the waffles from the oven, you'll have a crispy breakfast waiting for you — that tastes and feels like it just came off the iron.
Static Media owns and operates Tasting Table, Mashed, and The Daily Meal.