Martha Stewart's 12 Best Tips For Baking Cakes
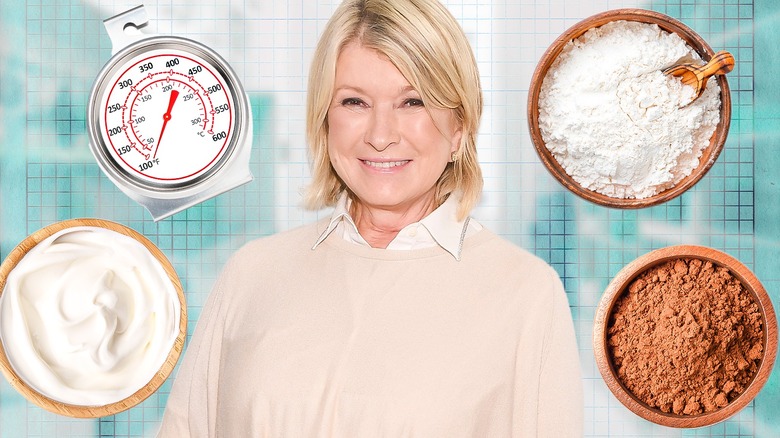
Martha Stewart has been on television, magazine pages, and cookbook covers for decades, and she's definitely not slowing down. With each passing year, she seems to reveal her expertise in something else — from gardening to CBD to cooking microwaved apple pie in prison. But while she is a woman of many talents, she always stays close to her culinary roots: she is a baker through and through.
Stewart has made a career of showing us all how to bake pretty much anything and everything while making even the most impressive desserts look easy. She's baked enough to know how to avoid all the classic pitfalls, troubleshoot when things go wrong, and put something so perfect on the table it belongs in (her own) magazine. Luckily, she's shared plenty of wisdom over the years. From simple yet stunning decorating techniques to secret weapon ingredients, these are Martha Stewart's best baking tips that have taken home cook's cakes to the next level.
Homemade baking powder makes all the difference
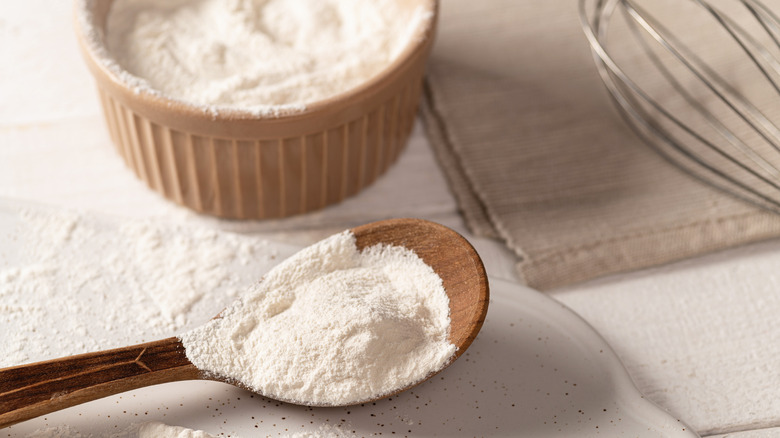
Even an infrequent baker likely has a container of baking powder in their pantry. As a leavening agent, it creates the chemical reaction needed for baked goods to rise. Baking powder is a key ingredient in creating the lift and airy texture of cakes. But as Martha Stewart's website points out, commercial baking powders, while convenient, impart a distinct taste. That's because store-bought baking powders contain the compound sodium aluminum sulfate as a leavening agent. This compound can make homemade baked goods taste metallic.
Stewart's site recommends an at-home baking powder for an improved, from-scratch flavor, and it's very easy. Simply combine a 2:1 ratio of cream of tartar and baking soda for a homemade baking powder with no metallic aftertaste. It can replace baking soda in any cake recipe and will result in a much better flavor with little effort. Just keep in mind that commercial baking powders are double-acting, which means that two chemical reactions take place: one when you combine baking powder with the rest of the ingredients and one when it goes in the oven. Homemade baking powder will be single-acting, so only that first chemical reaction will occur. That means you should get it into the oven quickly after you've added it.
Use a toothpick for perfect ombre cake
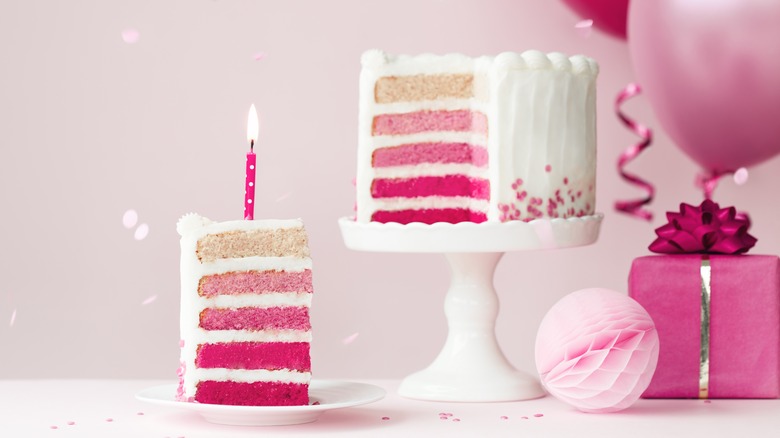
A perfectly executed ombre cake is a show-stopping dessert; when cut into slices, layers of colorful cake are revealed, with each layer's increasingly pigmented hue creating a stunning transition from light to dark shades. But the simple, elegant color gradation of the cake layers can be hard to achieve at home. Martha Stewart's trick for ombre cake is easy and requires no special tools: all you need is a toothpick.
After equally dividing cake layers into separate mixing bowls, grab gel food coloring and a toothpick. From here, Stewart recommends using the toothpick as a ruler to measure the food coloring. Dip the toothpick into the food coloring gel until the toothpick is about one-third covered. Mix that amount into one bowl of batter. Then, simply dip the toothpick further into the gel for each proceeding layer to create an ombre effect. Martha Stewart's method allows bakers to issue a gradual change across each layer's tint rather than simply dropping food coloring directly into bowls and hoping for the best. Since she uses the toothpick as a measuring tool, you can reproduce the tints from your cake over and over as needed. You can even replicate the ombre effect with the cake frosting by using the same toothpick measurements.
Armagnac adds a unique touch

All kinds of alcohol, from bourbon to brandy, make great additions to cakes and other desserts. That's because not only does alcohol unlock more flavor compounds, but it brings its complex flavors to dishes. Of course, not all booze is the same, and each type will impart its flavors and aromas. Martha Stewart's weapon of choice is a boozy French brandy that brings sophistication to a simple bundt cake.
Brandy is an excellent match for cakes and is an especially successful, boozy ingredient for bundt cakes. Traditionally, barrel-aged brandy has subtle notes of stone fruit, vanilla, and maple, with a slight oakiness imparted from the aging process. These flavors can complement and enhance the flavors typically present in a bundt cake. For a twist on this pairing, Stewart uses Armagnac, which has a unique distilling process and flavor and imparts notes of chocolate, dried fruit, and caramel. It's overall profile creates a flavor that other kinds of brandy lack. Stewart employs Armagnac in the batter of her lemon bundt cake, but it can even be added to the butter-sugar glaze that tops the decadent dessert.
Cookies and whipped cream make a simple icebox cake
In Martha Stewart's world, even the easiest recipes make for an elegant dessert. For an impressive centerpiece, Martha Stewart makes an icebox cake by layering cookies with whipped cream. This easy dessert needs no oven, making it one of the homemaker's best and simplest tips for cakes. Try it at home by topping a layer of cookies with a mixture of whipped cream and mascarpone. Continue stacking the cookies and whipped cream, then stick it in the freezer to make an icebox cake that tastes way too good for something with so few ingredients.
Whether you want to follow Stewart's lead and use homemade cookies or purchase them from the store, be sure to use a flat, crunchy variety so it stacks well and remains sturdy after absorbing some of the whipped cream. This icebox cake recipe is more of a technique than a rigid set of rules, so pick your favorite crackly cookie or wafer and go from there.
Closer to the finish, Stewart adds a touch of whiskey to the mascarpone and whipped cream to balance the sweetness and add rich complexity. You can use bourbon or Scotch, depending on what kind of flavors you want to add to your filling. Even the shape of the icebox cake is up to you; use a loaf pan, pie dish, or other baking pan to build your cake before placing it in the freezer overnight.
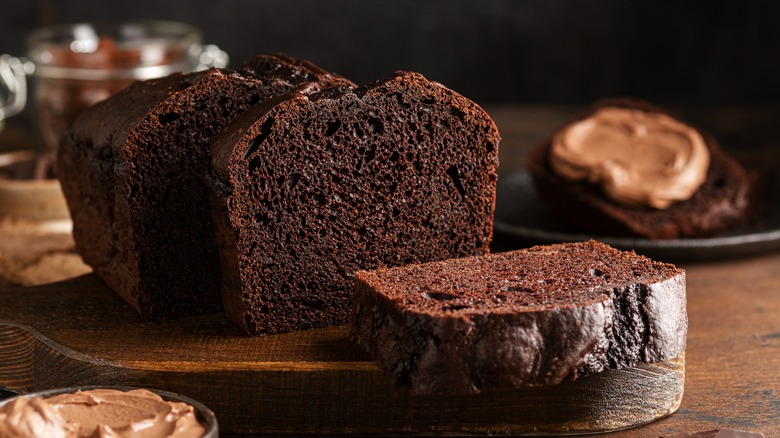
Coat your pans in cocoa powder instead of flour
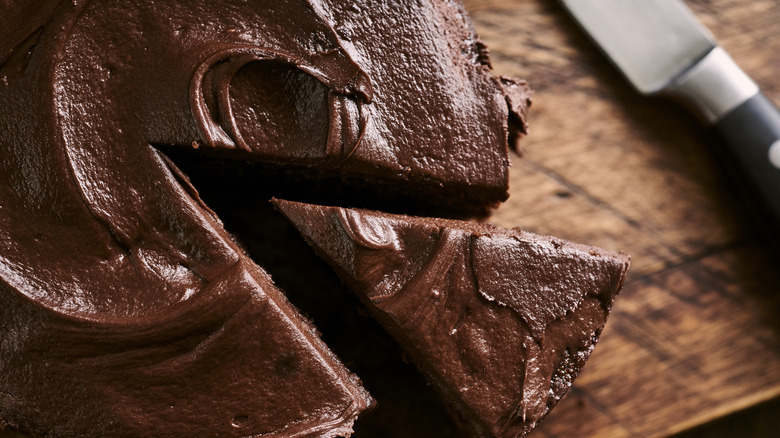
Greasing baking pans with a coating of butter and flour is standard practice for ensuring a nonstick surface. But Martha Stewart has a cocoa powder tip to use during this important prep step, and it is an opportunity to make a chocolate cake extra chocolatey. Instead of using flour to coat the pan, she uses cocoa powder. Not only does it give the cake another element of rich chocolate flavor, but it matches the color of the cake itself, which means none of the contrasting white splotches of flour with the same easy release from the pan.
To use Martha Stewart's tip at home, place a sheet of parchment paper on the bottom of the pan. Grease the pan with butter, including the parchment, and dust with cocoa powder. Tap out any excess cocoa powder and add the batter. Martha Stewart shared this tip as a pairing with the recipe for her Ultimate Chocolate Cake, but it will work beautifully with any of your chocolate cake creations.
Use a thermometer to double check your oven temperature
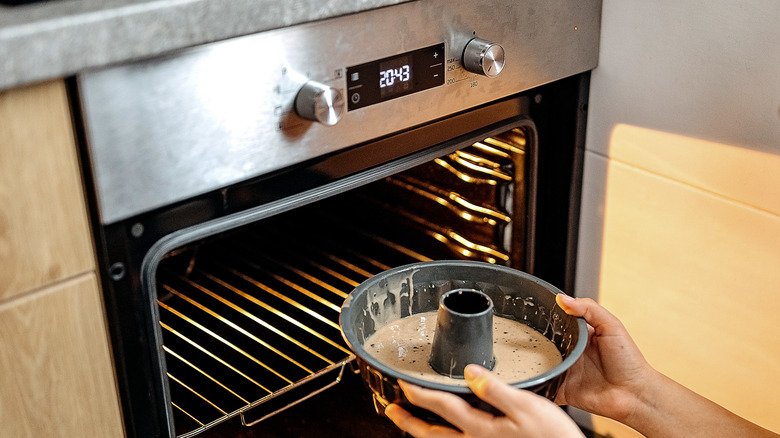
We've all been there: you follow every measurement and step in a cake recipe, and everything seems to be going great. You pull it out of the oven, and ... something is just not quite right. What happened? It's possible that the oven wasn't actually the temperature it needed to be to properly bake the cake. Martha Stewart's oven rules are important to remember when baking cakes. Number one? Always double-check the temperature of your oven.
While ovens allow you to preheat your oven to a set temperature, it isn't as simple as "set it and forget it." Your oven may not be the temperature it says it is. While all ovens will have some natural fluctuation around the target temperature, if an oven's internal thermometer is off, it can ruin your baked goods. Cakes need to be baked very close to the temperatures specified in the recipe to ensure a good final product.
Stewart recommends using a separate thermometer to ensure the cake batter is cooking at the correct temperature instead of relying on the oven's internal thermometer. Once you have the oven temperature right, consider her other tip: make sure the baking pans are placed exactly where the recipe says they should be in the oven. (Hint: hat's probably the center.)
Make a heart shaped cake without a special pan
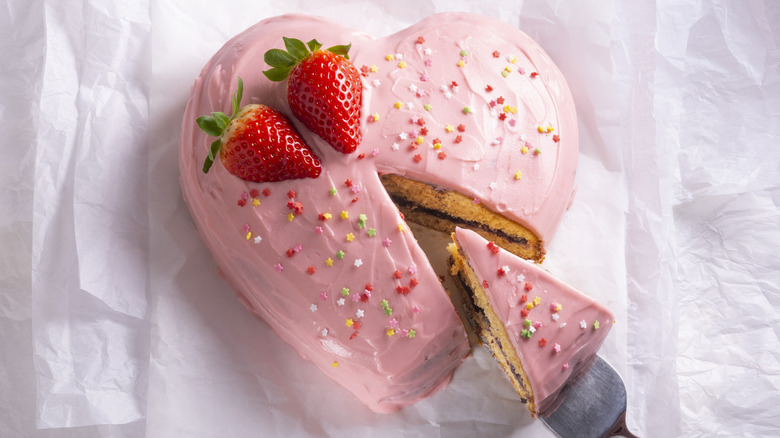
Heart-shaped cakes look simple enough to make, but it's all too easy to come in thinking, "How hard can it be?" and end up thinking, "How did I end up spending so much on cake pans?" Luckily, Martha Stewart has a straightforward method that might be the easiest way to make a heart-shaped cake. It requires no extra equipment or decorating prowess. You just need a round cake pan and a square cake pan, which you probably already own.
Per Martha Stewart's website, you should bake two cake layers: one in a square pan, the other in a round pan. Cut the round cake layer into two equally sized semi-circles. Then, position the square cake layer so that one corner is facing you — it will look like a diamond. Finally, place the two semi-circles up against the top left and right sides of the diamond, like ears (or the humps on a heart). Once it's frosted, the pieces will seamlessly match up, making a perfect heart.
Use sour cream to improve your cakes
One of the hallmarks of a well-made cake is a moist, tender crumb. But trying to add moistness to the texture of a cake is trickier than it may seem. It isn't as simple as just adding more liquid since this will thin out the batter and will likely result in a dense and flat cake. Martha Stewart's clever tip for chocolate cake is adding sour cream to the mix. Not only does sour cream result in a seriously moist crumb, but its tanginess creates a cake with a much more layered flavor.
Stewart's recipe calls for adding a cup of sour cream to her chocolate sprinkle sheet cake to achieve a perfect balance of springy texture and rich cocoa flavor. By not adding additional liquid to the batter, she preserves the light and delicate crumb. Just make sure that when you use room temperature, sour cream in your cake batters, as the homemaker suggests. That way, the batter will stay smooth and lump-free.
Keep cheesecake simple with condensed milk
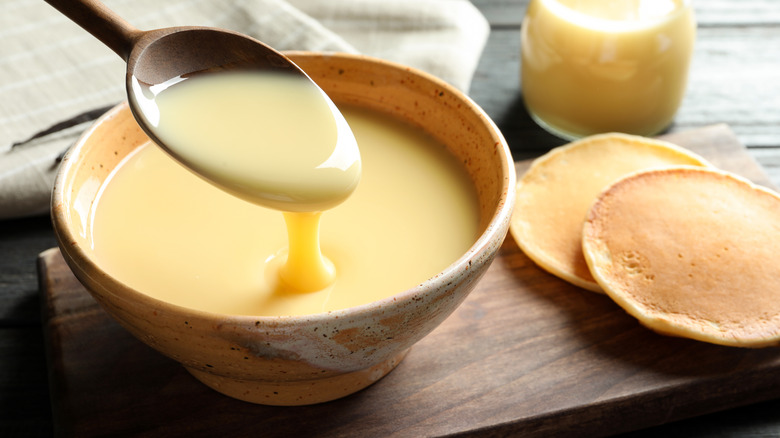
Condensed milk is an ingredient that can feel old-fashioned and unexciting. Its status as a canned product, sitting quietly in the pantry, doesn't always inspire creativity. But its sweet simplicity is what makes it such an incredibly versatile product– it's a favorite of the Martha Stewart test kitchen. One reason she loves condensed milk so much is the unexpected role it plays in an easy, no-bake cheesecake.
Martha Stewart's website points out that the magic of condensed milk is in its simplicity. When milk is reduced, its water content evaporates while its sweetness and flavor become super concentrated. This process results in a rich, thick syrup with a nutty, caramelized taste. Add condensed milk to the cheesecake, and it lightens the cream-cheese-based filling and allows the cheesecake to be set in the fridge instead of the oven. Since condensed milk has all of the flavor without the excess liquid, it keeps cheesecake both airy and solid enough to slice.
Pull out the slow cooker for perfect cheesecake
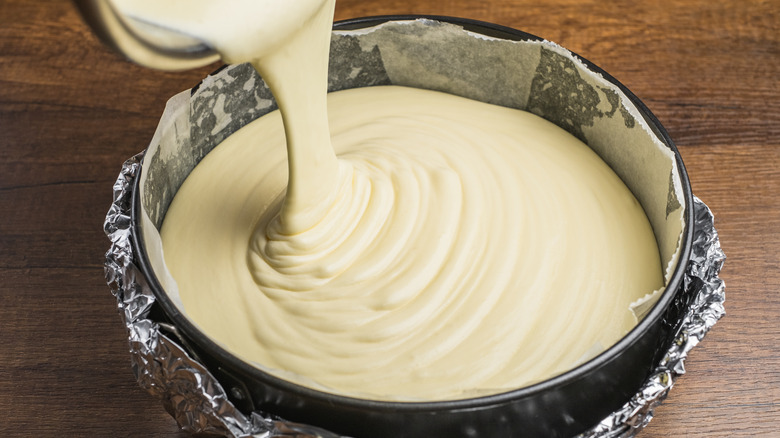
Cheesecakes can be fussy, time-consuming desserts. Most home bakers have a horror story about their cheesecake attempt gone wrong. But one of Martha Stewart's best tips for baking cakes involves an unorthodox solution: baking cheesecakes in a slow cooker.
While slow cookers are usually associated with savory dishes like stews and pulled meats, it's actually the perfect appliance for finicky cheesecakes. Traditionally, a cheesecake is cooked on top of a water bath. This creates steam, which keeps the temperature and moisture surrounding the cheesecake consistent. Using a slow cooker enhances the benefits of a steam bath. Martha Stewart's cheesecake recipe suggests pouring water into the slow cooker, then propping the cheesecake pan on top. The cheesecake should be cooked for about two hours on high heat, then left to cool in the slow cooker for about an hour.
The slow cooker will gently cook the cheesecake at a low and consistent temperature, which will help prevent an overcooked and cracked final product. Plus, the steam will slowly dissipate once the cooking time has ended, making it a perfect place for the cheesecake to rest before it moves to the fridge for chilling. To ensure you don't miss out on the benefits of using a slow cooker, don't remove the lid and let the all-important steam escape. And keep an eye on your cheesecake to get a better idea of when it's done cooking; Stewart notes that "'baking' in a slow cooker needs to be watched closely."
Avoid skin on lemon curd with plastic wrap
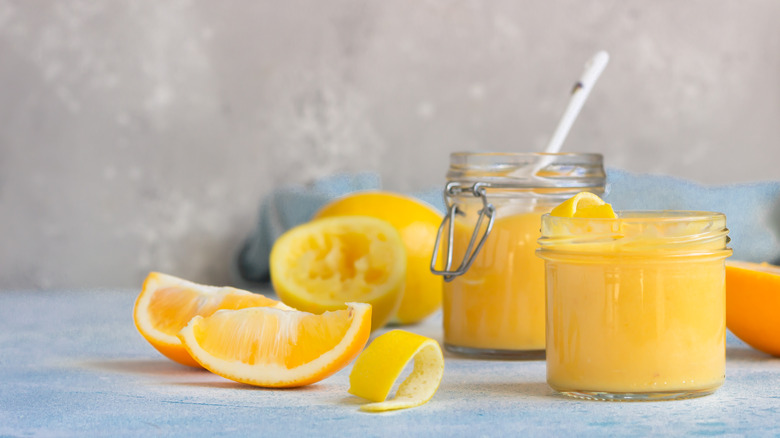
Lemon curd is an elegant and classic topping or filling for cakes. Made from lemons, sugar, and egg yolks, the ingredients are gently cooked until they thicken into a smooth, custard-like confection that retains the brightness of a fresh lemon. Unfortunately, this simple filling is not without its pitfalls; as it cools, it continues to thicken, and eventually, an unappetizing film forms on the surface. Martha Stewart, of course, has a quick and easy way of preventing this problem: plastic wrap.
A skin forms on lemon curd when it is cooled and exposed to air, so Martha Stewart's website suggests pressing plastic wrap directly onto the surface of the curd. Just stretching the plastic wrap across the curd's container or loosely covering it won't do the trick — air shouldn't be able to access the surface at all, so make sure there are no pockets or bubbles. Then, refrigerate until you are ready to put together your cake. As a bonus, the plastic wrap will keep any wayward flavors from penetrating your curd. Martha Stewart's plastic wrap trick will also work with puddings and custards, which suffer from the same skin-forming issue.
Perfect caramel is all about the temperature
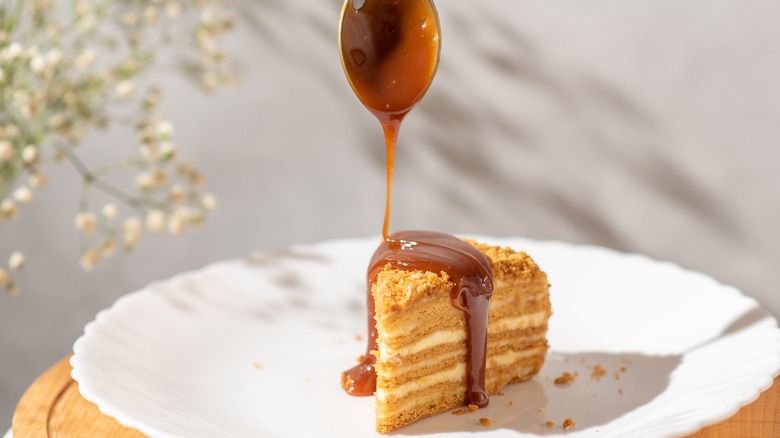
Making caramel is an intimidating process, and it's an easy one to mess up; if the caramel is overheated, it can burn or become overly stiff. It will then become difficult to spread or drizzle on your cake. It is tempting to swear off making caramel forever, but Martha Stewart has a secret solution for perfecting the Mile High cake. One of her best tips for a perfect caramel for your cake is to just follow the numbers: wait for the right temperature for the ideal caramel finish.
For her Mile High cake, Martha Stewart sandwiches layers of cake with a thick spread of caramel, resulting in a towering cake. For many, the idea of working with caramel to stack a cake sounds overwhelming. But coating the cake layers takes almost no effort if you take the caramel off the heat at exactly 238 degrees Fahrenheit. She told Today! that caramel brought to this temperature "spreads by itself when you let it sit for a minute," so you don't need to mess with it too much once it's poured into the center of each cake layer.
Static Media owns and operates Mashed and Tasting Table.