11 Hacks That Will Help You Open Stubborn Jars
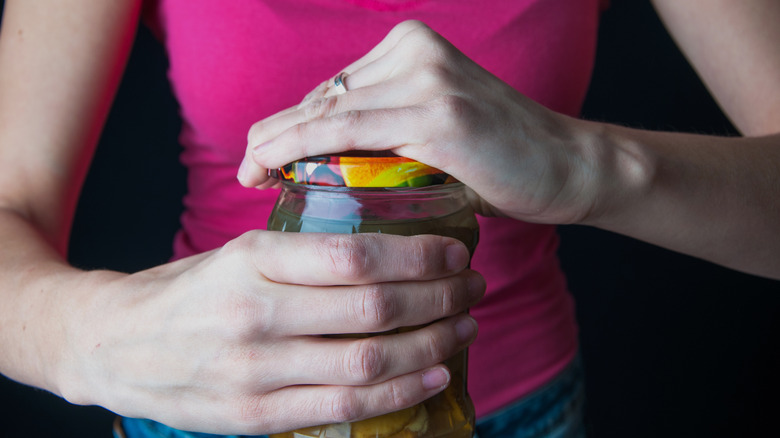
It's pretty frustrating trying to open a stubborn jar lid that just won't budge — especially when you're hungry. Individuals who have reduced muscle mass or those living with arthritis, carpel tunnel syndrome, or hand injuries may have particular difficulty twisting jars open. But most of us have been there, even if we don't fall into those categories, and skipping our gym workouts doesn't necessarily explain the issue. Some jars can be incredibly hard to open, and there's a scientific reason for this. When warm or hot food is poured into a jar and the lid is sealed, the small amount of air left at the top of the vessel contracts when it cools. This creates a tight seal and makes the little safety button on the top of the jar pull tightly downward. You know you've broken the seal when that little button pops up after opening, but opening that jar can sometimes take a lot of effort.
Luckily, many creative hacks can help you get those stuck jar lids off, and, while there are tools that can be purchased to help you open jars, most of these tips use items that are commonly found in the kitchen or somewhere else in your home. Check out these ideas to help solve your jar-opening woes. They're worth a try so you can finally hear that satisfying pop when the once impossible-to-remove lid comes off with ease.
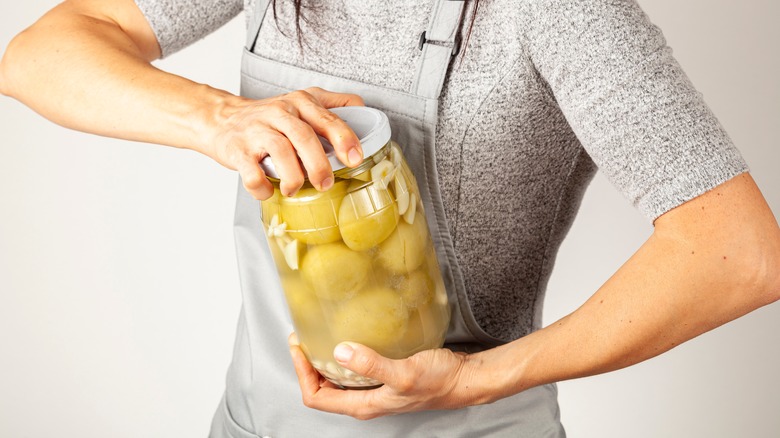
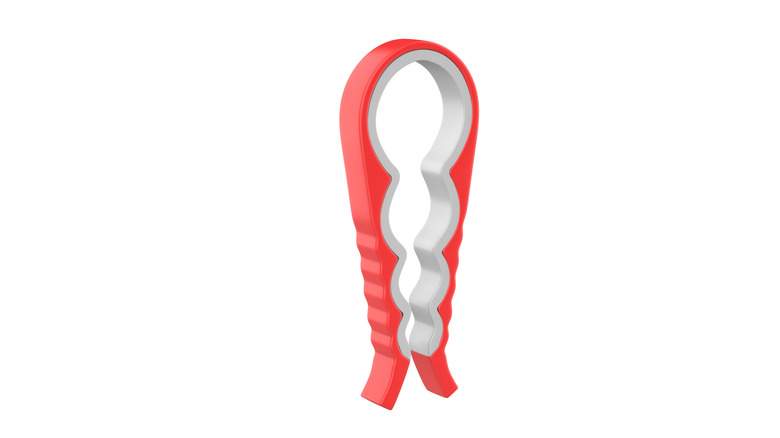
Get more traction with a rubber gripper
Struggling to get a good grip on the lid is a major impediment to twisting it away from a jar. Anything that makes your grip more slippery will make this harder, like a wet jar, damp hands, a bit of cooking oil on your fingers, and — funnily enough — both dry skin on your hands or overly moist skin from applying moisturizer. Improving your grip with traction will help you get that lid off more easily. Simple rubber gripper pads have been around for a long time – maybe you even saw one in Grandma's kitchen when you were growing up. This simple square of thin, rubbery material helps you to clamp down on the jar and prevents it from sliding out of your grasp when you turn the lid.
Some of these pads are made of rubber and may have little holes in them. There are also more modern versions made of thicker silicone or other non-slip materials. Both typically have some kind of texture, like raised bumps on the surface, to improve your grip.
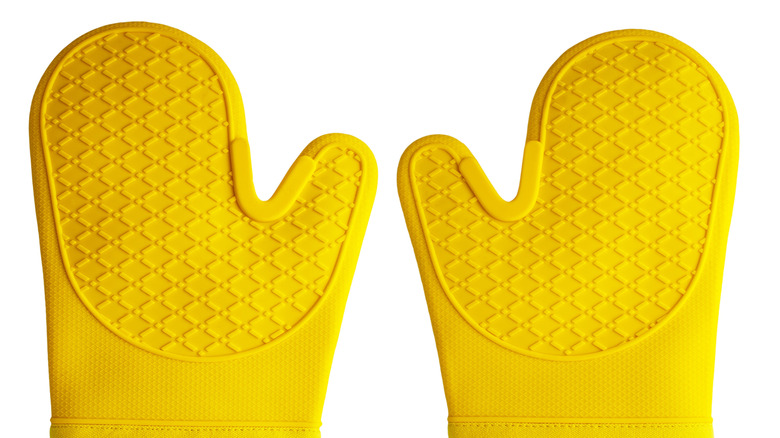
If you don't have any of those lying around, try wearing rubber dishwashing gloves or a silicone oven mitt. A leather work glove is another good choice if you have one lying around. Another good DIY hack is to cut off a small, unused piece of the non-slip material that's used under rugs to keep them from sliding around on the floor and use it on a jar instead.
Carefully use a knife

The seal keeping stubborn jar lids tight can be hard to break, but if you can get a little air into the small space between the jar and the lid, it could break the seal and allow the jar to open easily. You can do this by turning the jar upside down and — very carefully — working the point of a knife into that tight space and moving it around. For this method to succeed, you may have to do it in more than one place along the lid.
Be very careful when attempting this, in case the knife slips out. A relatively dull butter knife is a good first choice for safety reasons, though you should still work slowly and with full attention on what you're doing. You may also want to spare your best knives during this operation since the tip might get slightly bent out of shape when you move it from side to side. If that's a concern, keep an old knife in the kitchen just for this purpose. Protective gloves are also likely to be a smart addition, such as cut-resistant ones used by people filleting fish.
If you're an oyster lover, you just may be in luck. Oyster knives are good tools to open jars because the same design that helps them wedge inside a shell and twist it open can work on a jar, too. They feature a triangular blade and a thick handle that's easy to grip.
Open a jar with a rubber band

Many of us have a pile of random rubber bands sitting around in our kitchen, perhaps lying forgotten in a drawer or dangling from the doorknobs. While the usual uses for these fastening devices are well known, they have another handy dimension that may be surprising. If you need a last-minute solution to open a jar and you don't have any dedicated tools on hand, reach for rubber bands to help you get the job done. This jar-opening hack from Martha Stewart can work, though only under certain conditions.
You'll need to place the rubber band tightly around the edge of the lid, so choose a rubber band that will fit snugly, especially if the jar is small. You should favor wide rubber bands over thin ones, which won't give you as much surface area to hold on to. Another trick is to layer multiple rubber bands on the same lid. We know that these may not work as well as an actual gripper tool, but they can increase both the grippable area on the lid and the likelihood of successfully opening it.
Try a bottle opener
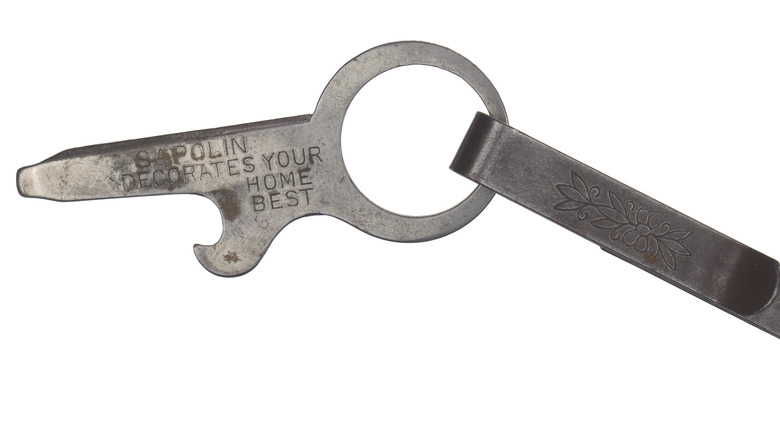
While bottles and jars are different vessels, you can use a bottle opener to open the toughest jars. There is more than one type of bottle opener, however, so make sure you use the right one for this task. You'll need the kind with the two sharper U-shaped grippers, rather than the flat device with a wide hole in the middle like you often find on the top of a corkscrew.
To open the jar, wedge the bottle opener under the jar lid just like you would do with a bottle cap, then carefully start to pry it open by planting the top piece on top of the lid and pulling it up. Once you hear or feel a little pop, stop. Stop there anyway even if you didn't notice the seal breaking, and see if the jar will open before trying again. You only want to break the seal and let a little air in so you can twist off the lid normally. If you pry it open too much you can distort the shape of the lid, making it difficult to put back on and maybe even impossible to remove.
Hold the jar under hot running water
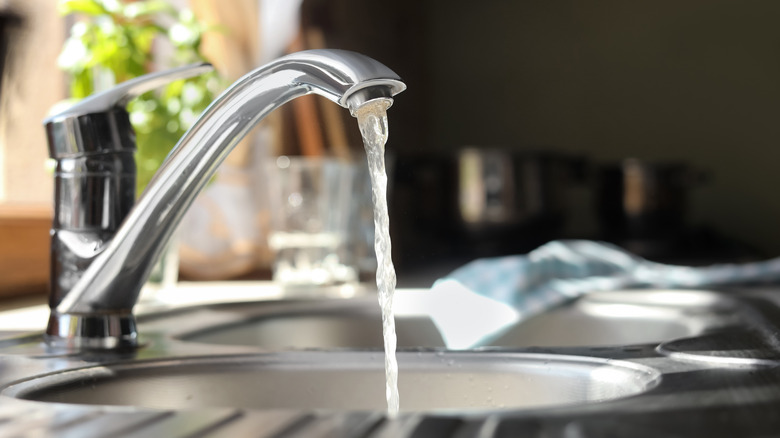
This tip doesn't require any special equipment at all – just the water that comes out of your kitchen tap. There are a couple of reasons why hot water is an effective way to open stuck jars. Hot water running over the metal lid will warm it up enough to expand a little as a result. Just 30 seconds should be enough. The water warms up the glass too, but that happens more slowly and shouldn't affect the jar.
Alternatively, you can waste less water by filling a bowl with hot water and inverting the jar into it. Let it sit in the hot water for the same half minute. This might be enough to loosen the tight seal and allow you to twist the jar open. This method works especially well on jars of sweet or syrupy foods like honey, molasses, or jam that have already been opened but got stuck when the sticky liquid hardened on the inside of the lid.
If you try this water trick, make sure the water isn't so hot that you could hurt your hands. Also, use a potholder or something similar to protect yourself when you open the jar. Since heat is the reason this method works, you could try slowly and gently warming the lid with a hairdryer to achieve similar results.
Cut open a spare tennis ball

This unique tennis ball hack for opening jars doesn't involve something you'll normally find in the kitchen. Instead, head out to the garage and grab an extra ball from your tennis bag. Of course, if it's been a while, you might want to give it a good dusting first and avoid the one you've been using for games of fetch with the dog. If it doesn't seem like a fuzzy green tennis ball will open a jar on its own, you're right. You're going to have to cut it open to expose the rubbery interior of the hollow ball. Do this very carefully with scissors, a box cutter, or a sharp knife. You'll only need one half of the ball, so go ahead and gift the other half to someone else who may also need an unconventional jar-opening tool in the kitchen.
Place one half of the tennis ball over the jar you're trying to open, rubber side down, and squeeze it firmly while twisting the lid open the usual way. The rubbery inner surface grips the lid and works according to the same principles that a rubber gripper pad does. Additionally, the soft and flexible outer surface of the tennis ball is easy to hold while you twist.
Use a dedicated jar opener
While some jar-opening hacks use common objects that are likely lying around your house, it's possible to purchase a dedicated tool solely for opening jars. If you have arthritis or other physical conditions and routinely struggle to open tight jars, for instance, a jar opener may be a good investment.
These sturdy devices work well and come in a variety of shapes. Some have an adjustable straight bar that grips the lid from above before you turn it. There is even a mounted style that you can attach to the underside of a cabinet. Performing a quick online search will provide you with more options than you could ever use.
What these openers all have in common is they use simple physics to surround a jar lid and provide the needed torque to open it. While many jar openers are manual, it's possible to purchase a hands-free battery-operated jar opener that works similarly, only with the press of a button that makes the job even easier for those who need the extra boost in power to open a jar.
Strike the jar
Striking or banging the jar may generate enough force to break the seal on the lid and allow you to twist it open. However, it's very important to use caution with these methods since you're probably working with a breakable glass jar. First, you may want to try the water hammer trick to open a stubborn jar. Invert the jar at a 45-degree angle, holding it in your non-dominant hand. Use the palm of your other hand to strike the bottom of the jar. You have to do this fairly hard to move the contents forward and increase the pressure on the lid. If you're successful, the seal will break and you can open the jar normally.
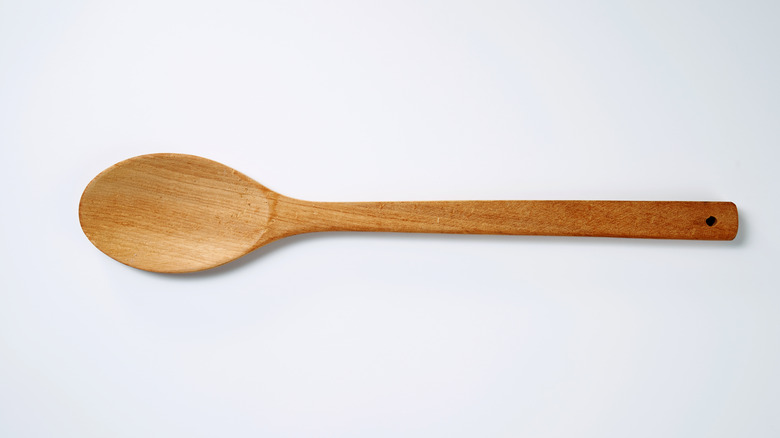
If that's too violent for your tastes or you want to keep your palm out of the line of action, try tapping the jar firmly with a wooden spoon. Use the spoon to hit the bottom of the upside-down jar, or turn the jar right side up and hit the place where the jar and the lid meet. The idea is to cause the lid to loosen a little.
Finally, you can use the kitchen counter itself. Carefully but firmly strike the jar on the edge of the counter. Aim to hit that same place where the lid and jar join. If this method makes you nervous, wrap the jar in a towel first with just the top sticking out.
Pierce the lid
Before you consider piercing the lid, note that this is a somewhat extreme method that should be undertaken with caution. But, if your guests are about to arrive and you're stressing out because you can't open a jar of capers for puttanesca or a jar of roasted red peppers for bean dip, then try one of the other methods. Stress can make it hard to be careful with sharp tools, after all.
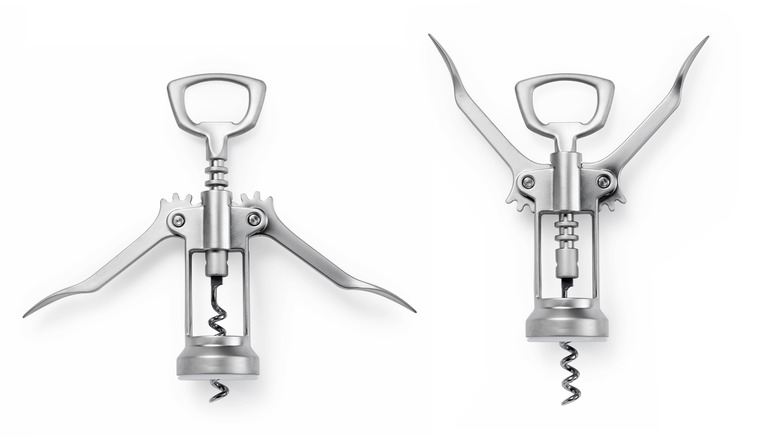
Piercing the lid with a sharp object will hopefully allow air to enter the jar, breaking the seal and releasing the pressure that was holding the lid tightly closed. One way to do this is with a corkscrew. Using the pointy spiral that enters the cork of a wine bottle, pierce the top of the jar lid. Another way to put a hole in the lid is with a hammer and nail. We recommend sterilizing the nail first for food safety's sake. However you go about it, work slowly and carefully to keep from injuring yourself.
This method also means you can't reuse the jar. If you don't use all the contents of the jar after making a hole in the lid, store the leftovers in a separate container, since the jar will no longer be airtight.
Open a jar with duct tape
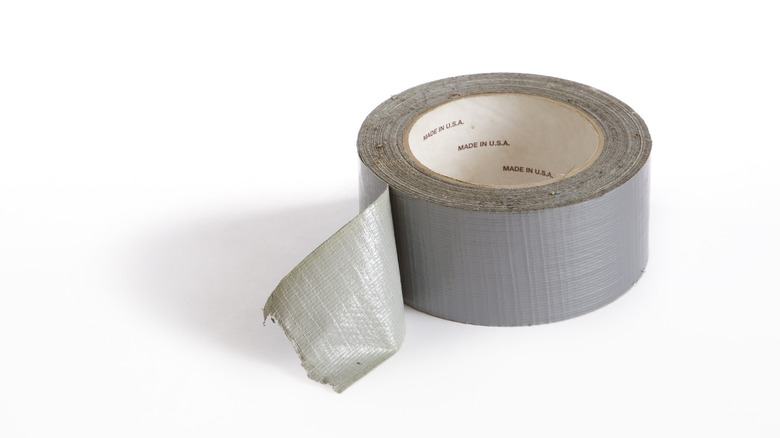
Duct tape is a common household item that's normally used to hold any number of things together, but it didn't do there. Surprisingly enough, this strong and sticky tape can also be roped into opening jars. To accomplish this task, first place the tape around the circumference of the lid, wrapping it at least one-quarter of the way around and lining up the lower edge of the tape with the lower edge of the lid. Don't cut the tape yet, as you'll use a tail of duct tape to pull on the lid. Also, make sure that you're applying it in the right direction so you won't be tightening the lid when you pull on it.
Next, fold down the top part of the tape and stick it onto the top of the lid. Now unroll about a foot of tape and cut it off the roll. Fold this section of tape in half lengthwise to strengthen it and turn it into a pull handle. Now all you have to do is hold the jar in one hand and pull the tape tail firmly with your other hand. With the extra leverage, you can more easily twist the lid off so you can open it.
Take cues from people with arthritis
This next tip isn't a single hack but a set of techniques often used by people with arthritis who are undergoing occupational therapy to help them better accomplish daily tasks. Not everyone has arthritis and other joint or strength-affecting disorders like carpal tunnel syndrome, but the following guidelines can be helpful for anyone struggling with a jar lid.
For one technique, first place the jar on a surface that will prevent it from slipping, like a silicone mat or something rubbery with a slightly bumpy texture. Consider also wearing leather gloves, gardening gloves, or dishwashing gloves to give you an even better grip on the lid. Make sure to keep jars close to your body when you're trying to open them. This will make both the jars and your body more stable since you'll be engaging your core muscles instead of mostly your arms. If you're having trouble holding onto the jar, try hooking it in your elbow.
For longer-term solutions, try exercises that build strength in your grip that can help you open jars. Look for devices you can squeeze, like a squishy ball to start. At the grocery store, you can also sometimes choose jars with easier-to-open plastic lids instead of metal ones. See if you can buy the same product in a different kind of packaging that's not a jar, too.