The 3-Fold Technique For Perfectly Layered Sandwiches
There's something undeniably satisfying about biting into a well-constructed sandwich wrap. Layers of flavor and texture can elevate a simple dish into a culinary delight. However, achieving that perfect balance of ingredients can be a challenge. Enter TikTok's viral 3-fold technique, which ensures your sandwich and sushi wraps are delicious and well-balanced. You, too, can transform everyday meals into culinary masterpieces by choosing a suitable base, mastering the art of layering, and executing a flawless fold.
Whether preparing a quick lunch, a picnic basket, or a party platter, this technique will ensure that your sandwich wraps taste fantastic and look incredibly delicious. We hope you are ready to delve into the secrets of this technique and how it can take your wrap (or should we say "fold") game to the next level. So, get creative, experiment with different ingredients, and enjoy the satisfaction of crafting the perfect handheld meal, no matter what you're in the mood for!
Choose your base and set your layers
The first step in creating a delectable sandwich wrap is choosing a suitable base. Whether you choose bread, tortillas, pita, or nori sheets, your choice will set the foundation for your culinary masterpiece. Tortillas are the go-to choice, not only because flour tortillas are versatile and come in various sizes, but they also are available in whole-grain or spinach, which add a nutritional twist and a pop of color. If you prefer an even lighter option, consider using large, pliable lettuce leaves like iceberg or butter, which provide a satisfying crunch and freshness.
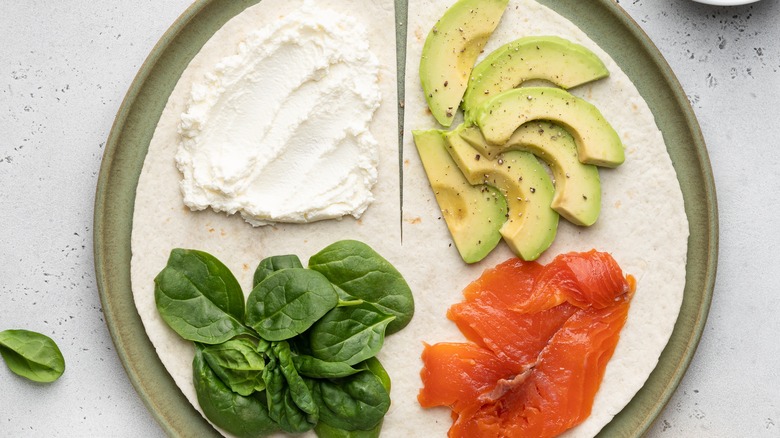
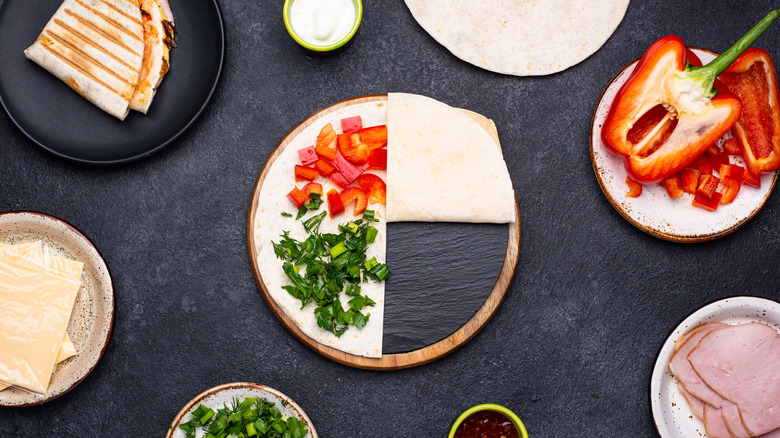
The success of the 3-fold technique depends on proper layering. With your base laid out, make a cut from the center to the edge of your wrap. From there, start with a thin layer of condiments or spreads on your base, such as mayo, mustard, pesto, or hummus. Ensure the condiments and spreads reach the edges, as these ingredients act as a glue that hold the protein layer in place.
Next, add your proteins; this layer should be evenly distributed on the next quadrant because it doesn't have a sandwich layer between the first. For the next quarter, spread out your cheese for a delightful melt and added creaminess. Finally, a vegetable layer lets you get creative and add crunch and freshness. Thinly sliced cucumbers, tomatoes, lettuce, bell peppers, red onions, and pickles are fantastic choices. An even distribution of all the ingredients helps maintain balance in the sandwich bite.
Executing the fold
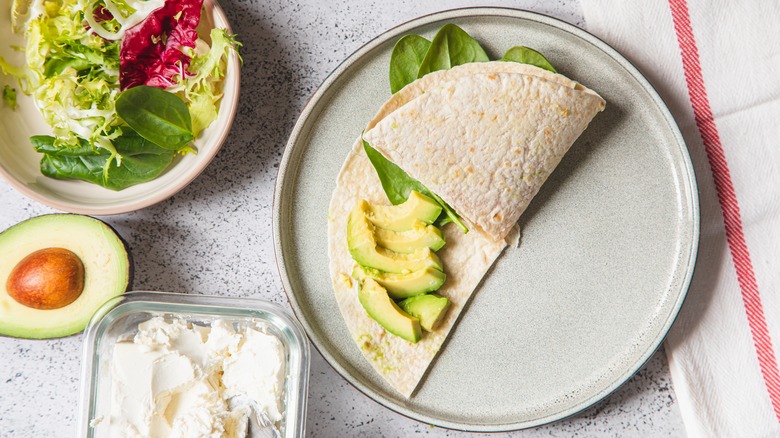
Now that your sandwich wrap is filled to perfection, it's time to execute the final (and most critical) step: the fold. Grab the corner of the condiment quarter and fold it onto the protein quadrant. From there, gently press each "slice" onto the layer below it, moving from one to the next. Continue to move, applying pressure to keep the contents secure. Once folded, with any space available, get creative and consider tucking in extra options like avocado slices, bacon bits, olives, or even a sprinkle of fresh herbs.
To take this 3-fold technique to the final level, consider adding heat. By warming the sides of the wrap — either in the air fryer, toaster, or on the stove — you can achieve melty, cheesy goodness (which, let's face it, makes everything better). When finished, this clever sandwich innovation should be ready to dig into — without a mess!