Simple Classic Vanilla Pudding Recipe

There's nothing like a delicious dessert to motivate you to step into the kitchen. When the recipe in question requires less than 20 minutes of hands-on work, you can bet our interest is piqued. Recipe developer Melissa Olivieri, aka The Olive Blogger, brings us this simple classic vanilla pudding recipe that is sure to whet your appetite. She is a huge fan of the straightforward dessert and notes, "this is a traditional version so I have kept it sweet and simple."
You'll only need a handful of ingredients to whip this up, and most of the recipe time involves letting the pudding chill in the fridge. Meanwhile, take the time to chill out yourself, knowing that a sweet and creamy dessert is on its way. The pudding's white canvas is the perfect backdrop for additional garnishes, and Olivieri comments that "it can be dressed up with fresh fruit or chocolate chips if you are looking for a more decadent treat." With so many ways to jazz it up, you can easily serve this one over and over without anyone being the wiser.
Gather the ingredients for this simple classic vanilla pudding recipe
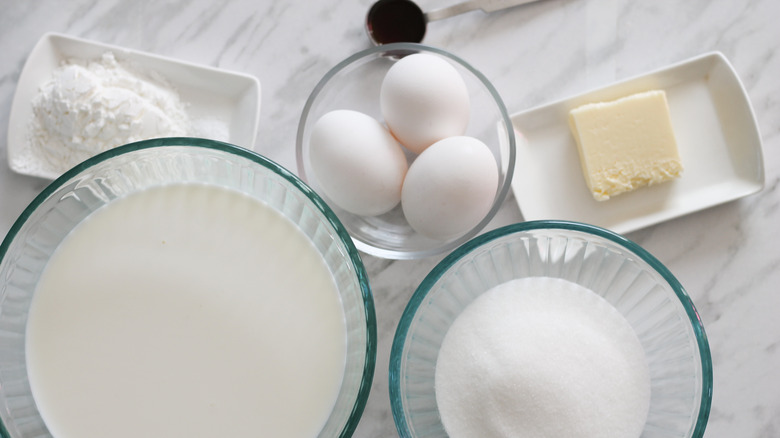
The steps follow quickly, so get a head start by assembling your ingredients. You'll need 3 cups of whole milk, ¼ cup of cornstarch, 3 egg yolks, ½ cup of granulated sugar, a pinch of salt, 1 teaspoon of pure vanilla extract, and 1 tablespoon of butter. Olivieri emphasizes to "always use the best quality vanilla you can afford." While substitutes might be masked in other preparations, she cautions that "you can really taste it in this recipe so using an artificial vanilla would not be ideal."
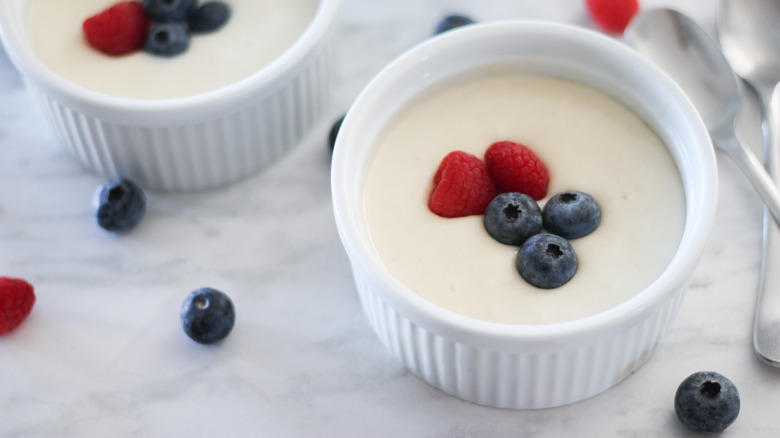
As Olivieri describes, garnishes can take this simple pudding up a notch. She shares, "I love to add in fresh berries, and in the summer [I] will thinly slice peaches to add to the top." Alternatively, she notes that "you can even mix them in if you chop them up, just be sure to allow the pudding to set in the fridge first before adding your flavorings."
Prepare the various mixtures

You'll need both a small and medium-sized bowl, as well as a medium pot. In the small bowl, whisk the cornstarch along with ⅓ cup of milk, then set it aside. Add the egg yolks to the second bowl and whisk them until smooth. Set this bowl to the side as well.
Place the pot on the stovetop and pour in the remaining 2 ⅔ cups of milk. Then add in the granulated sugar and a pinch of salt and mix. Bring the contents of the pot to a very gentle simmer.
Combine the hot milk and egg yolks
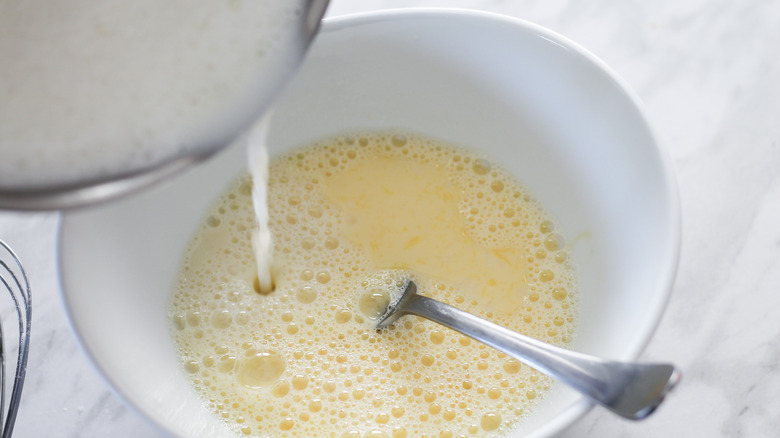
Now, carefully pour about ½ of the hot milk mixture into the bowl with the egg yolks as you whisk. It's important to continue to stir the mixture, as Olivieri explains that you want to prevent the eggs from curdling due to the difference in temperature.
Cook the pudding until it thickens
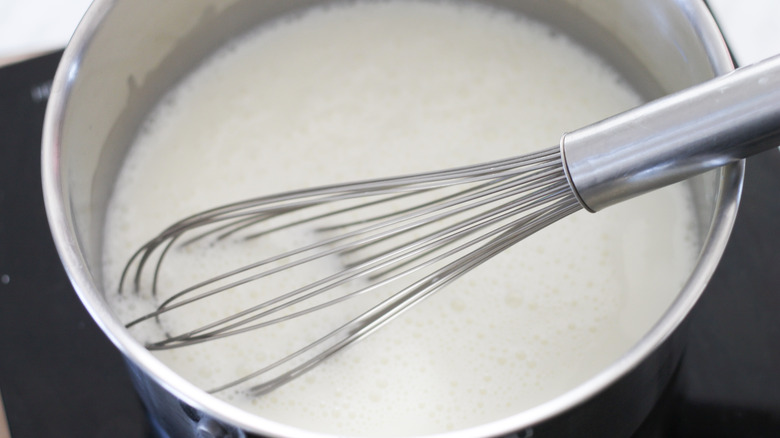
Pour the egg mixture back into the pot with the milk and dump the cornstarch mixture in too. Turn the heat to medium-low as you keep whisking the contents. You'll notice the pudding consistency will begin to thicken. At this point, give it 1 minute on the stovetop — don't stop whisking. Olivieri warns against cooking it for longer, since the pudding will finish thickening in the refrigerator.
Whisk in the final ingredients
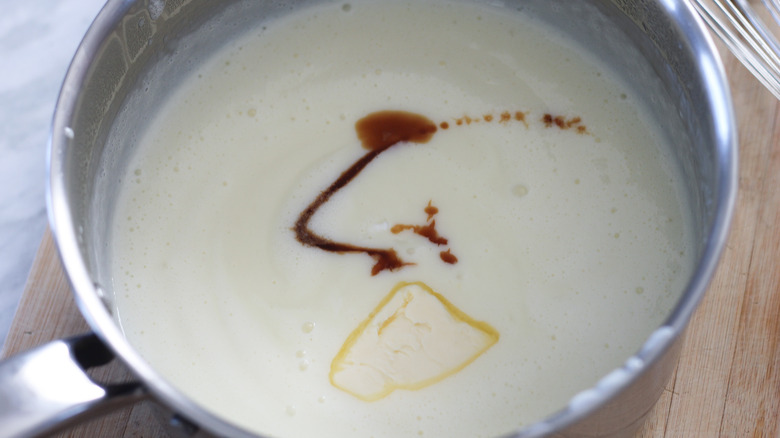
Remove the pot from the heat and add in the pure vanilla extract and butter. Whisk the ingredients until they are combined and the mixture is smooth.
Chill the pudding to set
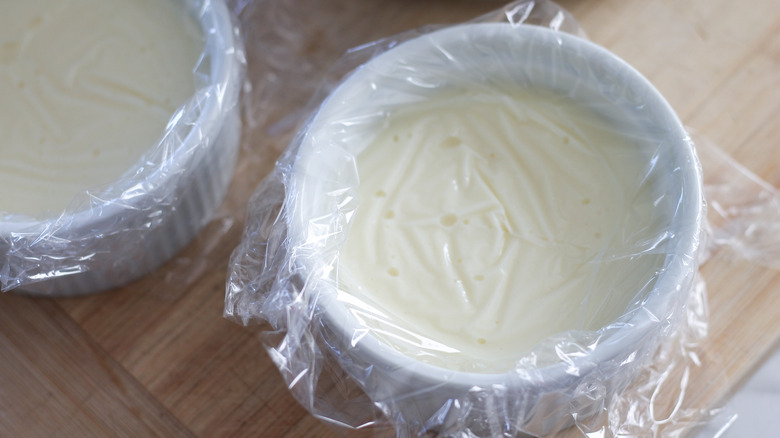
You can make individual puddings by dividing the mixture into four ramekins or pour it into one larger dish. Place a piece of plastic wrap over the dish, and gently press it down so that it touches the surface of the pudding. Olivieri explains that this step is meant "to prevent any film from forming," so you're left with a smooth top.
Transfer the dishes to the refrigerator and let the pudding chill for 6 hours or overnight.
Garnish and serve this tasty vanilla pudding
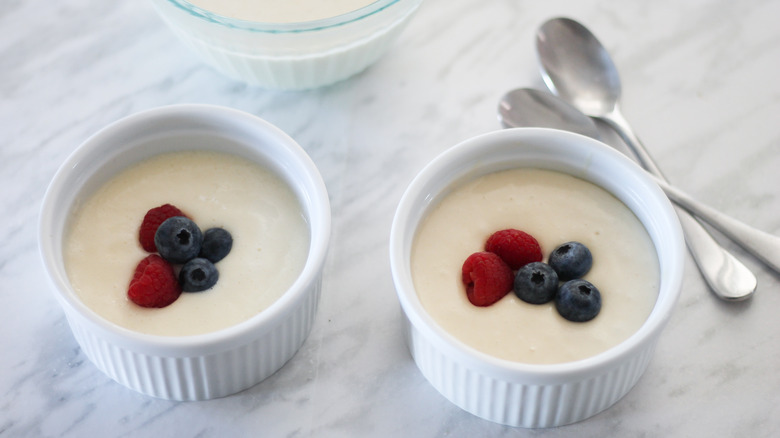
When you are ready to serve the pudding, garnish it with fresh berries or your favorite fruit or flavorings for an added touch.
This simple classic vanilla pudding is a great option to serve to guests since it has to be prepared ahead of time. You can even get an extra head start by making it up to three days in advance and keeping it chilled. However, Olivieri adds, "I wouldn't advise any longer than that."
Simple Classic Vanilla Pudding Recipe
Classic and sweet, this vanilla pudding recipe will become a go-to in your dessert repertoire.
Ingredients
- 3 cups whole milk, divided
- ¼ cup cornstarch
- 3 egg yolks
- ½ cup granulated sugar
- pinch of salt
- 1 teaspoon pure vanilla extract
- 1 tablespoon butter
Optional Ingredients
- fresh berries, for garnish
Directions
- In a small dish, whisk ⅓ cup of milk and the cornstarch, then set aside.
- In a medium bowl, whisk the egg yolks and set them aside.
- Place a medium-sized pot on the stovetop and add the remaining milk, sugar, and salt.
- Mix the contents and allow the mixture to come to a very gentle simmer.
- Pour approximately ½ cup of the hot milk mixture into the bowl with the egg yolks, whisking constantly.
- Pour the egg mixture back into the pot along with the cornstarch mixture.
- Cook over medium-low while whisking constantly as the pudding starts to thicken.
- Continue cooking it for 1 minute once it starts to thicken.
- Remove the pot from the heat and add in the vanilla and butter, whisking to combine.
- Pour the mixture into small dishes or combine it all into one large dish.
- Place plastic wrap over top and press down until it touches the pudding to prevent a film from forming.
- Place the pudding in the fridge to chill for 6 hours or overnight.
- Top with berries as a garnish if desired and serve.
Nutrition
| Calories per Serving | 300 |
| Total Fat | 11.5 g |
| Saturated Fat | 6.2 g |
| Trans Fat | 0.1 g |
| Cholesterol | 135.5 mg |
| Total Carbohydrates | 41.6 g |
| Dietary Fiber | 0.1 g |
| Total Sugars | 34.4 g |
| Sodium | 121.8 mg |
| Protein | 7.4 g |