Bread Baking Mistakes Everyone Makes

We may receive a commission on purchases made from links.
There's nothing more comforting than the smell of freshly baked bread, yet the daunting prospect of making your own means that many people only experience it as they walk into a bakery. Some bread recipes are lengthy, but, for the most part, they are fairly straightforward. Nevertheless, it is surprisingly easy to end up with bread that's less than spectacular. And while you can use it for bread crumbs, savory bakes, or croutons, there are reasons why it's not working out.
The more experience you have baking bread, the easier it is to see how different elements of the process affect the result. There are a lot of moving parts, from the ingredients and measurements to the proofing, kneading, and baking. While it might seem simpler to swing by the bakery, there's no need to be intimidated once you get the hang of the basics.
If you're a novice bread baker, you've come to the right place. We're breaking down common bread-making mistakes so that you can feel confident in doing it yourself. And you should: HuffPost reports that research shows it can have therapeutic and meditative effects. Plus, you end up with fresh bread (and that heavenly smell)!
Using the wrong type of flour
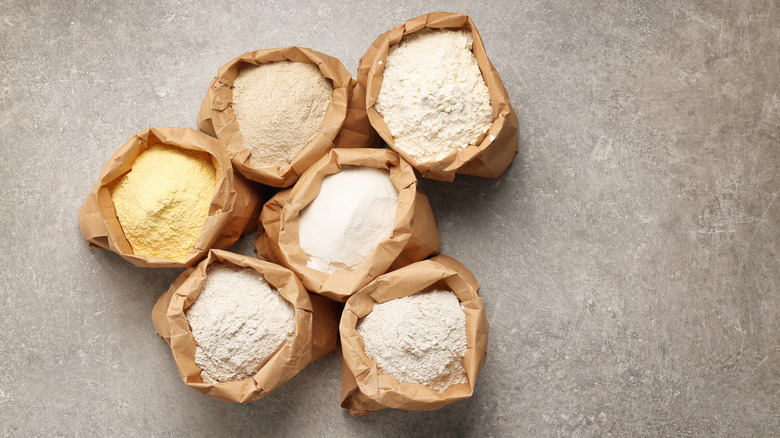
All-purpose, pastry, bread, self-rising, gluten-free, spelt, rye, pumpernickel, and whole wheat are among the many flour options available for purchase. While using novel flours is a great way to experiment, your bread recipe may need to be adjusted to accommodate your choices.
If you're unsure about where to start, bread flour is a good place. Bob's Red Mill explains how it differs from all-purpose, noting that the protein content is greater (12% to 14% compared with 10% to 12%, according to Food Network). This allows the dough to grow in height instead of splaying out. If your bread is consistently dense and falling apart, the protein levels may be to blame; look for a minimum of 10%, per Foodsguy. You can typically find the value on the packaging, or you can use the information from the nutrition label to calculate the amount of protein.
Meanwhile, Bob's Red Mill notes that higher protein levels in bread flour mean more gluten, which equates to greater elasticity — exactly what you're looking for to create a pleasantly springy bread dough. Alternative flours vary in both protein and gluten levels, so be sure you know what you're working with. Experimenting with different types of flours can yield delicious results, but, to be successful, you're best off using a recipe made with the specific flour in mind. Measurements and cooking time can vary, so avoid simply substituting flours without considering the big picture.
Not measuring your ingredients precisely
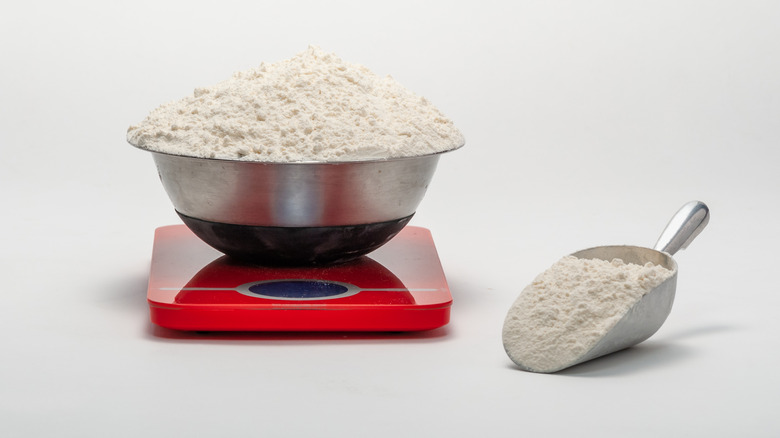
"A pinch of this" and "a splash of that" might be your motto when you're cooking, but precision is of utmost importance when it comes to baking. While it might seem excessive, a digital scale is the ideal piece of equipment for baking bread. King Arthur Baking highlights that measuring cups are surprisingly inaccurate, which Food52 confirms in an experiment with different brands.
Besides the fact that you're already starting off with questionably accurate equipment, your own technique for measuring ingredients affects the outcome. Take flour: Whether you scoop it, level it off, sift it, or pack it down will have a huge influence on the result. There's also the fact that European and American measuring cups differ slightly (via Nigella). Furthermore, Taste of Home notes that a cup of flour varies in weight depending on the type. Those are a lot of ways to be a little bit off with your measurements, and with bread, a little is a lot.
Since the ratio of water to flour can be the factor that separates a perfect loaf from a glutinous or dry one, it's worth taking the time to get your quantities right. If you're planning to bake bread regularly, the small investment will provide you with a huge return: delicious bread.
Forgetting to add salt
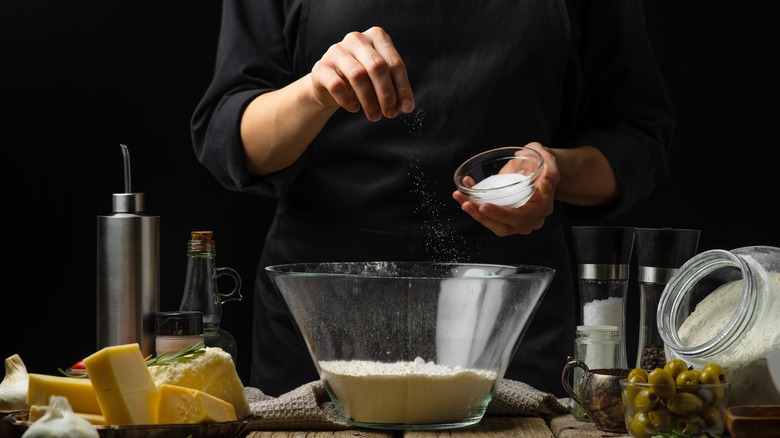
Although bread doesn't taste distinctly salty, skipping out on salt is noticeable. And while The Florentine reports that Tuscan bread is normally left unsalted, salted bread is more common for the rest of the world. Flavor issues aside, salt has a larger role in the bread-making process. King Arthur Baking explains that it soaks up moisture, affecting the gluten structure of the bread and the rate of fermentation.
Having no salt means your bread won't have the strength to grow as much — and may collapse. Slowing down fermentation has the added benefit of allowing flavors to develop, resulting in a bread with more complexity. King Arthur Baking notes that salt even affects the final color of your bread crust; by slowing down yeast activity, sugar from the bread starch isn't entirely eliminated and caramelizes to produce a golden color.
As for what kind of salt to use, The Bread Guide favors kosher but warns that due to the larger crystal size, measurements may vary (again, the importance of using a scale!). The outlet highlights a few alternatives and indicates that to guarantee a nice flavor, it's best to avoid iodized salts. Himalayan pink salt is one option, though it tends to be more expensive and may imbue your bread with a pink hue (not necessarily a problem, more of a preference). Sea salt also works, and regular table salt can be used. However, the latter is iodized and may give your bread a bitter taste.
Using the wrong type of yeast

Some recipes call for active dry yeast, others opt for an instant, and then there's fresh yeast to think about, too. Each has its characteristics, from appearance to the way it behaves. While it's not always as simple as making a direct swap, with a few adjustments, you can substitute one type for another. Epicurious explains that active dry yeast consists of mostly inactive granules that need to be brought back to life in a warm water solution, another process under the proofing umbrella. The outlet points out that chances are you'll pick up an active dry yeast in the supermarket since it's the most common format.
On the other hand, instant yeast has a finer, almost powder-like consistency and is ready to be used without activation. If you want to skip the extra proofing step, this is a reliable option that dissolves with ease, according to Fine Cooking.
Finally, fresh yeast, aka cake yeast, isn't something you'll have sitting around in your pantry, as the block of compressed yeast and water has a very short shelf-life. However, Fine Cooking notes that the pros love it for its leavening properties and added flavor. The yeast is alive but needs to be activated, so simply crumble some pieces into warm water before using it (via The Spruce Eats).
Using dead yeast or killing it yourself
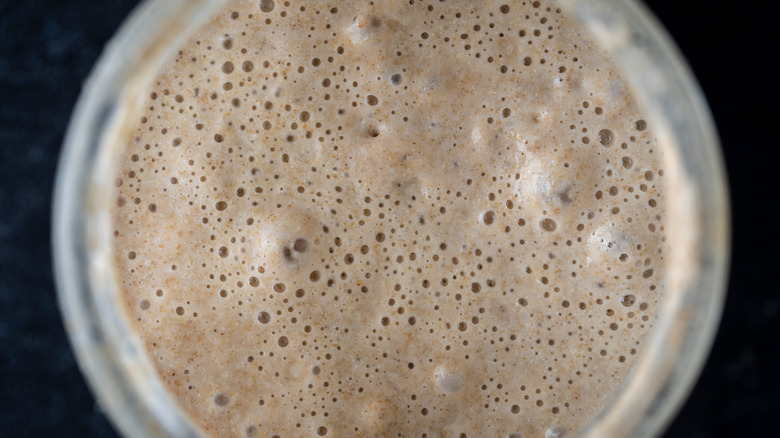
If you're using active dry yeast or fresh yeast, you'll have to activate it to ensure it's still alive. Otherwise, Taste of Home remarks that your loaf of bread will be dense and lack height. To test it out, the outlet explains that you'll need to mix your packet of yeast with half a cup of warm water and a teaspoon of sugar. The latter feeds the yeast, while the former activates it, resulting in light bubbles or foaming.
If the solution doesn't change after five to 10 minutes, you'll have to identify the issue; either the yeast is dead, or the water temperature was too high, effectively killing it. Fine Cooking indicates that fresh yeast can tolerate 100 degrees, active dry yeast will be fine up to 120 degrees, and instant yeast can endure up to 130 degrees. On the flip side, if your water is colder than 70 degrees, it might not be sufficiently warm to activate the yeast. This is where your trusty thermometer comes in!
Fine Cooking highlights another element that can put the yeast at risk: salt. While it is necessary for the outcome of your bread, adding salt together with the yeast can cause it to dehydrate and starve instead of proliferating into an ever-expanding mass.
Adding too much water too quickly
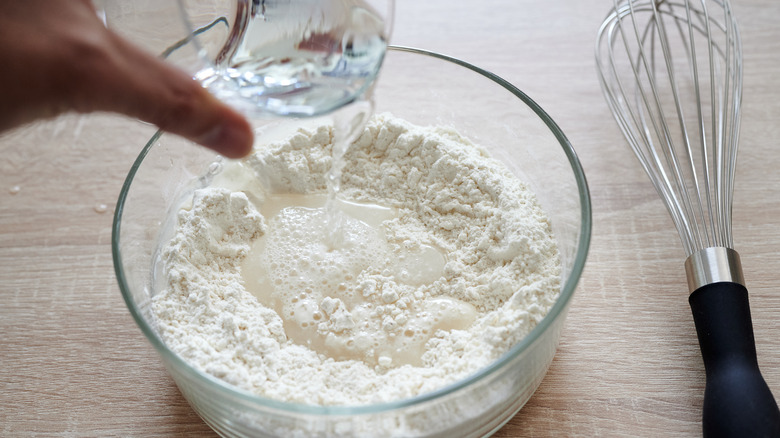
As with many steps when baking and cooking, you can always add more, but you can't remove what you've added. Since the careful ratio of flour to water (about 5-to-3 per Loafy Bread) determines your bread's success, it's important to take your time when incorporating water. For best results, be sure to adjust the water as soon as possible so the gluten doesn't have the chance to start forming.
Water affects the gluten structure, but if you add too much or too little, your dough may be sticky, dense, dry, or lacking elasticity. Busby's Bakery highlights the importance of using weight measurements and adding a small amount of water at a time as you get a feel for the dough. Crafty Baking points out that the type of bread will demand specific levels of dough wetness; consider the different textures of bagels, focaccia, and French bread.
Just because you've made a recipe before doesn't mean that all of your ingredients will behave the same way every time. Busby's Bakery explains that several factors can influence how your dough hydrates, including the flour's protein content, ambient humidity levels, and the dough temperature. For these reasons, you'll want to treat each loaf as an independent experiment as you familiarize yourself with the consistency you are seeking.
Only using a stand mixer
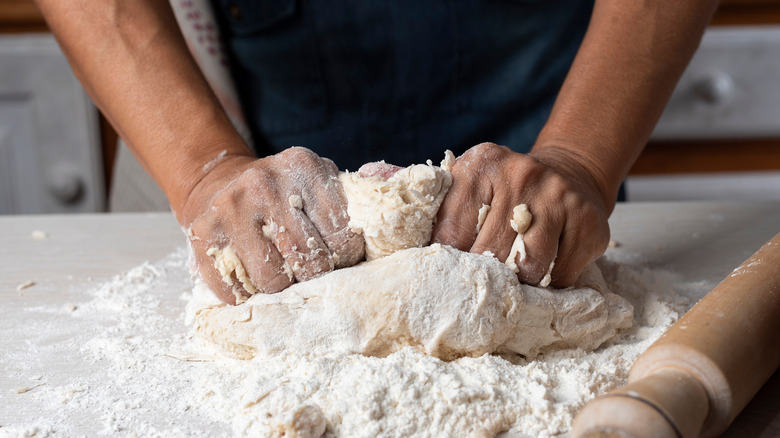
We get it: Using a stand mixer or bread maker can be huge time-savers that prevent you from getting your hands dirty. However, there's an argument to be made, which is that making bread with nothing more than your hands is satisfying. Sure, they'll get sticky and you might get flour everywhere, but the result is worth it. Julia Ponsonby, author of "The Art of Mindful Baking," told The Guardian that using your hands as you knead is not only a physical practice but can quickly become meditative. As she explains, the process forces bakers to be patient and slow down, bringing mindfulness to center stage.
Good vibes aside, The Spruce Eats points out that kneading the dough by hand makes it easier to monitor how it feels, allowing you to adjust for the perfect consistency. On average, you're looking at about 10 minutes of kneading time, which isn't that much more than the three or so minutes with a stand mixer. However, the appliance is not sentient and doesn't know what texture is required, which can easily lead to over-kneading. Meanwhile, you get to experience the gratification of the delightfully springy feeling of poking your hands in the dough. So even if you're loyal to your stand mixer or bread maker, when you have a few extra minutes, make your bread by hand.
Over or under-kneading the dough
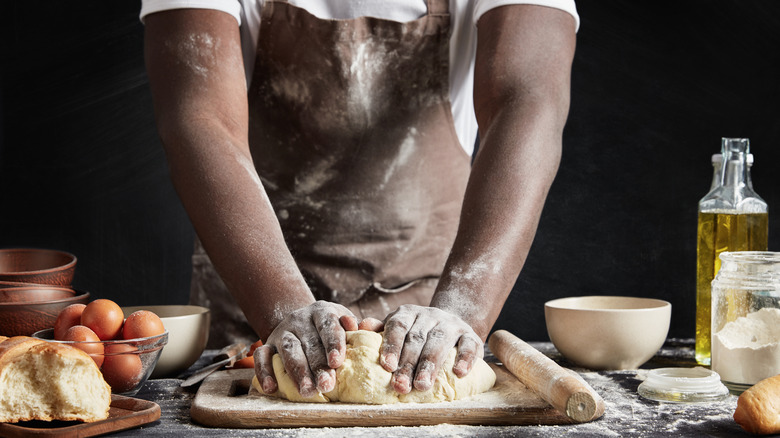
With practice, you'll come to familiarize yourself with the consistency of perfectly kneaded bread, but it can be a fine line to balance. The Kitchn notes that your dough is ready when it is smooth, keeps its shape, quickly retracts when poked, and can be stretched out thinly without breaking. It's important to reach this point because properly kneaded dough leads to bread that rises well, Taste of Home explains.
Unfortunately, the outlet notes that if you overdo it, your bread will be dense and very chewy. Here's another reason why working with your hands is key: You'll be able to notice the dough becoming stiff and be able to stop in time before it becomes chewy (plus, you'll probably stop from exhaustion before it happens). In case you notice it beginning to feel overworked, Bob's Red Mill suggests giving the dough more time to rise, in the hopes of improving the gluten structure. Typically, the baked result will be hard, dry, and perfect for bread crumbs.
On the other hand, as long as you know how to identify insufficiently kneaded dough by its droopy texture and inability to hold a shape, you just have to keep kneading, Bob's Red Mill advises. If you move forward with under-kneaded dough, the result will fall flat and be fairly tough. Thankfully, you can still use it for croutons, crostini, or even sliced bread (if it holds).
Drying out the dough
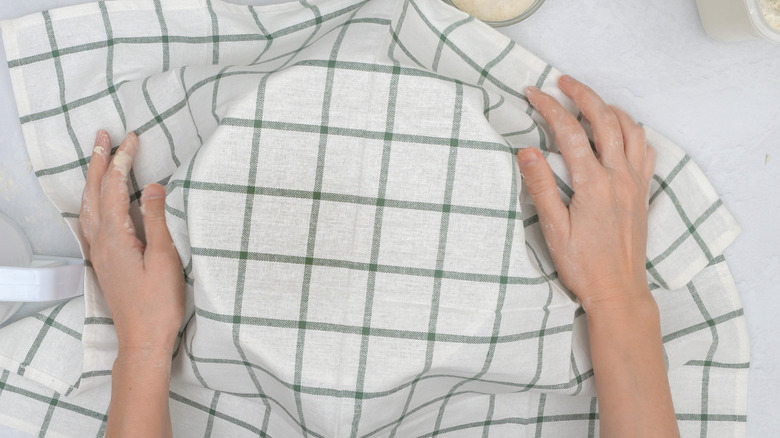
Once you've combined the ingredients and sufficiently kneaded your dough, it needs to sit while it rises. You'll notice that most recipes include a note about covering your bowl. This isn't only a suggestion but, in most cases, it is crucial to guarantee a successful loaf. There are some exceptions, though, and Knead Rise Bake notes that bakers need to adjust a few things depending on the bread's hydration level. Low-hydration types of bread such as bagels, sandwich loaves, and donuts need to hold onto moisture. Meanwhile, high-hydration types of bread, including sourdough and no-knead, can benefit from remaining uncovered.
For the most part, you want to cover your dough to prevent too much moisture from escaping. If you skip this step, the top of the dough will start to dry out first, forming a quasi-crust that impedes how high your bread can rise. The Spruce Eats explains that some recipes even require the dough to be greased before the first rise. This helps the exterior remain supple and prevents moisture from escaping. Alternatively, a damp tea towel, plastic wrap, or airtight containers or bags are all suitable options, according to the Crust Kingdom.
Not letting the dough proof sufficiently
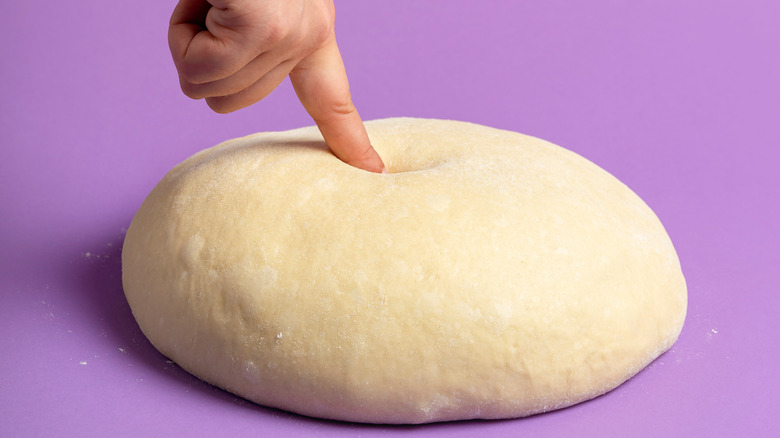
A lot of the time spent making bread involves waiting, and rushing your dough will not usually reward you with successful results. That's why making bread draws on mindfulness — patience is of the essence. Food Network explains that, typically, the dough goes through a first rise, and once it is shaped into whatever format you are striving for, it gets proofed. The two terms are often used in place of one another, but the rules for determining readiness remain the same regardless of the stage.
Given that several factors can influence the speed of the process (dough temperature and yeast freshness, for example), there's no specific duration that's guaranteed to be right. According to Food Network, things are looking pretty good if the dough has doubled in size and retains an indentation when you poke it, only partly filling in. You could eyeball it, but taking a photo of the dough before can make it easier to determine how big it has grown.
If the dough hasn't been proofed enough, it will spring back and cover the indents. In this case, give it some more time. If, on the other hand, the indent doesn't disappear at all, Knead Rise Bake recommends punching the dough down and letting it rise a third time for maximum success. Alternatively, go ahead and bake it, but know that the consistency might not be ideal.
Keeping your dough at incorrect ambient temperature

If the same recipe turns out differently each time, the temperature may be to blame. Swiss Bake explains that it can influence the rate and predictability of fermentation, as well as the taste of the final product. More heat makes the process happen faster, preventing the starches from slowly breaking down and creating complex flavors. Meanwhile, a cool ambient temperature means your bread will take longer to rise.
If you want a specific idea as to how temperature affects your bread, use a thermometer to help you determine whether you need to move the dough to a cooler or warmer location. King Arthur Baking indicates that a temperature between 75 degrees and 78 degrees is ideal for wheat doughs as they start to rise. Keep in mind that the temperature of the water you mix in will also affect results, so the website provides calculations to determine the ideal figures. Precise measurements aside, it's perfectly fine to try to wing it; just know that the results will be hard to predict.
The Perfect Loaf suggests using a dough proofer to maintain a warm temperature, and some ovens even have a proof setting. Alternatively, the outlet says that leaving your dough in the oven (turned off) with the light on provides some ambient heat. If you need to cool it down, The Baker's Guide recommends popping your dough into the refrigerator as it ferments.
Using the wrong equipment to bake your bread

Given the particularities of baking bread, it shouldn't be a surprise that different vessels are better suited to various styles of bread. Food & Wine recommends a non-stick loaf pan for sandwich bread and cast-iron for no-knead dough. Meanwhile, for French loaves and bakery level results, a baking stone is your best bet. Realistically, you won't have a different bread pan for every day of the week, and Taste of Home offers alternatives you might already have lying around.
Use your trusty cast-iron skillet for small loaves and buns. A basic sheet pan will do the trick for most loaves, as long as the shape of the dough remains fairly stable. As for glass loaf pans, Kitchenseer points out that they have the advantage of making it easy to see when your bread starts to change color. Aluminum works well, too, and Edd Kimber, author of "One Tin Bakes," highlights its capacity to uniformly transfer heat (via Bon Appétit).
Sourdough bread is often baked in a Dutch oven, as the tight seal allows steam to build up in the pot, guaranteeing a proper crust. You don't have to stop at sourdough, but it's essential to preheat the vessel, according to King Arthur Baking. When you place your dough in a hot sealed pan, steam builds up and cools down the exterior of the bread. This allows the dough to slowly bake without burning the crust, resulting in an extra flavorful slice.
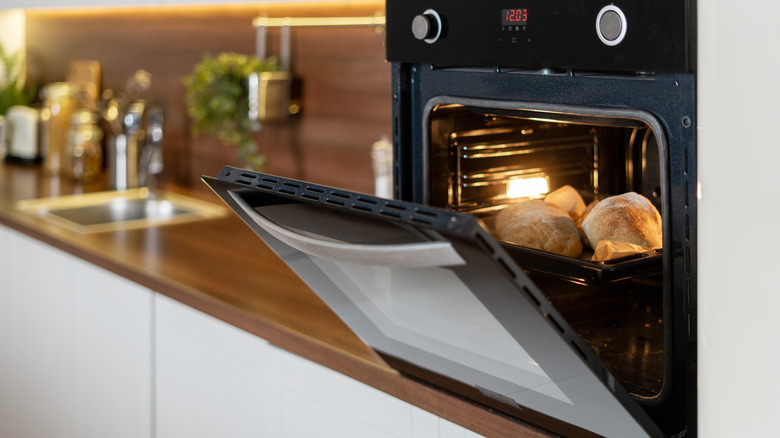
Forgetting to preheat your oven

Regardless of the vessel, preheating your oven before adding the dough is a must. Chef Ian Rynecki tells Cooking Light that it adds an extra touch that distinguishes good bread from the kind of stuff you would have every day. One advantage of a preheated oven is that steam can build up, which prevents the dough from drying out as it bakes — much like what occurs in a Dutch oven, Ben Glazer indicates to The Guardian.
Known for his exceptional country-style sourdough, Glazer explains that placing the dough in a hot oven gives the yeast an extra blast to release carbon dioxide and grow slightly more. Skipping out means the process happens much more slowly, which Glazer notes will affect the yeast and produce a flat loaf. In case you're in a hurry and don't want to wait, you can up your chances of success by baking the bread in a Dutch oven.
Skipping out on scoring the loaf
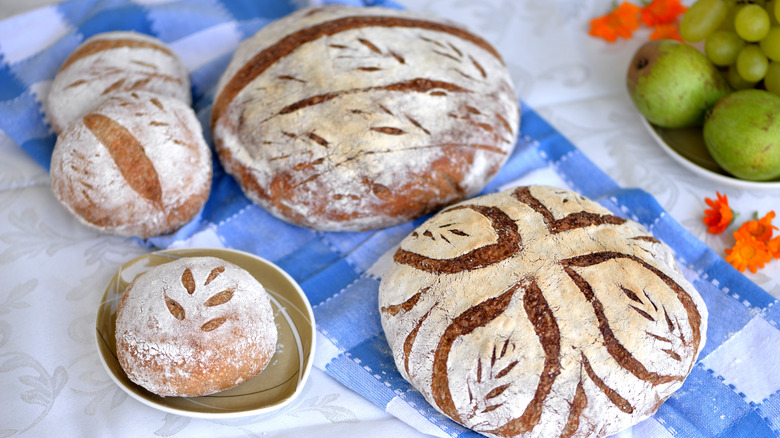
You don't have to be an artist to properly score a bread loaf, but there's plenty of room to be creative if you're so inclined. The Spruce Eats remarks that the technique of making light cuts in your dough before baking is what sets apart the amateurs from the experts. It's not only about aesthetics — it affects what happens as the yeast causes the loaf to expand further. If you didn't score the surface, the gases would still escape and could affect the structure of the bread, depending on where the exterior tears. Think of scoring as creating an exit route for the gases so that your bread can properly grow.
King Arthur Baking highlights the importance of confidently slicing through the dough with a sharp blade or even scissors. The outlet suggests cooling the dough first to facilitate smoother cuts. The Spruce Eats warns that once scored, you should bake your bread immediately, as the gluten structure becomes compromised. This is where you can have some fun, so enjoy experimenting with different patterns.
Removing the bread too quickly from the oven
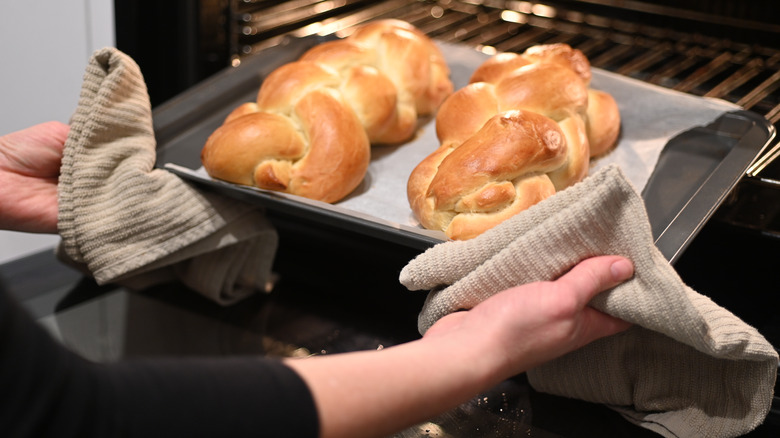
It's hard to know for certain whether or not your loaf has baked through without slicing into it. While a dark golden crust is a good sign, the center might still be undercooked. The Bread Guide notes that in a hot oven, the exterior can cook too fast and burn before the middle is ready, an issue that can be mitigated with a Dutch oven. The Bread Guide adds that as you become familiar with the way your oven heats, you can adjust the temperature.
In case you cooled down your dough during fermentation, it is essential to bring it back to room temperature so that it bakes evenly. Likewise, a preheated oven guarantees a smoother bake since it will heat the dough uniformly. Once again, a trusty thermometer is helpful to determine whether the center of your bread has reached the appropriate temperature.
Taste of Home points out that if you dig in too quickly, the loaf might seem moist and undercooked since it's still loaded up with steam — patience is rewarded! For a quick fix if your bread is not done, pop it back in the oven with aluminum foil tented over the top to prevent the crust from burning. It might not be your best loaf yet, but as long as it cooks through, it will be edible.
Opening the oven as it cooks
Since a stable temperature is so essential to the baking process, it follows that opening the oven door while your bread is baking should be avoided at all costs. Unless you're approaching the end time, you should use the oven light to check the color of the crust. Busby's Bakery explains that if you open the door before the crust has fully formed, the volume you've been working to achieve in your loaf will likely fall flat. This happens due to the difference in pressure between the inside of the oven and your kitchen. Take our word for it — you've been working so hard to achieve the perfect rise, so don't get in your own way.
Within the first couple of minutes, opening the door to spritz a bit of water to create steam is fine. However, you'll want to be sure to keep it closed for the next 15 minutes as the bread grows. Aside from a potentially flat result, opening the oven causes plenty of heat to escape (as much as 150 degrees, according to "Bakewise" author Shirley O. Corriher), which means you'll have to adjust your cooking time and add on a few minutes (via Bake it Instinct).
Slicing into the bread before it cools down

The fine art of bread-making comes down to patience, as we've seen in several steps. This is just as essential when it comes to tasting the result. As tempted as you'll be, slicing right into a hot loaf of bread will not yield success. Food52 indicates that allowing it to cool down entirely enhances the consistency and taste, and having put so much effort into the process, you might as well follow through to the end.
The exact duration varies with the size of your loaf, and Crust Kingdom suggests a minimum of 30 minutes for rolls and baguettes, one hour for smaller portions, and easily two hours for sourdough bread and bigger products. The outlet contends that the bread can still feel slightly warm to the touch, which is the best way to eat it anyways! Be sure to facilitate some air circulation by using a cooling rack or leaning the loaf on its side.
We've already established that cutting into the bread too soon can fool you into thinking it's undercooked. By letting the loaf cool, the hot steam inside can slowly evaporate, ultimately producing a drier (but not too dry) result that holds together well. On the flip side, if you've let the steam escape prematurely, the bread will first appear sticky, but the final product will likely be overly dry. Baking is considered a science for a reason!
Making crumbly bread
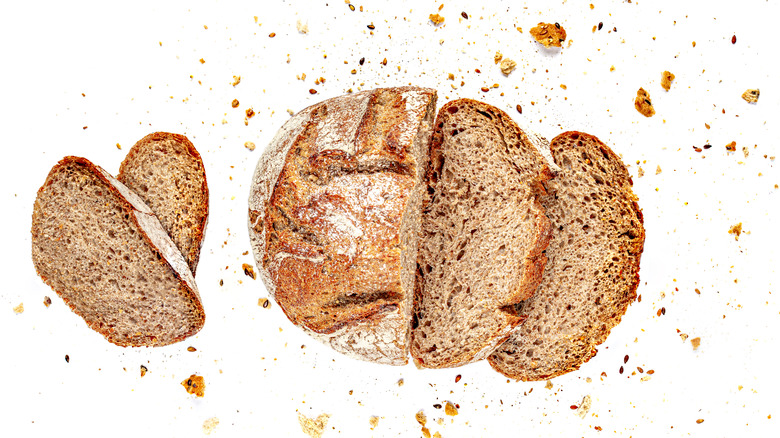
No one sets out with the intention of making crumbly bread, but several factors at multiple stages of the baking process can cause this. For starters, if there isn't sufficient water in your dough, Freshly Baked warns that your loaf will likely be crumbly. The outlet cautions bakers not to follow a recipe blindly when it comes to quantities since humidity and ambient temperature can skew measurements. The more familiar you become with the desired dough consistency, the better you'll be able to adjust based on feel.
Although you might be inclined to sprinkle plenty of flour on your kneading surface, Freshly Baked points out that if your dough has a good texture, it isn't necessary, and it could introduce too much flour and result in crumbly bread. According to LEAFtv, insufficient hydration and kneading can impede the creation of gluten, which helps your loaf rise and become airy instead of falling apart in a crumbly mess. If the thought of kneading dough for 10 minutes seems overwhelming, the outlet reports that food scientist Raymond Calvel recommends letting the dough rest for 20 minutes to give the gluten time to develop.
Flour and kneading aside, LEAFtv also points to over-fermentation as a possible cause for crumbly bread. Overdoing it on the yeast or skipping out on the salt, which tames yeast activity, can be to blame. Finally, waiting before slicing into your loaf will significantly improve the chances of ending up with a successful consistency.
Not storing your bread correctly
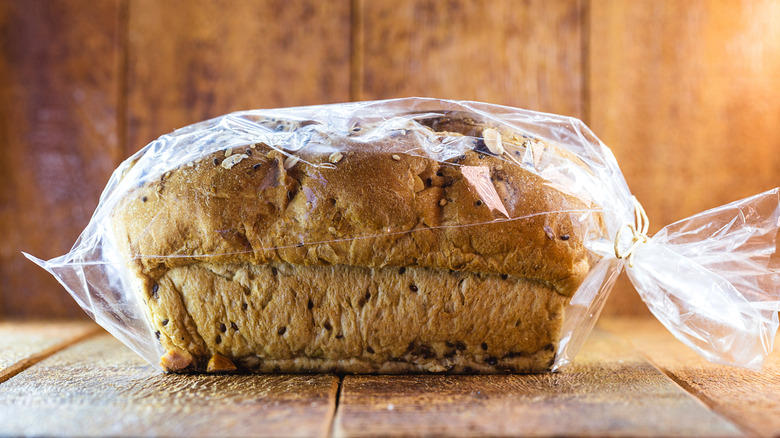
Depending on your hunger and how many people you're feeding, you may not have to store your freshly baked loaf for long. However, if you're planning on having it on hand, proper storage is essential since homemade bread isn't loaded with preservatives. MasterClass points out the importance of tightly sealing the loaf to avoid air contact, which causes bread to dry out. Wrap it with tin foil and transfer it to a paper bag, bread box, or bread bag. Plastic wrap and bags are a good option, especially if you're transferring the bread to the freezer. However, MasterClass warns that you'll want to keep a close eye for mold if you're keeping the bread at room temperature.
Since room temperature is so variable depending on location, follow King Arthur Baking's range of 60 to 80 degrees for best results, and avoid storing it in the sun. If you're not going to finish your loaf quickly, the outlet recommends slicing, sealing, and then freezing it and reheating a slice when you're hungry. Finally, the outlet doesn't recommend storing bread in the refrigerator as moisture escapes, causing it to go stale.
Depending on the type of bread, the rate at which it becomes stale can vary (via Epicurious). It's not the end of the world, though, as bread crumbs, croutons, and several dishes can be made with stale bread — so don't toss it!
Failing to pay attention to what works and what doesn't
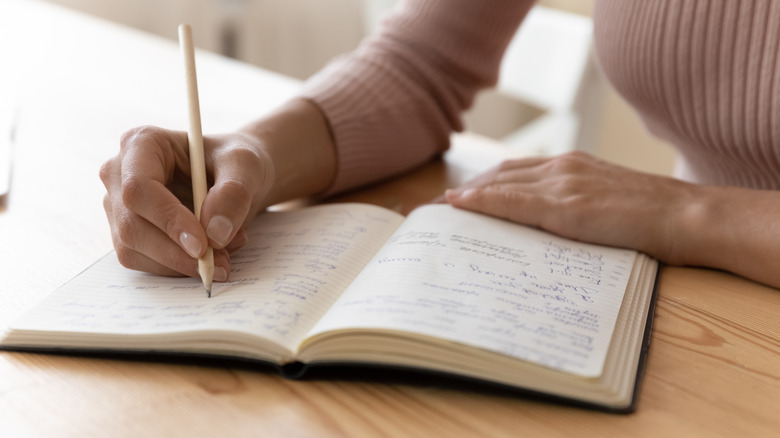
Imagine experimenting with baking bread and finally producing the perfect loaf but having no clue what set this one apart from the rest. Given the number of variables at play, a few shifts here and there can lead to significantly different results. That's why if you're planning on getting serious about your bread making (as in regularly baking delicious bread), give yourself a hand by taking notes. Thinking of it as a science experiment will greatly increase your chances of obtaining consistent results. Why not nerd out on bread if it means you'll benefit from it?
Figures such as weight measurements, temperatures, proofing, and baking times can be helpful to guide you on your next loaf. Similarly, comparing the dough consistency after kneading, along with these other factors, can be helpful. The more you learn, the more you can adjust accordingly, as Serious Eats demonstrates with its troubleshooting bad bread tips. Keep going and you'll be the one doling out advice!