14 Broiler Hacks You Should Know About
The range in your kitchen has a broiler, either at the top of the oven itself or in a separate drawer at the bottom. The broiler is something few of us use, which is odd when you think about it: Broiling is just like grilling — which we all love, and most of us do — but with the heat coming from above rather than below.
It's not like baking or roasting, where the hot air in your oven does the work. Instead, it's the actual radiant heat of your element that sears and cooks the food, much as the sun toasts you at the beach (admittedly from much further away).
If you seldom use your broiler because of unfamiliarity or because it just plain intimidates you, relax. Using your broiler effectively is a handy skill, and like most other things in the kitchen, it's easy if you don't overthink it. These hacks and tips can help make you a broiling master in no time flat.
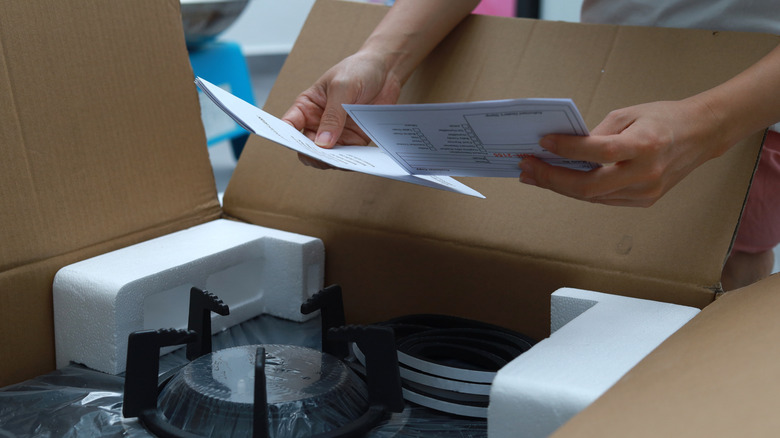
Use your broiler pan, not a sheet pan or baking dish
Telling people to use a specialized pan for its intended purpose isn't ordinarily a "hack," but here we are. Often, cooks forget about the neglected broiler pan, gathering dust in the storage drawer under the oven, and broil foods instead on a regular sheet pan or in a baking dish.
Neither of these is really suited to the purpose. A heavy-duty aluminum pan with a rolled rim is the best kind of sheet pan to use under the broiler if you must, but they're still prone to warping in the heat and may never recover. Tempered glass baking dishes and some types of ceramic are worse, and may shatter explosively (never put Pyrex dishes in the broiler).
A two-piece broiler pan is the tool for the job when available. Slits in the cooking surface allow fat and cooking juices through to a sturdy drip pan underneath rather than spattering or even igniting under the broiler's intense heat. If you have one, wash it and use it; and if you don't, they're inexpensive to buy.
Know the distance to your broiler element
Some recipes specify how close to the broiler element your food should be. It's because of physics: The inverse square law says that radiation (whether x-rays or radiant energy from your broiler) decreases as the square of the distance. In plain English, if your food is twice as far away from the element, it'll only get ¼ of the heat.
Adjust your oven racks for broiling by switching them between their top two positions as needed. Start by placing the rack in each of those top positions and measuring how far it is from there to the element (in our own oven, they're 3 and 5 inches). Now, place your food on the broiler pan and measure from top to bottom. Subtract that from the distance to the broiler element, and that tells you which position to use.
Suppose the recipe calls for broiling your steak 2 inches from the element. If your steak is 2 inches thick, and your broiler pan is 1 inch deep, you know your rack needs to be 5 inches away. The math may not work out this neatly, but it should be close. If that sounds like more thinking than you'd prefer at dinnertime, the quick rule is "thin stuff in the top position, thicker cuts at the lower position."
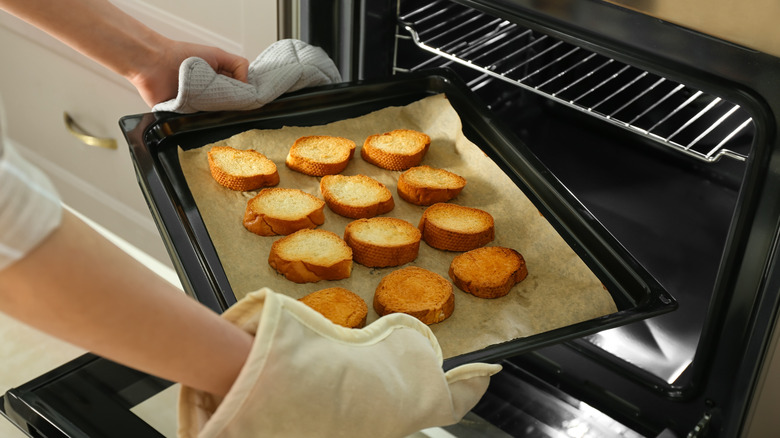
If you line the drip pan with foil, get it right
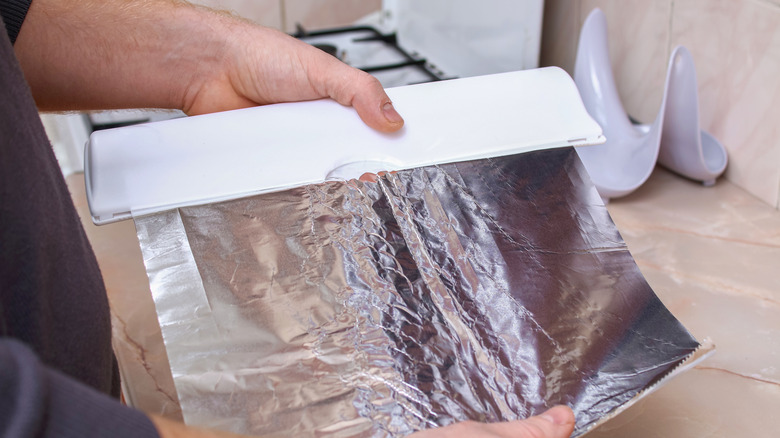
Fats and juices cooking out of your food are going to quickly become seared-on, crusty stains under the broiler's heat. Most broiler pans have a ceramic coating to minimize scrubbing, but it's better to avoid that mess in the first place.
Lining the cooking surface with foil speeds cleanup, but that quick description leaves out some key details. First, it's important to slash the foil wherever the pan itself has openings. Those allow for airflow and let the drips through. Your best choice here is silicone-impregnated, non-stick foil, which releases food like parchment does but won't catch fire (never put parchment paper under your broiler).
Also, people often forget to line the lower drip pan under the cooking surface (it's a common mistake when broiling). The whole point of a broiler tray is that the drips fall through to the pan underneath, so if you don't line that well, you'll still be scrubbing unnecessarily.
Read the instructions
It's hard to say this tactfully, but sometimes, there's just no substitute for reading the manual. Working with extreme heat is one of those times, so take a moment to look up the broiling instructions for your make and model of oven. If you've lost the manual or never had it, you should find it on the manufacturer's website.
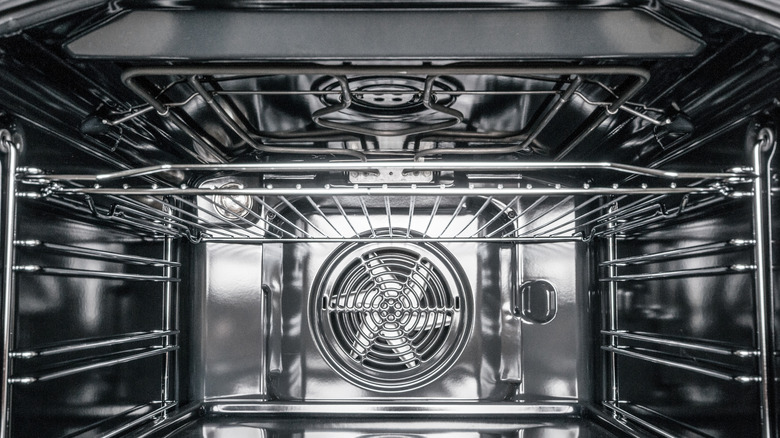
There are several kinds of broilers in home ovens. Yours may have a regular electric element, simple bars with gas flames, a grid or honeycomb arrangement that heats by gas or electricity, or perhaps even a quartz infrared broiler. Some also have both High and Low settings, while others do not.
Each type of broiler behaves differently, and the instructions in a given recipe or on a given site won't necessarily be right for yours. Some recipes tell you to prop the door open for broiling, for example, which works great for electric broilers (it keeps the element from shutting off at the preset temperature) but prevents a gas broiler from working properly.
Learn your broiler's quirks
There's a lot you can learn about your broiler just from reading the manufacturer's instructions, but you'll still see a lot of individual variation from one broiler to the next. Even if you've used the broiler in an identical range, your current one probably has a few quirks that your previous one didn't.
One important thing to know is how long it takes for your broiler to preheat fully. You can test that with an inexpensive oven thermometer or by watching how long it takes for the element to stop heating. A more crucial piece of information is where and how evenly the broiler heats.
The first step is simply knowing what kind of element you have and where it's placed. Big, square electric elements or grids offer reasonably even coverage, while the bar-shaped elements of a gas oven give more localized heat. For a more detailed picture, filling a sheet pan with bread and placing it under the broiler is a simple trick to find the hot and cold spots. Put your food where the bread browns, and avoid spots where it doesn't. You could also map out your oven's hot spots with parchment paper, though you'll have to watch closely so it doesn't ignite.
Maximize your ventilation when broiling
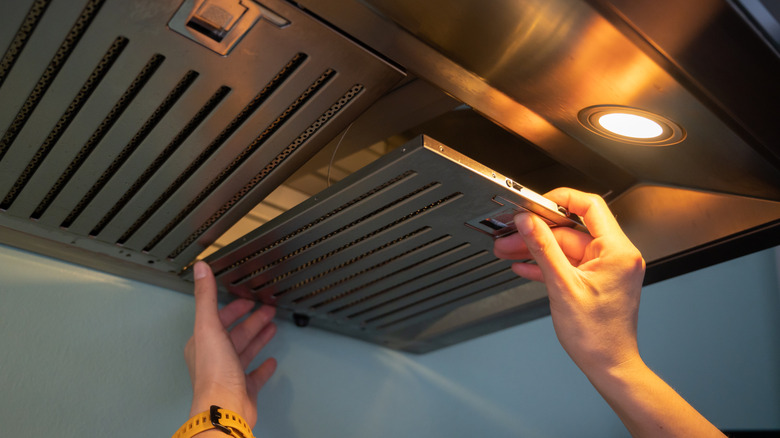
Some apartment buildings don't allow tenants to grill on their balconies because the heat, smoke, and grease can irritate neighbors and potentially pose a fire risk. Those same issues are a consideration with broiling as well, because it also generates a lot of heat and smoke (and can be a fire risk).
Code calls for some pretty serious ventilation around broilers in restaurants. Home broilers are less powerful, though high-end models may sometimes require upgraded ventilation. Even with an ordinary home oven's broiler, ventilation matters: Smoke and grease in the air are unpleasant, cause extra cleaning, and your existing range hood — if you have one — might not be completely up to the task.
Start by giving your range hood all the help you can. Clean it regularly, and wash its cover screen in the sink or your dishwasher. For those that recirculate air into your kitchen instead of venting it outside, replace the filter regularly. Any time the weather permits, open your windows when broiling and use fans (if necessary) to move the air. If you still struggle with smoke and cooking smells, a small-room air purifier isn't expensive and can help a lot.
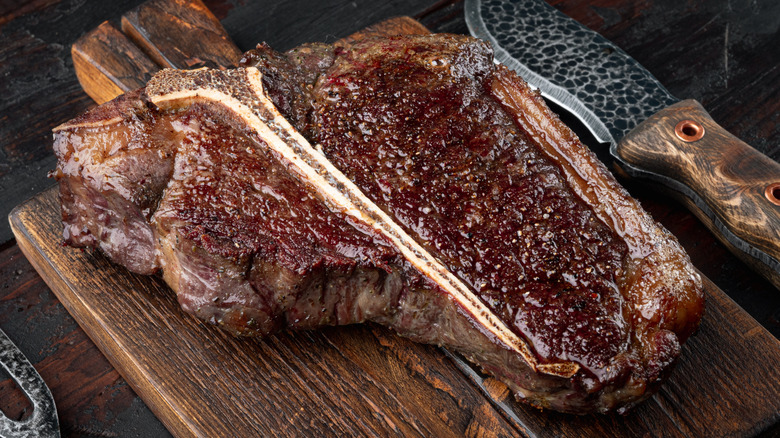
Trim fatty cuts before broiling
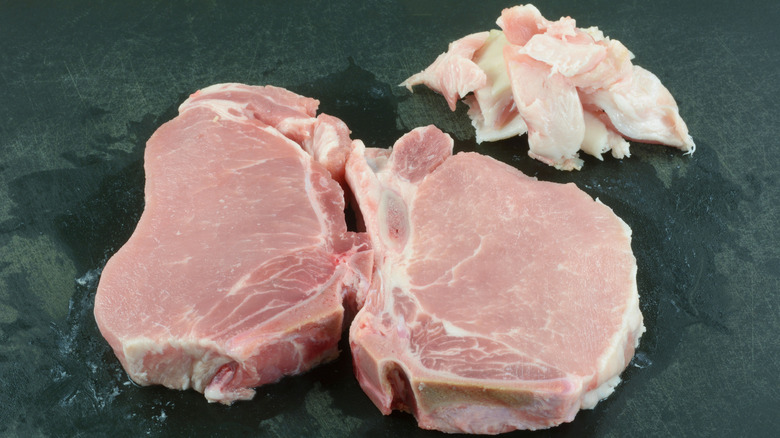
Chefs and cookbooks explain that the best cuts for grilling or broiling are well-marbled, meaning they contain a lot of fat. Outdoors, that's fine, but indoors, it's problematic because fat is flammable and drips through the grate, creating smoke. Ironically, the best meats for broiling (from a culinary perspective) are the worst for generating grease and smoke.
There's a saying that "an ounce of prevention is worth a pound of cure," and that can be applied here. There are actually two kinds of fat in meat: intramuscular (within the muscle) and intermuscular (between and around the muscles). The first kind is what we call marbling, and usually, it can't be easily removed. But the intermuscular kind often can, and doing that will cut down on the amount of grease and smoke you contend with.
If your steak or chop has a rind of fat around its edge, that's easy to trim away with a sharp knife, leaving a relatively thin strip for appearances. If you take this a step further and cut thin slits in the fat every inch or so, it will also prevent your steak from curling as it broils. With some cuts, you may also find some bands of fat within the steak that are large enough to be removed with the tip of a sharp knife. That can affect its appearance, but you can compensate for that by tying up the steak with butcher's twine to restore a neat appearance.
Avoid oily marinades

Whenever you broil, it's important to remember that the fat in and on your food will be exposed directly to intense heat. That can sometimes cause the fat to flare up, charring your food, creating smoke, and potentially even leading to a kitchen fire.
Trimming away any excess fat from your meats or poultry before broiling is an easy and obvious step, but you may be overlooking another potential source of trouble: your favorite marinade. Most marinades for steak and chicken, or vegetables for that matter, include a healthy splash of oil. The specific type of oil can vary, but it's there largely to carry fat-soluble flavor compounds into your food.
If you take your steak or chicken leg straight from the marinade and slide it under your broiler, the oil on those heavily marinated meats is directly exposed to the broiler's heat. So take a moment first to blot away any excess with a clean paper towel, or experiment instead with dry rubs or even marinating your meat after cooking rather than before.
Dry the surface of your food
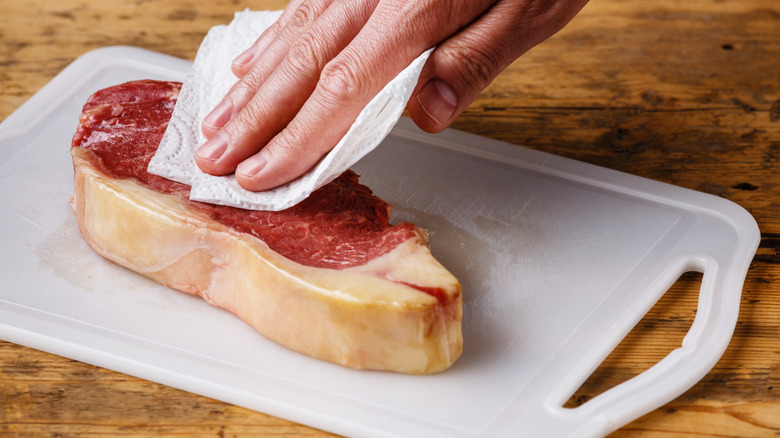
High-heat cooking methods like broiling have a lot of positives, and one of the most important is that they're really good at browning your foods. The Maillard reaction causes that browning, as molecules of carbohydrates and amino acids in your food break up and recombine in the heat to make more complex flavors.
You can get browning at low temperatures over a long time, but getting them quickly requires intense heat. Unfortunately, surface moisture interferes with that process because a lot of the thermal energy has to be expended first in turning that moisture into steam. It's why you're often told to pat your steak dry before cooking it, and that's excellent advice for broiling.
Moisture on steak may be from its naturally occurring juices or from a liquid marinade — even Worcestershire sauce — that you've applied as a flavoring. Take a moment to blot that up with a paper towel before you broil to get the best possible browning. The marinade's flavor will remain in the meat's crevices, and you can always brush on a little more once the steak is well-browned.
Broil on a bed of salt
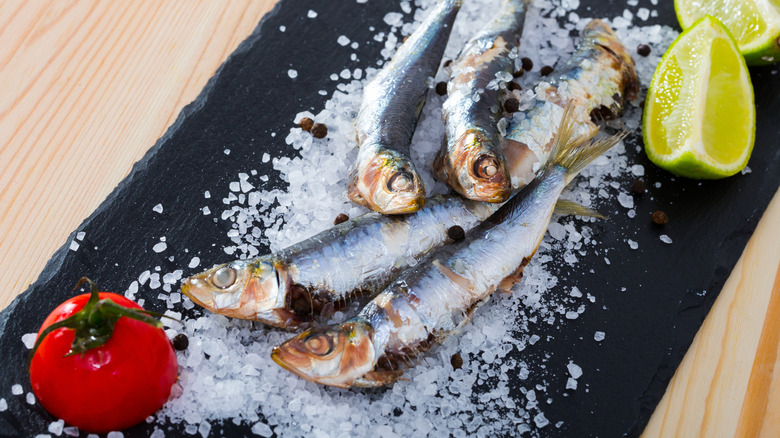
Salt plays a lot of roles in the kitchen, from its obvious use as a flavoring and preservative to subtler jobs like controlling the growth of yeast in your bread dough. Another of those subtler roles is its use as a cooking medium in your oven.
You may have seen salt-baked fish, for example, where whole fish are cooked in a crust of salt. The salt dries the skin and seasons the fish, and breaking the crust at the table creates drama and showmanship. Similarly, Oysters Rockefeller are baked and presented on a bed of rock salt.
Broiling on a bed of rock salt can be equally effective. Start by preheating the pan of salt under your broiler, then add your meat or fish on top. Your food will cook quickly, with top heat from the broiler and bottom heat from the salt, and of course be flavored by the salt as well. A bonus is that fat and drippings will disappear into the salt, reducing smoke and grease, an excellent technique for broiling whole fish, fatty ribeyes, and pork chops.
Use your broiler for browning after sous vide or reverse sear
Recipes for roasts and thick steaks traditionally start with searing your meat to brown it and then finishing it at a lower temperature. In recent years, science-minded cooks have flipped that advice on its head.
Instead, they advise cooking your meat at a lower temperature until it's nearly done, then searing it at high heat for late browning. This so-called reverse sear method works with conventional cooking or can be adapted to sous vide cooking, and your broiler is the perfect tool for it: A grill only gives its best browning at the grill marks; a heavy skillet gives a great sear on steaks but struggles with larger cuts; and a torch (used by a lot of sous vide cooks) is best for relatively small cuts.
Broiling, on the other hand, ticks all of those boxes. It gives a whole-steak sear, like a pan, but also the tasty charred, caramelized edges and corners like a grill (the best of both worlds!). Your broiler can also be used to sear and crisp oddly-shaped foods like whole roasts or poultry, which don't lend themselves especially well to grilling or pan-searing.
Use your broiler for prep, as well as finished meals
In most cases, you're going to use your broiler for the final step in cooking a meal. The side dishes will be ready, the plates will be warmed, and all you need to do is pull your meat or fish from the broiler and transfer it to your plates or a waiting cutting board.
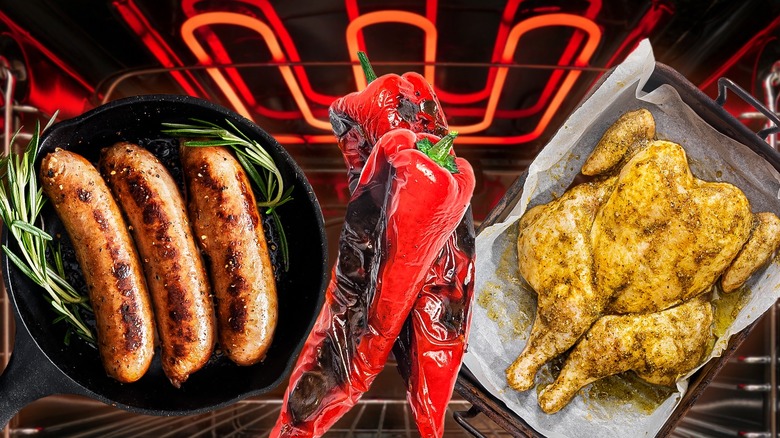
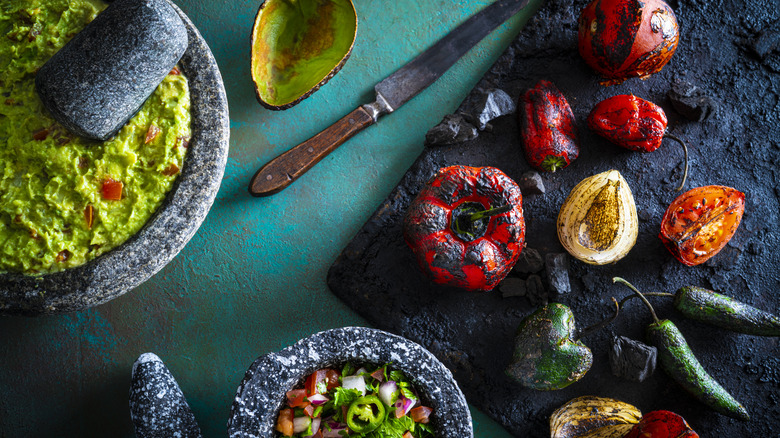
Yet there's also a role for your broiler to play in food prep. Tweaking your ingredients to dial up their flavor is a common step for home cooks and professional chefs alike, and searing or charring those ingredients is an excellent way to do that. To take just one example, how often do recipes start by having you char a batch of peppers so the skins can be removed? Well, roasting the peppers under your broiler is an easy way to do that, especially for large batches.
Don't stop there because lots of other ingredients benefit from a quick charring. Think of charred fresh corn for your esquites salad, home-charred tomatoes instead of canned in a fire-roasted tomato salsa, charred romaine for Caesar salads, or roasted aromatics like onions, garlic, celery, or fennel in your sauces and pilafs. It's a real recipe booster.
Broil everything, not just meats, fish, and poultry
Have you ever noticed that even under-ripe fruit seems to become more flavorful when you cook or bake with it? That's because high heat softens the fruit and caramelizes its sugars, improving both flavor and texture.
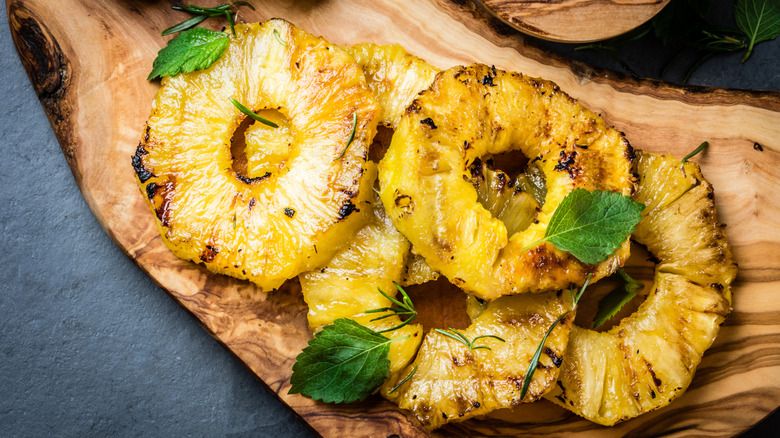
Any fruit or vegetable you've ever seen grilled (and probably a few you haven't) can benefit from broiling, as well. Using your broiler to put a quick char on sturdy salad greens like Romaine lettuce or Belgian endive, and especially bitter greens like escarole, utterly transform them. The best fruits for grilling, peaches, pineapple, and citrus fruits, are equally good under the broiler.
You can even use your broiler to put the final browning on a casserole or pasta dish, to brown and crisp a crumb topping, or put crispy edges on your browned and bubbly cheese (just make sure it's in a broiler-safe metal or ceramic pan. We've even used the broiler to caramelize the sugar crust on a whole pan of creme brulees at once. They need to sit in a bath of ice water to keep the custard itself cold, but it's an ideal method for finishing them in bulk when you have a dinner party.
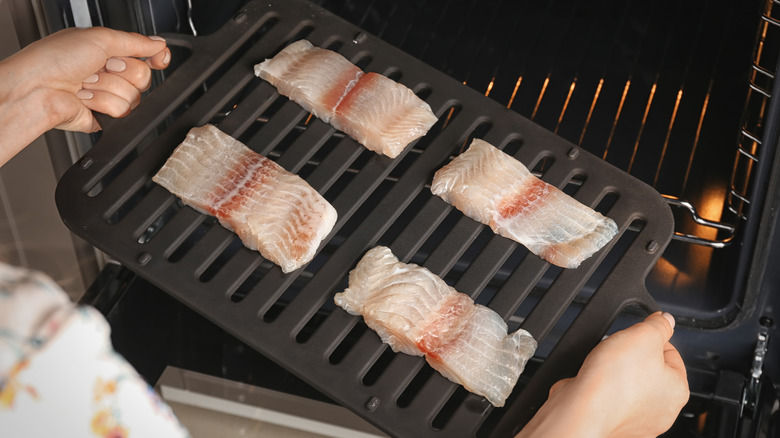
Broil on preheated cast iron for two-sided cooking
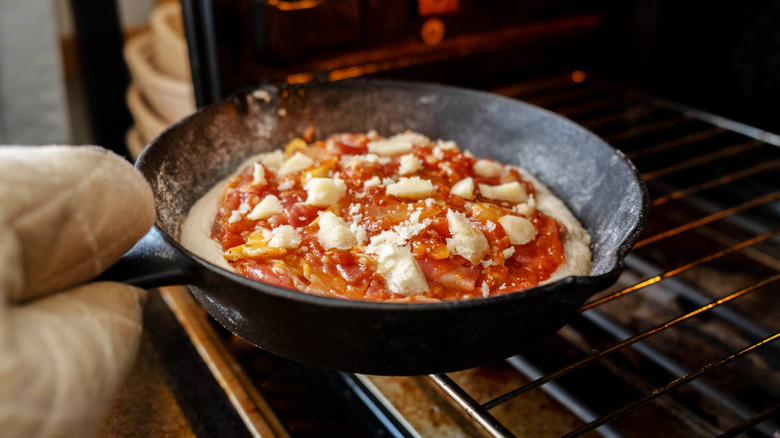
A broiler pan is usually your best bet for broiling, but there are exceptions to every rule, and in this case, cast iron is the exception. Cast iron is broiler-safe and retains its heat for a long time, so you can use your trusty skillet, griddle, or grill pan under the broiler for fast, two-sided cooking.
Your cast iron pan should go under the broiler when you start to preheat, and we find it takes at least 5 to 10 minutes — depending on the size of the pan and the power of your broiler — to heat fully. Once it reaches that point, carefully remove it from the broiler (use your heaviest oven mitt, and don't have your face in the hot air when the door opens), add your food, and return it to the broiler.
It's a good technique for thin steaks or searing tuna without over-cooking the middle. It also puts homemade naan or restaurant-quality pizza within reach for home cooks without specialized ovens (it's one of those insider's pizza secrets), and so on. Just don't try it with non-stick pans, which you should never put under a broiler because its heat will damage the non-stick finish.