10 Tips For Softening Ice Cream Faster
Whether we're looking to beat the heat or obtain brain freeze in a wintery wonderland, we all scream for ice cream all year round. But, ironically, this frozen dessert might be too rock-hard to enjoy straight from the freezer. All too often we pry off the lid in anticipation and spend the next few minutes chipping away for a sizable chunk, leaving a trail of bent spoons, a messy counter, and maybe even some loud, impatient tykes waiting around for a scoop.
But no need to invest in sturdier silverware. From zapping Neapolitan in the microwave to mixing up French vanilla in an ice cream maker to strategically placing the cookies 'n' cream carton in the ice box, there are many ways to avoid having to chisel through a dense layer of granite-like Rocky Road. Here's the scoop on tips for softening ice cream that make it easier to top that cone.
Thaw it in the fridge

One of the easiest ways of softening ice cream while making zero effort is to move it from the freezer straight to the fridge. The fridge will gradually warm your ice cream from frozen solid. The ideal temperature to aim for is a range from 6 to 10 F for a smooth texture that's not too runny and not a solid core in the middle. If the carton has frozen stains that can melt onto your shelf space, place the container on a plate or in a plastic bag.
There's one downside to thawing out food from frozen to cold, of course. To evenly soften ice cream, the refrigerator will need about 20 minutes to work its magic before the ice cream is soft enough to scoop out. So if your kids — or the kid inside — are biting their lips and watching the clock, this method might not be ideal. But you can always reward your patience with an extra spoonful before returning it back to the freezer.
Give the churn a turn
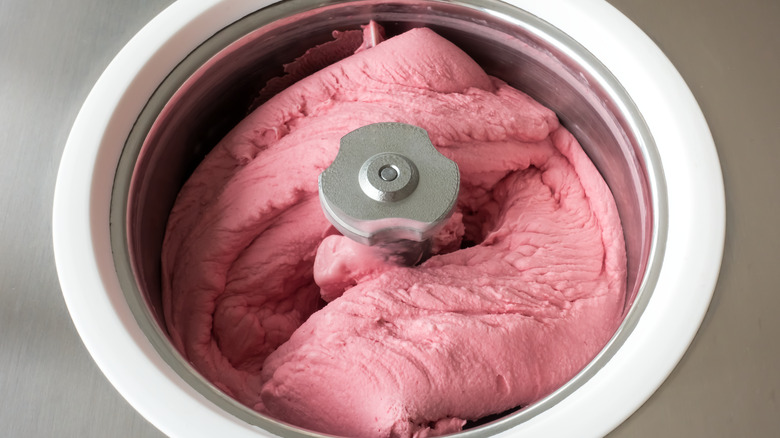
If you want your ice cream to be soft and have a creamy texture throughout in a jiffy, try a tech-savvy method: the ice cream maker. Empty your frozen tub into the mixing bowl and set it to "churn." If you don't have an ice cream maker, a regular mixer works just as well. Once the ice cream has been whipped a bit, it's ready to be served immediately. Hint: if looking for a churner or mixer, don't substitute the blender for a food processor. A blender is fantastic if you're in the mood for a milkshake or a thick slurpee you can sip through a straw.
There are a couple of hurdles that might complicate a churn cycle for your favorite flavors. Cutting off a frozen portion into the mixing bowl might be a chore in itself. If your ice cream has solid bits in it — like nuts, candies, or fruit pieces — the mixer might crush them as it churns. Regardless of the kitchen gadget enlisted, you might need to factor in some extra clean-up time after it's all over — including transferring the leftovers back into the empty carton.
Bag it up

When the cravings hit and you need an ice cream fix right now, one way to avoid thawing ice cream entirely is to use proper storage to prevent over-freezing in the first place. Don't just toss your ice cream in the first available spot in the freezer. Instead, place the carton in a zip-lock bag and squeeze all the air out. The sealed bag helps keep your ice cream perfectly scoopable by keeping cold air from freezer-burning your favorite flavors. Your ice cream will be kept soft and ready for scooping, with little cleanup needed. After serving, just place the carton back in the same bag — zip-top freezer bags are completely washable and reusable for all non-fresh food leftovers — and repeat.
But there's a bit of controversy over this tip. WTMJ in Milwaukee noted that ice cream that was sealed in plastic bags was just as hard as those pints left out au natural. The taste test concluded that consistency, ingredients (artificial sugar substitutes), and quality might have something to do with whether bagged ice cream had a longer shelf life before freezing over with ice. Our suggestion? Stock up on your dairy delights and try this one out for yourself.
Set microwave to nuke

One of the fastest and least-effort ways to soften ice cream is to zap it in the microwave. If your ice cream is in a paper or cardboard carton, place it in the center of the microwave without the lid. (Note: If the ice cream is in a plastic tub, check to make sure it's microwave-safe.) Microwaves don't have a pre-set "ice cream" button, although some do have a "defrost" setting that you can try out. But to avoid overheating any ice cream, you'll need to manually lower the microwave's power level to about 50%. Half power is the best microwave setting for foods that can't be stirred or just need to be softened. Zap in short 10-second bursts for a pint and a bit longer for tubs.
Microwaving your favorite ice cream can get tricky. Microwaves can melt the ice cream along the carton's edge into goo while leaving the middle frozen. One Healthline report cautions us that we should also keep in mind that microwaving any food can lead to a toxicity buildup as micropolymers from the container can seep into the food.
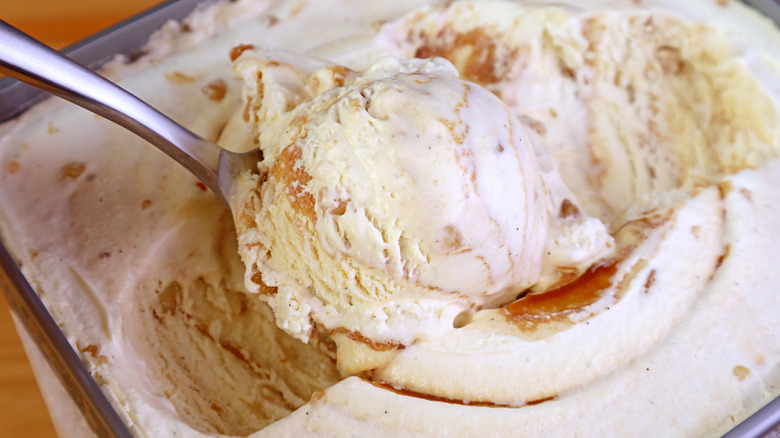
Scoring with a hot knife

If you're not eating an entire tub of ice cream, thawing the whole thing and then re-freezing the leftovers can be hazardous to your ice cream's health. The cream in the ice cream might lose quality if a carton is constantly thawed and then re-frozen. One way to just get the scoop that you want and soften ice cream much faster is to score the top with a hot knife and then scoop what you need. Warm a butter knife under hot tap water and sear your ice cream in a tic-tac-toe pattern. The heated sharp metal will quickly cut through the frozen treat like, well, a hot knife through ice cream. If your knife gets cold before you're done scorin' and scoopin', run the blade under the hot tap, then repeat.
One thing to keep in mind is that even though it's just ice cream, using a hot knife probably isn't safe for kids — supervised or not — and even some adults. Scalding and accidental nicks and jabs will definitely spoil the mood for even the best of flavors. As far as tips go, this one is riskier than most.
Dipping the scoop
There's a reason why the tried-and-true method of using an ice cream scoop still works. Specialized ice cream utensils have been around since 1876, and since that formative year, ice cream scoops have come in all shapes and sizes. But not all scoopers are created equal, and some scoops can have a tougher time than others breaking into the ice cream's rock-hard surface. And for those who want to carve out a perfectly crafted globe, the ice cream can stick to the metal scoop.
But all ice cream scoops can be prepped in an easy step. Just dip the scoop into a cup of cold water — not hot to avoid a runny mess — before you scoop. The cold water acts as a lubricant to help the ice cream glide from the scoop to your cone or bowl in the perfect ball. For a higher-tech model, look for an ice cream scoop like Zeroll, which has heat-activated liquid in the handle to avoid dipping it in water. But whether a state-of-the-art scooper or a basic cast-pewter spoon, the venerable ice cream scoop satiates our collective scream for ice cream.
Cranking up the freezer
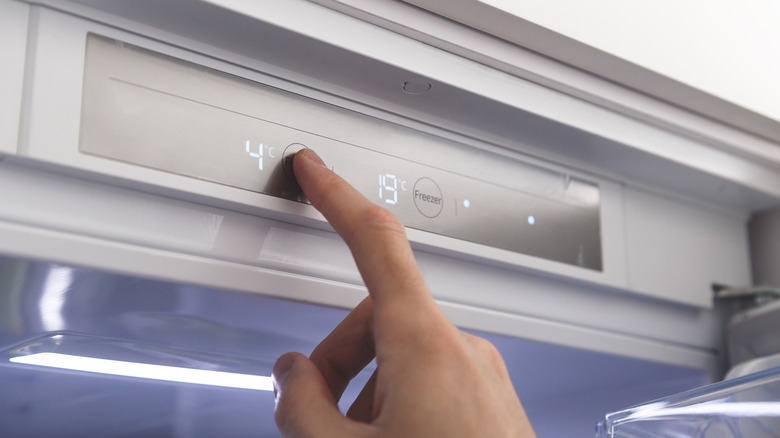
Turning up the temperature in the freezer might seem counter-intuitive to keeping food frozen, but increasing the thermostat can help prevent your ice cream from freezing solid. Ice cream has a lower melting point than water because of additives, like salt, which can cause water to remain in a liquid state at lower temperatures. Many ice cream manufacturers recommend storing ice cream at around minus 20 F, but inching up the thermostat to minus 10 F can soften the ice cream while keeping other foods safely frozen.
One drawback to keep in mind is that the freezer doesn't stay at a set temperature all the time. The refrigerator's motor is like an air conditioner and turns on periodically to keep the freezer from getting too warm. Between those intervals, the freezer starts to warm up. If your freezer is set at a higher temperature, your ice cream might melt and freeze repeatedly, which can lead to a gritty texture.
Store it in the door
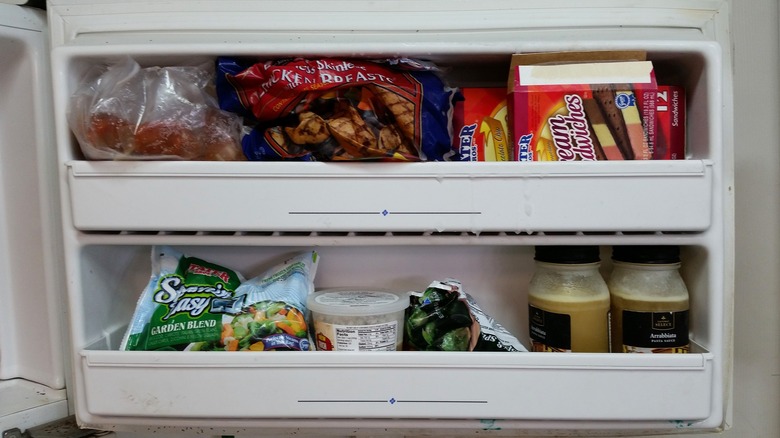
Despite what the thermostat says, not all space in your fridge and freezer has the same temperature. Areas furthest away from the cooling unit, like the front and door spaces, are exposed to room temperature most often and are generally the warmest spots in the freezer or refrigerator. Keeping ice cream in the door racks can keep your carton warmer than shoving it way in the back of the bottom shelf with the leftover vegetables where it's out of sight, out of mind, and frozen solid.
One downside is that uneven temperature in the door racks can affect the food stored there. Exposure to warmer air might partially melt and freeze your ice cream time and again, which, as mentioned, can change the texture over time. No one wants their ice cream full of ice crystals or to taste like a scoop of sand got into the mix.
Try wax paper to prevent ice crystals

We've all seen the dead ice that can engulf frozen containers when left in the freezer. One of the biggest reasons ice cream gets freezer burn is due to excessive airflow. When the freezer door is open, warm air rushes in and condenses on the packages after the door is shut. When air seeps into empty spaces in, around, and on packaging, ice crystals can build up like frost. This can especially happen under the lid. According to Healthline, the air absorbs moisture from the food while also freezing on the surface, leaving ice residue on ice cream that keeps it hard and tough to break through. When ice cream is deprived of moisture, it eventually turns gummy.
To keep warmer air from gumming up your creamy confections, try placing a sheet of wax paper directly on top of the ice cream itself before putting the lid back on. There should be enough wax paper to stick out the edges to block out any unwanted air. The wax paper helps prevent ice crystals from forming and keep your ice cream rich and soft. No need to get a new sheet after each serving. Just reuse the same sheet if it's not too stained or torn.
Bath time for butter pecan

One idea that might seem like common sense is to simply leave an ice cream carton on the kitchen counter to warm up at room temperature. But many people make the mistake of leaving just any frozen food sitting out. Per WebMD, defrosting food at room temperature for long periods of time can introduce bacteria, leading to food poisoning. Instead of thawing ice cream at room temperature, run your ice cream container under cold — not hot — water for about 30 minutes.
There are a couple of caveats with this tip. If your ice cream is in a coated cardboard or paper carton, the packaging can deform as water seeps through. Your ice cream will be thawed, but super soggy. You can avoid direct contact with water by placing the carton in an airtight freezer bag before running it under the faucet. For those who live in water-conservation areas or want to avoid a high water bill, you can set the bagged container in a cold water bath for the same amount of time.