16 Tips For Making The Best Apple Pie
There's no dessert quite like apple pie. Not only is it the best way to use up your leftover utility apples at the end of the picking season, but the dessert never fails to impress eaters of all ages. It's also one you can serve casually, like for a Thursday night dinner or on your Thanksgiving table during the holiday season.
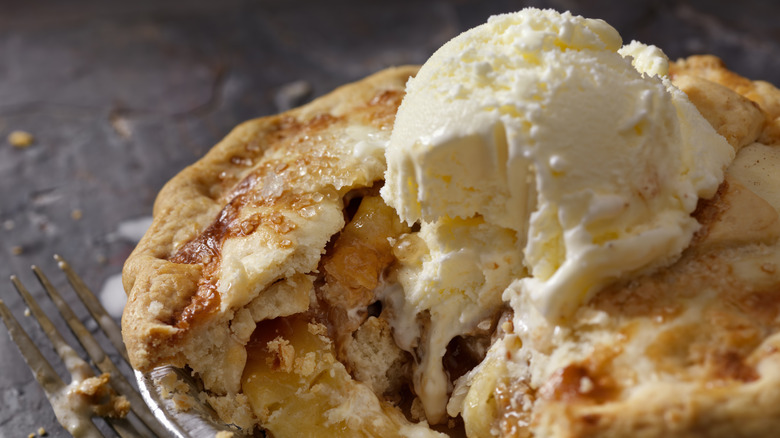
Although every baker should know how to bake an apple pie at home, many tricky bends come up along the baking process. Maybe your latticework might look like a seven-year-old child's art project, or the bottom of your pie comes out completely raw while the top has the perfect golden hue. Rest assured, these simple apple pie mistakes are commonplace among novice apple pie bakers and can be avoided with a few simple tricks. Here are our best tips for crafting the tastiest and most quintessential American apple pie. Just don't forget the ice cream.
Chose a diverse range of apples
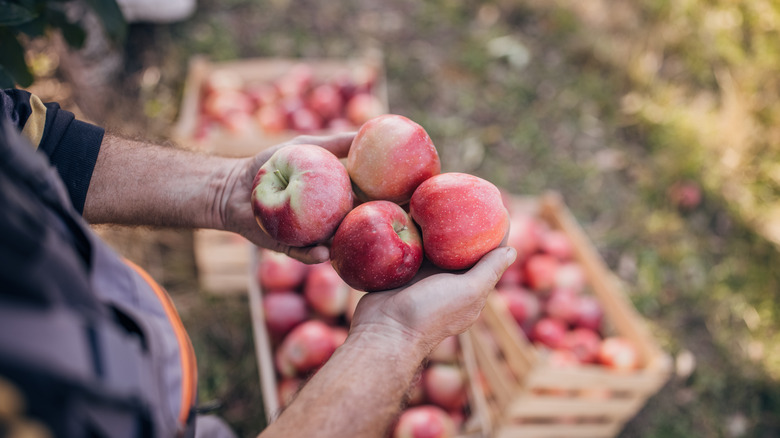
A good apple pie starts with good apples. Instead of only using one type of apple, you should aim to add a variety of apples to your pie with differing levels of tartness, oakiness, and sweetness. Some of the absolute best apples for baking include the juicy consistency and tart flavor of the Cortlands. These apples work well with the aptly named Honeygold, which has a profile similar to a Golden Delicious with a bit more hearty texture. You should also use relatively firm apples rather than those that get mealy when the apple starts to break down, like McIntosh. For example, the Jonathan is a sweet, heirloom variety with an oblong shape. Its texture must be supplemented with a more robust Braeburn, Honeycrisp, or popular Granny Smith.
There are some apples that you should stay away from when baking apple pie — mostly the plasticky Red Delicious variety. However, making your own pie opens up the opportunity to mix and match flavorful varieties from your local orchard or even include some non-apple ingredients like quince and pear.
Leave your apples unpeeled for a bit of color
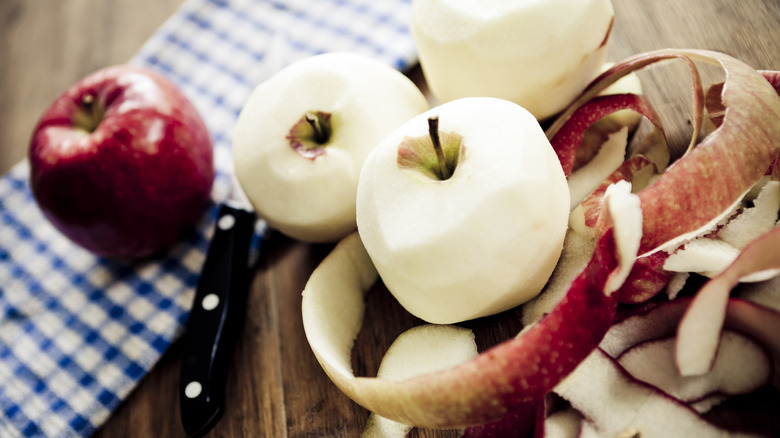
Do you have to peel apples for apple pie? It's a question that has been often asked in the baking world, although most people opt to peel off the skin from their apples. If you want to leave the skin on your apples for a pie, you'll need to be careful about the variety of apples that you're working with. Thin-skinned varieties, such as a Gala or a Golden Delicious, rarely leave a discernible texture on the pie.
The texture of the pie may feel a bit more rustic, but you won't notice too big of a difference. If you're using a waxy Granny Smith, you're going to want to peel it to avoid getting hard pieces of apple skin stuck in your throat and teeth. If you want the nutritional value of the apple peel, you can blitz the peels with whole apples to break it down before adding in the rest of your filling ingredients.
Avoid the slump by precooking your pie filling
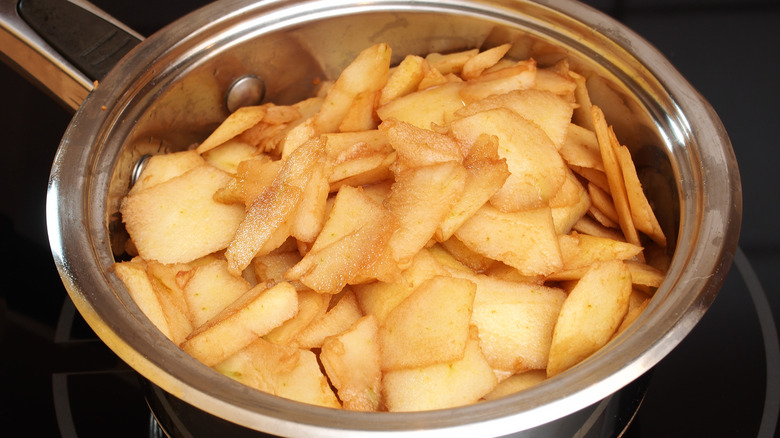
One of the most common problems for apple pie bakers is that there is always more filling when they start than when the pie comes out of the oven. This is because apples are a notoriously wet fruit. When cooked down, the apples release their moisture (causing a soggy bottom crust for the not-careful baker) and subsequently lose volume. Not only does this lead to a disappointing slice, but it can also open up the opportunity for the top crust to cave in on your pie.
If you're worried about your pie caving in, you should always cook down the filling before making apple pie. Other folks will recommend you cook your apples in boiling water for ten minutes instead to soften them or roast the apples on a baking pan (and drain them) until they've released their moisture before adding your other filling ingredients. In addition, par-baking the apples before you assemble your pie can save you a lot of time. You can cook the filling on your stove and place it in the refrigerator for four to five days before assembling the recipe.
Don't neglect the thickener in the filling

Apple pie filling includes several staple ingredients: the apples, sugar, an acid to slow browning, and arguably the most important of them all — the thickener. Starches are used to thicken fruit pie filling, and your apple pie may come out soggy if you neglect to add one to your filling.
White flour and cornstarch are the two most common thickeners used for pie baking. White flour is ubiquitous in most home kitchens, but you must add a lot to your filling to have the same effect as a concentrated thickener like cornstarch. The latter is only needed in small amounts, which can prevent your filling from developing a gummy texture. You should use twice as much flour as cornstarch to thicken your filling.
When working with pies, it's also important that you give the recipe sufficient time to sit so the thickener can activate and soak up the residual moisture in the filling. Otherwise, you may be relegated to a soggy bottom.
Balance out the sweetness of your pie with other ingredients
Pies tend to take on a singular sweet flavor profile, as to be expected. However, you can add different ingredients to your apple pie to play with this compass and create a pie that will genuinely excite your tastebuds.
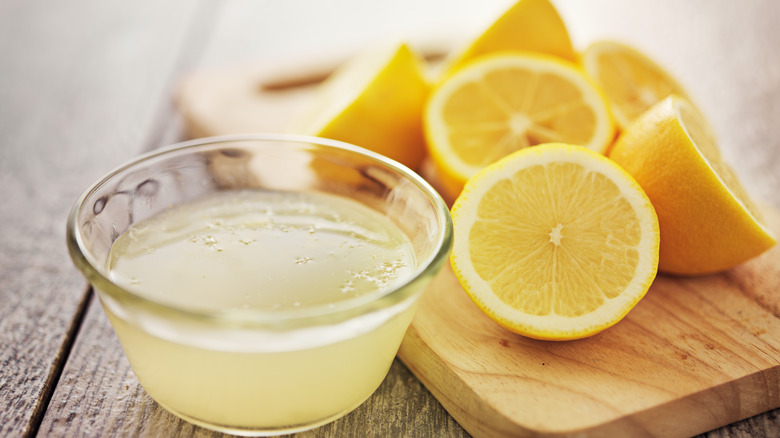
Add a fair amount of lemon juice and lemon zest to your pie recipe to counteract the sweetness of your recipe. The lemon juice will not only curb the sugar but it will also delay the inevitable browning in the sliced apples. We recommend grating fresh lemon zest to the top of your apple pie before serving since this will lend itself to the most vibrant flavor.
You can also take your apple pie to the next level by adding an unlikely ingredient: MSG. MSG, or monosodium glutamate, is a savory, umami-rich seasoning that can be added to apple pie filling mixed with salt, and sprinkled on top of the pie crust. Since MSG tends to be an overwhelming ingredient, you must add it incrementally to your recipe. If you want to add a bit of back-of-mouth heat to your recipe, you can seek some help from one of our favorite spices: dried ginger. It's a warm ingredient that pairs well with the cinnamon in your filling.
Add a creamy ingredient

Most pie recipes abstain from adding a creamy ingredient to the filling and, instead, reserve it for adding to the top of a pie recipe. Instead of saving your creamy ingredients for the à la mode effect, add them directly to your pie filling. To majorly upgrade your apple pie, marinate the apples in melted vanilla ice cream for an hour with your other filling ingredients before adding it to your pie shell. Don't forget to pour all that liquid into the pie crust, too, since you'll want the unctuous mouthful in every bite. For this hack, you'll need about ½ cup of ice cream for each 2 ½ cup of apples, and the pie will have to sit for a minimum of four hours to allow the filling to set.
Another ingredient that will change your apple pie forever is sour cream. This spread will seep into the gaps between the apples and create a custardy filling that you won't even be able to tell is sour cream.
Use a blend of flour for a subtle nutty flavor

The standard apple pie crust recipe calls for all-purpose flour because it's the most versatile. It has a moderately high gluten content, meaning that it can develop some elasticity without becoming overtly stringy. Bread flour has a very high gluten content, so it should be used exclusively for making pizza crusts and loaves. If you find that your pastry crust is often overworked and difficult to roll, you should consider substituting some of the all-purpose flour for pastry flour, which has a more delicate texture to it.
You should try a blend of different flours for pie crust because it can also enhance the flavor. Apple pie tends to lend itself well to a mixture of nutty whole wheat flour. Substituting a 50/50 blend of this flour type and all-purpose flour won't dramatically alter your pie's texture and gluten content, but it will create a more rustic appearance and complex taste.
Substitute the water in your crust for vodka

The ideal texture for an apple pie crust is tender and filled with pockets of buttery softness. One way to help your pie crust maintain its unique texture is to add vodka to it. Eighty-proof vodka is made with 40% alcohol and 60% water, so it won't speed up gluten development in the crust like plain water will. In turn, this will make your crust easier to roll out. You also won't have to worry about your crust getting soggy since the alcohol will evaporate off while the pie bakes. While you're at it, you can also use a cold bottle of vodka to roll out your pie crust; it will prevent the butter from melting and ensure your dough is rolled evenly.
You don't have to use vodka exclusively for a great pie crust. Rum, whiskey, and gin all make perfect substitutes for vodka in the crust — provided that the spirit is eighty-proof. You'll also be able to introduce more complex flavors to your crust by substituting in an oaky-tasting alcohol.
Experiment with different types of fats
Another signature ingredient used in pie crusts is butter. Butter is often the primary fat chosen for sweet pie crusts because it has a more pronounced flavor (that one can only describe as "buttery") and sufficient water to produce steam when the pie bakes. This steam is what gives the pie its signature flake.
However, just because butter is proven to be a timeless fat to add to apple pie doesn't mean you can't experiment with other unctuous ingredients. Lard can help your pie crust because it's easier to work with and harder to accidentally melt than butter because it contains solid fat. It also has a unique porky flavor (almost bacon-like) that pairs well with apples. You should consider adding suet to your pie crust if you're trying to stay away from the flavor of lard but still keep your dough tender. We recommend substituting no more than about 30% of your fat with a butter alternative since you'll want to pair the signature flavor with your apple filling anyway.
Vary the size of your fats
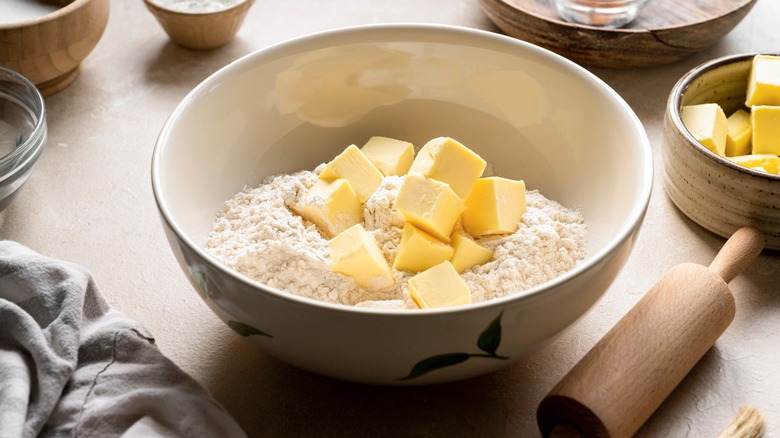
Standard apple pie, as well as other fruit pies, utilizes a particular crust-making method that involves adding very small, cold pieces of fat to the flour with salt before incrementally bringing the dough together with cold water. Many bakers struggle to decide how big the butter pieces should be in the pie crust to develop the signature flake.
The easy butter method for extra flaky pie crust is always to utilize two different sizes of butter for your crust. The first cut with the flour should break the pieces down to pea-sized lumps; you may have to constantly wipe the pastry cutter with your finger to break down all the pieces. Once this base is made, cut slightly larger butter discs, smash them with your fingers, and add them to the dough. The smaller pieces of butter will aid in bringing the crust together, while the large discs will create enough steam for the layers.
Always double chill your pie crust
One of the biggest mistakes people make with pie crust is letting it sit at room temperature for too long while they're preparing their fillings. Neglecting to chill your pie crust sufficiently will create numerous issues during the baking process since steam can't be generated from melted butter. Plus, your pie will also be more difficult to roll since the water in the butter leads to increased gluten development.
You should always keep things chill when making pie crust — and double-chill pie dough. This means placing the ball of dough into your refrigerator after you've cut in the flour and brought it together with a splash of cold water. Then, once you've rolled your pie crust out and placed it in the tin, you can set the whole vessel in the refrigerator to stay cold before popping it into your preheated oven. This will result in the optimal puff in your dough and the delicate layers pie aficionados dream of.
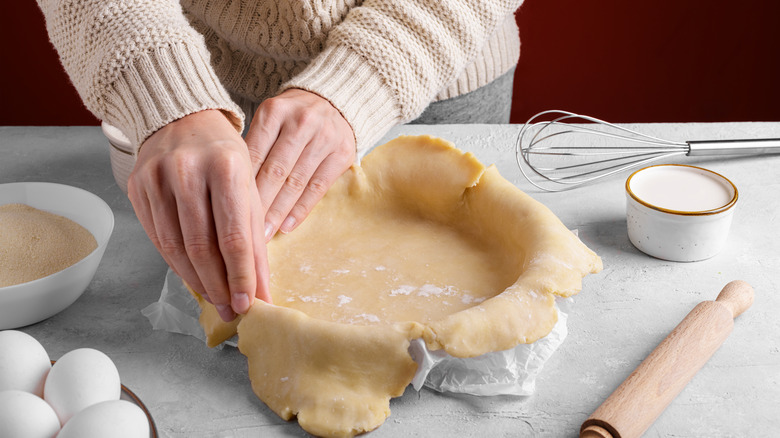
Take it easy with the rolling pin
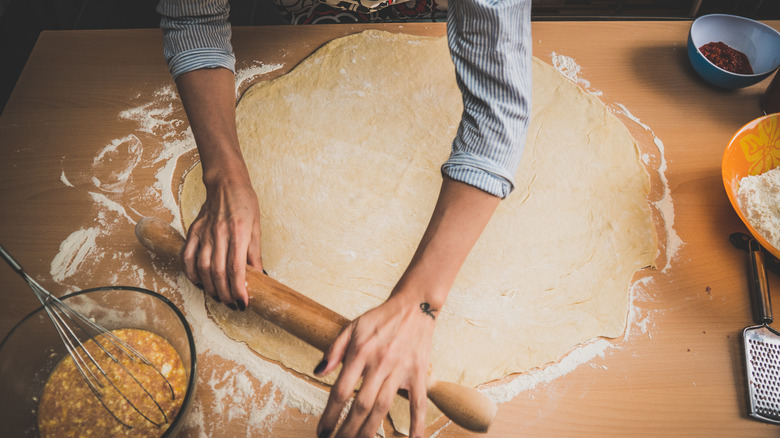
Wielding a rolling pin is nothing short of a power trip. When you're rolling out your pie dough, you might be inclined to keep rolling out the edges so much so that your pie crust would pass the windowpane test. However, the absolute best thickness for pie dough is about ⅛ of an inch thick, or about the height of two quarters stacked on top of one another.
Making the perfect pie crust is also all about the technique. The trick to rolling out pie dough evenly is to be gentle and avoid rolling it in the same spot and creating a deep valley with your kitchen tool. Instead, place the pin in the center of the dough and slowly push outwards to the edge, rotating the dough each time. You should also always add a sufficient dusting of flour to the bottom of your crust, as well as to the rolling pin, to prevent the crust from sticking. This can also be avoided by the age-old plastic wrap trick. Place a layer of floured plastic wrap on the top and bottom of your dough and use the rolling pin on top of it.
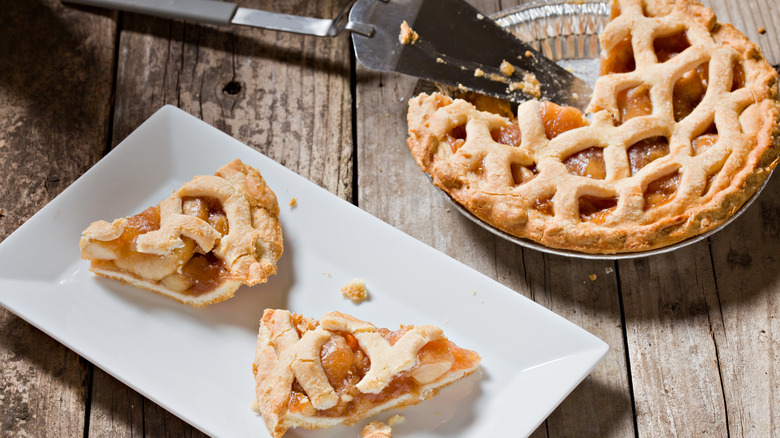
Make your pie look bakery-level with latticework

To lattice or not to lattice — that is the question. Latticework on a pie crust can add a sophisticated flair to your pie, but it can also look haphazard if done incorrectly. To make the perfect fall lattice pie, start by slicing long strips with a sharp knife or pastry cutter. From there, you can braid three of the strands together or add the neatly cut pieces of dough to the top of your pie. Tuck under and over each piece gently until you get the perfect lattice shape. Then, once you've trimmed off the excess dough, you can tuck and crimp the edges of your crust to ensure all of your latticework stays put as the pie bakes.
If you're making a double-crusted pie, be sure to slice steam holes in the top crust to prevent it from doming in the oven. If messing with dough strands isn't your forte, you can also take the unconventional route and make an open-faced apple pie instead.
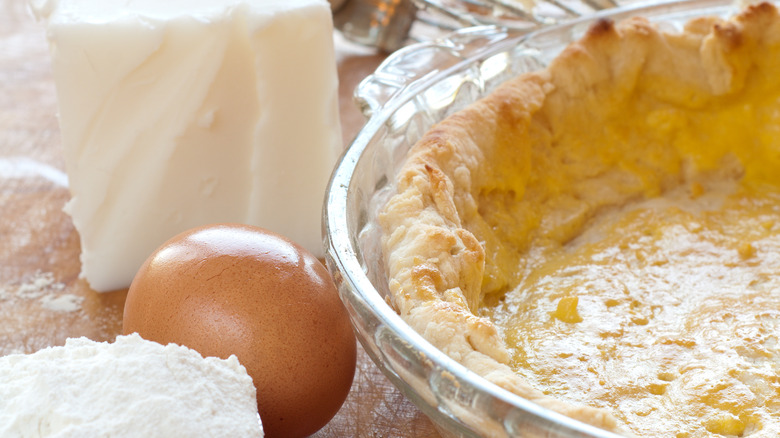
Always wash your crust before baking
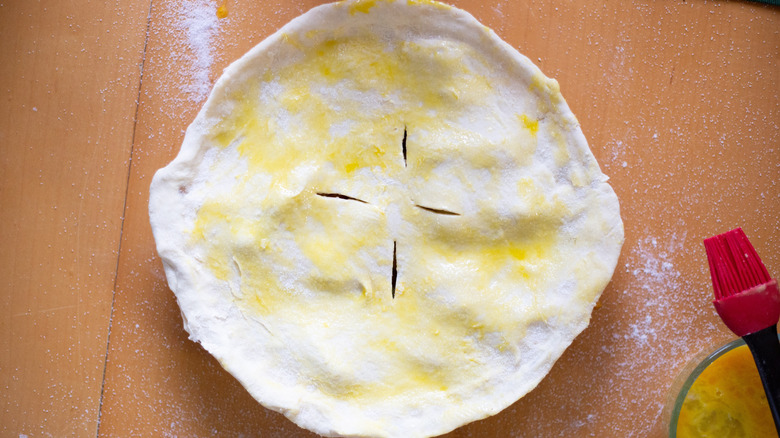
Once you've assembled your pie and are ready to pop it in the oven, you need to reach for one last ingredient: wash. Wash is the secret ingredient you need for the perfect color on your apple pie, and it will help adhere any additional decorative pieces, like sanding sugar, to the top of your crust.
It's important to pick the right wash for your crust because each will produce a different color and texture. Whole eggs mixed with water are one of the most popular options for apple pies because it will create a light, golden hue. Substituting this recipe with egg yolks alone will produce an even more pronounced color. If you're looking for a shiny crust, you'll want to amp up the fat and add a splash of milk or heavy cream to your wash. Vegans and those with egg and dairy sensitivities can use almond or coconut milk for their wash instead.
Bake your pie in a sturdy tin
There is an entire litany of options regarding what to bake an apple pie in. Most people reach for the disposable aluminum tin, but better options exist for your pie-baking needs. Although cheap and convenient, these disposable pans are rarely sturdy enough to bake a heavy apple pie in. If you must use one of these disposables, we recommend baking it inside a sturdier glass or ceramic baking dish to ensure your pie doesn't crumble when it comes out of the oven. Ceramic or glass plates tend to hold up better to the heat and will ensure your bottom crust bakes evenly. Many of these tins also come with handy fluted edges for easy crimping and timeless designs that you'll want to keep on your table.
Conventional pie tins aren't the only vessel you should turn to for baking apple pie. A cast iron skillet can help you make better pies because it has a non-stick coating (provided it is adequately seasoned ahead of time) and has high sides, so you can really pile in your sliced apples.
Allocate enough resting time for your pie

One of the most common mistakes people make with any type of pie is rushing the cooling process. Although apple pie doesn't have nearly the same liquid level as a blueberry or a cherry pie, resting is still an important step to allow your pie filling to set. It's one of the best ways to avoid wet apple pie and keep the bottom of your pie crust crisp. You should allow your dessert to sit on the counter for at least an hour before serving, if not longer. To ensure your pie has maximum airflow, consider placing it on top of a wire rack to cool.
Another commonly asked question when baking apple pie is when to remove it from the oven. When you poke the apples with a toothpick, there should be no resistance. You'll also want to look for your crust to develop a golden hue, but remember that the top will always brown faster than the bottom. To avoid a raw crust, you can cover the edges of your pie with a pie shield or leave an aluminum foil cover on for the last 20 minutes of baking.