Italian Lobster Tail Pastry Recipe
To the average home cook, baking probably consists of cookies, cakes, and the occasional pie or tart. But what if you're itching to take your baking skills to the next level? For a truly tasty challenge, try whipping up some homemade lobster tails. Similar to sfogliatelle, this Italian pastry is chock-full of flaky layers and creamy filling, and gets its name because the laminated dough looks like a crustacean's tail. "This recipe is a huge labor of love! They are not for a beginning baker and do take some practice to get right," recipe developer Leah Maroney says. "The result is absolutely delicious, flaky goodness. The thing that makes this pastry the most unique is the crazy thin layers of pastry. They are [unlike] croissants or phyllo and are their own special texture."
This is more or less a traditional lobster tail, but Maroney does put her own spin on it. "Ricotta is often used in the filling, but I opted for a sweeter, thicker filling more like pastry cream," she says. You've got a delicious project ahead of you — let's get started on these unique pastries.
Gather your lobster tail pastry ingredients
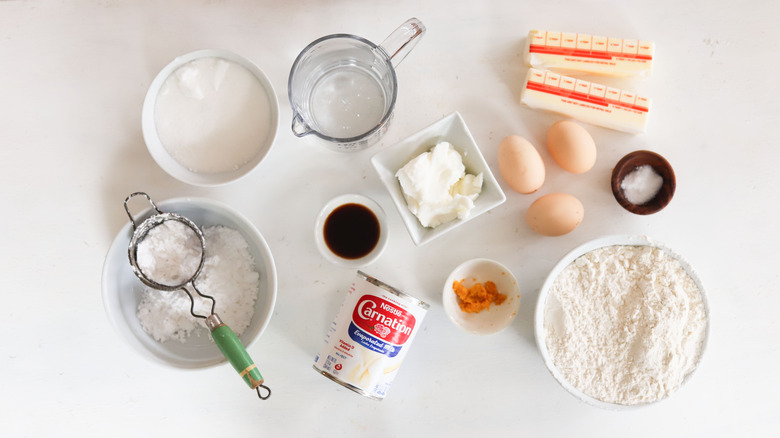
For the pastry component of this recipe, you'll need bread flour, salt, salted butter, vegetable shortening, vanilla extract, sugar, and lukewarm water. The filling calls for salt, vanilla extract, orange zest, flour ("Semolina is traditionally used instead of flour for the filling. Either taste great," says Maroney), sugar, eggs, and canned evaporated milk. Finally, to finish it all off you'll need melted butter for the baking process and powdered sugar to dust your baked pastries with.
Note that you'll also need a pasta roller, which Maroney calls "a must." She also calls for "two large containers or water bottles to balance the rolling pin."
Make the dough
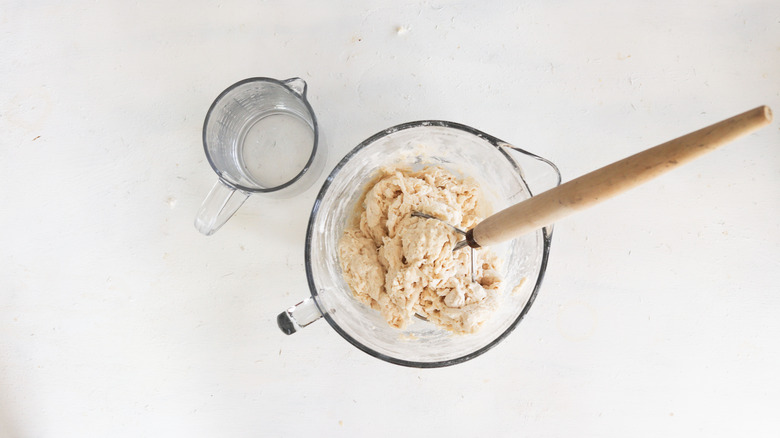
Time to get started. Mix together the bread flour and salt in one bowl, and the lukewarm water and sugar in another smaller bowl. "Bread flour must be used so the dough has enough elasticity to hold up to the stretching and rolling," Maroney explains. Put the liquid into the flour mixture and stir until it becomes a dough. (It's okay if it's a little crumbly.) Take the dough out, knead it, and cut it into four equal pieces.
Create and chill the layers
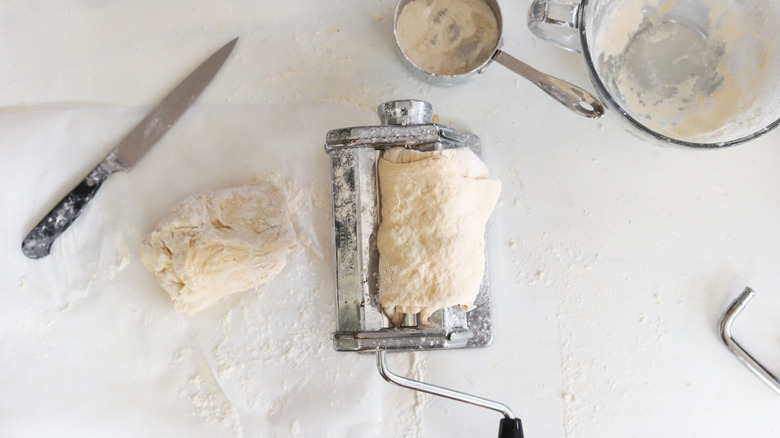
Get out your pasta roller, set it to the largest setting, and run each piece of dough through it. Fold each piece into thirds and run it through again and again until it looks like a thin, even sheet. Then, do that all again with the other pieces of dough. Stack up your dough pieces, cover them, and let them chill for a few hours. "You can make the dough in advance in any of these stages. It can be stored in the refrigerator for up to 2 days. The cream for the center can be made 3-4 days in advance," Maroney says.
Once your dough pieces are chilled, take a rolling pin and press the top so the four pieces become one. Then, feed that larger piece through the pasta maker again, lowering the setting each time until you've reached the thinnest one and you have one very thin piece of dough.
Keep laminating the dough
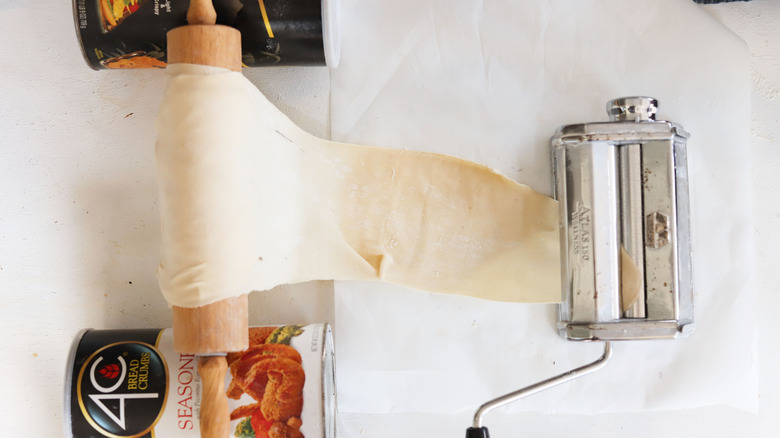
Flour your long, thin piece of dough and roll the end onto your rolling pin. Then, pull it by the sides so the sheet of dough gets wider. Prepare a mixture of shortening and room-temperature butter, then coat your piece of dough with it as you pull it off the rolling pin, rolling it up into a log as you grease it. Once your dough is entirely greased and rolled up, cover your laminated dough snugly in plastic wrap and chill it for another couple hours.
Make the filling
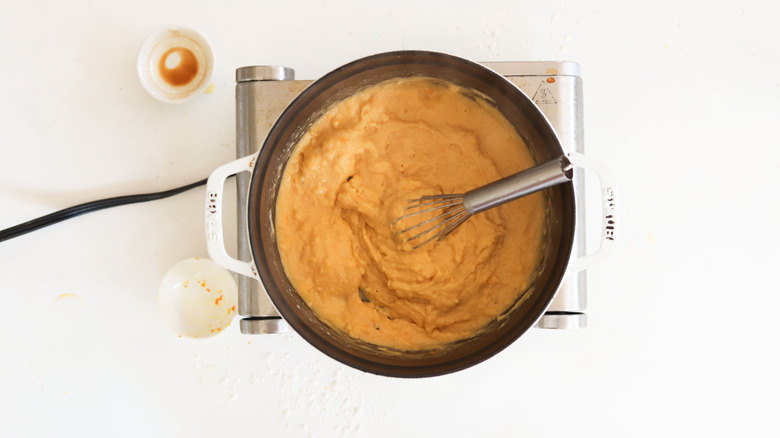
While your dough is in the fridge, stir together the eggs and sugar, then incorporate the flour and mix thoroughly until there are no lumps. Heat the evaporated milk on the stove, and once it's hot, slowly add it to the egg mixture, stirring the whole time so everything combines and the eggs don't scramble. Put that mixture back on the stove and cook over low heat until it thickens and resembles custard or cream. Stir in the vanilla, orange zest, salt, and take it off the heat.
Shape and fill your pastries
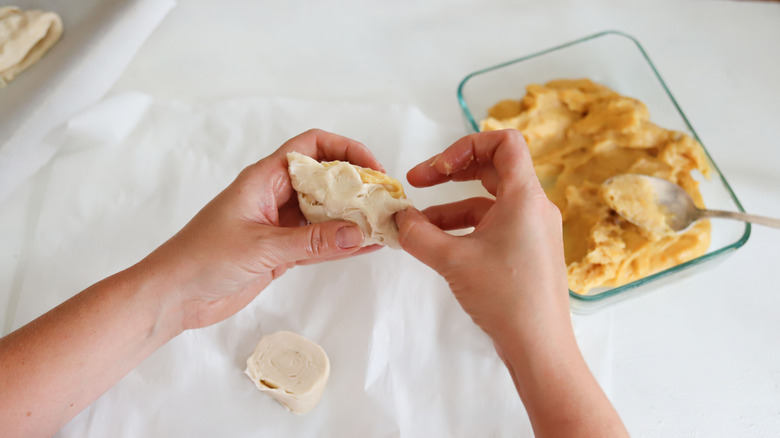
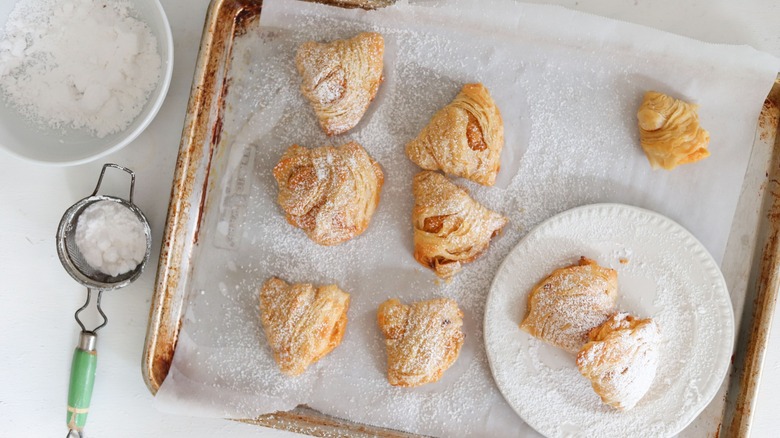
Preheat your oven to 400 F. then take your chilled dough log out of the fridge and cut it into equal pieces about 1-inch thick. Due to the layers, you should be able to open each one so it expands into a conelike shape. Spoon the filling into the opening, then seal the top by pressing the dough with your fingers. Put each filled lobster tail on a sheet pan lined with parchment and put melted butter over each piece.
Bake and serve your lobster tail pastries
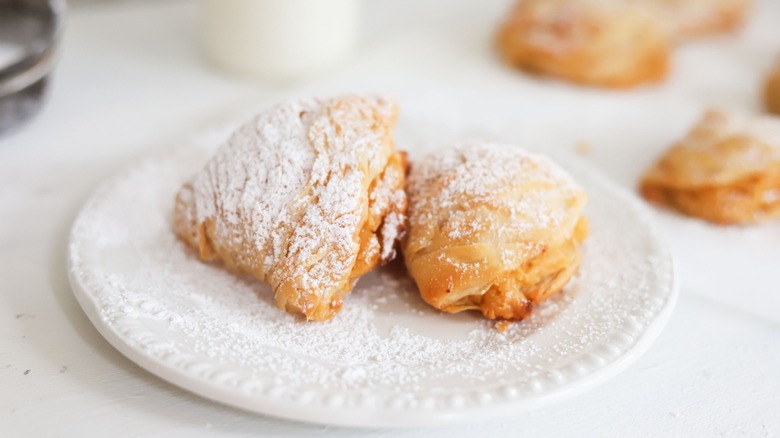
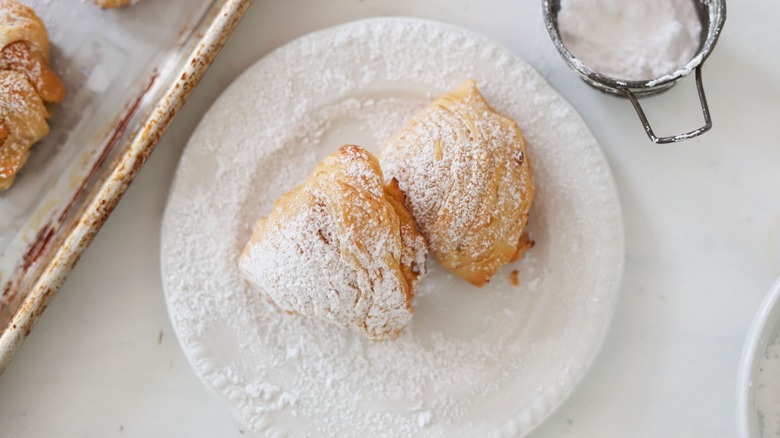
Pop your pan of lobster tails in the oven, and once they're golden brown, dust them with powdered sugar. Now that you've done all that impressive work, it's time to enjoy your sweet, flaky, creamy creation — you deserve it. "They're best eaten hot out of the oven," Maroney says. "They can lose their crispiness pretty quickly and get soggy if stored in an air-tight container. I would freeze them right after they cool if you can't eat them all right away. They freeze best prior to baking, but you can freeze them after baking and then reheat them in a 400 F oven for 5-10 minutes."
Italian Lobster Tail Pastry Recipe
Impress your dinner guests with these exquisite Italian lobster tail pastries.
Ingredients
- For the pastry
- 3 ½ cups bread flour
- ½ teaspoon salt
- 1 tablespoon sugar
- ½ teaspoon vanilla extract
- ¾ cup lukewarm water
- 8 tablespoons salted butter, room temperature
- 4 tablespoons vegetable shortening
- For the filling
- ½ cup sugar
- 3 large eggs
- ⅓ cup flour
- 1 (15-ounce) can evaporated milk
- ¼ teaspoon salt
- 1 tablespoon orange zest
- 1 teaspoon vanilla extract
- For baking and garnishing
- 2 tablespoons butter, melted
- ⅛ cup powdered sugar
Directions
- Add the bread flour and salt to a large bowl. In another bowl, dissolve the sugar and vanilla in the lukewarm water.
- Slowly add the water mixture to the flour, stirring as you incorporate. The dough should be rough and slightly crumbly in texture. It will come together as it is rolled in the pasta maker.
- Knead the dough on a flat, floured surface until it becomes a bit more smooth. Cut the dough in fourths and place the piece of dough through the pasta roller on the largest setting, typically zero. Fold the dough into thirds and put it through the pasta roller again. Repeat until you have a smooth sheet of dough. Repeat with the remaining pieces of dough.
- Stack the 4 sheets of dough on top of each other, cover, and refrigerate for at least 2 hours.
- Roll the stacked dough with a rolling pin to press it into one sheet. At this point, you can either move on to the rolling stage or cut the dough into four (or more) pieces to make it easier to work with.
- Roll the dough through the pasta roller on each setting until you reach the thinnest setting. Dusting it with flour, roll it onto a rolling pin. If you divided the dough, repeat with remaining dough, connecting the ends to form one long sheet.
- Combine the room-temperature butter and shortening in a bowl. Pull the sheet of dough off of the rolling pin and stretch it to create a wider sheet. Begin spreading the butter mixture onto the sheet and roll it into a very tight log. Continue to pull the dough off of the rolling pin, generously greasing it and rolling it into the tight log.
- Continue until the entire sheet of dough is rolled into a tight, fat log. Wrap it in plastic wrap and refrigerate for at least 2 hours.
- While it is chilling, prepare the filling. Whisk together the sugar and eggs in a medium-sized bowl until they are well combined. Whisk in the flour vigorously to avoid clumping.
- Heat the evaporated milk in a saucepan until hot. Slowly pour the hot milk into the egg mixture while whisking quickly. Once it is all incorporated, add it back into the saucepan and cook it on medium-low heat, stirring constantly until it thickens, about 3 minutes.
- Whisk in the salt, orange zest, and vanilla extract. Set aside the mixture to cool.
- Preheat the oven to 400 F.
- Remove the log from the refrigerator and cut it into 1-inch thick rounds.
- Flatten a round with your thumbs and then turn it inside out, gently pushing the center out to form a cone. Be careful not to separate the delicate layers too much.
- Fill the cone with 2 tablespoons of filling and seal the edges as best you can. Place the completed pastry on a parchment-lined baking sheet. Repeat with remaining rounds.
- Brush each pastry with melted butter and bake in the preheated oven for 15 minutes or until golden brown.
- Sprinkle the hot pastries with powdered sugar and eat while still warm.
Nutrition
| Calories per Serving | 388 |
| Total Fat | 18.4 g |
| Saturated Fat | 9.2 g |
| Trans Fat | 0.9 g |
| Cholesterol | 82.2 mg |
| Total Carbohydrates | 46.1 g |
| Dietary Fiber | 1.1 g |
| Total Sugars | 14.4 g |
| Sodium | 263.8 mg |
| Protein | 9.2 g |