11 Cleaning Tips For Keeping Your Oven Spotless
There's nothing more relaxing than stepping into a clean kitchen first thing in the morning. All you have to focus on is enjoying your freshly brewed cup of coffee, and deciding what you'd like for breakfast. Fortunately for you, the bugs and critters don't agree, and would certainly prefer to snack all night long on crumbs. Keeping your kitchen clean can benefit both your mental health and your physical health by deterring pests and bacteria growth. And while you may feel that because your sink is empty, or because your surfaces have been wiped clean that your kitchen is in pristine condition, there are a few nooks and crannies that often go overlooked. One of those out-of-sight, out-of-mind places just happens to be your oven. But don't fear, we have top-tier cleaning tips for keeping your oven spotless, and some of them are easier than you may think.
If it's been a while since you've dared to shine a light into the caverns of your oven, don't worry. We've all been there, and there are ways you can bring back even the most grease-stained, baked-on messes. It might take a little elbow grease in the beginning, but once you have it looking brand new again, there are plenty of ways to prevent it from slowly edging back to that dark and greasy state. Preventative care, maintenance, and deep cleaning are all equally as important to keep that oven squeaky clean.
Cover your dishes with lids

If you have a new oven, or you've just completed a much-needed deep clean, you may be hesitant to bake that cheesy casserole or those oil-rubbed veggies. But alas, that's what the oven is for, and otherwise all of your hard work will go to waste, so let's get baking. Instead of preserving your perfectly cleaned oven altogether, consider covering dishes with lids that you know might splatter. Of course, some recipes require air circulation to help them crisp up, but many allow for a lid, or at least a small piece of tin foil that can loosely protect the outside of the food to prevent splatter in the first place.
In fact, enough splatter can lead to food dripping which is dangerous and can cause fire. Now, this is in extreme cases, but why take the risk? At the very least, those grease splatters, if left unattended, can heat up with each use and both create smoke and cause unpleasant smells. As you purchase cookware, consider casserole dishes with lids, dutch ovens, and for those oddly shaped pots and pans, use a sheet of aluminum foil. Be cautious to only use oven-safe lids, and keep in mind that just because a lid may come with an oven-safe base, it might not be able to withstand high heat itself (like the plastic lids that come with some Pyrex glassware).
Wipe up spills right when they happen
Sometimes splatter and spills are just unavoidable. And many recipes call for the dish to be exposed to circulating hot air without the option to cover it. If you have an air fryer, opt to use that for any high-heat oily foods when you can, but if you need to use your trusty old oven, it's important to follow your recipe accordingly. There's no need to compromise on flavor and texture just because you don't want to have to deal with a full oven clean-down. Luckily, just because you have a little splatter doesn't mean you have to get out your tool kit of cleaning supplies and spend all day on your hands and knees. Instead, catch the mess before it has a chance to bake in during your next culinary creation.
However, this doesn't mean you should grab a cleaning rag and get to work the second your bake comes out of the oven. It's dangerous to clean a warm oven, so let it cool off fully before you get to work. Warm ovens not only increase the potential of a burn, but they also heat up any chemicals you may be using, which can make them steam into the air and make it easier to make their way to your lungs. Once the oven is clean, give it a good wipe down wherever you see splatter or drips. Get ahead of the problem like you would with any other kitchen surface.
Keep a handheld broom nearby
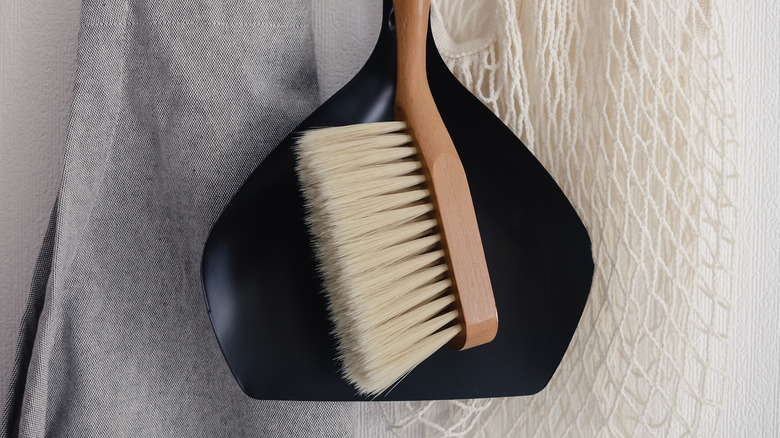
The overlooked kitchen chore that should be a daily habit is sweeping. It's simple, quick, and can make quite a difference in both the appearance of the physical space and in any pest problems that you might be having. That tiny cracker crumb seems like nothing to you but will make for a wonderful snack for an ant colony or hungry mouse. Your oven functions in a similar way. Grease drips and fallen soldiers turn into the burnt residue that builds up in the bottom of your oven. This charred residue causes smoke, and unpleasant smells, and can even catch fire. There is, however, a very simple way to ensure that it doesn't reach that point, and it's to simply dust out your oven frequently with a little broom.
Of course, you'll want to do this when the oven has not been used for the day. Not only is reaching into a hot oven dangerous, but if you choose to use a plastic duster broom it's likely to melt and become a toxic and messy disaster. Nobody wants to inhale burning plastics. Choose a small hand-held broom, preferably with stiff bristles, like one made with organic material. Remove the shelves and use it to dust the top, back, and sides of the oven first, before sweeping all the residue off of the bottom. You may need to finish with a damp wipe, to ensure you are removing all the dislodged grime, dirt, and dust.
Make a baking soda paste for spot cleaning

No matter how hard you try to prevent splatter and drips, they are an inevitable part of the baking process. Instead of getting frustrated and doing a deep clean every time you roast a turkey or your pie overflows, get good at spot cleaning. Don't let your fear of harsh chemicals stand in the way. There are plenty of chemical-free ways to clean your oven, and there are many that are perfect for spot cleaning.
Wait until your oven is cool, and then get to work making a paste using our favorite natural household cleaner: baking soda. Where would we be without sodium bicarbonate? It makes our cakes rise beautifully, keeps our teeth pearly white, and can be used to get out stubborn stains. Make a paste using baking soda and water, and apply it to the area that has come in contact with food or grease using a sponge, or clean towel. Let the paste sit on the affected area for a few hours, but you'll want to leave it on for up to 12 hours for particularly stubborn stains. It will work its magic, and when you're ready to remove the paste that has now formed a crust, use vinegar. The vinegar will cause it to foam, and lift right off. Finish the job by wiping the area down with a little water on a rag. Now, you can get back to baking.
Catch drips
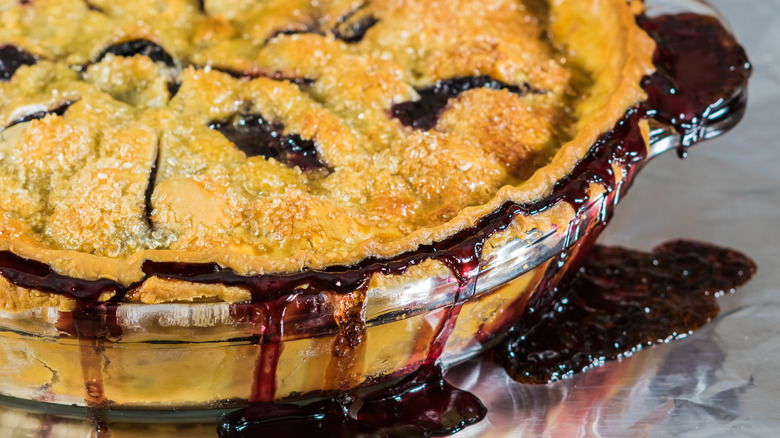
There's nothing better than a fresh blueberry pie, or oven-roasted sweet potatoes cooked right on the rack. However, both have a tendency to drip and bubble, which makes them so delicious but can also create a cleaning project that nobody wants to deal with. This may seem like a no-brainer, but a great way to prevent drips from baking into the bottom of your oven is to catch them. Many ovens come with a drip catcher that lives below the bottom burners and is removable. If that's the case with your oven, you're in luck. Because the drip tray is tucked below the burners, it doesn't change the heat flow throughout the oven. However, it's important to clean these frequently, especially if you have any food overflow.
If you don't have this special part in your oven, or you know that your dish is about to overflow like a volcano, then consider placing a pan or aluminum foil underneath your culinary creation. If you opt for aluminum foil, be sure to turn up the edges to create a little wall in case it fills up more than anticipated. If you're worried about the pan or foil blocking the airflow, then use the convection setting on your oven to get hot air circulating around. If you have hot grease or liquid buildup in either your pan or aluminum catcher, be sure to let it cool before trying to remove it from the oven to prevent dangerous burns.
Clean the racks often
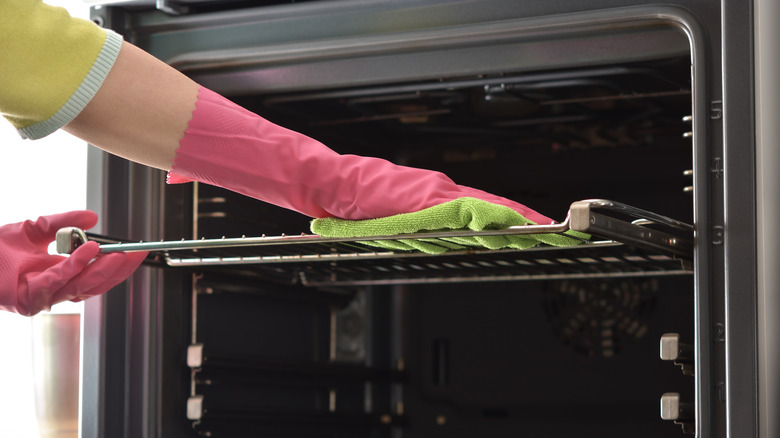
Yes, getting on your hands and knees and scrubbing out an oven can make you feel a bit like Cinderella, but it's worth it in the long run. However, some elements of the oven, like racks, are removable and more accessible when it comes to cleaning duty. If you've been hitting the self-clean button and letting the racks bake clean, you've been using your oven wrong. These racks aren't meant to be cleaned this way, and really, you should be avoiding that button in general (but we will get to that). Instead, when those racks start to get that splattered brown coloring to them, it's time for a hands-off deep clean.
Simply take cool racks out of your oven, place them in your bathtub with hot water, and add vinegar and baking soda. Let them bathe overnight, and in the morning drain the water and wipe them down with a clean cloth, or scrub brush if needed. Use your shower attachment to rinse off any residue, and pop them right back into the oven. This overnight method ensures that you don't have to use quite as much elbow grease to get the job done and that every nook and cranny gets hit with the powerful dynamic duo of baking soda and vinegar. Alternatively, to the natural cleaners, you can use dish soap, just be sure that it's mixed in thoroughly with the bath water, and that it gets fully rinsed off before reentering the oven.
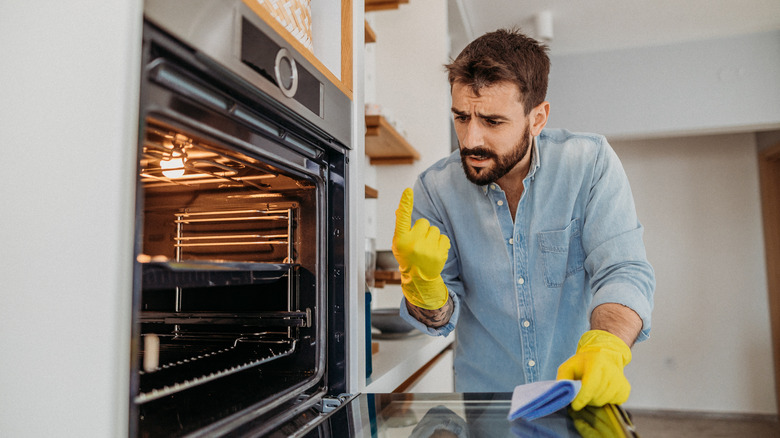
Wipe the outside down
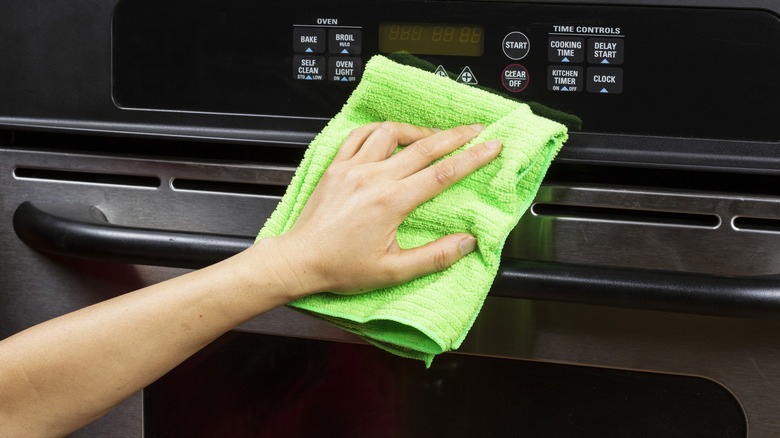
Although the inside of the oven takes the brunt of the grease and grime, that doesn't mean that we should forget about the outside. As you probably know from wiping down the surfaces in your kitchen, dirt seems to magically appear out of nowhere. That daily sweep seems to collect quite a bit of dust, pet hair, and crumbs, and those paper towels look awfully dark after a quick surface wipe around the kitchen. The outside of your oven experiences all of this and should be cleaned down each time you take a rag to your countertops and surfaces.
Luckily, this process only takes a few minutes to accomplish. Use a damp cleaning cloth, or one with a little natural kitchen cleaner, and rub down the outside of the oven on the sides, front, and top surface. During each kitchen deep clean, use a scrubby sponge or brush to eliminate any tough stains, splatters, or spots. Don't forget that this is another surface in your kitchen, and can get just as dirty as the outside of your cabinets, your countertops, and the outside of your microwave. The handle to your oven door might need more frequent attention, as well as the top surface, so clean it as needed. Keeping up with the outside of your oven is a surefire way to keep your kitchen looking spick and span from the outside, and smelling fresh and clean.
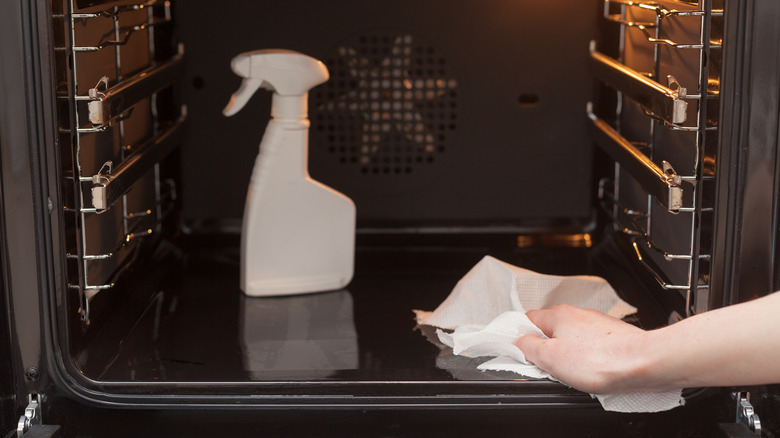
Steam clean with vinegar

Although it's never a good idea to heat up chemicals, there are some natural pantry staples you should be cleaning your stove with that won't become toxic. Generations of cooks, cleaners, and handy homeowners will tell you that both baking soda and vinegar are a natural way to get tough with stains. And while spot cleaning with baking soda works wonders, sometimes you need a light, overall clean of the oven that doesn't focus on one particular area but instead hits the whole thing. The steamer method works well for basic maintenance and makes wiping down the inside a breeze. In fact, you might be used to this method for cleaning out your microwave, and if you haven't been, it's never too late to start.
Get an oven-friendly dish, like a Pyrex, pot, or casserole dish, and fill it with water, and a splash or two of vinegar. Place it in the oven, and crank the heat up to 450 degrees Fahrenheit. Let it bake for at least 30 minutes, but if you notice that it's not quite steaming and boiling like you'd like it to, then leave it in for a full hour. This should create a steam room in your oven. Once the oven has cooled down to a reasonable temperature, take a sponge or clean rag and wipe down the interior of the oven. The steam should have dislodged grime and grease, making it easier to remove.
Avoid the self-clean button
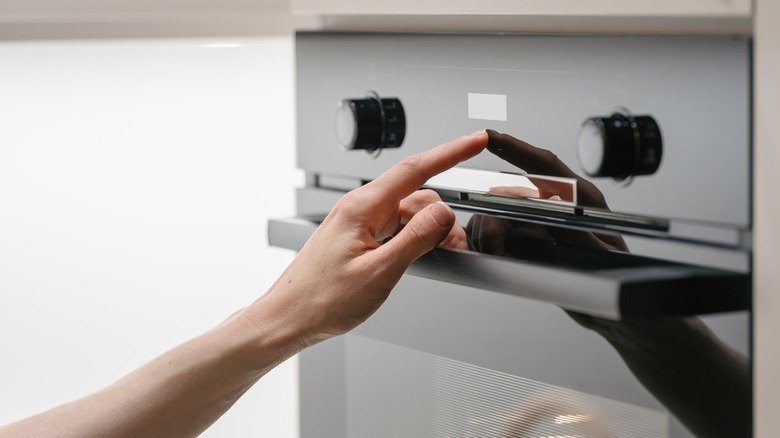
Ovens were made with a built-in self-clean button, right? So why are we even discussing all of these alternative ways to keep your oven clean when all you have to do is press and button and come back in a few hours, without any hassle? Well, it's not that simple. In fact, we recommend that you should never use the self-clean button on your oven, and there are several compelling reasons why.
Firstly, this process essentially incinerates anything in the oven that isn't the oven itself. This creates a huge pile of ash and can result in a smokey kitchen if there is enough buildup. Of course, you won't want to inhale that smoke, but even worse, it releases chemicals like carbon monoxide and nitrous oxide. These chemicals are harmful and can cause damage to your lungs, and even poisoning if inhaled in concentration. At the very least, your kitchen can end up smelling quite unpleasant during the long cycle. Be cautious, especially if you have small children or any health-compromised individuals in the house. Be sure to open windows, and evacuate during the process, without going too far in case of fire. All in all, it's best to avoid that seemingly magical self-clean button and stick to a little elbow grease and maintenance instead. Sorry to burst your bubble, but it's simply safer and healthier for you and your family in the long run.
Keep up with the mess
It's so easy to allow the inside of your oven to get dirty. With self-promises of cleaning it next time, it truly is out-of-sight, out-of-mind, especially in the hotter months when you might not be using it as frequently. But you'd never let your sink, cutting boards, or microwave go without a good wipe-down every once and a while. So why let your oven get out of hand? One mistake that everyone makes when cleaning the oven is that they wait for that yearly, or bi-yearly deep clean, instead of simply maintaining it like they would with the rest of their house.
Now, this doesn't mean that after each and every use your oven needs a full deep clean with scrub brushes and chemicals. Instead, it simply means that after a few uses, it's best to get ahead of the grime rather than let it bake in further with each cycle. This could mean that you spray it down with a little water mixed with vinegar and take a sponge to it once a month, or if you're a frequent baker you could wipe it down even more often. Even if you don't have an apparent spill or an area that needs to be spot-cleaned, and it's not ready for a full steam clean or deep clean it never hurts to take a rag to the interior. This will keep your oven smelling fresh, and prevent the need for frequent deep cleans.
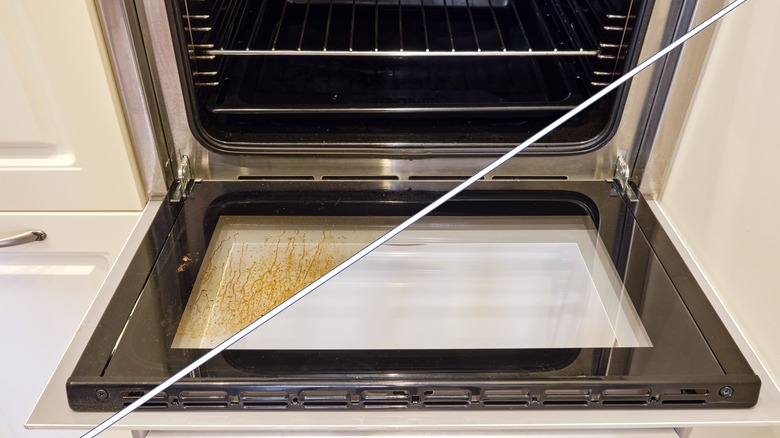
Don't forget about the inside of the door

One area of the oven that often gets overlooked is the inside of the door. This glass area is perhaps the most interactive part of the oven because it's where we get to watch our creations flourish. If you're unable to see through the glass, then it's long past due for a cleaning, and it's time to remove baked-on grease from your oven's glass door. Luckily, unlike the top or walls of the inside of the oven, the glass door is easily accessible and doesn't require bending and twisting to get to. Sometimes, they are even removable.
Again, we turn to our trusty household super cleaners, baking soda, and vinegar to get the job done. Create a paste using baking soda and water, wipe it on the inside of the door, and let it sit for 10 minutes. Do this only with an oven that is cool to the touch. Once the paste has had a moment to sit, spray or pour on some vinegar mixed with water to activate the baking soda. You can also use a microfiber cloth that has been dipped into the liquid solution to wipe the surface clean. The paste will foam as the baking soda and vinegar interact, which creates a reaction to help lift grease from the surface. Next, wipe it clean with a fresh cloth and water until it's spick and span. Enjoy your new standard of clean, and a bright, fresh kitchen.