Old-Fashioned Peanut Butter Fudge Recipe
Good desserts can be hard to come by. When in doubt, go back to the basics and try this old-fashioned peanut butter fudge. This recipe is incredibly easy to make, and it requires just a few ingredients to put it together, making it super affordable. What's not to love about that? For this sweet treat, you use smooth, white chocolate and some creamy peanut butter, and adding them together tastes like pure magic. This dessert is sure to be a hit with kids and adults alike.
Recipe developer Autumn LeAnn came up with this old-fashioned peanut butter fudge recipe, and we should all be thanking her. "What I love most about this recipe is how simple it is! Anyone can make this peanut butter fudge whether they're experienced in the kitchen or not," LeAnn raves. "This is a fun, casual dessert that would be perfect for a pot luck or cookout. It's also good to have on hand for when you want a sweet snack." If you love peanut butter and you love fudge, this is absolutely the dessert for you — keep reading to learn how to make it.
Gather the ingredients for peanut butter fudge
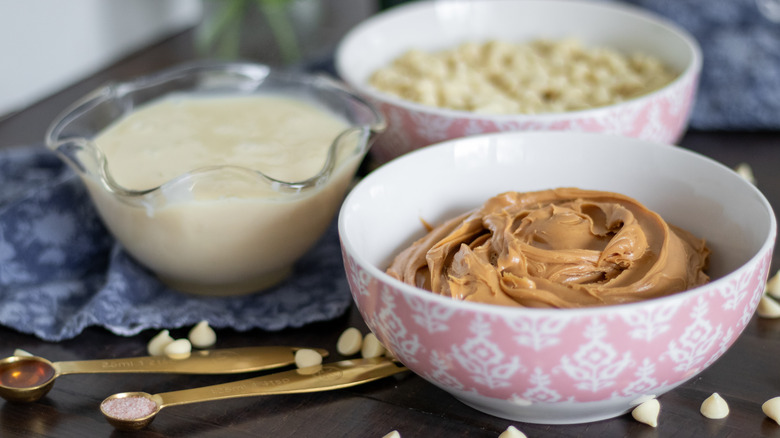
The first thing you will need to do is gather all the ingredients to whip up these this tasty fudge. Luckily, you will only need a few things. When you get to the store, head straight to the baking aisle and pick up a few ounces of white chocolate chips. In addition, you will need to get some sweetened condensed milk. Of course, the recipe wouldn't be complete without a few cups of creamy peanut butter. The last two items on the list are salt and vanilla extract. Once you have everything, you can head home and get started.
Measure your ingredients and melt the white chocolate
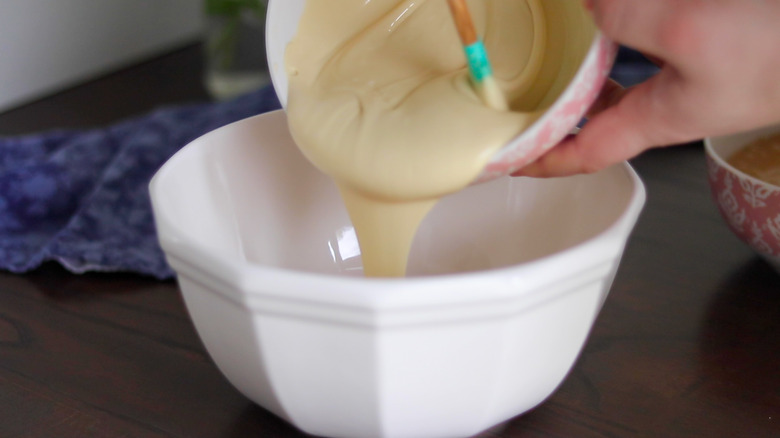
Ready to begin this cooking party? We are so ready! Start by measuring out all of the ingredients, so they are good to go. This will make it easier in the long run, so be sure to do this ahead of time. Then, grab a microwave-safe bowl and add in the white chocolate chips. Pop them in the microwave and heat in 15-second intervals. Be sure to stir between each heat cycle to mix them around and avoid potential burning. Repeat the steps until the white chocolate chips are melted and smooth.
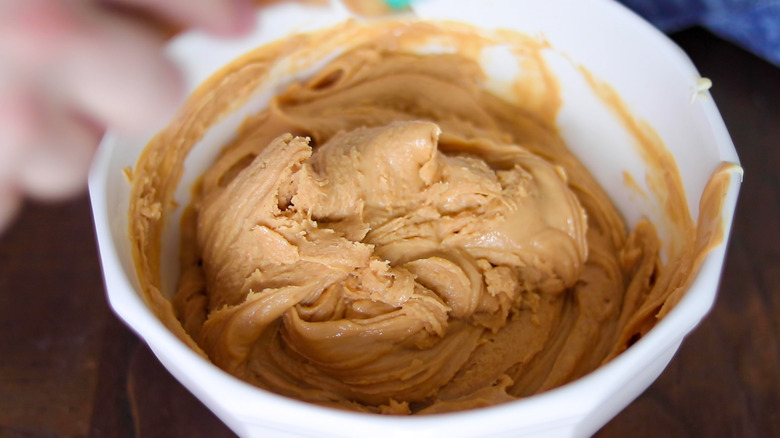
Melt the peanut butter and mix together
Once you finish the white chocolate, set it to the side because you will need it again in just a moment. Select another microwave-safe bowl and add the peanut butter. Pop it in the oven and heat it in 15- to 30-second intervals, until it turns to liquid. By heating the peanut butter in intervals, you will avoid scorching the peanut butter. Take another large mixing bowl once the peanut butter is good to go. Pour in the white chocolate and the peanut butter and mix until smooth. This should only take a minute or so.
Add the condensed milk, vanilla extract, and salt
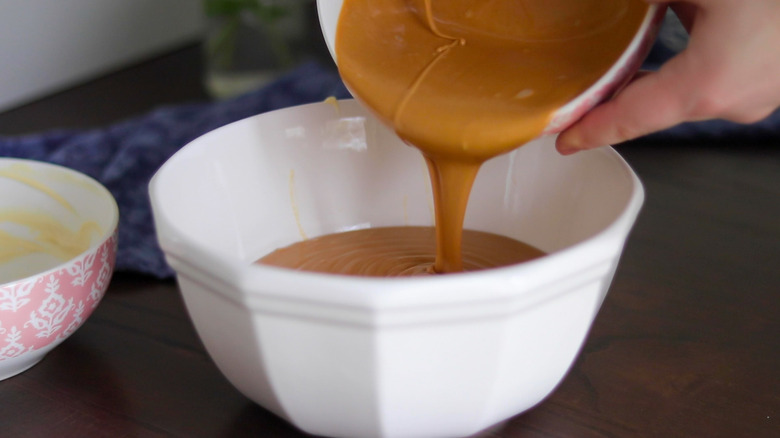
There are still a few more things that you will need to add to the mix, so let's get right down to it. Toss in the sweetened condensed milk first, followed by the vanilla extract. Next, pour in the salt and mix thoroughly until everything is well-combined. The salt gives it a nice bit of flavor that compliments the peanut butter and chocolate well. Now, you will need to take out a 10x10-inch pan. Pour the mixture in and spread it evenly on the bottom. You can also use a piece of parchment paper to smooth it out if you wish.
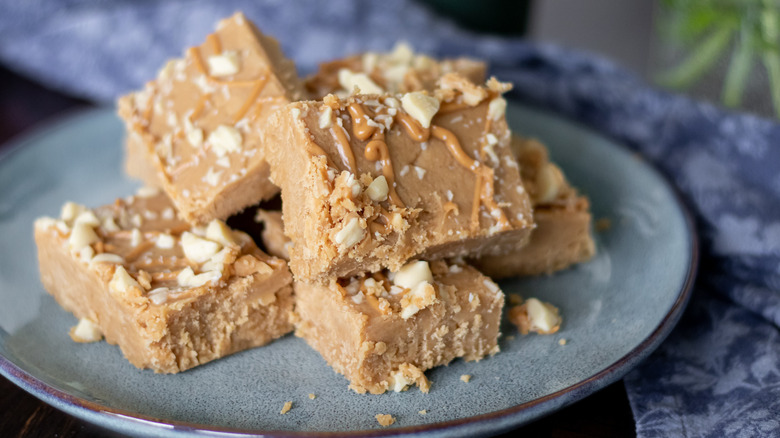
Garnish and serve
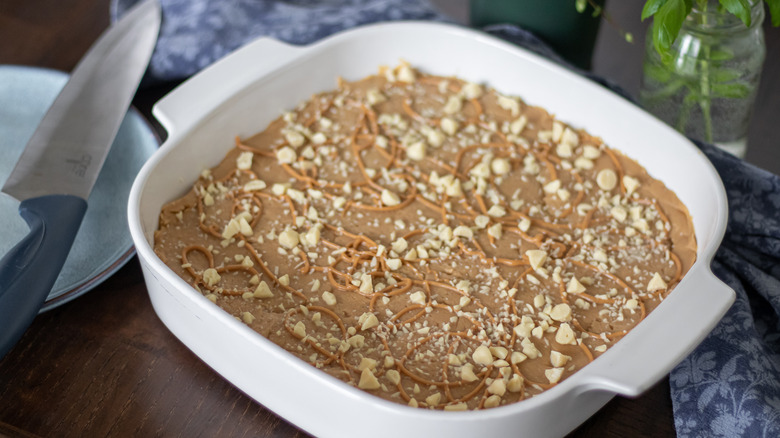
At this point, you can let it sit, or you can continue on and garnish the peanut butter fudge to make it a little bit more visually appealing. This is up to you! LeAnn shares that she melted down the tiny bits of peanut butter left in the jar and used it as a drizzle on top. Then, she sprinkled over some leftover chopped white chocolate. "The taste is very sweet and peanut butter heavy. The white chocolate isn't a bold flavor in this recipe," LeAnn says.
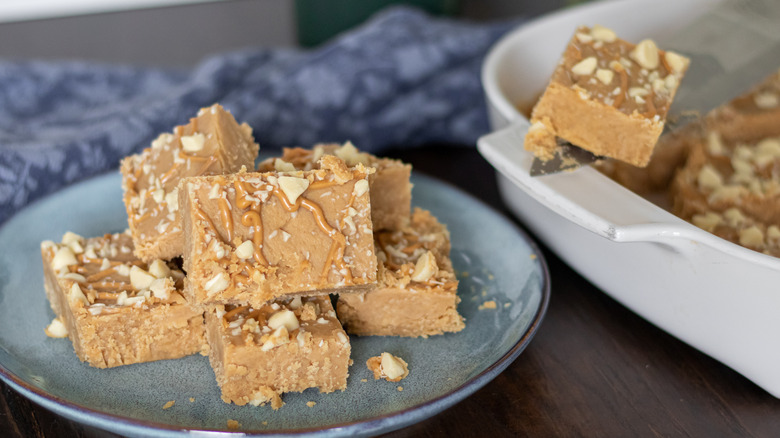
The peanut butter fudge will need to set at around 2 hours for room temperature. Once set, slice into 24 pieces and serve! "This fudge will be best if eaten within 7 days but because of the sugar content you could keep it longer without it going bad. Keep it in an airtight container at room temperature," LeAnn shares. "I would not recommend freezing it because freezing and thawing will affect the texture."
Old-Fashioned Peanut Butter Fudge Recipe
If you love peanut butter and white chocolate, then this old-fashioned peanut butter fudge recipe is made for you.
Ingredients
- 14 ounces white chocolate chips
- 1 (14 ounces) can sweetened condensed milk
- 2 cups creamy peanut butter
- 1/4 teaspoon salt
- 1/2 teaspoon vanilla extract
Optional Ingredients
- melted peanut butter, for drizzling
- white chocolate, chopped, as garnish
Directions
- Measure out all of your ingredients.
- In a microwave-safe bowl, melt the white chocolate chips. Heat them in 15-second intervals, stirring in between each heating cycle. Repeat until the white chocolate chips are melted and smooth.
- In a separate microwave-safe bowl, melt the peanut butter so it becomes liquid. Heat it in 15- to 30-second intervals to avoid scorching.
- In a larger mixing bowl, combine the melted white chocolate and peanut butter, and mix until smooth.
- Add in the sweetened condensed milk, vanilla extract, and salt, then mix until thoroughly combined.
- Evenly spread the mixture into a 10x10-inch pan. You can use a piece of parchment paper on top to smooth it out if desired.
- At this point you can either let it set, or go on to optionally garnish the fudge with extra melted peanut butter and chopped white chocolate chips.
- The peanut butter fudge will need to set for around 2 hours at room temperature.
- Once set, slice into 24 pieces and enjoy!
Nutrition
| Calories per Serving | 325 |
| Total Fat | 21.3 g |
| Saturated Fat | 7.6 g |
| Trans Fat | 0.0 g |
| Cholesterol | 10.9 mg |
| Total Carbohydrates | 28.3 g |
| Dietary Fiber | 1.3 g |
| Total Sugars | 25.2 g |
| Sodium | 76.5 mg |
| Protein | 8.5 g |