How To Use Your Microwave To Make Crispy Cheese Baskets
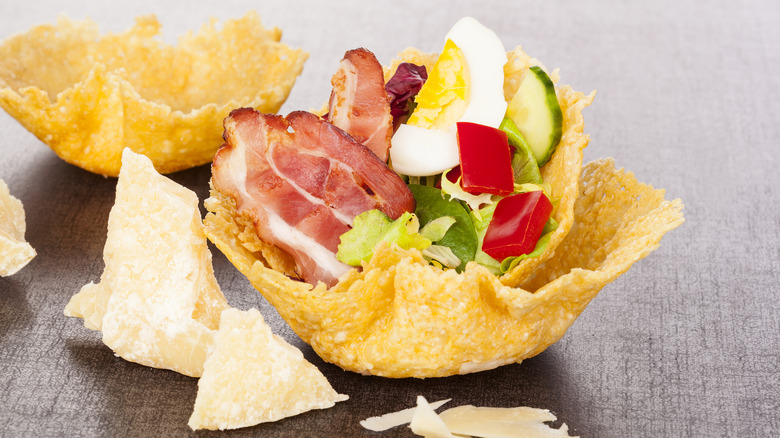
There's an interesting trick your microwave can do, and it's not just reheating leftovers. You can use it to make little edible baskets using cheese. These are not just vessels for holding your best salads and taco fixings; they're an integral part of the dish, enhancing the overall eating experience. Moreover, they're pretty easy to make.
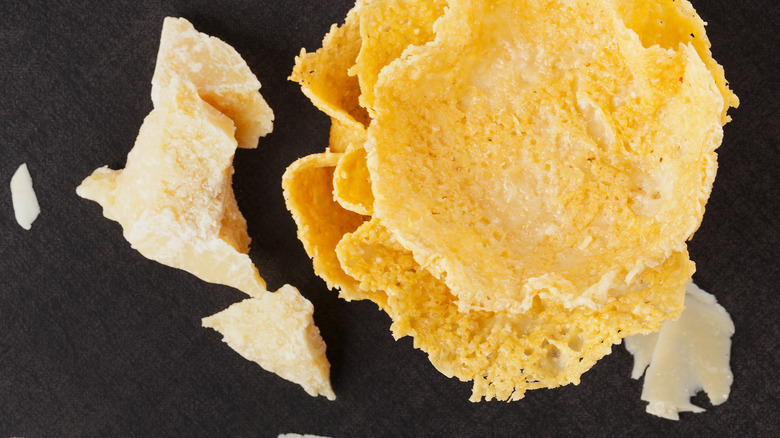
First, select the right type of cheese. Ideal candidates are the hard variety since they melt well and crisp up upon cooling, such as cheddar, parmesan, or Romano. Grate half a cup of cheese for each bowl you plan to make. Once you have your cheese ready, line a microwave-safe plate with parchment paper. Spread your shredded cheese evenly on the parchment paper, forming a circle with a diameter about an inch wider than the rim of the bowl you'll use as a mold.
Microwave the cheese next. This is where the magic happens. Heat it for about one to two minutes, but keep an eye on it to avoid burning. Once it's done, take it out of the microwave — carefully, as it will be hot. Now, you'll need to act quickly to shape your basket. Take a bowl (turned upside-down) as a mold and drape the melted cheese over it. Mold the cheese around this form to create a bowl-like shape. Let it cool for a few minutes. Once it's firm, you can easily peel it off the bowl, and voila, you have a crispy cheese basket.
Tips for perfect cheese baskets
Creating perfect little cheese baskets requires a bit of know-how. First, the texture of the cheese plays a significant role in the outcome. Finely grated cheese spreads more evenly, leading to a more uniform bowl. So, if you're aiming for a lattice look, grated cheese works better than a sand-like shredded texture. On the other hand, the texture of your finished dish depends on the microwave time and the amount of cheese used. For a crispier basket, use less cheese and microwave for a longer duration, while a chewier outcome requires more cheese.
When microwaving, it's essential to watch the cheese closely as it cooks. Every microwave is different, so cooking times may vary. The cheese should bubble and start to brown along the edges — that's your cue that it's done. Finally, when shaping your cheese, after laying it on the inverted bowl, place a second bowl of the same shape and size on top to mold the cheese into shape. This will help you avoid burning yourself with the hot cheese.
Remember, cheese bowls are best when they're fresh and crispy. However, if you need to store them, ensure the container is airtight to maintain their texture. This storage tip makes them a practical option for meal planning or for having a unique snack option readily available.